How to Fix ‘uBlock Origin prevented the Following Page’ Error
Several users that are using the uBlock Origin (on Chrome, Firefox, and Opera) are reporting that sometimes, the extension blocks an entire page with the message: “uBlock Origin has prevented the following page from loading“. Most affected like unlock Origin and they would like to keep using it, but they would like the add-in or uBlock to block ads and other elements only instead of blocking whole pages.
What is causing the ‘uBlock Origin has prevented the following page from loading’ issue?
We investigated this particular issue by looking at various user reports and the workarounds that they used to get around this inconvenience.
Most of the time, this particular popup is displayed when the user tries to visit a website or download something that has malware/adware bundled installers – This is why the issue is quite common directories like download.com.
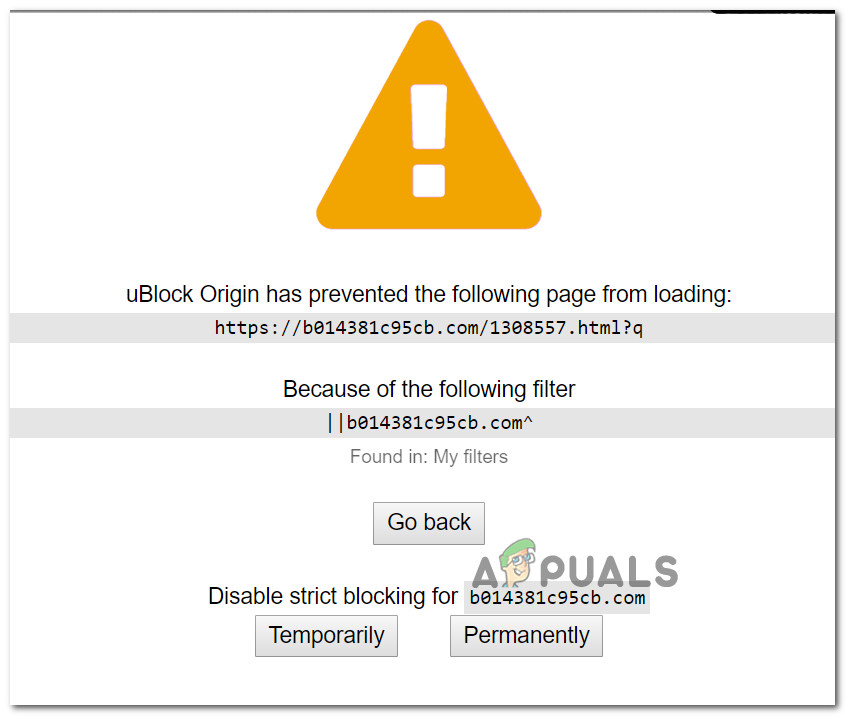
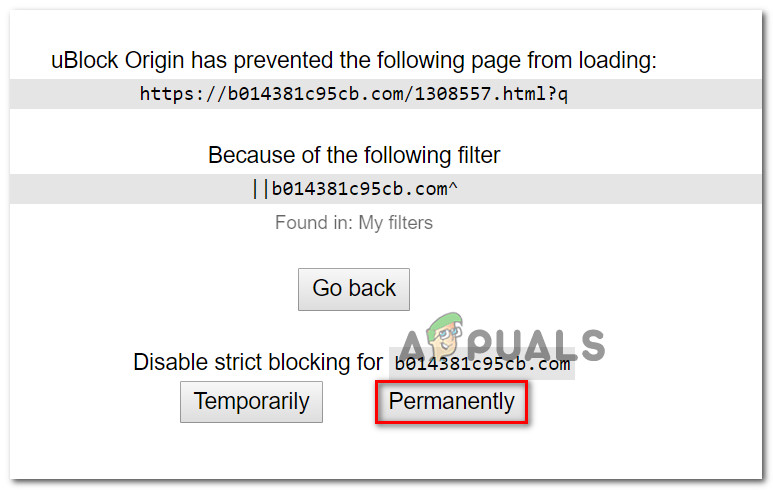
The reason why this error appears is that uBlock Origin extension is configured by default to block whole pages if the URL matches with a listing present inside the Malware Domain list. This ad blocking method is typically referred to as strict blocking. If uBlock manages to find a match, the whole domain will be blocked by default.
Even if the default behavior of uBLock Origin (when newly installed) is to block ads, trackers, and malware, there are some steps that you can take to whitelist the site in question. But keep in mind that when the warning occurs, it doesn’t necessarily mean that the site is harmful – it just means that the extension managed to find a matching filter in the selected filter list.
If this scenario is applicable to you and you’re looking for a method that will allow you to prevent the block page from ever appearing again, this article will provide you with some workarounds. There are ways to disable the apparition of the ‘uBlock Origin has prevented the following page from loading’ page temporary or permanently.
Down below, you’ll encounter a collection of methods that other users in a similar situation have used to modify the default behavior of uBlock Origin. All the workarounds featured below will ultimately help you achieve the same thing, but each approach is different. Because of this, feel free to follow the one that is more convenable to your situation.
Method 1: Allowing temporary access
If you don’t plan on spending too much time on the blocked URL (maybe you’re just trying to download something), the most convenable choice is to just click the Temporarily button under Disable strict blocking.
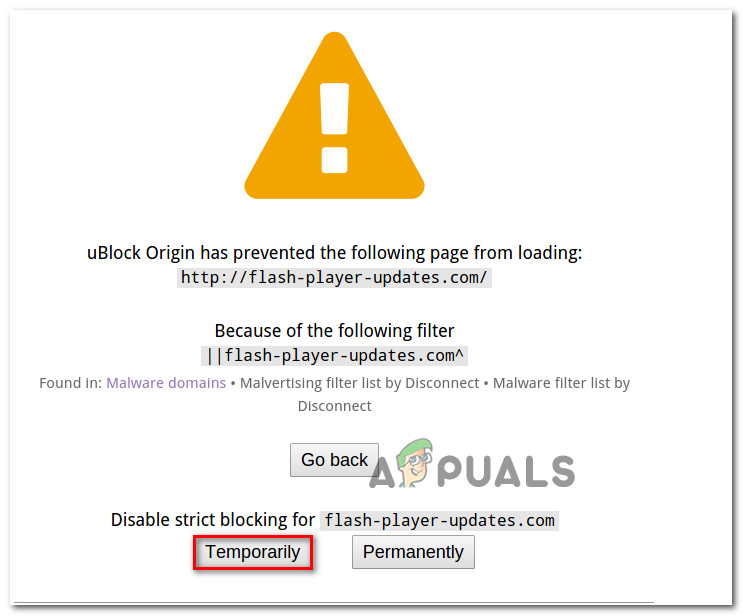
This option will allow you to temporarily allow the URL to be accessed. By default, the access period will be for 60 seconds, but you can boost that to 120 seconds bo following the steps below:
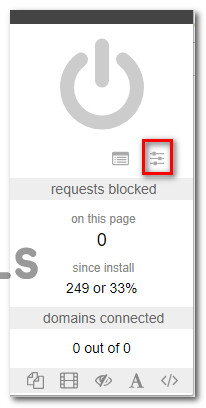
- Click on the Extension/addon icon of Unlock (top-right corner). Then. click on the Settings icon from the newly appeared pop-up.
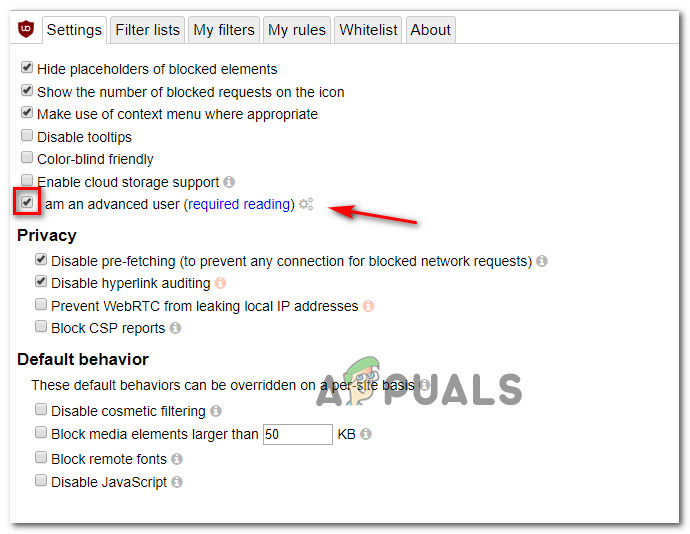
Accessing the Settings menu of uBlock - Inside the Settings of uBlock, go to the Settings tab and check the box associated with I am an advanced user. Then, click the little gear icon that appeared near the option that you’ve just checked.
Accessing the advanced settings - Paste the following line of code at the end of the list, then click Apply Changes to save the new default behavior:
strictBlockingBypassDuration
If this method did not help you to resolve the issue or you’re looking for a permanent fix, move down to the next method below.
Method 2: Allowing permanent access
If you visit the blocked website and you want uBlock to play well with it, you can also allow the site permanently by clicking on Permanently.
Doing this will prevent the web page from being blocked by uBlock in the future. If you end up changing your mind and decide that the pop-up should prevent any users from visiting the website, you can simply remove them whitelist rule by following these steps.
- Click on the Extension/addon icon of Unlock (top-right corner). Then. click on the Settings icon from the newly appeared pop-up.
Accessing uBlock’s Settings - Inside the Settings menu of uBlock, go to the Whitelist tab and delete the site that you previously added. Once the web page is removed, click on Apply Changes.
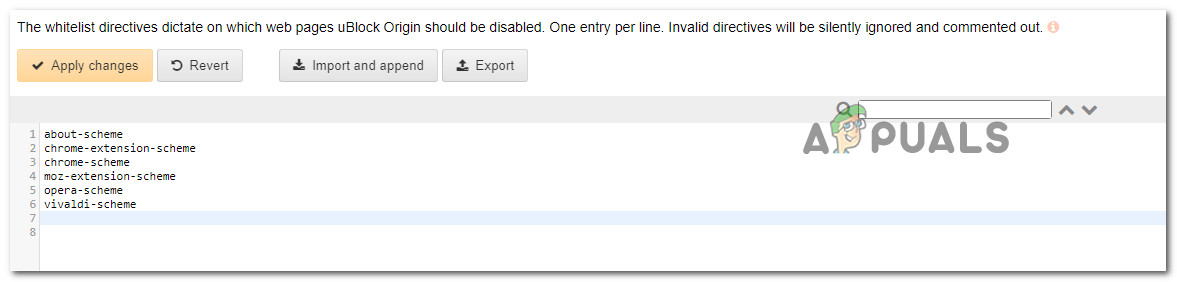
Removing a website from the Whitelist
If you are looking for a way that will prevent the popup from ever appearing again (even with websites that you haven’t visited before), move down to the next method below.
Method 3: Disabling strict blocking
If you’re looking for a way that will prevent the annoying pop up from ever appearing again, one way to do it is to enforce a ‘no-strict-blocking’ rule using the My rules pane. But keep in mind that while this might resolve the issue and allow you to navigate without interruptions, you’re also exposing the computer to a lot of ad-bundled installers and potentially even malware.
But if you want to go ahead with the procedure, here’s what you need to do:
- Access uBlocks Settings menu by clicking on the extension icon (top-right corner) and clicking on the Settings icon.
Accessing the Settings menu of uBlock - Inside the Settings menu of uBlock, go to the My rules tab and add the following line of code to the Temporary rules tab:
no-strict-blocking: * true
- Once you type the rule inside the Temporary rules table, click Save and then click on Commit to set the rule as permanent.

Establishing a permanent rule
That’s it. The no-strict-blocking rule is now active, so you won’t see the annoying pop-up prompt again. But if you ever change your mind, you can remove the rule by deleting it from the Temporary rules, clicking on Save and then clicking on Commit again.

If you’re looking for a different approach, follow the next method below.
Method 4: Using a Pop-up blocker with uBlock (Chrome & Mozilla only)
This might seem like an over the top method of preventing the pop-up from appearing, but a lot of uBlock users are using this workaround to avoid seeing the “uBlock Origin has prevented the following page from loading” prompt.
This method involves installing another extension called Proper Blocker. This is confirmed to work well with uBlock and will prevent annoying pop up from ever showing up on your screen.
Here’s are two guides on installing and configuring Poper blocker depending on the browser that you’re using.
Google Chrome
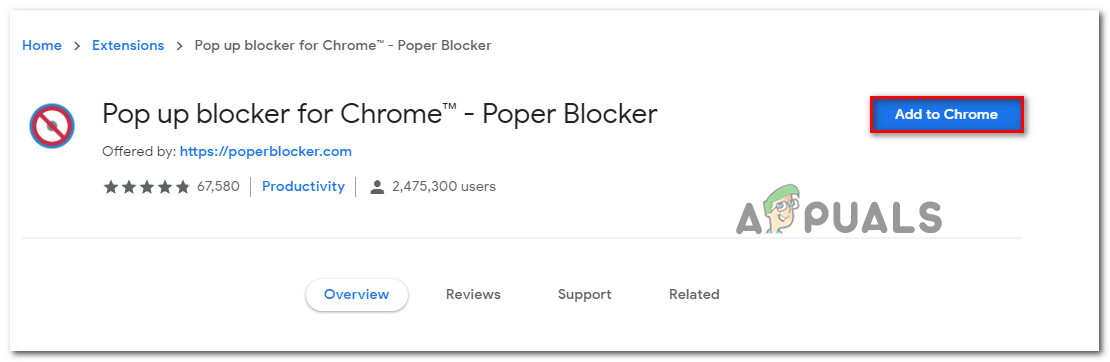
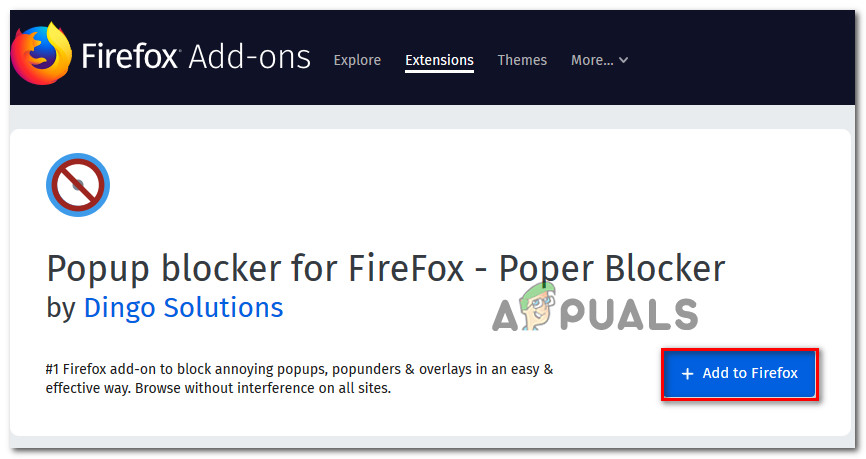
- Visit this link (here) and click on Add to Chrome to install the Poper Blocker extension on your browser.
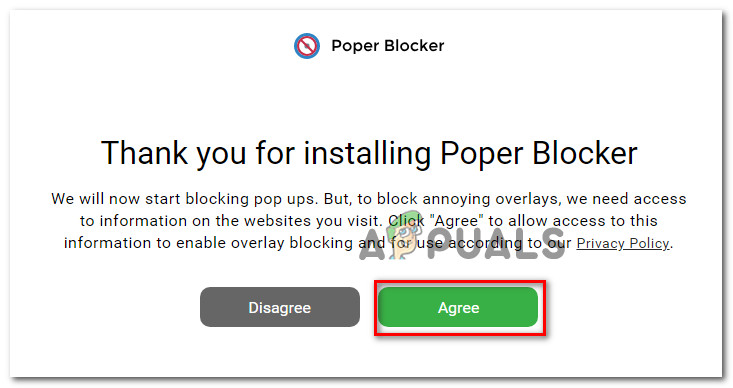
Installing Poper Blocker on Chrome - Once the extension is installed, click on Agree to allow Poper Blocker to access information about the websites that you visit.
Allowing Poper Blocker access to the websites that you visit - That’s it. Poper Blocker will now start blocking any type of popup or overlay (including the on in uBlock).
Mozilla Firefox
- Visit this link (here) and click on Add to Firefox to install Poper Blocker on your Mozilla Firefox browser.
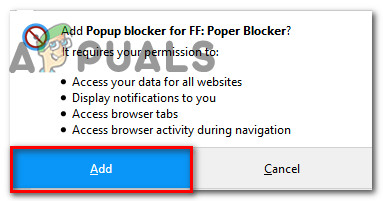
Installing Poper Blocker on Mozilla Firefox - Click on the Add button to allow the installation of Poper Blocker.
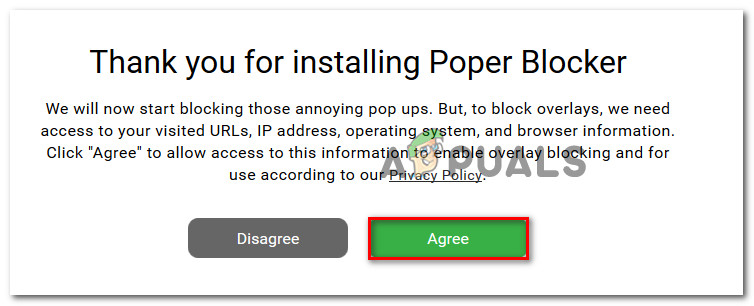
Adding Poper Blocker to Mozilla Firefox - Once the extension is installed, click on the Agree button to allow the add-on to access your URLs, IP address and browser information.
Allowing Poper Blocker to use the required information - That’s it. Poper Blocker will now start blocking any type of popup or overlay (including the on in uBlock).
If you’re looking for a different approach for preventing the “uBlock Origin has prevented the following page from loading” pop up from appearing on your screen again, move down to the next method below.
Method 5: Removing your custom filters
If you’re using custom filters (your own or some filters imported from somewhere else), the pop-up might appear due to a false positive. In the event that you maintain a list of custom filters or you imported them from the web, you might want to disable them and see if the issue is still persisting.
Here’s a quick guide on how to do this:
- Click the uBlock extension icon (top-right corner) and then click on the Settings icon.
Accessing the Settings menu of uBlock - Inside the Settings menu of uBlock, go to the My filters tab and delete every filter that you have in place. Then, click on Apply changes to save the new behavior.
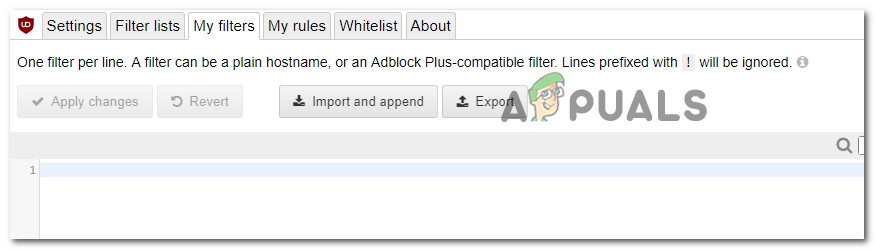
Deleting every custom filter Note: If you plan on using the filters again, it’s advisable to click the Export button to create a backup before deleting them all.
That’s it. Visit the page again and see if you’re still getting the annoying pop-up.
If this method wasn’t applicable or you’re looking for a different approach, move down to the next method below.
Method 6: Disable Malware domain checking (not recommended)
uBlock mostly blocks whole pages only if the URL matches something in the Malware Domain list. Because of this, you can prevent the popup from ever occurring if you disable uBlock’s ability to reference Malware Domains.
As you can imagine, this is not something we recommend since you might leave your system exposed to security lists. However, this method is efficient in those cases where you use a different 3-rd party application to protect yourself against malware.
But if you’re determined to use this workaround, here’s a quick guide on disabling malware domain checking:
- Click on the uBlock icon (top-right corner) and then click on the Settings icon.
Accessing the Settings menu of uBlock - Inside the Settings menu of uBlock, go to the Filter lists menu and expand the Malware domains menu.
- Uncheck every checkbox under Malware domains to disable any type of malware domain checking. Then, click on Apply changes (top-right corner) to save the new preferences.
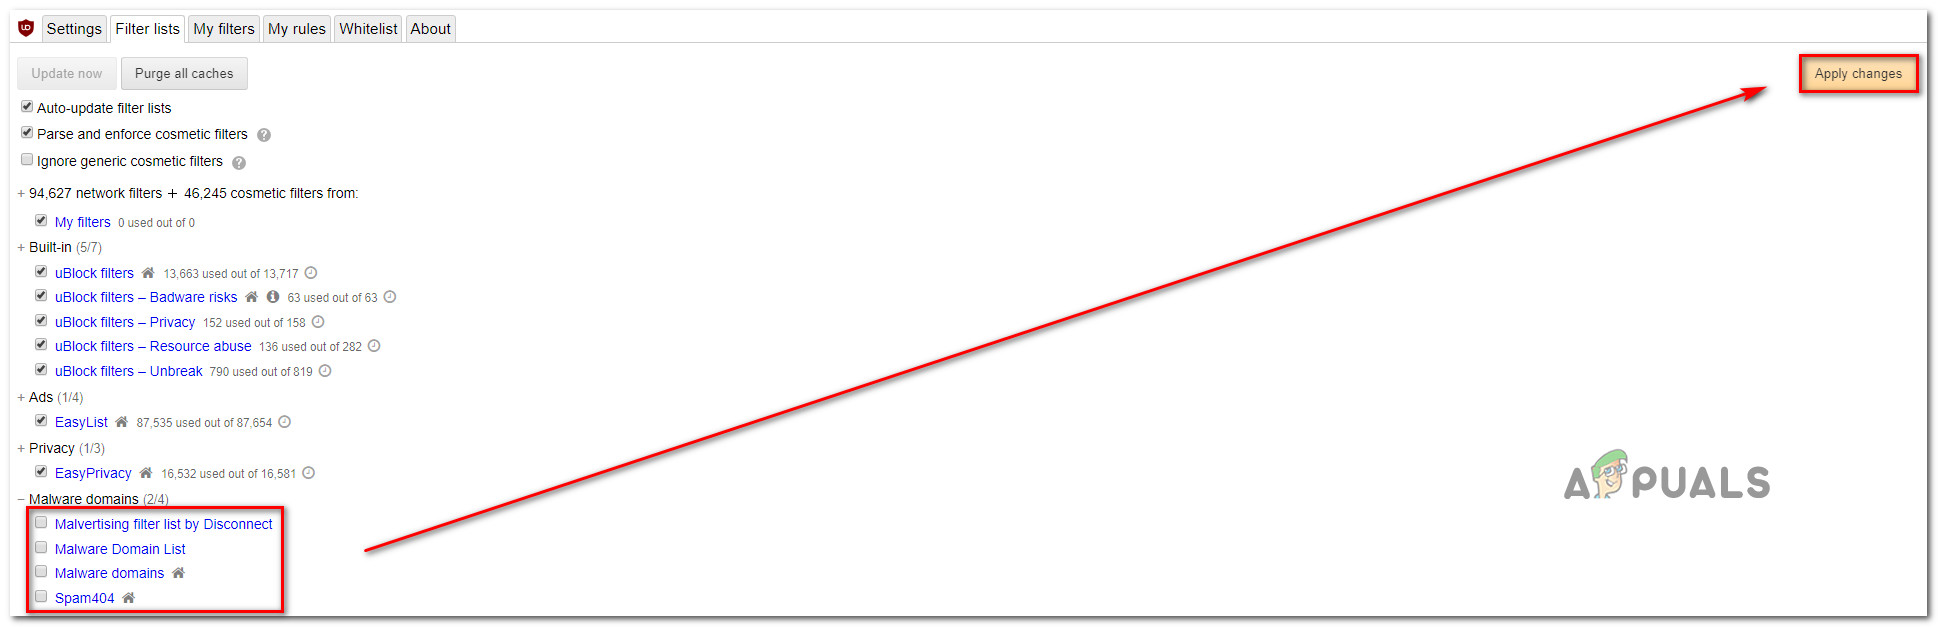
Disabling Malware Domain Checking


Similar to this I have an issue
In my case this website is a ad website and I want ublock origin to automatically close this tab.
Is this possible?