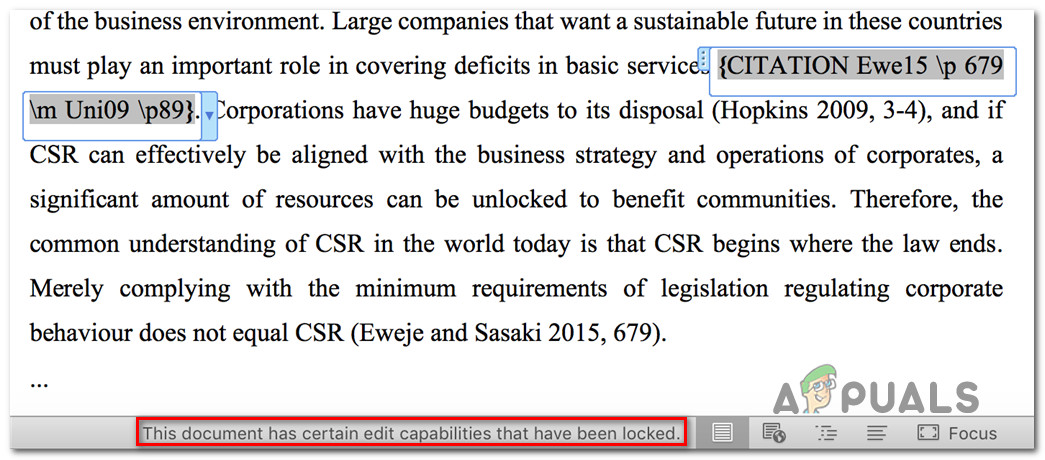
[Solved] This document has certain edit capabilities that are locked
Some Microsoft Word and Excel users are reporting that the program is suddenly showing “This document has certain edit capabilities that have been locked” when they try to edit it. The issue mostly seems to occur when the user tries to edit citations. As most users have reported, the issue doesn’t seem to be caused by migration or password protection, but it seems to be exclusive to the Apple ecosystem – confirmed to occur on MacOS, OSx, and iOS (occurring on tablets).
What is causing the “edit capabilities that have been locked” issue?
We investigated this particular issue by looking at various user reports and the repair strategies that are commonly used to resolve this error message. Based on our investigations, there are several different scenarios that will end up triggering this problem on Mac computers and iPad tablets:
- Office version is outdated – As it turns out, this particular issue can occur if you’re using a severely outdated Office version on your Mac. Microsoft has released a hotfix that corrects this issue, so updating to the latest build available might end up resolving the issue automatically.
- Corrupted Normal.dotm template – As some users have reported, this particular issue can also be caused by a corrupted Normal.dotm template. If this scenario is applicable, you can resolve the issue by just moving the file from the Office folder, forcing it to create a new, healthy file.
- The file is saved in an older Word format – Another possible reason why you might end up seeing this error is if the file is saved in a format that is no longer fully supported by newer Office versions. In this case, you can resolve the issue by converting the file to a newer format.
- The Office Suite is not activated – If you’re using a temporary activation key or your Office product is not activated at all, you might also encounter this particular issue. If this scenario is applicable, the only way to resolve the issue is to activate your product.
- Leftover files from an older Office installation – Some affected users have confirmed that the issue can also occur if you recently upgraded to a newer Office version without uninstalling the older suite properly. This has the potential of leaving behind some leftover files that might trigger this error. In this case, you can resolve the issue by uninstalling the current installation completely and doing a clean install.
- Permission issue caused by current profile – This particular error can also be triggered on a Mac with insufficient permissions. Several users in a similar situation have managed to get around this problem by creating a new machine profile for their Mac.
If you’re currently struggling to resolve the “This document has certain edit capabilities that have been locked” error, this article will provide you with several different repair strategies that other affected users have successfully used to fix the problem.
For the best results, we advise you to follow the methods below in the order that they are presented in. One of the potential fixes is bound to resolve the issue in your particular scenario.
Method 1: Update Word version to the latest version
As some users have reported, this issue can also be caused by a glitch that Microsoft already patched with a couple of hotfixes. If you want to take advantage of them and avoid using any workarounds, the easiest way to fix this issue is to update your Word version to the latest build.
This will ensure that every hotfix that Microsoft released for the Word application is applied. Here’s a quick guide on how to update Word to the latest version:
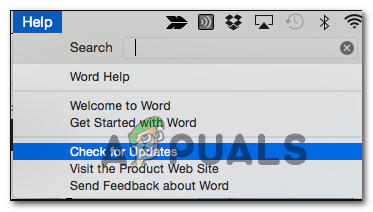
- Open the Word application.
- From the ribbon bar at the top-right corner, go to Help > Check for Updates.
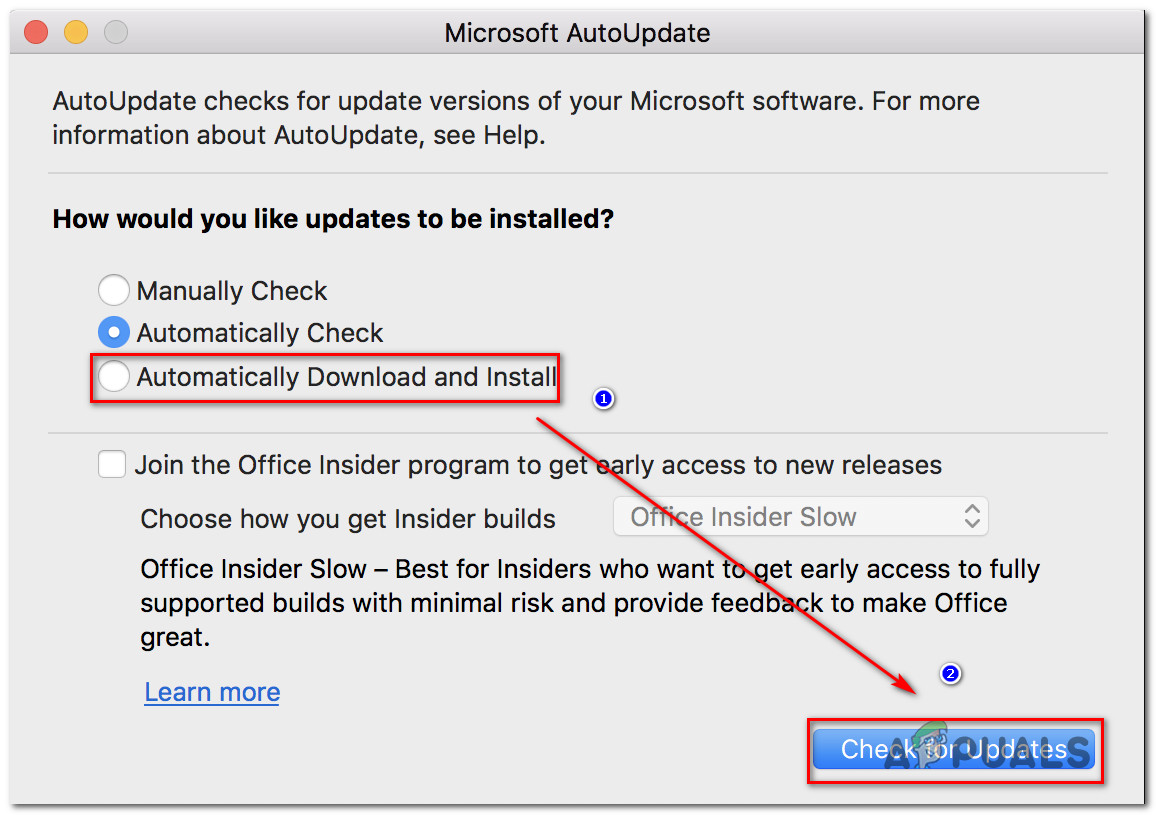
Checking for Updates - From the Microsoft AutoUpdate screen, choose the toggle associated with Automatically Download and install, then click on Check for updates.
Checking for updates Word - If a new available update is found for your particular Word version, a link will pop up with more information about the update.
- Follow the on-screen prompts to install the latest update and bring your Word version to the latest.
- Restart your Mac and see if the issue has been resolved at the next startup.
If you’re still seeing the “This document has certain edit capabilities that have been locked” when you’re trying to edit a document with Microsoft Word on Mac, move down to the next method below.
Method 2: Rebuilding the Normal Template
As it turns out, this particular issue can also be caused by a corrupted Normal.dotm template. This file will open whenever you start Microsoft World and it includes a collection of default styles and customizations that will determine the basic look of a document.
If you’re encountering the “This document has certain edit capabilities that have been locked” error with every new document that you create, chances are you’re dealing with a corrupted Normal. dotm template. Fortunately, if this scenario is applicable, you can resolve the issue quite easily by rebuilding the Normal.dotm file.
Here’s a quick guide on how to do this:
- Quit Word and any associated applications (supporting apps or other applications from the Office suite).
- Use the finder function and choose Go > Go to the folder.
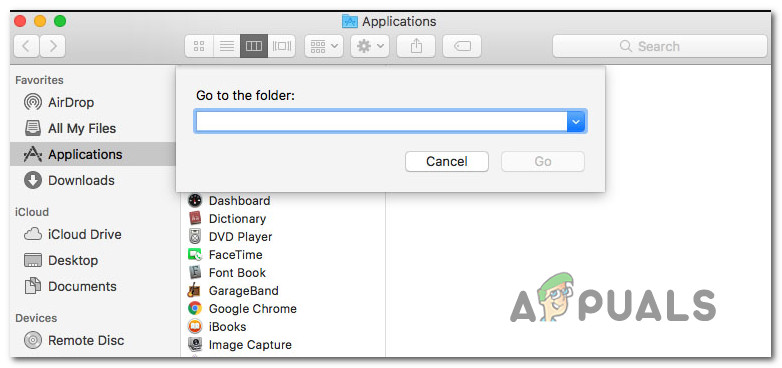
Go to the folder text box - Inside the Go to text field, paste the following location and hit Return:
~/Library/Application Support/Microsoft/Office/User Templates
- Once you get there, drag and drop the Normal.dotm file to the Desktop. This operation will force Word to rebuild the Normal.dotm file to the stock version.
- Open a new Word file (or the one that was previously causing issues) and see if the problem has been resolved.
If you’re still encountering the This document has certain edit capabilities that have been locked” error, move down to the next method below.
Method 3: Saving the document to the current format (.docx)
This particular error can also occur if the file you’re working on is of an old file format that is no longer being actively used by Microsoft Word. If you’re trying to use newer Word features on an older document that is using a file format that is not .docx, chances are you’ll encounter this particular issue.
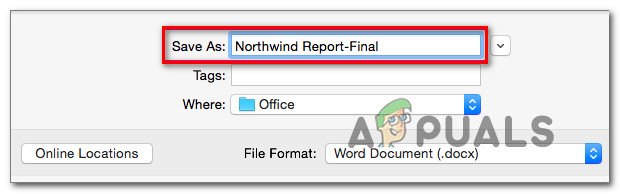
If this scenario is applicable, you can resolve the issue quite easily by saving the current file with the .docx file format and give it a new name. To do this, use the ribbon at the top to go to File > Save as, then choose the current Microsoft Word format (.docx) from the list of file types. Then, set a new name for your file and hit Save.
Once the file has been migrated to the newer file format, open the new file and see if you’re still encountering the same error message.
If you’re still seeing the “This document has certain edit capabilities that have been locked” error, move down to the next method below.
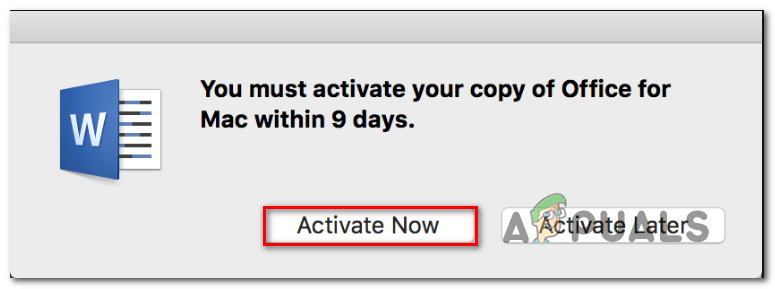
Method 4: Activate your Microsoft Office product
Another possible reason why you might be encountering this particular error when trying to edit .docx files in the Mac version of Word is that the software is not activated. If you have the product key for it, access the File menu from any Office application and you will be given the option to activate it.
If your Office product is already activated, move down to the next method below.
Method 5: Resolving a password alteration conflict (if applicable)
As it turns out, this particular issue can also be caused by a password alteration conflict in KeyChain Access caused by the Microsoft software installer. This is a well-documented issue that is known to be caused by the installers for a couple of Office 2016 updates.
If this scenario is applicable and you’re encountering the issue on a Mac computer, here’s what you need to do to resolve the conflict:
- Quit all open applications (all Office & other applications you might have open).
- Open the Keychain Access app and click on Passwords.
- Inside the search box associated with the Passwords box, type “office”.
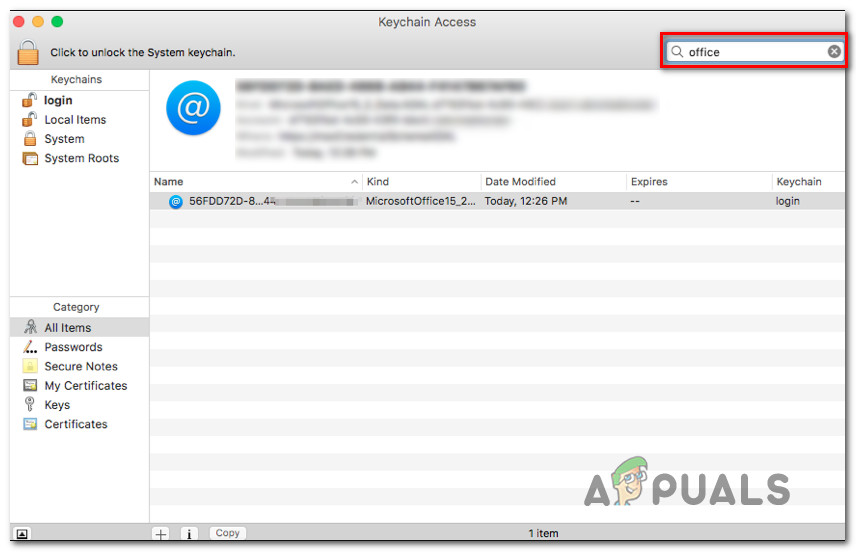
Finding Office passwords in the KeyChain App - You can get anywhere from 1 to 4 different listings, depending on which version you have and how many users are using the product. Click on the first listing, then go to the Description area and click the info icon at the center.
- Next, make sure that you check the box associated with Show Password
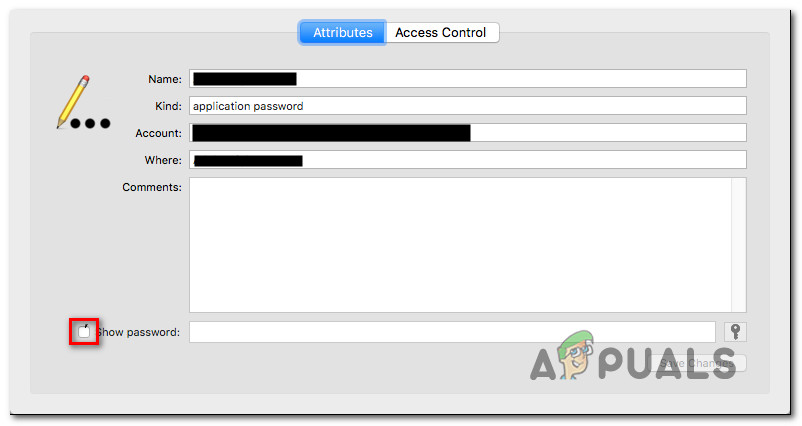
Showing passwords inside the KeyChain App - Check if the password you used to activate your Office product is correct. If the password is mangled, change it to the correct one and click on Save Changes.
- Repeat steps 4, 5 and 6 with every listing that you identified at step 3.
- Once finished, save the changes and quit Keychain Access.
- Restart your machine and open the same document that was previously showing the “This document has certain edit capabilities that have been locked” error and see if the issue has been resolved.
If the issue is still occurring, move down to the method below.
Method 6: Reinstalling the entire Office installation
For some users, the issue was only resolved after they clean installed the entire Office installation again. This is necessary because the standard procedure that Microsoft implemented for removing the old file when installing a newer Office installation is insufficient in some cases. In certain scenarios, several files will be left behind and will end up triggering the “This document has certain edit capabilities that have been locked” error with all documents opened in Word.
Here’s a quick guide on how to completely uninstall the entire Office suite before doing a clean install:
- Open your Finder and go to Applications.
- Inside your Application menu, use Command + click to select every Office program that you see there.
- Then, right-click on a selected application and choose Move to Trash.
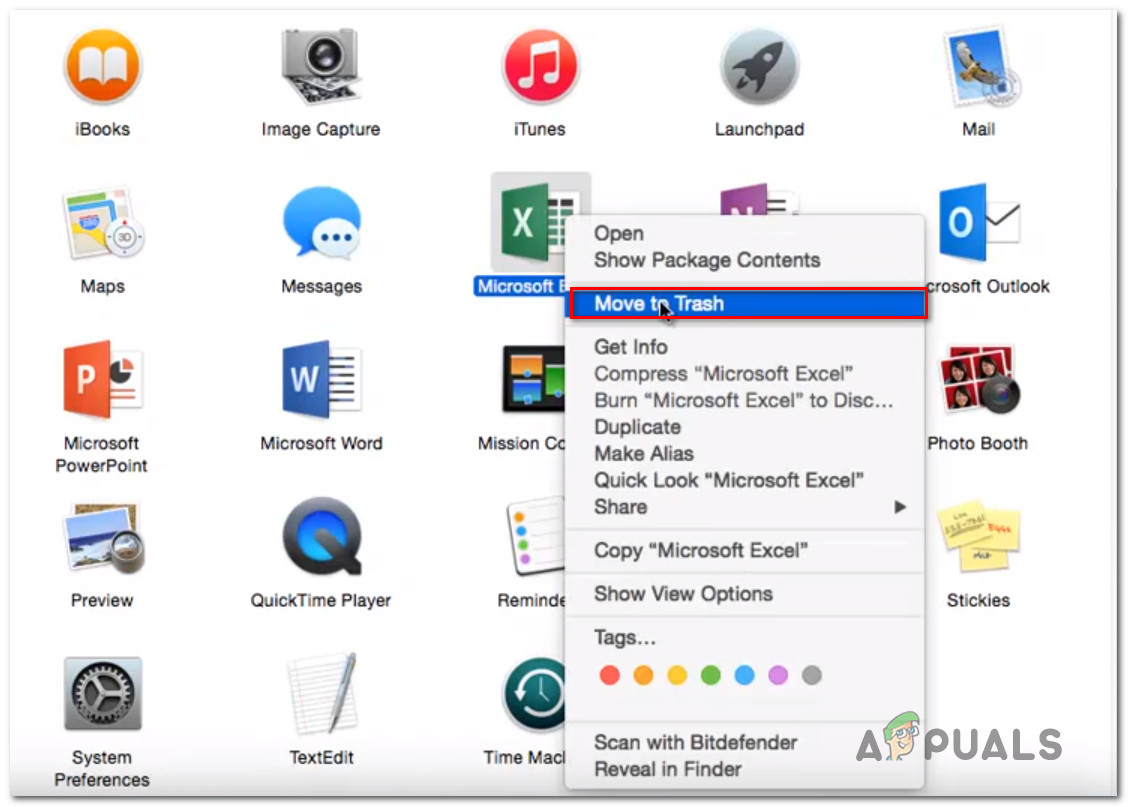
Moving every Office application to the trash Note: You can also move every application to the trash individually.
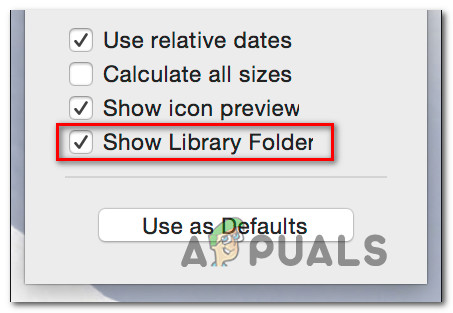
- Once every Office application has been moved to the trash, open your Finder app and press Command + Shift + H. Then, go to View > as List and then click on View > Show View Options.
- Inside View Options, ensure that the box associated with Show Library Folder is checked.
Making the Library Folder visible - Go back to the Finder App and go to Library Containers. Once you get there, Command + Click every folder from the list below, right-click and choose Move to Trash:
com.microsoft.errorreporting
com.microsoft.Excel
com.microsoft.netlib.shipassertprocess
com.microsoft.Office365ServiceV2
com.microsoft.Outlook
com.microsoft.Powerpoint
com.microsoft.RMS-XPCService
com.microsoft.Word
com.microsoft.onenote.mac
- Once every Office folder has been removed, click the back arrow to return to the Group Containers folder. When you get there, Command + Click each of the following folders, then right-click and choose Move to Trash:
UBF8T346G9.ms
UBF8T346G9.Office
UBF8T346G9.OfficeOsfWebHost
- Once all folders and files have been removed, restart your Mac.
- At the next startup, reinstall your Office application and see if the issue is now resolved.
If you’re still encountering the same error message, move down to the next method below.
Method 7: Creating a new machine profile
Some users that we’re encountering the “This document has certain edit capabilities that have been locked” error have reported that the issue stopped occurring after they created a new admin profile on their Mac. This is confirmed to work on multiple OsX versions, as long as your product is activated.
There’s no official explanation why this fix is effective, but some users are speculating that it’s probably a permission issue.
Here’s a quick guide on creating a new profile on your Mac computer:
- To add a new user, access the Apple Menu and click on System Preferences. Then, click on User & Groups.
- In the newly appeared menu, click on the lock icon to unlock editing, then type in your administrator name and password.
- Click the + icon (Add) icon, choose the type of user, enter your full name and a password for the newly created profile.
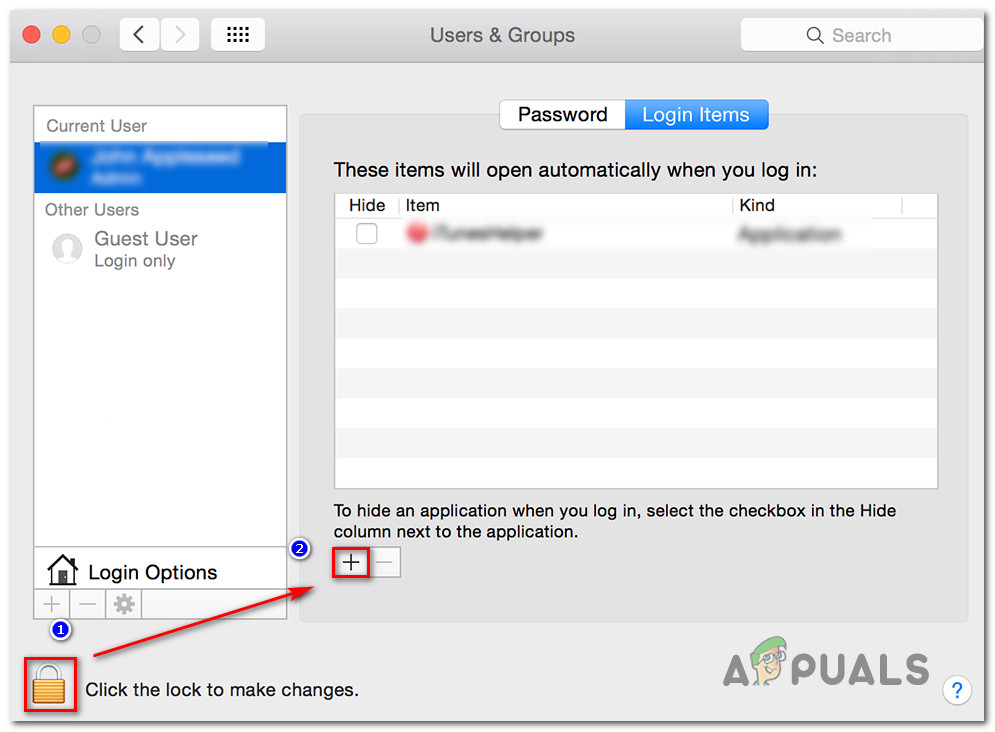
Creating a new User profile - Click on Create User to complete the creation process.
- Restart your machine and log in with the newly created profile. Then, launch Word and see if the issue has been resolved.


