8 Best Solutions to Fix “This app can’t run on your PC” Error
The “This app can’t run on your PC” error message is one of the most notorious error messages to have ever affected Windows 10 users. This error message comes in all sorts of different forms and can affect a wide array of different apps ranging from default Windows applications to third-party software designed for the Windows Operating System. Unfortunately, in most cases this error message is not very helpful, i.e. it is no help in deciphering the exact cause of the affected user seeing the error message on their screen. All this error message indicates in most cases is that, for some reason, the app the affected user tried to launch and failed can’t run on their computer.

The “This app can’t run on your PC” can affect any and all Windows software and apps, making it exceptionally troublesome. In addition, the error message can also affect multiple applications on the same computer, proving to be remarkably pesky as well. Thankfully, though, this error message can, in most cases, be gotten rid of provided the affected user applies the right solution for their specific case. The following are some of the most effective solutions that you can use to try and get rid of the “This app can’t run on your PC” error message and resolve this problem:
Solution 1: Run an SFC scan
An SFC scan is designed to analyze a Windows computer and all of its system files for corruptions and other kinds of damage. If you run an SFC scan and it finds corrupted or otherwise damaged system files, the utility either repairs them or replaces them with cached copies. Running an SFC scan can fix whatever underlying issue is causing you to see the “This app can’t run on your PC” error message. To run an SFC scan on a Windows 10 computer, simply follow this guide.
Solution 2: Make sure you have the right version of the program you’re trying to run
There are two different versions of every single variant of Windows 10 – a 32-bit version and a 64-bit version. That being the case, every third-party application designed for Windows 10 that is capable of utilizing everything that the 64-bit version of Windows 10 has to offer has both a 32-bit version and a 64-bit version. If you’re seeing the “This app can’t run on your PC” error message while trying to run a third-party application, one of the very first things you should do is check to make sure you have the right version of the program considering the version of Windows 10 you have on your computer. If you’re running a 32-bit version of Windows, you’re going to need the 32-bit version of the application. If you’re using a 64-bit version of Windows, you’ll be needing the application’s 64-bit version. Here is how you can check what variant of Windows is installed on your computer.
- Press Windows + S to launch the search bar. Type “system information” in the dialogue box and open the application.
- Once the application is open, select “System Summary” using the left navigation panel and search for the “System Type” field at the right-side of the screen.
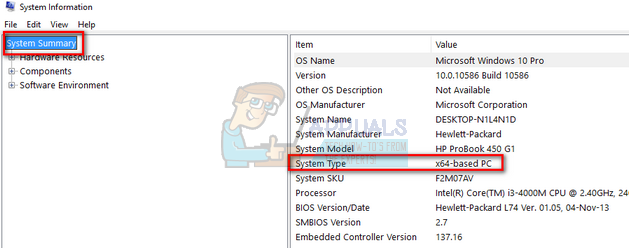
- Now check the application which you are trying to run is compatible with your computer.
Sometimes launching the application in compatibility mode solves most of the problems. Make sure that you are launching the application in an administrator account. Follow the steps listed below to launch it in compatibility mode.
- Right-click on the application and select “Properties”.
- Once in the properties, navigate to the compatibility tab.
- Once in compatibility, check the options “Run this program in compatibility mode for:” and “Run this program as an administrator”. You can select the version of Windows you want to run in the compatibility mode.
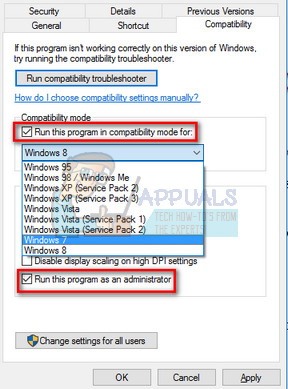
- Press Apply to save changes and exit. Restart your computer and check if the problem got solved.
Solution 3: Update the Windows Store
- Launch the Windows Store.
- Click on the Options button (represented by three horizontal dots and located in the top right corner of the window).
- Open Downloads and updates.
- Click on Get updates.
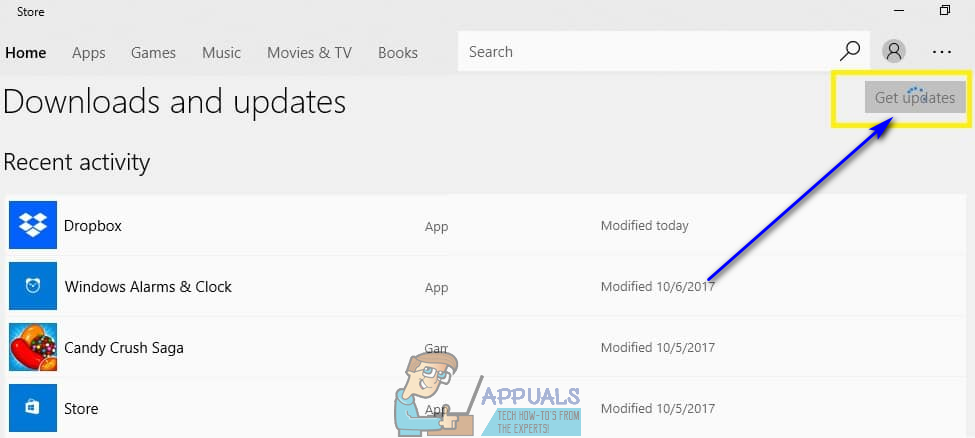
- Wait for the Windows Store to check for and download any available updates and then install any updates that it downloads.
- Once done, close the Windows Store and check to see whether or not the issue still persists.
Solution 4: Enable app side-loading
Another pretty effective solution to a number of different variants of the “This app can’t run on your PC” error message is enabling app side-loading, a feature that is enabled when a Windows 10 user enables Developer mode for apps. To enable app side-loading on a Windows 10 computer, you need to:
- Open the Start Menu.
- Click on Settings.
- Click on Update & Security.
- In the left pane of the window, click on For developers.
- In the right pane of the window, under the Use developer features section, locate the Developer mode option and enable it.
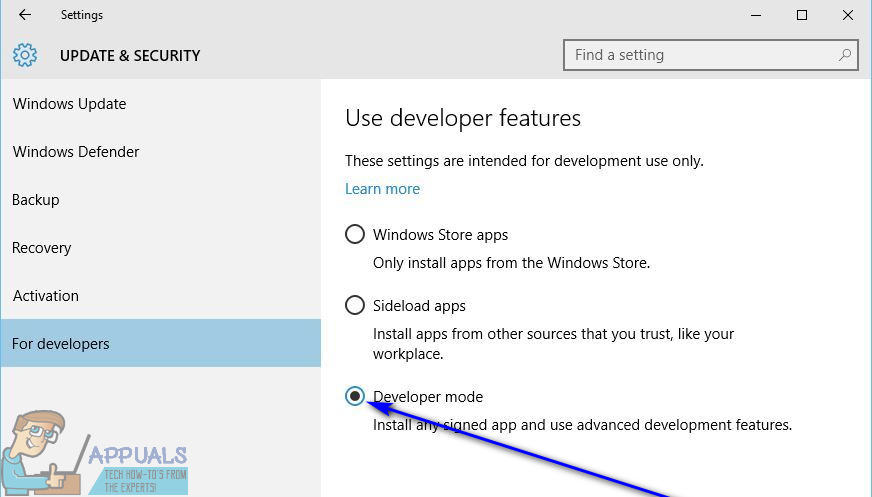
- Close the Settings app.
Once Developer mode has been enabled on the affected computer, app side-loading will also have been enabled. That being the case, restart your computer and check to see whether you’ve successfully gotten rid of the “This app can’t run on your PC” error message when it boots up.
Solution 5: Disable SmartScreen
SmartScreen is a Windows 10 feature designed to protect Windows 10 users from different kinds of outside invasions such as malware and phishing attacks. SmartScreen is a feature primarily designed to protect and serve Windows 10 users, but in some cases it can do more harm that it does good. For example, SmartScreen has been known to be one of the leading causes of the “This app can’t run on your PC” error message showing up on Windows 10 users’ computers. If SmartScreen is what is causing you to see the “This app can’t run on your PC” error message, simply disabling the feature should be enough to resolve the problem. To disable SmartScreen, you need to:
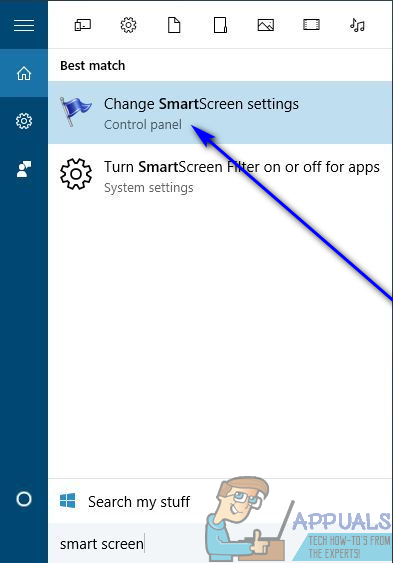
- Press the Windows Logo key + S to trigger a Search.
- Type smartscreen into the Search bar.
- Click on the search result titled Change SmartScreen settings.
- Navigate to the Security section.
- Locate Windows SmartScreen and click on Change settings.
- Select Do not do anything (turn off Windows SmartScreen).
- Click on OK to save the changes you’ve made.
- Restart your computer.
When the computer boots up, check to see whether or not the problem still persists.
Solution 6: Switch to a different user account on your computer
If none of the solutions listed and described above have worked for you, the issue might stem from something pertaining to your user account on your computer. If that’s the case, the only thing short of a clean installation of Windows 10 that is likely to get rid of the “This app can’t run on your PC” error message for you is switching to a new user account on your computer. To create a new Administrator account on a Windows 10 computer, you need to:
- Open the Start Menu and click on Settings.
- Click on Accounts.
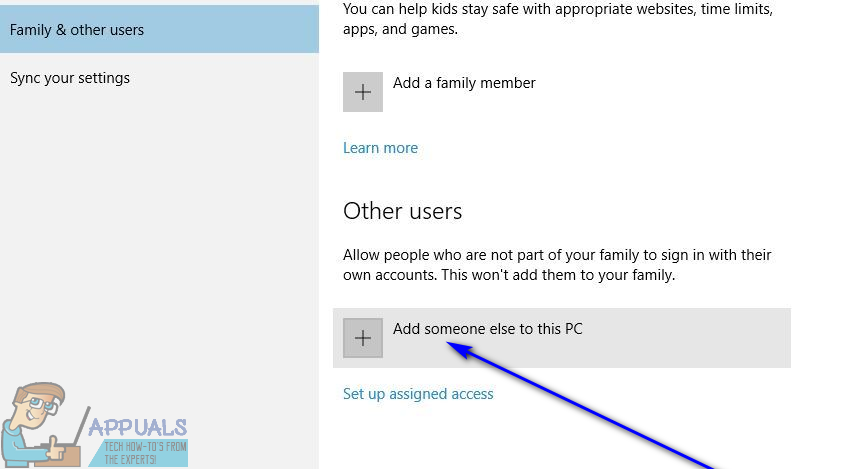
- In the left pane of the window, click on Family & other users.
- In the right pane of the window, under the Other users section, click on Add someone else to this PC.
- Select I don’t have this person’s sign-in information.
- Select Add a user without a Microsoft account.
- Type in a name and password for the new user account.
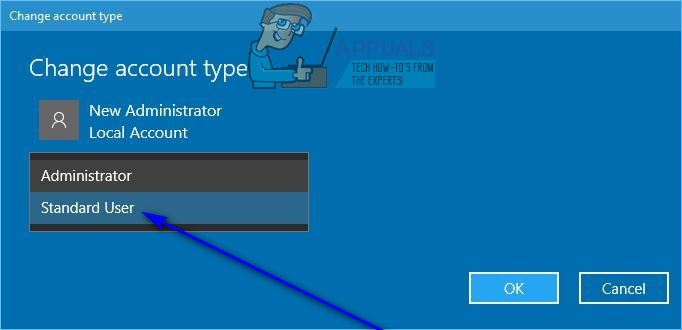
- The newly created user account should now appear in the Other users section. Click on the new account and then click on Change account type.
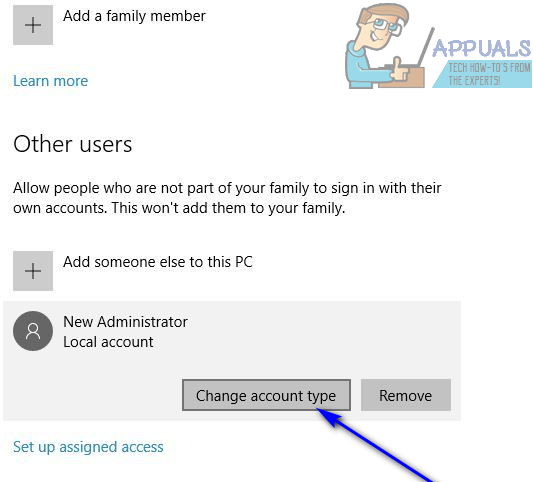
- Open the Account type dropdown menu and click on Administrator, and then click on OK.
Restart your computer, and sign in to the newly created Administrator user account when it boots up. Check to see whether or not you see the “This app can’t run on your PC” error message while using the new user account. If all is well on the new user account and the issue is no more, simply move all of your personal files and data from your old user account to the new one and completely delete the old user account.
Solution 7: Disabling Shell Integration of Daemon Tools
Another workaround which can solve the problem is disabling the shell integration of Daemon Tools. We can use an application “Shell extension manager” and use it perform the required actions. You can always revert the changes by using the same method.
Note: Appuals is in no way associated with any third-party applications. Please use these applications at your risk. They are listed purely for information of the reader.
- Download Shell Extension Manager to an accessible location and launch the exe file (ShellExView).
- Now search through all the listed entries and select “DaemonShellExtDrive Class”, “DaemonShellExtImage Class”, and “Image Catalog”.
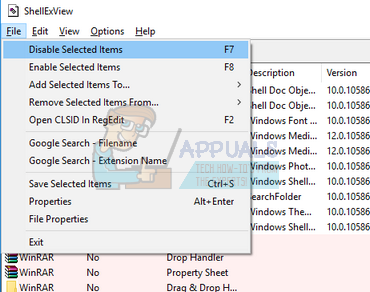
- After selecting the entries, click on File present at the top left side of the screen and select “Disable Selected items”.
- Now check if the problem got solved. You can also reboot your computer.
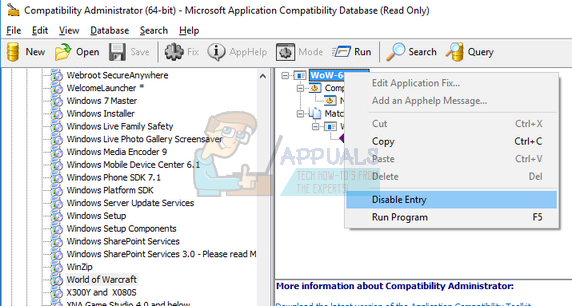
Solution 8: Using Windows Assessment and Deployment Kit (Windows ADK)
Windows ADK contains tools to customize your Windows experience. We can use this application to check if the application giving u the problem is being blocked by the operating system. If it is, we can try fixing it and then launch it accordingly. Do note that we need to include compatibility component when installing the application so follow the instructions carefully.
- Download Windows Assessment and Deployment Kit from Microsoft’s official website. Download the application according to the version of Windows installed on your computer.
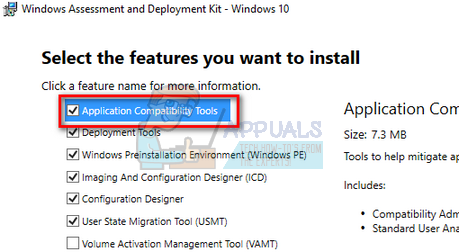
- Launch the executable to install the application. Make sure that you check “Application Compatibility Tools” when installing it.
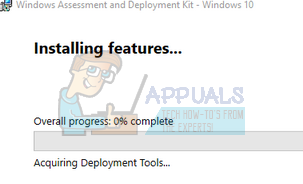
- The install might take a while. Make sure that you have an active internet connection and wait for the installation to complete.
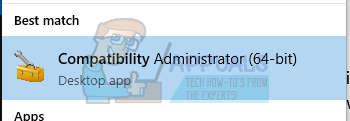
- After the installation is complete, press Windows + S, type “compatibility” and open the application.
- Now open “applications” using the left navigation pane and search for the application which is causing you trouble.
- Let’s suppose World of Warcraft I causing the error. Right-click on the application and click “Disable Entry”. Now try launching the application again and check if the problem got solved. Make sure to restart your computer too.