Fix: Steam Error Code 80
Many users experience an error named Error Code 80 when they try to launch their Steam games. It is very incorrect to state that this occurs due to only one reason. We can’t say for certain why it triggers because of the unique hardware and software specifications of the players/users. Each of you may be experiencing this problem either due to the same reason, or totally different ones. We have tried to list down every solution which worked. We advise that you start with the top solutions and move down accordingly. Although reinstalling Steam does the trick, we will resort to that solution in the end if all the others fail.
Solution 1: Verifying the integrity of Steam cache
Many cases arise when the Steam cache files get corrupted. If this is the case, we can verify and replace the files to solve the problem. This solution will compare the files present on your PC with the latest ones available on the Steam servers. If the files are missing or incomplete, this will replace them after downloading from the official servers. This won’t prompt you for any login credentials after it’s finished so no need to worry.
- Open your Steam client using administrator privileges. Just right click on the launcher and select “Run as administrator”.
- Head over to the Library tab located at the top when you enter the Steam client.
![]()
- Once in the library, right click on the game which is giving you the error and click on Properties.
- Browse to the Local Files tab and you will find an option saying “Verify Integrity of Game Files”. Click it to begin the process.

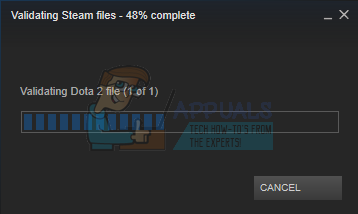
- Now Steam will check your files one by one. This may take a few moments so avoid canceling the process in between.
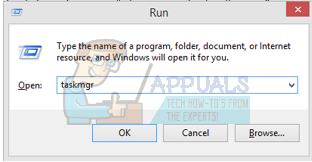
- Launch your Task Manager by pressing ⊞ Win + R button. This should pop-up the Run application.
In the dialogue box write “taskmgr”. This should open up the task manager.
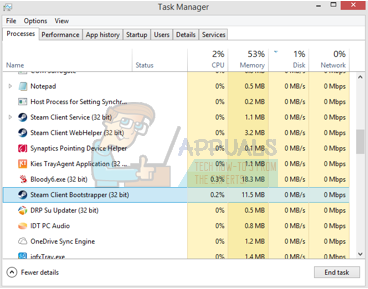
- End all Steam related processes starting from the process ‘Steam Client BootStrapper’.
- Relaunch Steam using “Run as administrator”. Start the game which was giving you the problem and hopefully the problem will be fixed.
Solution 2: Checking folder security permissions
Steam may not have sufficient Write privileges which may cause it to generate the Error 80. As we all know, in order for a program to work efficiently, it needs to have both privileges (read and write). Missing any one of these may cause Steam to stop in between of processes and end up giving the error. Follow the steps below.
- End all Steam related processes through the method listed above.
- The default location for your steam folder should be “C:\Program Files (x86)\Steam”. Press ⊞ Win + R button. This should pop-up the Run application. In the dialogue box write “C:\Program Files (x86)\Steam”.

Or if you installed Steam in another directory, you can browse to that directory and you will be good to go.
![]()
- Now go one step back to the folder “Program Files (x86)”. Right click on the Steam folder and select Properties.
- Click on the General tab and uncheck “Read Only” check box if it is checked.
- Launch Steam again “Run as administrator”. Hopefully, the problem will be solved; if not, please refer to the other solutions listed below.

Solution 3: Changing your Regional settings
Mismatching time zone and time may also cause Steam to pop up the problem. The fix for this is pretty easy. Follow the steps mentioned below:
- Click Windows button and type “Control Panel”. From the search results, open the Control Panel.
- From the list of categories, choose “Date and time”.

- From the three tabs, choose “Internet Time” and click on “Change Settings”.

- Check the dialogue box which says “Synchronize with Internet time server”. Click on Update now. Click on OK after the time is updated successfully and restart Steam.

Solution 4: Conflict with Data Execution Prevention
There also may be a problem of Data Execution Prevention having a conflict with Steam. Data Execution Prevention is a security feature in Windows. Basically, it blocks and shuts down program which it deems can harm your computer. Obviously, Steam never harms your computer but it is very normal for it be listed as one of the programs. Follow the steps mentioned below to check if there is a conflict between Steam and DEP.
- Open up the Run application and in the dialogue box type “Control”. This should bring up the Control Panel.

- There will be a number of settings available in the control panel. Browse through them until you find “System”. Click it.

- Another window will come forward containing your system details. Look at the left side and you will find an option which says “Advanced System Settings”. Select it.

- Select the Advanced tab and in the Performance area, click on “Settings”. This should pop up a window of Performance settings.
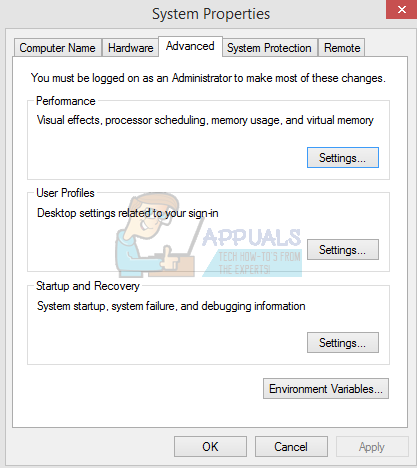
- When you open the settings, click the Data Execution Prevention tab. The first option will be chosen as default. Select the second option which says “Turn on DEP for all programs and services except those I select”.

- Click on “Add” near the bottom of the screen. Now you would have to navigate to your Steam directory and select the Steam folder. You can navigate easily as you did earlier in this guide. The default location for Steam is C:\Program Files (x86)\Steam. Select the folder and press Ok to save the changes. Relaunch Steam and open the game that was giving the error.

Solution 5: Disabling Windows Defender
Many users reported that unexpectedly, Windows Defender was causing the problem. Somehow, after disabling it, the fluctuation was fixed. It is advised to turn it off and try re-launching Steam. However, if this method doesn’t work, it is highly recommended for you to turn it back on.
- Press ⊞ Win + R button and in the dialogue box type “msc”.
- A Local Group Policy Editor will come forward. Click the Computer Configuration tab and select Administrative templates.
- Here you will see a folder of Windows Components. Click it and select Windows Defender.

- Here you will find a number of different options. Browse through them and select “Turn off Windows Defender”.

- Select “Enabled” to turn Windows Defender off. Apply settings and press OK.

After completing the above steps, your Windows Defender should be turned off. Restart your computer and re-launch Steam using Steam.exe. It is preferable to launch it with administrative privileges. To do so just right click on your client and select “Run as administrator”.
Solution 6: Updating your drivers
Always make sure that your drivers are up-to date. These include audio, video, graphic drivers etc. Also, update other drivers such as DirectX.
- Press the ⊞ Win(windows) + R key to bring up the run window (make sure to run it as administrator).
- In the dialogue box type “dxdiag”. This will open up DirectX diagnostic tool. It will list all the available hardware that is installed on your PC along with the versions of the software.
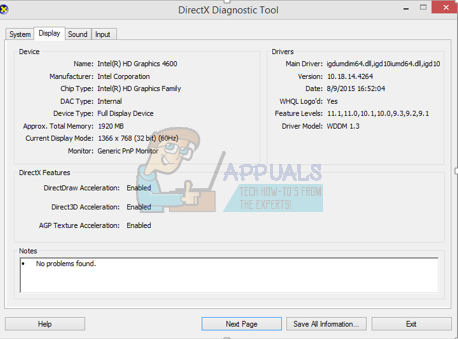
- Use your official hardware name to search for the latest drivers available and download them through the internet.
Solution 7: Deleting corrupt Steam files
Sometimes Steam’s files may get corrupted. There can be many random reasons and there is nothing to worry about. We can try deleting the Steamapps folder and let Steam download the missing files again. Please note that you can move the folder to another location for this process so we can retrieve it if the need arises.
- End all Steam related processes through the method listed above.
- The default location for your steam folder should be “C:\Program Files (x86)\Steam”. Press ⊞ Win + R button. This should pop-up the Run application. In the dialogue box write “C:\Program Files (x86)\Steam”.

Or if you installed Steam in another directory, you can browse to that directory and you will be good to go.
![]()
- Here you will find a folder named “SteamApps”. Either move it to another location or delete it.
- Launch Steam using “Run as administrator” and let it download the missing files.
Solution 8: Disabling the anti-virus
In many situations, your antivirus may be causing the problem. It is not unusual for it to mark Steam files as potential viruses and quarantine them. Below are listed different ways to disable the antivirus until you can update your game.
McAfee Antivirus:
McAfee has no way to exclude certain files from its real time scanning. The only way is to disable the antivirus entirely until the game is updated. To do this, open McAfee and select “Virus and Spyware Protection”. Here you find the option of “Real-Time Scanning”. Click that option and turn it off.

Then follow the following instruction to verify integrity of game files.
- Restart your computer and relaunch Steam.
- Head over to the library section and right click on the game which is giving you problems.
- Click on its properties and select the local files tab.
- Click the verify integrity of game files button and Steam will verify that game in a few minutes.
Hopefully, after performing the above steps, your Steam won’t give any issue.

ESET NOD32
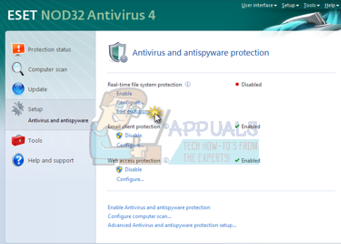
NOD32 has the tendency to mark some application files as malicious and will most probably quarantine it. This often results in the error while updating a game. Browse to your current Steam directory and copy the address
- The default location for your steam folder should be “C:\Program Files (x86)\Steam”.
Press ⊞ Win + R button. This should pop-up the Run application.
In the dialogue box write “C:\Program Files (x86)\Steam”.
Or if you installed Steam in another directory, you can browse to that directory and you can proceed with steps mentioned below.
After copying the address open ESET NOD32 and paste the location in exclude from real time scanning.
Follow the ‘verify integrity of game files’ method listed above and you will be all good.
Kaspersky AV
Kaspersky may sometimes flag Steam as an intruder and disable it from making any changes to the hard drive. To fix this, head over to ‘threats and exclusions’. Navigate to ‘trusted zone’ and add Steam.exe as a trusted application. Remember to change the settings to Do not restrict application activity as well as Do not scan opened files.
Follow the ‘verify integrity of game files’ method listed above and restart your computer.

Final Solution: Reinstalling Steam
Since none of the normal methods seemed to work out, we can try to reinstall Steam while preserving your game data. Please note that this method may take a while and it is recommended that you continue with this solution only when you have ample of time.
- Navigate to your Steam directory. The default location for your directory is
C:/Program Files (x86)/Steam
- Locate the following files and folders:
SteamApps (folder)
Userdata (folder)
Steam.exe (Application)
Ssfn (Number sequence)

- Delete all other files/folder and restart your computer.
- Re-launch Steam and hopefully, it will start updating itself. After the update is complete, it will run as expected.
Hopefully, after going through this guide, your problem will be solved. Remember to run Steam as administrator in all of the cases even if it isn’t mentioned in the method involved. We wish you happy gaming!