Fix: Skype Can’t Access Sound Card
In order for all sound-related processes to work on your computer, all programs and services need to be able to communicate with your sound card. The same can be applied to Skype, an instant messaging and calling app, which heavily relies on the use of on-board sound since it needs to be used for microphone recording and for playing incoming sound.

What Causes Skype to Display the Error?
This error may be cause by a recent Windows update or by upgrading your computer to a new version of Windows. It causes some permissions settings to reset themselves and Skype no longer has the permission to access the microphone.
The second major cause can be found with old sound card drivers which can’t keep up with new versions of Windows or Skype.
If Skype can’t access your sound card, you may be up for a challenge but it should be an easy one to overcome if you follow the steps we have prepared in this article. These methods were confirmed as working by users so make sure you check them all out.
Solution 1: Let Apps Use Your Microphone
This hidden little setting might have always been turned on but it can be changes by new programs being installed or by a Windows Update which might have turned it off for various security reasons. This solution is the simplest and it can save you hours of effort so make sure you don’t skip this method when troubleshooting the “Skype can’t access sound card” problem.
Windows 10 Users:
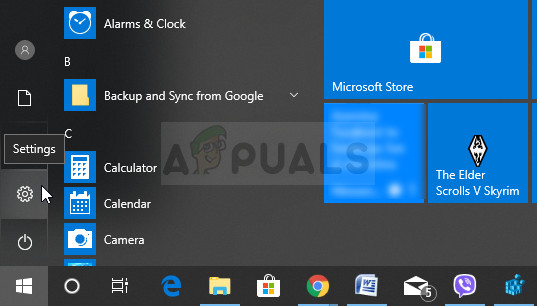
- Click the gear icon in the lower left section of the Start menu in order to open the Settings app. You can also search for it.
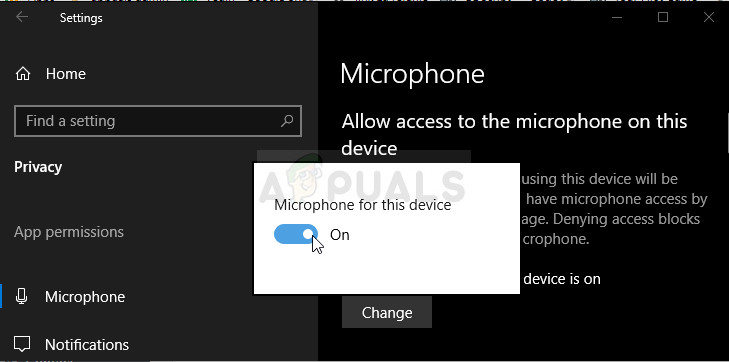
- Scroll down until you see the Privacy section and make sure you click on it. At the left side of the window, you should see the App permissions section. Scroll down until you reach Microphone and click on this option.
- First of all, check if the Microphone access for this device option is on. If it’s not, click on Change and set the slider to on.
- After that, switch the slider under the “Allow apps to access your microphone” option to On and scroll down in the list of installed apps on your computer to locate Skype. Switch the slider next to the Skype entry on the list to on.
- Reopen Skype and check to see if the problem persists.
Older Versions of Windows:
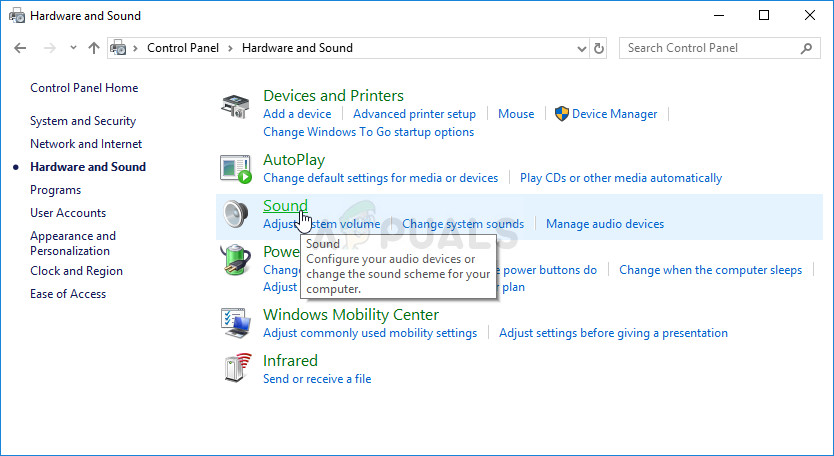
- Right-click on the volume icon located at your taskbar and choose the Sounds option. If this icon is not located at your taskbar, you can locate Sound settings by opening Control Panel, switching the view to Category and selecting Hardware and Sound >> Sound.
- Check to see if your microphone is enabled under the Recording tab. Switch to this tab by clicking at the top of the window and locate the Microphone you are using. It should be located at the top and be selected.
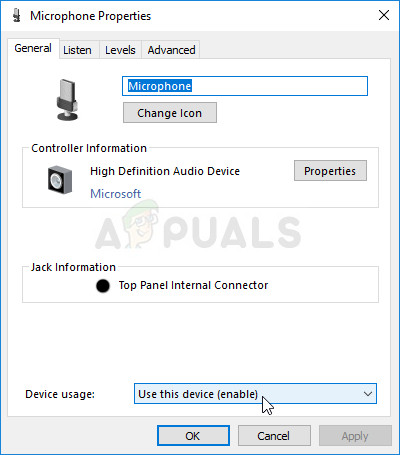
- Click on it once and click the Properties button at the lower right part of the window. In the Properties window which opens, check under Device usage and set the option to Use this device (enable) if it wasn’t already and apply the changes.
- Navigate to the Advanced tab in the same properties window and check under Exclusive mode.
- Uncheck the boxes next to the “Allow applications to take exclusive control of this device” and “Give exclusive mode applications priority”. Apply these changes as well and repeat the same process for your Speaker device in the Playback tab before you close these windows. Reopen Skype and check to see if the error persists.
Note: Even if you are a Windows 10 user, you should still try out the second set of steps as they managed to solve the problem for some Windows 10 users when the above has failed.
Solution 2: Update Sound Card Drivers on Your Computer
If you have recently updated things on your computer but missed out on updating your drivers, you might be risking various errors and BSODs on your computer. Old drivers are one of the root problems of almost all errors on Windows, and that includes this problem as well. Make sure you take your time and update sound card drivers.
- Select the Start button, type Device Manager, and select it from the top of the list of results. Alternatively, you can use the Windows Key + R key combination and type in devmgmt.msc in the Run dialog box. Click OK afterwards.

- Expand one of the Sound, video and game controllers to find devices to update, then right-click (or tap and hold) it, and select Update Driver from the context menu.
- There might be several devices listed there but make sure you update both of them just in case. The process may be long but it’s important to keep your drivers updated.
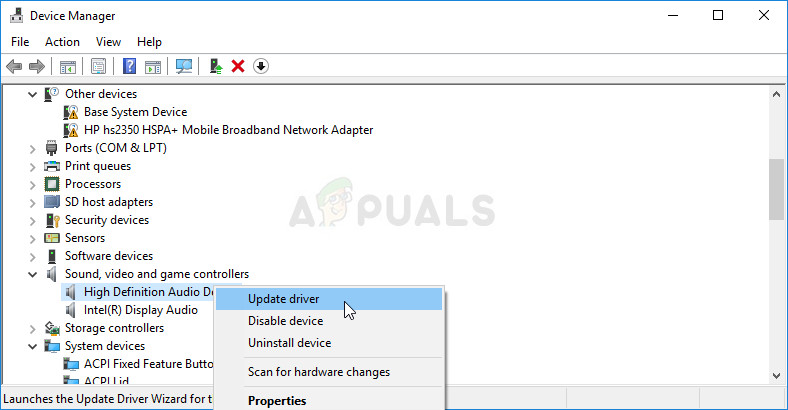
- Select Search automatically for updated driver software from the new window. If Windows doesn’t find a new driver, you can try looking for one on the device manufacturer’s website and follow their instructions to install the new driver. You should be able to search by the name of your laptop or your PC as well.
Note: If you are using Windows 10, latest drivers are often installed with Windows updates so make sure you keep your computer’s operating system fresh. Windows Update is run automatically on Windows 10 but you can check if there are new updates by following the instructions we have below.
- Search for “Settings” by using the search bar located at the taskbar or click the gear key which will appear after clicking the Start menu button.
- Locate and open the “Update & security” section in the Settings app. Stay in the Windows Update tab and click the Check for updates button under the Update status part of the window in order to check whether there is a new version of Windows available.
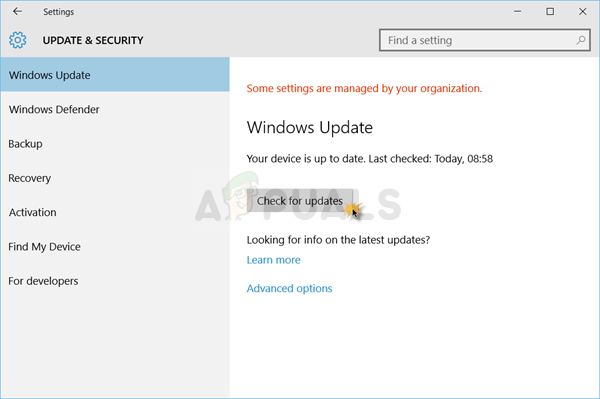
- If there is one, Windows should start the download process automatically. Please be patient for the update to install and check to see if Skype is now working properly.
Solution 3: Perform an In-place Upgrade
This is a popular name for the method where you update or refresh your computer using the Windows 10 Media Creation tool instead of the regular way via the automatic update feature. It’s very useful and it’s the methods Microsoft officials used to solve the problem on users computers. Check it out below!
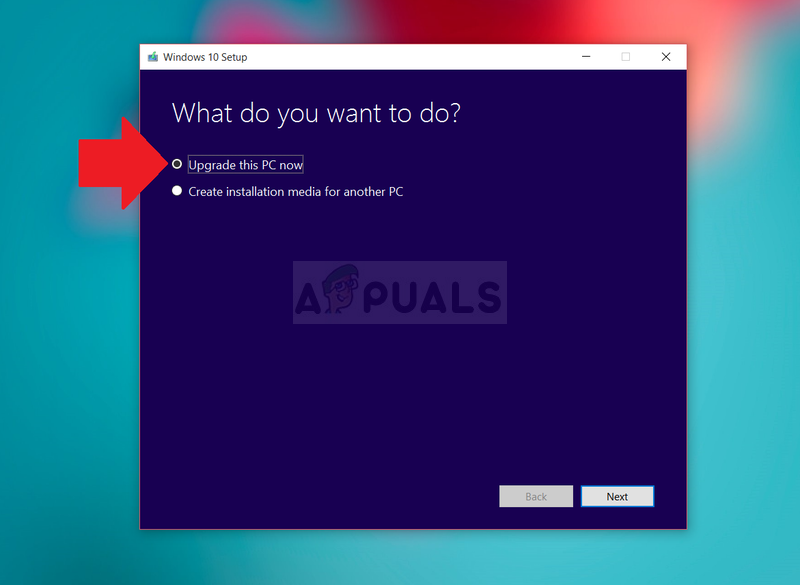
- Download the Media Creation Tool executable from Microsoft’s website and wait for the download to complete. Double-click on the downloaded file in your Downloads folder called MediaCreationTool.exe in order to open the setup. Tap Accept at the first screen.
- Select the “Upgrade this PC now” option by enabling its radio button and click on the Next button to continue. The tool will download certain files, check for updates, and scan your PC to see if it is ready so please stay patient.
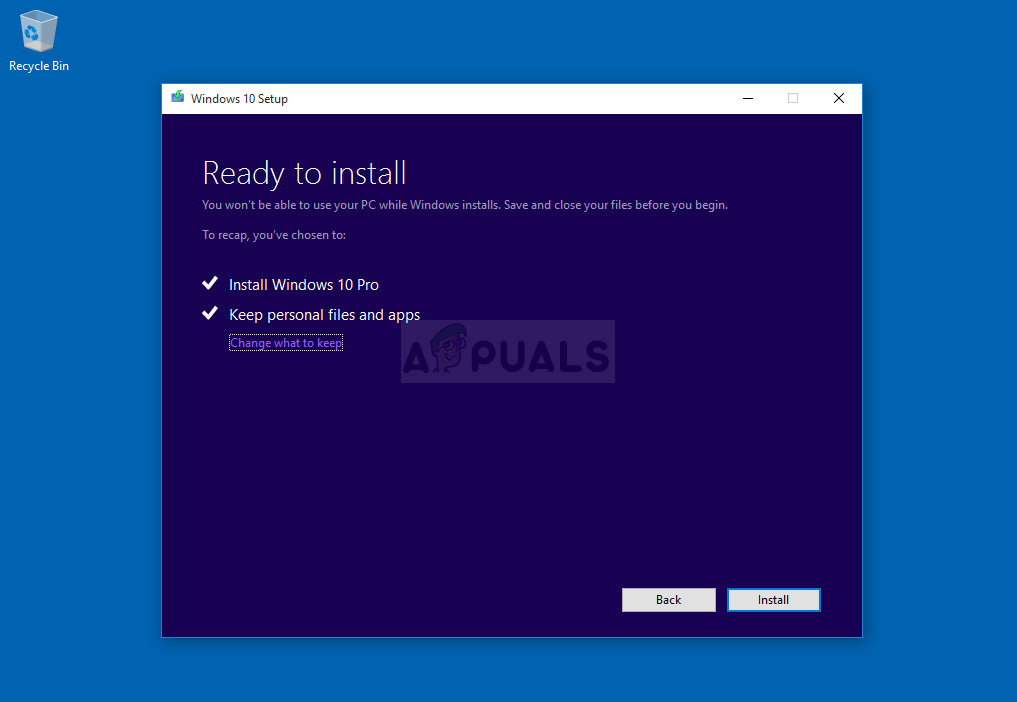
- Accept the license terms from the next window if you want to continue with the installation and wait again to communicate with Microsoft for updates (again).
- After that, you should already see the Ready to install screen with Install Windows and Keep personal files and apps options being listed. This has been chosen automatically since you are already running Windows 10 and you want to keep everything. The install should now proceed so your computer should be updated after the tool finishes with its process and Skype should work properly.
Solution 4: Perform a Clean Install of Skype
If the methods above have failed you, you should definitely consider performing a clean install which will reset the app from scratch yet you will be up within a couple of minutes. Clean install differs from a regular reinstall because it will remove all leftover files and registry entries which you wouldn’t get normally and the error might still appear without you knowing what caused it. Good luck!
A good idea would be to save your chat history if you wish to have access to previous messages you have sent via Skype. You can do so by following these steps:
- Use the Windows Logo Key + R key combination in order to bring up the Run dialog box. Make sure you type “%appdata%\skype” in the box without the quotation marks and click OK in order to open this location.

- After that, locate a folder called “My Skype Received Files”, right-click on it, and choose the Copy option from the context menu. Paste the folder somewhere else on your computer, preferably on your Desktop.
Now it’s time to actually uninstall the program from your computer which can be done using the steps below. If you have installed Skype using the Windows Store, it’s advisable you follow the instructions regarding the Settings app on Windows 10.
- Click on the Start menu and open Control Panel by searching for it. Simply type with the Start menu window open. Alternatively, you can click the gear icon in the lower left section of the Start menu in order to open the Settings app if you are using Windows 10.
- In Control Panel, select the View as: Category option at the top right corner of the Control Panel and click on Uninstall a Program under the Programs section.

- If you are using the Settings app, clicking on Apps should immediately open a list of all installed programs on your PC so wait for a while in order for it to load
- Locate Skype in Control Panel or Settings and click on the Uninstall button located in the window. Follow any instructions which appear afterwards in order to uninstall it completely.
Now it’s time to remove any leftover files and registry entries which may have been left behind by the program. This is how you make sure you that no old files make it into the new installation and you will avoid old files from making the same errors on Skype.
- Use the Windows Logo Key + R key combination in order to bring up the Run dialog box. Make sure you type “%appdata%” in the box without the quotation marks and click OK in order to open this location.
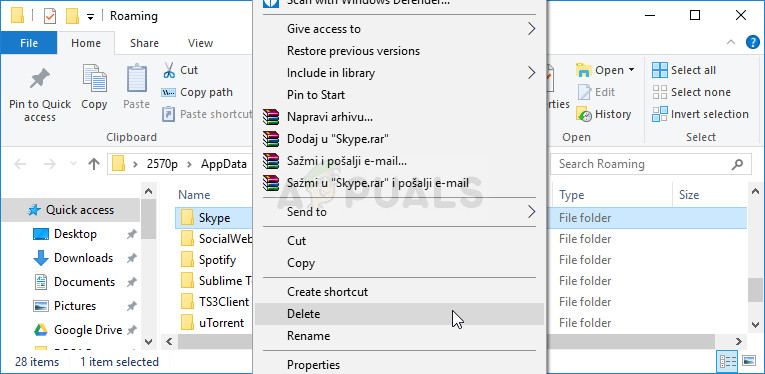
- After that, locate a folder called “Skype”, right-click on it, and choose the Delete option from the context menu.
Now we will delete the remaining registry entries related to Skype. Deleting registry keys is dangerous if you don’t know what you are doing. Nothing bad will happen if you follow the instructions carefully though.
Since you are going to delete several registry keys, we recommend you check out this article we have made for you to safely backup your registry to prevent other issues on your computer. Still, nothing wrong will occur if you follow the steps below.
- Open the Registry Editor window by typing “regedit” in either the search bar next to Start or the Run dialog box which can be opened with the Windows Key + R key combination.

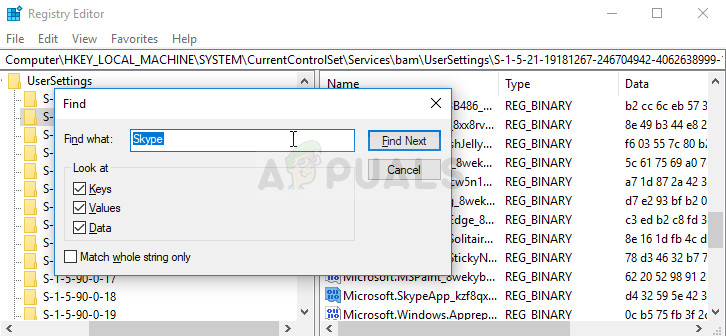
- Use the Ctrl + F key combination or click on Edit at the menu available at the top of the window and click on Find.
- Type “Skype” under the Find what bar and click on find next. Right-click on each found key and choose Delete from the context menu. Confirm your choice and proceed to the next key by clicking Edit >> Find next.
Note: If you struggle with permissions issues while deleting one of the keys, you may need to add yourself sufficient permissions to do by following the easy set of steps below:
- Right-click the problematic key which is host to the key which refuses to be deleted at the left navigation pane and choose the Properties option.
- Under the Group or user names option, try to locate your computer’s username on the list. If you don’t see it anywhere, click on Add >> Advanced >> Find Now. You should be able to see your user account under the Search results so choose it and click OK twice until you back in the Permissions folder.

- Select your account in the Group or user names part ,check the Full Control checkbox under Permissions for (YourUsername) and apply the changes you have made.
- After that, you can right-click the key you wanted to remove and click on Delete to try again.
After performing the steps above, you can reinstall Skype by downloading it from their official downloads site, running the file you downloaded, and following the instructions on screen in order to install Skype again. Check to see if the problem still appears.

Note: If you were using the app from the Store on Windows 10, click the Store icon from the taskbar or search for it, and type Skype in the search bar. Click the Download button and wait for the app to install.


