Fix: Scanner Not Working
Many people experience the problem where they are unable to get their scanners to work particularly after updating their system, their version of Windows, or configuring their scanners over the network.
The problem is very widespread with different scenarios and cases each time as all computer configurations are different. Since the topic is very generic, we have listed down a number of workarounds for you to try. Start with the first one and work your way down in order.
Solution 1: Running SFC Scan
This error might be generated because of bad configurations present on your computer. Because of these errors, your computer might not be able to connect properly with the scanner hence making it inaccessible to you. We can try running the SFC scan and check if there are any integrity violations. If there are, we can run the DISM command to fix them.
- Press Windows + R to launch the Run application. Type “taskmgr” in the dialogue box and hit Enter to launch your computer’s task manager.
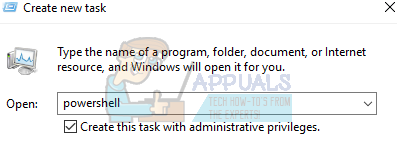
- Now click on File option present at the top left side of the window and select “Run new task” from the list of options available.

- Now type “powershell” in the dialogue box and check the option underneath which states “Create this task with administrative privileges”.
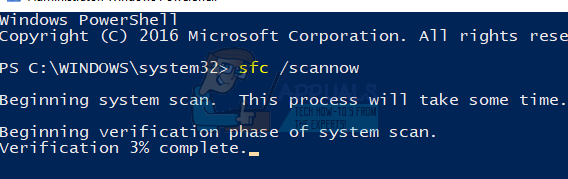
- Once in the Windows Powershell, type “sfc /scannow” and hit Enter. This process may take some time as your entire Windows files are being scanned by the computer and being checked for corrupt phases.
- If you encounter an error where Windows states that it found some error but was unable to fix them, you should type “DISM /Online /Cleanup-Image /RestoreHealth” in the PowerShell. This will download the corrupt files from the Windows update servers and replace the corrupt ones. Do note that this process can also consume some time according to your internet connection. Don’t cancel at any stage and let it run.
If an error was detected and was fixed using the above methods, restart your computer and check if the scanner started working normally.
Solution 2: Turning off Firewall and other Applications
Another workaround which worked for many people was disabling Firewall applications (including Windows Firewall, Windows Defender, and other Antivirus applications). If you are trying to access the scanner over any network, it is possible that it is the firewall which is blocking some ports and restraining the information from being passed on.
- Turn off all firewalls. You check our article on how to disable Windows Firewall.
- Turn off your running Antivirus You can either pause it temporarily or if you don’t have that option, you can uninstall it. Make sure that you have the installation package and your registration keys at hand while uninstalling.
- After making all the necessary changes, check if you can make the scanner work as expected.
Solution 3: Making Sure all Related Processes are Running
There are few processes which drive the operation of the scanner. If these processes are not running or if they are disabled, you will not be able to access the scanner. Make sure that you are logged into an administrator account while carrying out this solution.
- Press Windows + R, type “services.msc” in the dialogue box and press Enter.
- Once in the services window, navigate through the list and locate each of the following processes:
Remote Procedure Call RPC
DCOM Server Process Launcher
Windows Image Acquisition (WIA)
Shell Hardware Detection
RPC Endpoint Mapper
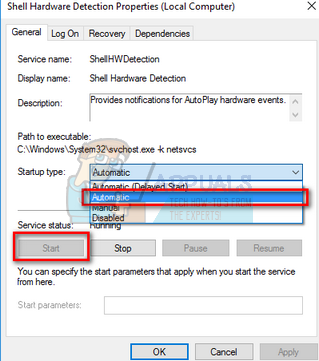
- We need to make sure that all these processes are running and have their startup state set as “Automatic”. I will take one service as a reference (Shell Hardware Detection) and show you how to check.
- After identifying the processes, right-click it and select “Properties”.

- Once in the Properties, click on “Start” (if the processes are stopped), click the drop-down window and select “Automatic”. Press Apply to save changes and exit.
- Once you have made sure that all the processes are up and running, restart and reconnect with your scanner and see if you can access it as expected.
Solution 4: Installing Scanner Patch and Scanner Utility from Manufacturer
Most of the scanners nowadays are simply plug and play. You don’t need to install any additional software to run them; you can simply use the inbuilt Microsoft utilities to directly forward the job for scanning.

However, not all scanners work that way. There are many scanners out there which require that you install the required patch, install scanner software (such as Canon MF Toolbox), and then operate the scanner.
You should input your model into the search engine and look around for any related software which you are meant to install on your computer. After installing the software, restart your computer and check if you can use the functionality of the scanner as expected.
Solution 5: Doing a Full Power Cycle
Another workaround which works for a lot of users is power cycling your computer and the scanner utility. Power cycling is an act of turning off a device completely off and then on again. Reasons for power cycling include having an electronic device reinitialize its set of configurations parameters or recover from an unresponsive state or module. It is also used to reset all the network configurations as they are all lost when you turn the device completely turned off.

After turning off your scanner and computer, take out the main power cable and let them stay idle for a couple of minutes (~10). After the required time, plug in the cables, turn both devices on and try connecting them.
Solution 6: Running the Printer Troubleshooter
Windows has an inbuilt collection of troubleshooters meant to troubleshoot problems in various categories. We can try running the printer troubleshooter and check if it detects any problems and fixes them.
- Press Windows + R, type “control panel” in the dialogue box and press Enter.
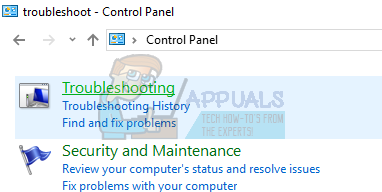
- Type “troubleshoot” in the search bar of the control panel at the top right side of the window.

- Select “Troubleshooting” heading from the list of results returned.
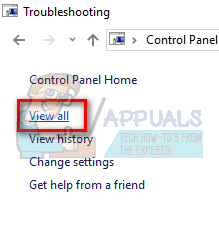
- Once in the troubleshooting menu, click “View all” present on the navigation pane at the left side of the window. Now Windows will populate all the troubleshooters available on your computer.
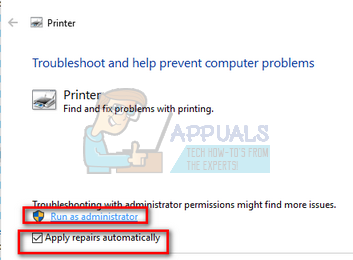
- Navigate through the options until you find “Printer”. Click it.

- Check both the options “Run as administrator” and “Apply repairs automatically”. These options will ensure that you find maximum problems and the repairs are applied fast as well.
- Follow the on-screen instructions and wait for the troubleshooting to complete.
Solution 7: Checking the Scanning Program for Updates
Whenever your scanner doesn’t work, you automatically assume that the problem lies with the scanner hardware only. That is true in most cases but there are also scenarios where the software you use for managing scanning is out of date or the version is not supported anymore.

These software are mostly multipurpose programs (such as IrfanView) which are used for more than one tasks. Head over to the software developer’s website and check if there are any pending updates you did not perform. After updating the software, restart your computer and check if this makes any difference.
Solution 8: Checking Toner Cartridge
If all above solutions don’t give any positive results, you should check your toner cartridge if it is full or not. Sometimes if the cartridge is not full up to the required level, the scanner will not print any pages. You will be inputting blank pages only to receive blank pages in the output.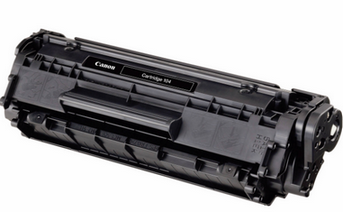
Check your toner cartridge if it is inserted correctly and are the levels up to the mark. If not, replace the cartridge and after performing all the necessary checks above, power cycle the scanner (solution 5), and then check if the problem got solved.
Solution 9: Using USB instead of WiFi for connection
Another widespread problem which many users face is connecting to the scanner over a WiFi connection. There are several cases where the scanner works with a USB connection to the computer over a wireless one. Plug in the USB and see if your computer detects the scanner successfully. If it does, it means you have to configure the WiFi connection on both machines (your scanner and your computer).
- Make sure that your scanner is connected to the wireless network correctly with the correct password. Each scanner configuration is different but you can easily find the wireless network option in its menu. Use the arrows to navigate and make sure that it is connected.
- On your computer, press Windows + S, type “printers and scanners” in the dialogue box and open the first application.
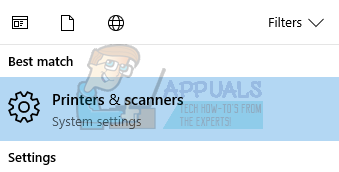
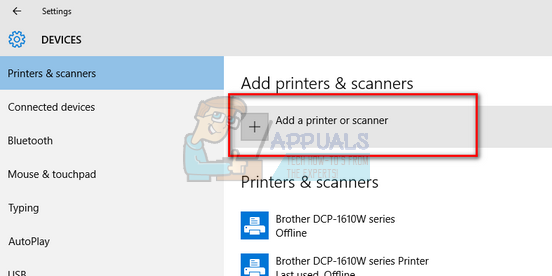
- Click on “Add a printer or scanner” and wait for Windows to detect. After the detection, click on the scanner for the computer to connect.
- Send in a test job to check if the scanner is performing all the functionalities correctly.
Solution 10: Checking Compatibility
Each scanner/printer is designed to target a particular version of the operating system. But after you buy a scanner, its hardware doesn’t upgrade itself whereas you might receive major updates on your operating system on your computer. Such is the case with Windows 7 and Windows 10.
There were many reports that some scanners were not compatible with the newer version of Windows (Windows 10), and there was also no support available (for example PIXMA MX310). Head over to your manufacturers’ website and check if it is compatible with the version of operating system you are running on your computer.
Solution 11: Turning off Auto Management by Windows
Windows has an automatic management feature which lets it decide the default printer and manage all the other ones. This might be useful in various scenarios but it can prove to be a menace sometimes when you are installing scanner software on your computer. You can try disabling it using the steps given below and try installing the software again.
- Press Windows + S, type “settings” and open the application.
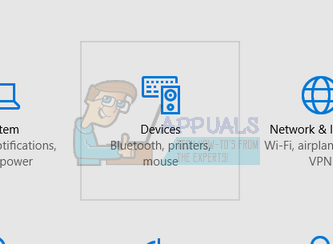
- Once in settings, click on the subheading of “Devices”.
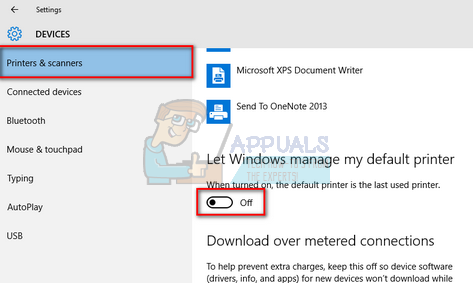
- Click on “Printers and scanners” using the left navigation bar and scroll to the bottom of the page until you find “Let Windows manage my default printer”. Make sure it is unchecked.
- After making the necessary changes, exit Settings and try installing the software again.
Solution 12: Updating Scanner Drivers
If all the above solutions don’t work, we can try updating the scanner drivers. You should navigate to the manufacturer’s website and download the latest scanner drivers available. Make sure to download the exact drivers meant for your scanner. You can look for the model number present on the front of your scanner or in its box.
Note: There are few cases where a newer driver doesn’t work. In that case, download an older version of the driver and install it using the same method described below.
- Press Windows + R to launch the Run Type “devmgmt.msc” in the dialogue box and hit Enter. This will launch your computer’s device manager.
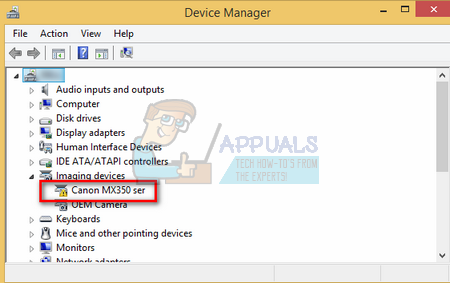
- Navigate through all the hardware, open the sub-menu “Imaging devices”, right click on your scanner hardware and select “Update driver”.
Note: If your scanner is inbuilt with your printer, you should update the drivers of your printer using the same method explained below. In that case, you should look in the category of ‘Print Queues’.
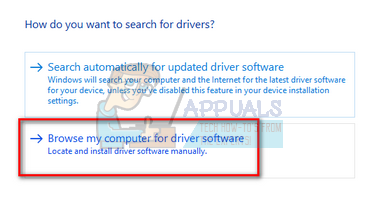
- Now Windows will pop a dialogue box asking you which way do you want to update your driver. Select the second option (Browse my computer for driver software) and proceed.
Select the driver file you downloaded using the browse button when it appears and update it accordingly.
- Restart your computer and check if the problem gets resolved.
Note: If you can’t update the drivers manually, you can also select the first option “Search automatically for updated driver software”. This option will make Windows search the web automatically and select the best driver out there.


