Fix: S7 Battery Drains too Fast
The Samsung Galaxy S7 is the 7th addition to the Samsung’s Galaxy Line up which serves as their flagship lineup for every year. The Galaxy S7 introduced many improvements over its successor the Galaxy S6 which was heavily criticized for its weaker battery and lesser screen on times. The Galaxy S7 provided a much better battery usage experience with its battery lasting a whole day on one charge under normal usage. However, quite recently, a lot of users have experienced that their phone does not last as long as it used to and is draining the battery more rapidly.
What Causes the Rapid Battery Drain on Samsung’s Galaxy S7?
After receiving numerous reports regarding the issue we decided to investigate the issue and based on our reports we formed a list of solutions that solved the issue for most of our users and improved their experience with the battery drainage. Also, we compiled and listed the reasons due to which the problem was occurring.
- Faulty Application: It is possible that a certain application on the mobile phone might be causing the battery drain by running in the background and even using the data while doing so. Also, if a certain application has stored a lot of cache on the device, it can also use up the battery rapidly.
- Outdated Software: If the Android of your device has not been updated to the latest version the phone might end up using more battery because every application requires the latest version of the Android for better compatibility and added functionality. Therefore, having older software can cause some applications to use more battery and thus cause the drainage issue.
- Outdated Applications: Also, if some applications are not updated to the latest version they end up using more power than necessary and cause battery drainage. Therefore, all the applications need to be updated to the latest versions provided by their developers.
- Faulty Charging Methods: If you are using a charging cable or an adapter that is not officially branded by Samsung it can also cause issues with the phone’s charge. The phone charges best if you choose the company provided accessories to charge the phone.
- Cache: Cache is stored by applications to decrease the loading times and provide a smoother experience to the users. However, if an application stores a lot of cache on the device it can become sluggish and require more power to operate resulting in a battery draw that is greater than the normal
Now that you have a basic understanding of the nature of the issue we will move on towards the solutions. In order to prevent conflicts make sure to implement these solutions in the specific order in which they are listed.
Solution 1: Identifying the problem
In order to identify the application that is using up the most power from the mobile, we will be checking the statistics but first, we must ensure that the problem does not lie within the hardware. For that, we will be running the mobile in the Safe Mode. For that:
- Press the power button and select “Switch OFF” option.

The button allocation on Samsung Devices - Once the device is turned off completely, switch it on by holding the power button for 2 seconds.
- When the Samsung animation logo displays hold down the “Volume Down” button.

Samsung Animation Logo while starting the device - The word “Safe Mode” must be displayed in the lower-left corner of the screen if the process was successful.

Safe Mode displayed in the lower-left corner of the screen - Now keep on using the phone and check to see if the battery timings change dramatically. If you only see an improvement in the battery timings by 20 or 30 minutes it might be an issue with the phone’s battery health and the actual battery will need to be replaced.
- However, if the battery timings increase by more than 40 minutes the battery was being used rapidly due to a software issue and you can proceed with the guide below after booting out of safe mode.
Solution 2: Deleting Faulty Applications
After identifying that the problem actually lies within the software, we will be isolating the applications that use a lot of battery and delete them. For that:
- Drag down the notifications bar and click on the “Settings” knob.
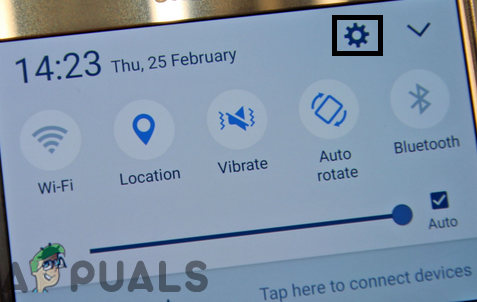
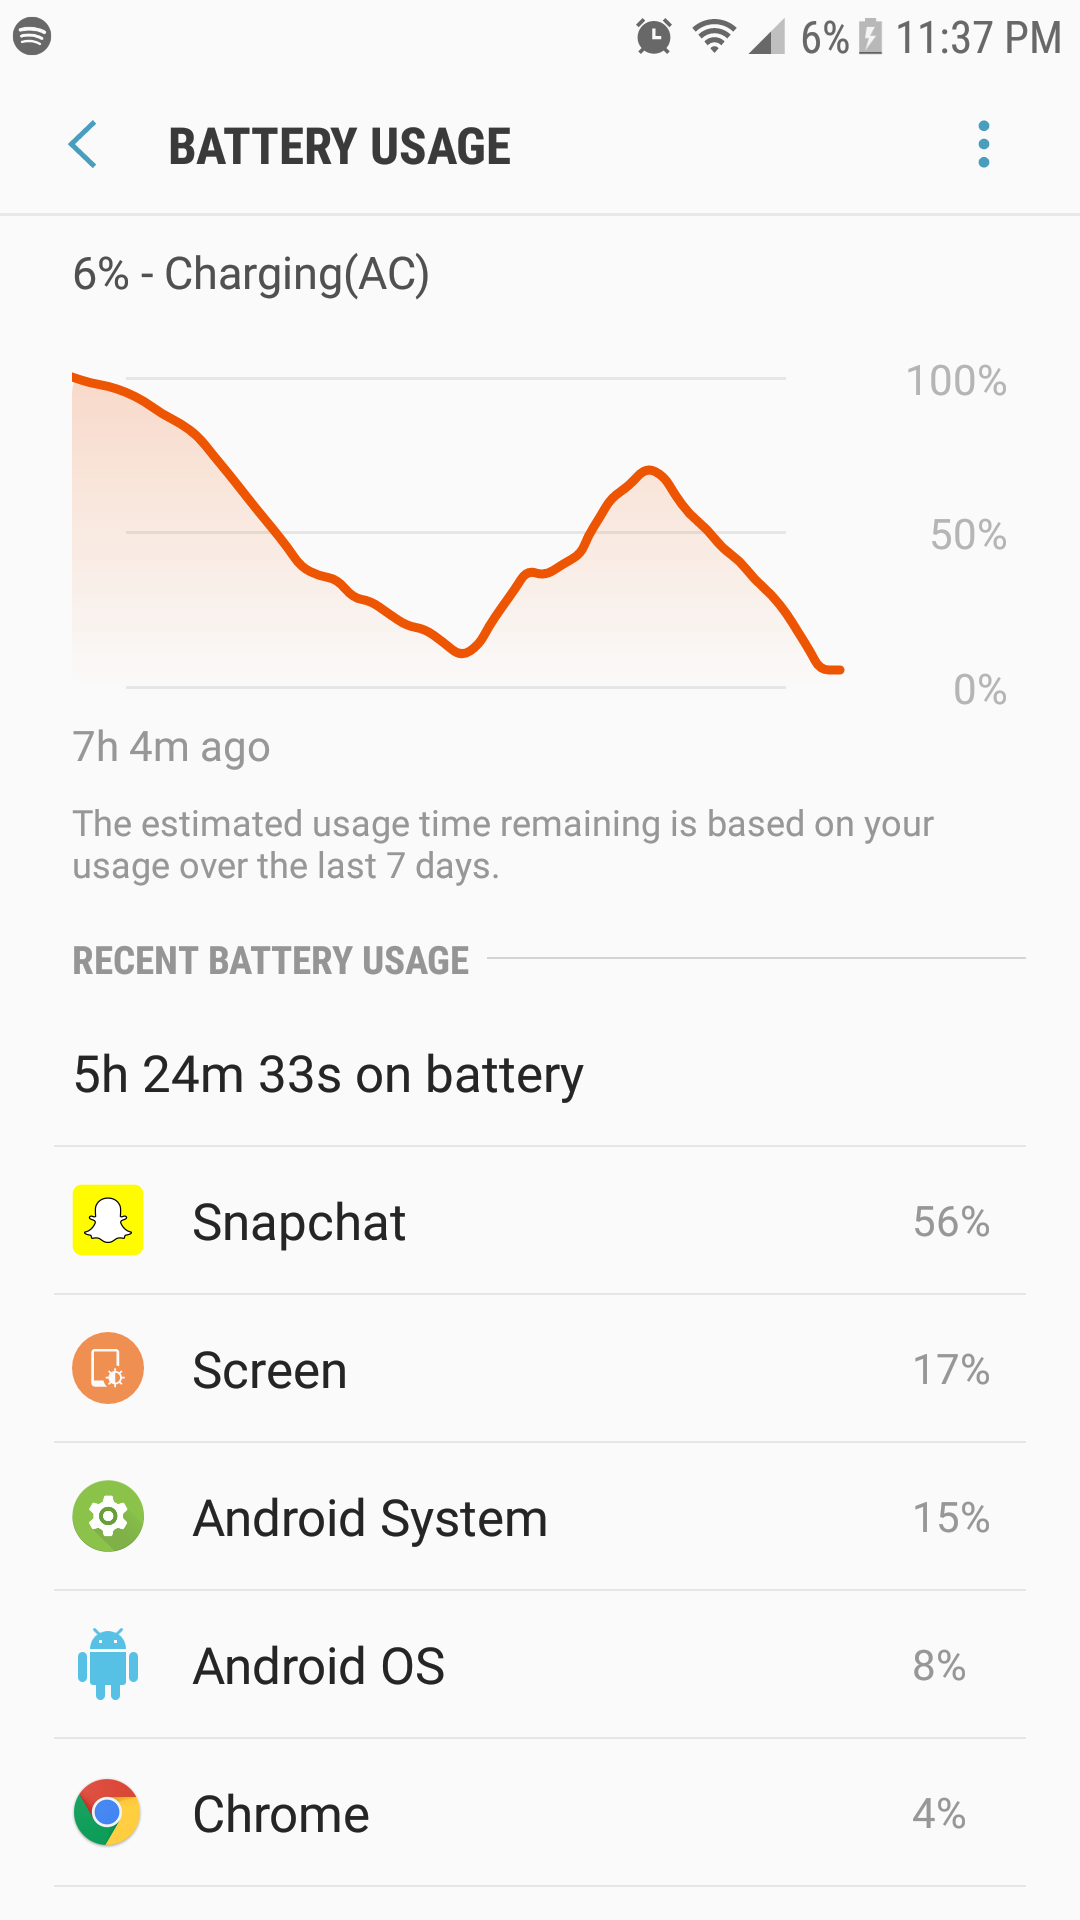
Tapping on the settings icon - Inside the Settings, tap on the “Battery” option and then click on the “Battery Usage” button.
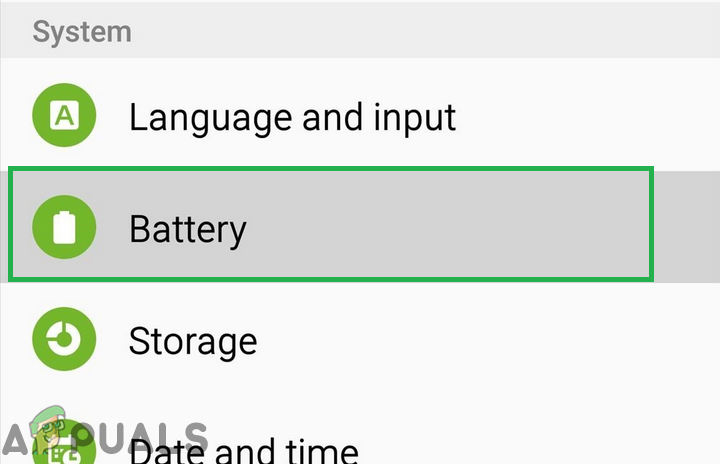
Tapping on the battery option - Inside the Battery Usage details, identify an application that is using a lot of battery, keeping in mind the amount of time you spent using that application.
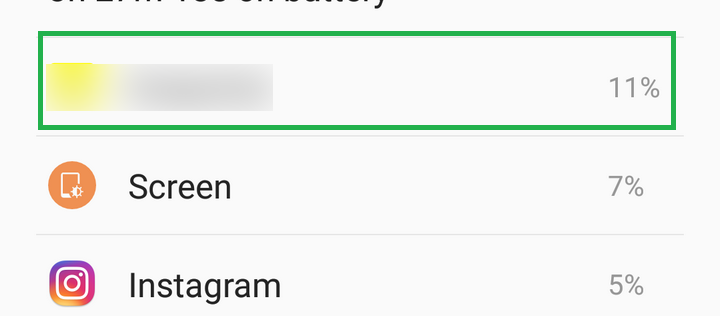
Identifying the application using a lot of battery - Delete the application that is using the most battery and wasn’t used that much.
- Check to see if the battery drainage b is solved by doing so.
- If the problem is not solved try to delete more applications that are using a lot of battery.
- If the issue still persists by deleting these applications move on towards the next step.
Solution 3: Checking for Application Updates
if some applications are not updated to the latest version they end up using more power than necessary and cause battery drainage. Therefore, in this step, we will be checking for updates to all the installed applications and applying them if available. For that:
- Unlock the phone and open the Google Play Store application.

Opening the Google Play Store application - Click on the menu button on the top left corner and select the “My Apps & Games” option.

Clicking on the Menu button on the top left corner - Tap on the “Updates” tab and select the “Refresh” icon.
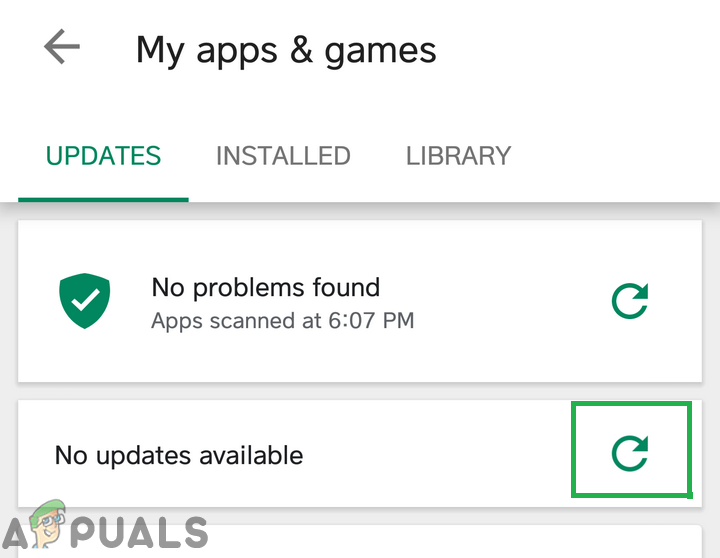
Clicking refresh in the Updates option - Click on the “Update All” option and wait for the applications to be updated and installed.
- Check to see if the issue persists.
Solution 4: Checking for Software Updates
If the Android of your device has not been updated to the latest version the phone might end up using more battery because every application requires the latest version of the Android for better compatibility. Therefore, in this step, we will be checking to see if any software updates are available to the application. For that:
- Unlock the phone and open the settings.
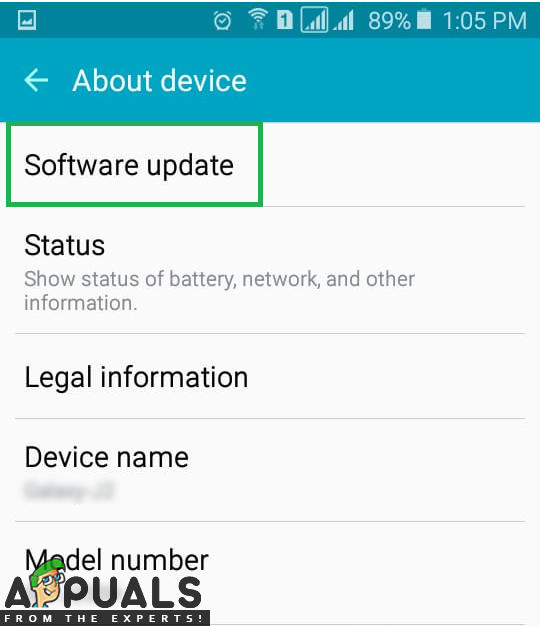
- Scroll down to the bottom and click on the “About Device” option.

Scrolling down to the bottom and clicking on the “About Device” option - Click on the “Software Update” and select the “Check for Updates” option.
Clicking on the “Software Update” option - If a new software update is available, click on the “Download Updates Manually” option that appears after the checking process has finished.
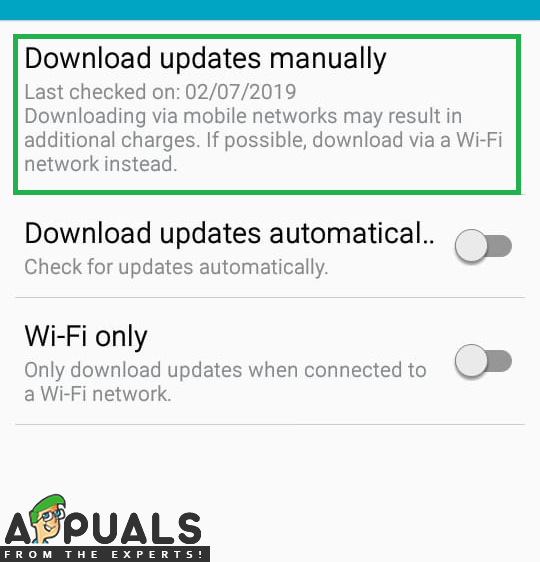
Tapping the Download Updates Manually option - After the phone finishes downloading the update, it will prompt you to confirm the installation of the update select “Yes” and the phone will now be restarted.
- The update will be installed and the phone will launch back into the normal mode, check to see if the issue still persists.
Solution 5: Wiping Cache Partition
If an application stores a lot of cache on the device it can become sluggish and require more power to operate resulting in a battery draw that is greater than the normal. Therefore, in this step, we will be deleting the cache. For that:
- Hold down the power button and select “Switch OFF“.
- Hold the “Home” button and “VolumeUP” button simultaneously and then press and hold the “Power” button as well.
The button allocation on Samsung Devices - When the Samsung Logo screen appears, release only the “Power” key.
Samsung Animation Logo while starting the device - When the Android logo screen shows to release all the keys the screen might show “Installing System Update” for a couple of minutes before showing the Android Recovery Options.
- Press the “Volume down” key until the “Wipe Cache Partition” is highlighted.
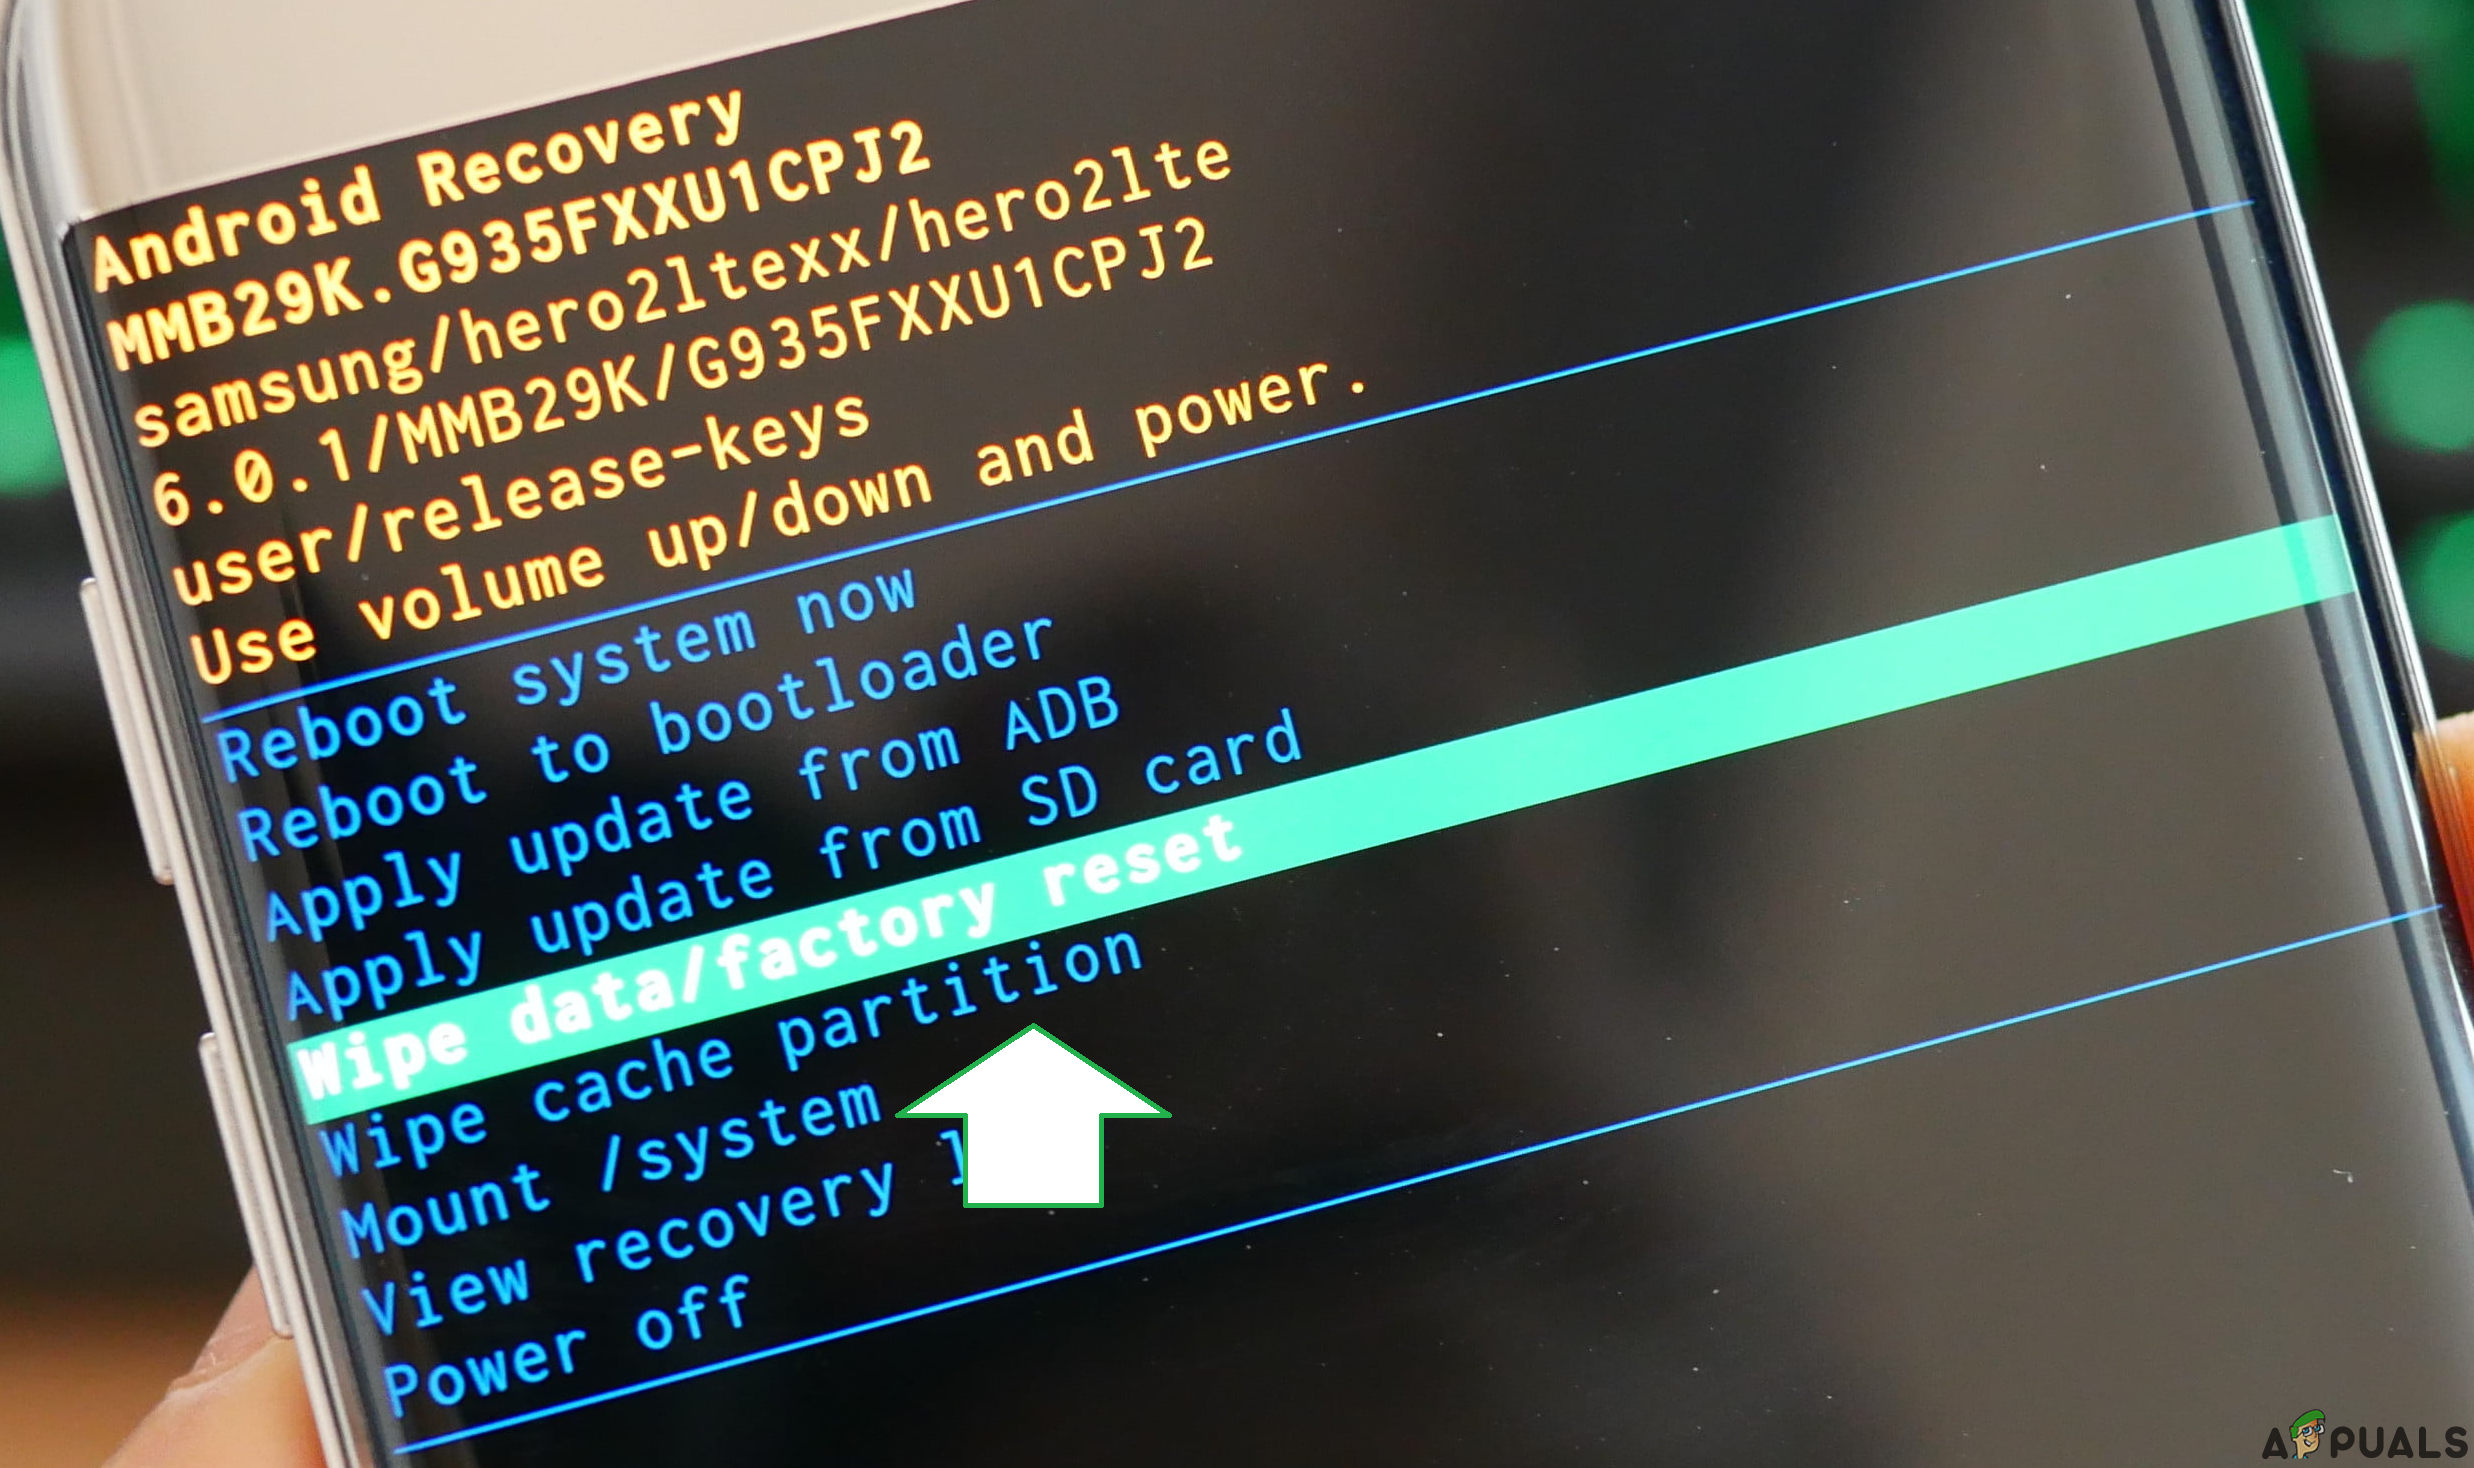
Navigating down to the “Wipe Cache Partition option” - Press the “Power” button and wait for the device to clear the cache partition.
- When the process is completed, navigate down the list through the “Volume Down” button until “Reboot System Now” is highlighted.
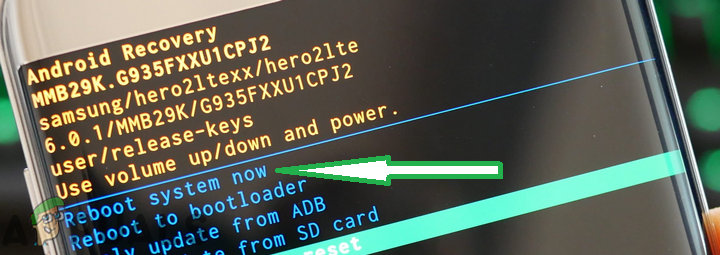
Highlighting the “Reboot System Now” option and pressing the power button - Press the “Power” key to select the option and restart the device.
- Once the device is restarted, check to see if the issue persists.
Note: You must be very careful with this process because even a slight mistake during this can cause the phone software to get bricked permanently.
Additional Tips:
- First thing is to restart your phone every once in a while to get rid of some charging bugs.
- Try to recalibrate your battery, in order to get the most out of your battery, discharge it completely until it turns off and then charge it fully to 100% using the original equipment. Repeat this method to use your phone and you should get better battery life out of it.
- Turn the Wifi Off when you aren’t using it and keep Bluetooth or other features off when not in use.


