Fix: RDP ‘Remote Desktop’ Black Boxes/Bars and Screen Size issue
Remote Desktop Connection Manager provides a great way of accessing remote computers and their files over the internet. However, you might face a few problems on your end while accessing the remote desktop. On your end, the screen of the remote desktop might not resize properly. This means that the screen might be really big (some of its parts will be out of your screen) or the screen might get really small. There are different variations of the screen problem but the point here is that the screen won’t be normal. There are cases where users might see black bars on the bottom and on the right side of the remote desktop. The black bars might vary from user to user. Some people might see bars on the edges of the screen while some people might see black bars/squares randomly spread on the screen. The black portions of the screen won’t block your interaction with the screen though. You will be able to click through the black box or black bar meaning if the black box or a black bar is appearing on top of a start button then you would be able to move your mouse there and click the start button.
There are a couple of things that can cause this. The size of the screen can be adjusted via the properties or settings of the Remote Desktop Connection Manager. The black bars or black squares can be caused by video driver issues. Another reason that might be causing these black boxes is the connection speed. Switching to appropriate connection settings from the Remote Desktop Connection Manager and changing a few more settings rectify that situation as well.
Tips
- Try to end the remote session and then try again. Sometimes disconnecting and reconnecting solves these issues
- Maximize the RDCMan (Remote Desktop Connection Manager) screen before opening up the connection.
Method 1: Adjust Screen Size via Remote Desktop Settings
You can change the settings of Remote Desktop Connection Manager that will let the screen adjust according to the client’s screen. There is an option named Same as client area which will automatically adjust the screen. This option will solve the screen size issue.
The steps for changing this option are given below
- Open Remote Desktop Connection Manager
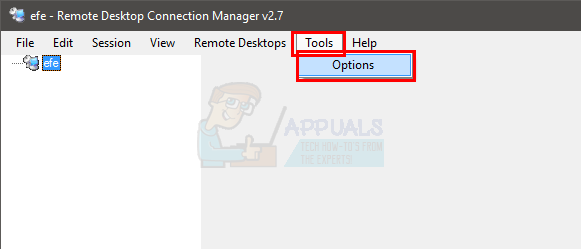
- Click Tools
- Select Option

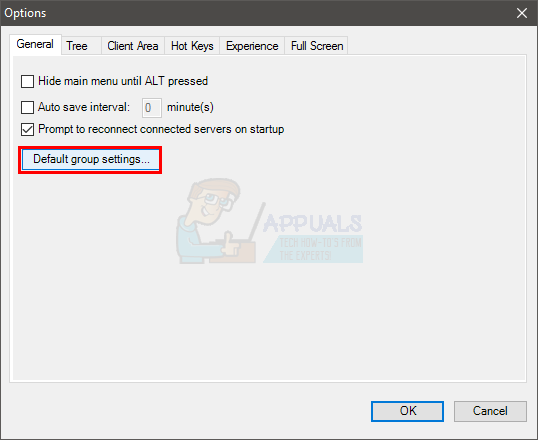
- Click Default Group Settings…

- Select the tab Remote Desktop Settings
- Select the option Same as client area
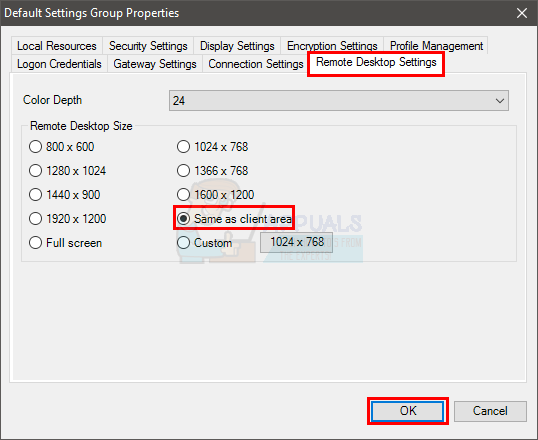
- Click Ok and click Ok again
- Close the Remote Desktop Connection Manager and open it again.
The problem should be solved now
Note: If it doesn’t solve the issue then right click the connection/file (from left pane) and select Properties. Select the tab Remote Desktop Settings and make sure the option Inherit from Parent is checked. If it isn’t, check the option and click Ok. This should solve the issue.
Method 2: Adjust Screen Size via Properties (Alternative method)
If method 2 didn’t solve the issue then you can try changing the DPI settings options from the properties. Here are the steps for changing these settings
- Right click the RDCMan.exe and select Properties. This is the exe file of Remote Desktop Connection Manager
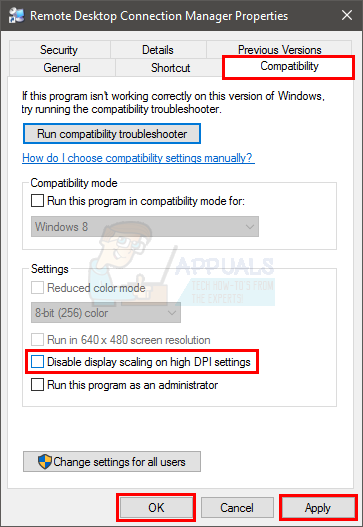
- Select Compatibility Tab
- Uncheck the option Disable display scaling on high DPI settings
- Click Apply then select Ok
That’s it. This should fix the issue. Try running the Remote Desktop Connection Manager again and the problem should be resolved.
Method 3: Adjust Screen Size via Scaling Options (Second Alternative)
If the first 2 methods didn’t work then there is another option that can be changed from the settings. These options are related to scaling up the desktop to fit the window. So, try to turn these options on and see if this resolves the issue.
Here are the steps for changing these options.
- Open Remote Desktop Connection Manager
- Click Tools
- Select Option
- Click Default Group Settings…
- Select the tab Display Settings
- Check the option Scale docked remote desktop to fit the window
- Check the option Scale undocked remote desktop to fit the window
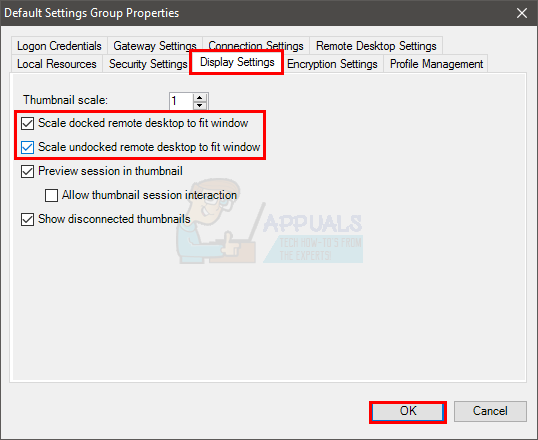
- Click Ok and click Ok again
This should solve the issue of screen size. Once done, restart the Remote Desktop Connection Manager and you should be good to go.
Note: If it doesn’t solve the issue then right click the connection/file (from left pane) and select Properties. Select the tab Display Settings and make sure the option Inherit from Parent is checked. If it isn’t, check the option and click Ok. This should solve the issue.
Method 4: Set Connection Speed
This solution is for the black bars or black boxes appearing on the screen. Changing the connection speed has solved the issue for many users.
Here are the steps for changing the connection speed
- Open Remote Desktop Connection Manager
- Click Tools
- Select Option

- Select the Experience Tab
- Select the appropriate connection speed from the drop down menu in Connection Speed
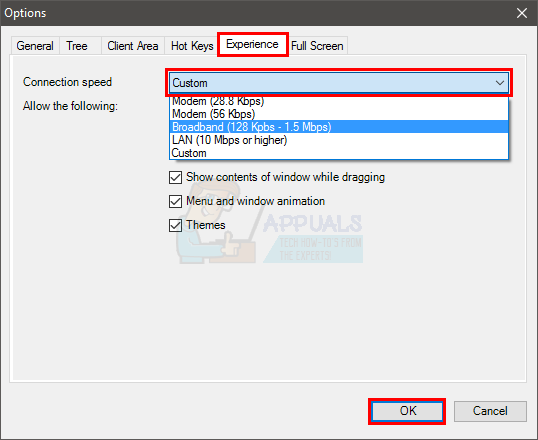
- Once selected, Click Ok then select Ok again
This should solve the issue of black boxes appearing on the screen. If it doesn’t then restart the Remote Desktop Connection Manager and try again
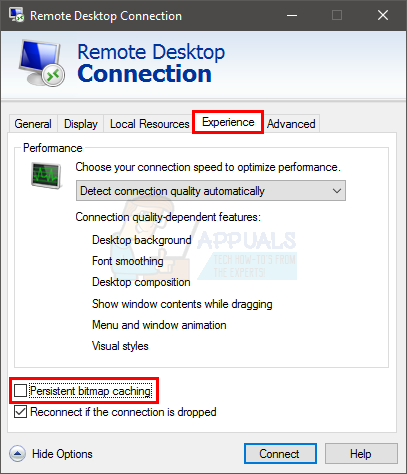
Method 5: Turn off Bitmap Caching
Bitmap Caching is an option available in the Remote Desktop Connection Client. This option basically lets the user store the images locally so the client doesn’t have to send the images or data over and over again. This option is although useful but might cause the black box/black bar issues. Turning this option off has solved the issue for plenty of people.
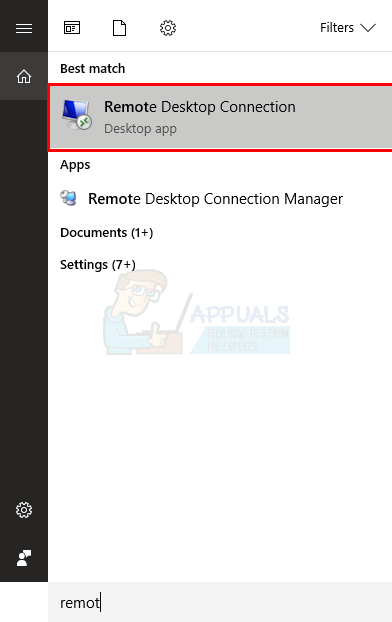
- Press Windows key once
- Type Remote desktop connection in the start search
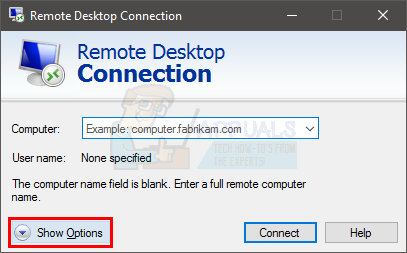
- Select the Remote Desktop Connection from the search results
- Click Show options
- Select the Experience Tab
- Uncheck the option Bitmap Caching (or Persistent Bitmap Caching)
That should do the job. Now the next time you reconnect, the black boxes will not appear.
Method 6: Update Video Drivers
If the problem still persists after following the above given methods then it is time to check the video drivers. This solution is for the black bars appearing on the screen. Although it isn’t common that the problem is caused by the driver issue, but it isn’t impossible.
We already have a guide on how to update/fix the video drivers. The guide have a step-by-step instructions that will help you fix the video drivers. Click here and follow the steps given in method 1 and method 2.