Fix: NVIDIA Web Helper No Disk
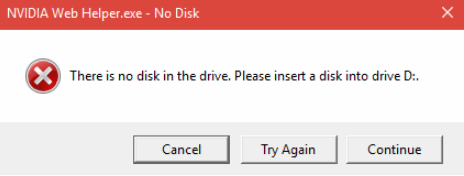
This particular error message “There is no disk in the drive. Please insert a disk into drive D” appears to users who are currently running an old or corrupted version of Nvidia GeForce Experience. The error is quite annoying since it appears during windows startup and while playing games. There are plenty of reasons why this error might occur on your PC. Whenever you start your PC, you will be welcomed by an error message saying the following:
This error is caused by a generic bug in NVIDIA web helper.exe which prompts this error message. There are countless methods to resolve this problem and here is a list of verified methods which helped hundreds of other users just like you!
What Causes “There is no disk in the drive” in Nvidia web helper?
Nvidia Web helper is an application which basically stores all the cache advertisements about Nvidia products. Nvidia graphics driver causes this error as they can’t use a disk. So Nvidia web helper prompts this error message. This problem can harm your computer and make the performance of the Nvidia graphics card slow. Here is a short list of the most common reasons:
- There might be invalid values for Nvidia web helper in Windows registry subfolders
- You might have installed an Outdated version of Nivida GeForce Experience
- Your PC simply facing a Bad or corrupted driver issue
- One of your drives has mismatching drive names, Especially the “D” Drive
Solution 1: Manually Reinstalling The Graphics Driver
Because of corrupted or malfunctioned drivers, you need to reinstall them. If your Nvidia graphics driver is tampered because of any disk cleaning or antivirus software, then you might try this. Users who frequently clean their PC of quarantine files and junk folder should check this out!
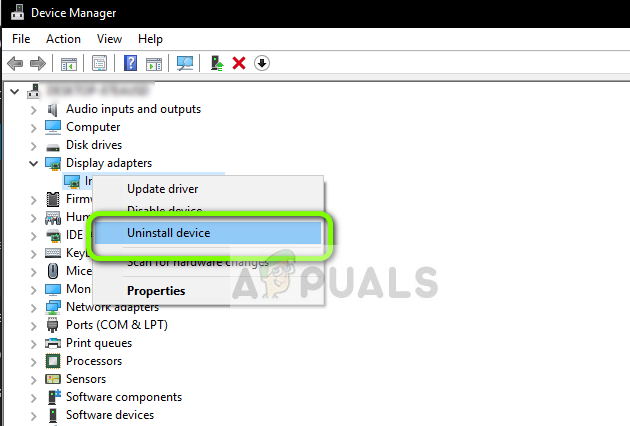
- Press Windows + R, type “devmgmt.msc” in the dialogue box and press Enter.
- Right-click on the NVIDIA graphic drivers and click on “Uninstall”
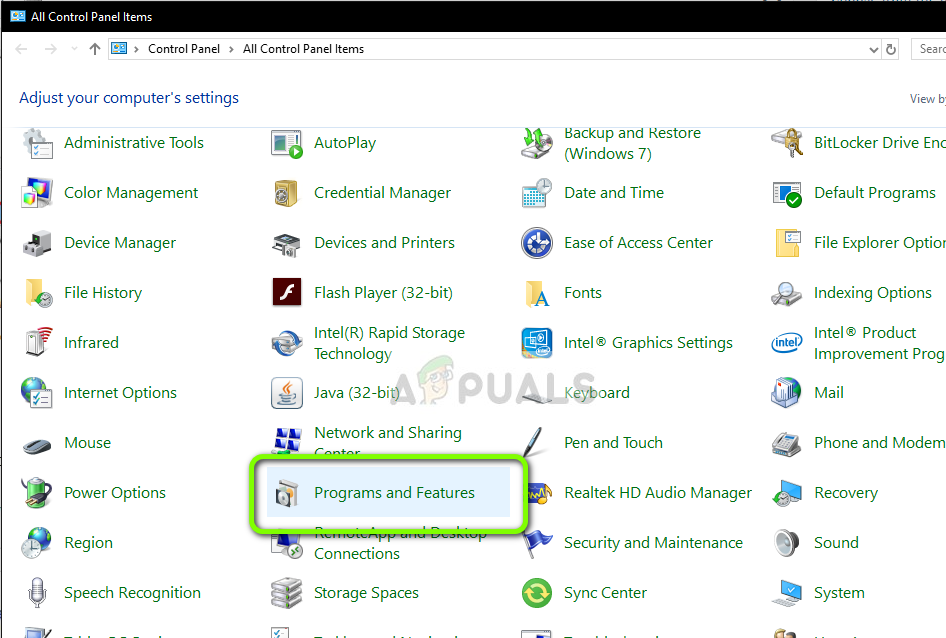
Uninstalling NVIDIA Drivers - Now press Windows + R key then write “control” in the space provided and hit enter. Now select “Programs and features”.
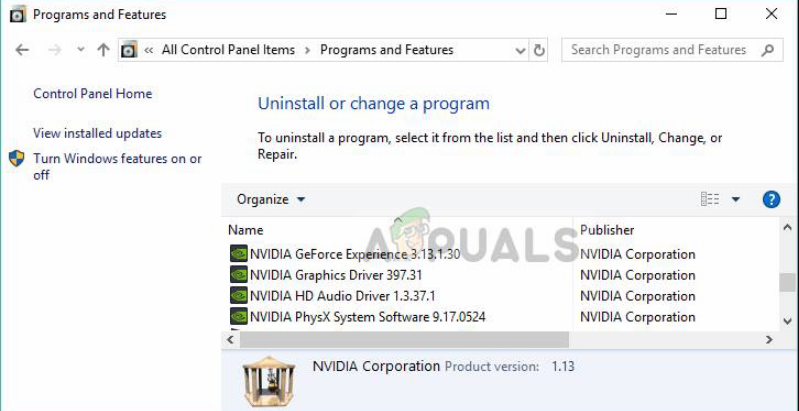
Double Click On “Programs and Features” - Uninstall all programs that seem related to NVIDIA. Right click on Nvidia programs and select uninstall. Follow the onscreen instructions to uninstall the program.
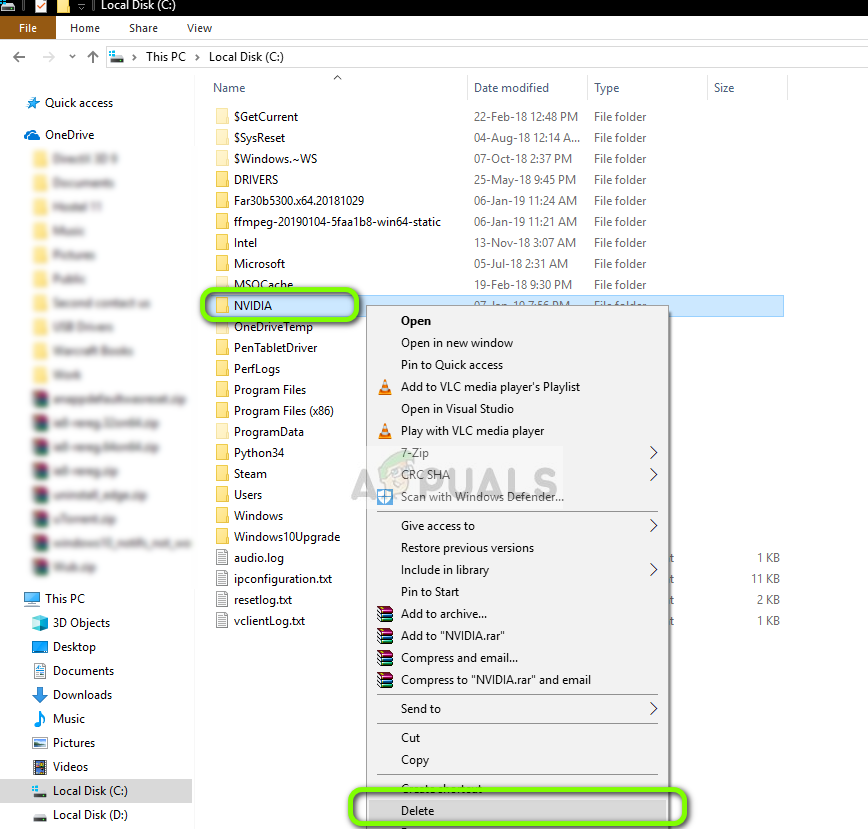
Uninstall All Programs Related To Nvidia - Now go to My computer > LocalDisk C > Nvidia folder and delete it. reboot your PC.
Deleting NVIDIA Data - Go to NVIDIA official website and download the drivers for your graphics card.
- Install the drivers using on-screen instructions and then reboot your PC
Solution 2. Update the Nvidia Graphics Card Driver
Nvidia keeps updating their device drivers time to time. If you’re on an outdated version of the driver, it might be the reason for this error. Updating the driver have helped plenty of users and its advantage is the fact that its easy as playing a game.
- Press Windows + I and select Update and Security from the menu.

Update and security – Windows Settings - Click on Check for updates and look for any Nvidia driver update. If there are any updates then tap on the ‘Apply’ button.
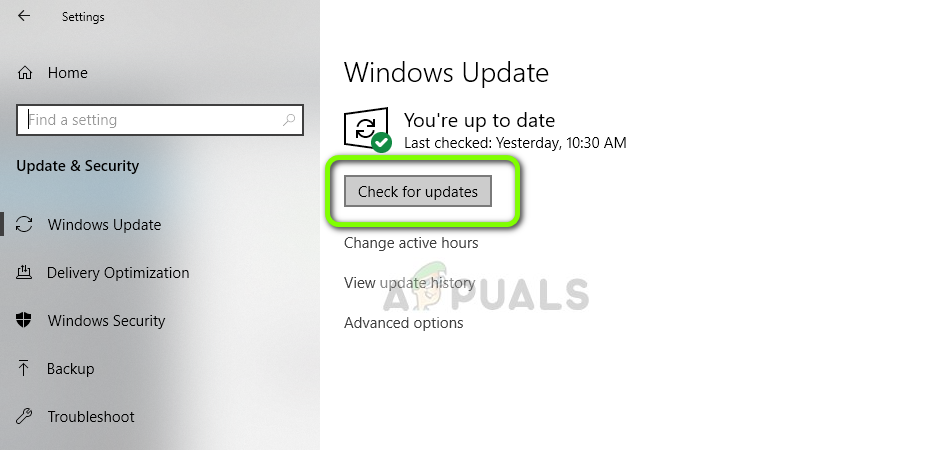
Checking for Updates - After applying all the updates, reboot your PC
- Press Windows + I and select Update and Security from the menu.
Solution 3: Re-assign your DVD drive letter
Another possible reason for this issue is mismatching drive names. Many users keep multiple pen drives and other storage cards. Sometimes these storage cards bear the driver letter “D” which conflicts with the Nvidia web helper. There’s a simple fix for this bug. Users who keep multiple external disks and flash drives should try this out!
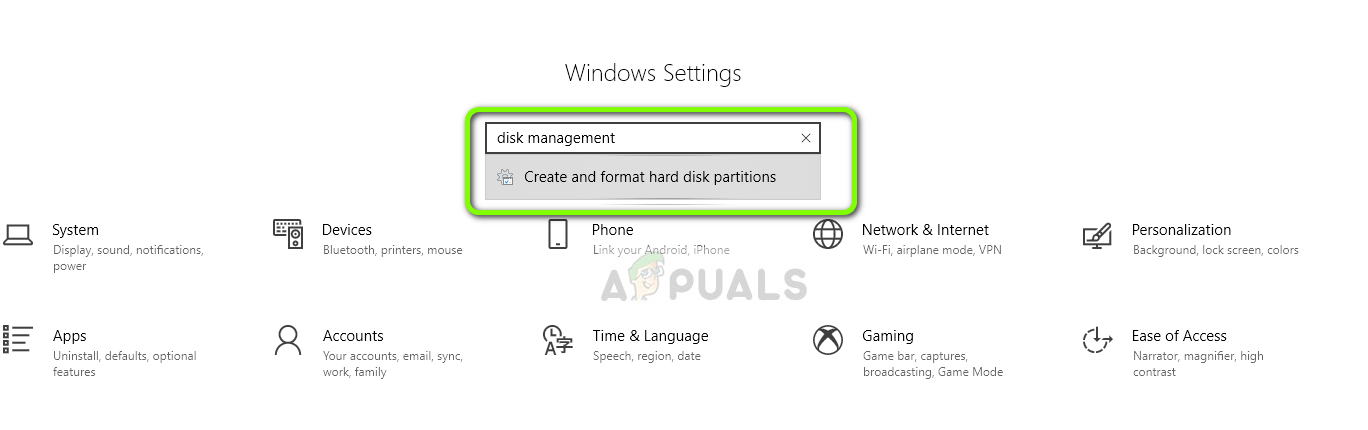
- Open windows settings and search for disk management. Then click on “Create and Format Hard Disk Partitions”
Open Disk Management By Clicking On “Create and Format Hard Disk Partitions” - Find your DVD drive (usually with a DVD icon). Right-click and select “change drive letters and paths”
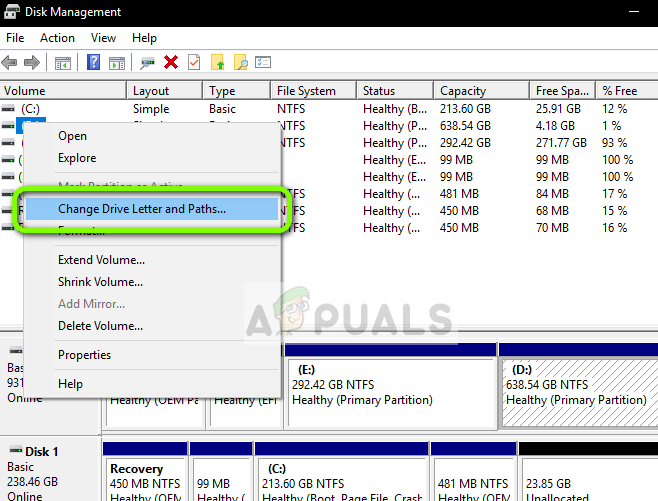
Changing Drive Letters - A popup window will open, simply remove the existing drive letter and add a new one. You can also change the driver letter directly.
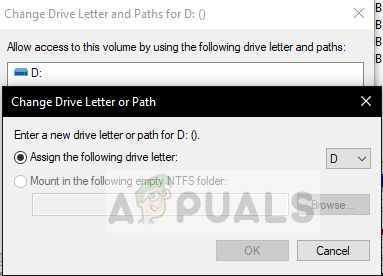
Changing Drive Letters - After everything is done, reboot your PC. The aftermath of this procedure should solve your issue.
- Open windows settings and search for disk management. Then click on “Create and Format Hard Disk Partitions”
Solution 4: Editing Windows Registry
Sometimes, bad values in the registry can ruin a working program or service. This is the case with many users and this solution has worked for them. Users who have tried all the above solutions but still facing the issue can try this one out.
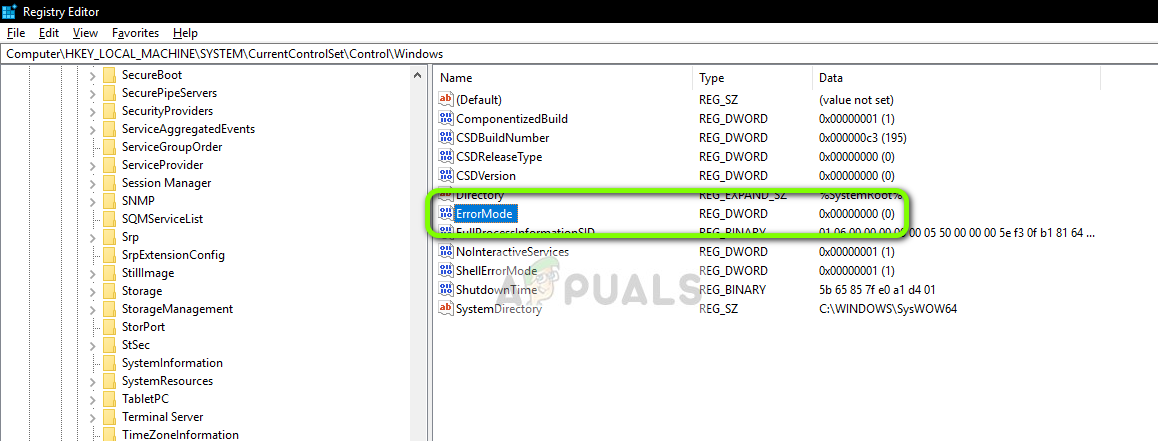
- Press window keys and R together to open Run dialog box. Type regedit.exe and hit enter.
- Navigate to the following key:
HKEY_LOCAL_MACHINE>SYSTEM>Current Control Set>Control>Windows.
- Double click on “ErrorMode” file and enter “2” in value data by erasing “0”
Double Click On “ErrorMode” – Windows Registry - Change the Base to Decimal from Hexadecimal and click OK. After that, reboot your PC
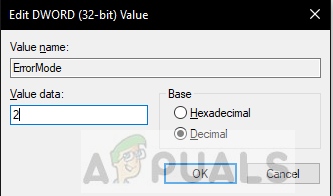
Change Hexadecimal To Decimal


