Fix: No Scanners were Detected
The error “No scanners were detected” usually arises when the computer fails to successfully detect a scanner to send or receive a job request. This error is caused by various reasons including the incorrect installation of drivers, the scanner not connected correctly, or problems in wireless connection.
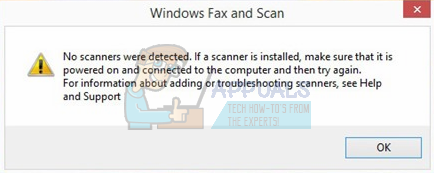
This problem is very common and it usually pops up when you are configuring your scanner for the first time. Usually by reconfiguring the printer the correct way solves the problem instantly. Follow the solutions starting from the first one and work your way down.
Solution 1: Checking Cables and Power Supply
Before we indulge in software related workarounds, we will start by checking if the power and the data connections are inserted and working correctly. If the scanner is connected to a USB, try plugging it into other USB slots and see if the printer/computer displays an indication that a connection is established.
Also, check if the printer is turned on properly by pressing the power button. In case of the scanner built with a printer, check if the scanner module is enabled within the printer, and is at a running stage. After performing all these checks, check if the error message still persists.
Solution 2: Reconfiguring the Scanner Again
This error message primarily means that the scanner isn’t connected to your computer or Windows doesn’t detect a valid online scanner to send the job to. We can try reconfiguring the scanner before we head on to reinstalling the involved drivers. It’s best to have an administrator account for carrying out these solutions.
- Press Windows + S, type “control panel” in the dialogue box and open the application.
- Click on “View by: Large icons” and select the category “Devices and Printers”.
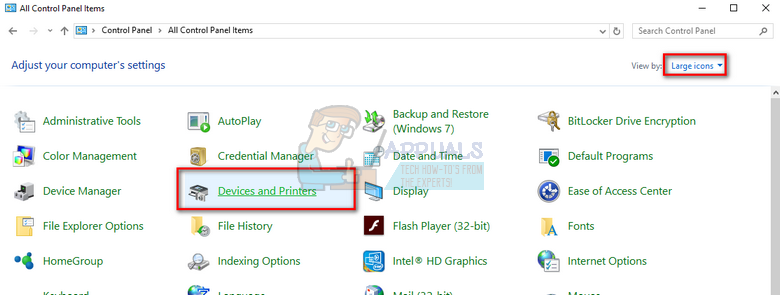
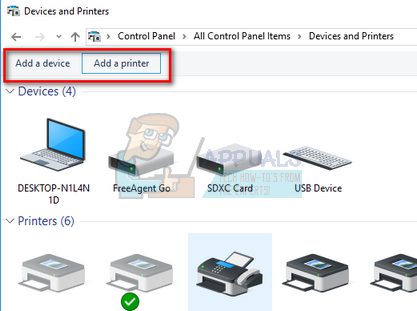
- Click on “Add a device” or “Add a printer” if your scanner is built into a multi-purpose printer.
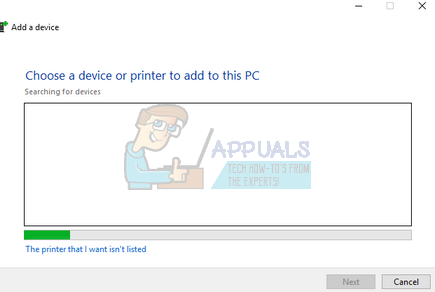
- Now windows will start searching for available scanners/printers connected through the USB or through the network. If your device shows up, click it and follow the onscreen instructions to connect to them.
- After the scanner/printer is connected, try scanning a test page and check if the functionality is as expected.
Note: If you are connecting the scanner over the network, make sure that it is connected to the right network with the correct credentials. You can change its network settings using the arrow keys in the menu.
Solution 3: Updating Scanner Drivers
If all the above solutions don’t work, we can try updating the scanner drivers. You should navigate to the manufacturer’s website and download the latest scanner drivers available. Make sure to download the exact drivers meant for your scanner. You can look for the model number present on the front of your scanner or in its box.
Note: There are few cases where a newer driver doesn’t work. In that case, download an older version of the driver and install it using the same method described below.
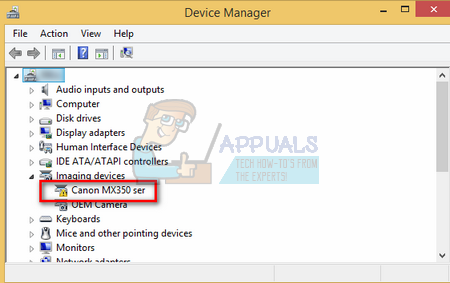
- Press Windows + R to launch the Run Type “devmgmt.msc” in the dialogue box and hit Enter. This will launch your computer’s device manager.
- Navigate through all the hardware, open the sub-menu “Imaging devices”, right click on your scanner hardware and select “Update driver”.
Note: If your scanner is inbuilt with your printer, you should update the drivers of your printer using the same method explained below. In that case, you should look in the category of ‘Print Queues’.
- Now Windows will pop a dialogue box asking you which way do you want to update your driver. Select the second option (Browse my computer for driver software) and proceed.
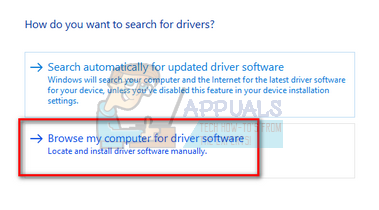
Select the driver file you downloaded using the browse button when it appears and update it accordingly.
- Restart your computer and check if the problem gets resolved.
Note: If you can’t update the drivers manually, you can also select the first option “Search automatically for updated driver software”. This option will make Windows search the web automatically and select the best driver out there.


