Fix: Multiple TAP-Win32 Adapter OAS and TAP-Windows Adapter V9 Connections
Having several different connections when opening the Network and Sharing Center is quite normal since you are probably using only one connection to actually connect to the Internet and you probably have the Ethernet and Wi-Fi drivers set up. Additionally, certain external devices such as a Bluetooth stick or an alternate Internet connection device may create an entry in the Network and Sharing Center.
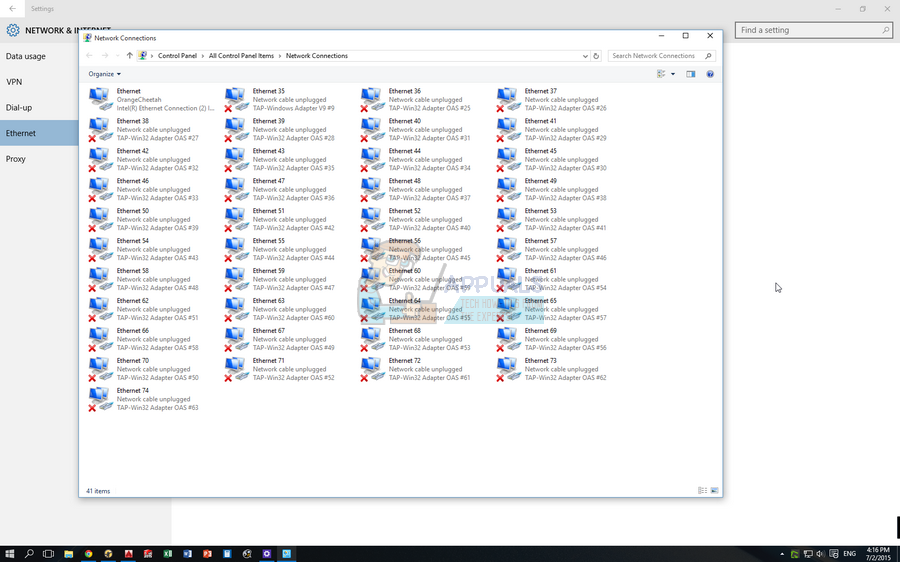
The number of connections in the Device Manager should not exceed a number of five or six and if you notice the devices named TAP-Win32 Adapter OAS or TAP-Windows Adapter V9, that means that something suspicious is going on. There are several causes for this particular problem and we are going to discuss them along with providing proper solutions so make sure you follow the instructions presented in the set of solutions below.
Note: Most of these issues are caused by VPN and Traffic-Modeling tools such as Tunngle, Hamachi, and some VPN clients. Uninstalling them sometimes solves the issue almost immediately so please consider this option if you are not using these tools regularly.
Solution 1: Deleting the AutoKMS.exe File and Uninstalling the Drivers
A possible cause of this problem is the use of KMS software which is usually used to register unlicensed products. Some users install it without knowing that the software they are using is unlicensed and they are fooled by the fact that their product appears to be legal.
On the other hand, some users exploited this feature in order to use an unlicensed product, which is illegal. Either way, one of the ways to resolve this issue is to uninstall the drivers which appear in the Device Manager and to delete the file which is causing this.
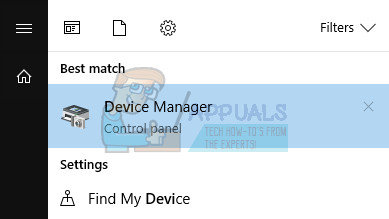
- Type “Device Manager” into the search field to open the device manager console.
- Expand the “Network Adapters” field. This will list all network adapters that the machine has installed. Right click on the adapter you want to uninstall and select “Uninstall”. This will remove the adapter from the list and uninstall the device.
- Click “OK” when prompted to uninstall the device. This will remove the adapter from the list and uninstall the driver. Make sure you repeat the process for all of the suspicious network drivers you find. They will all probably share a similar name and they can be easily recognized.
Now that you have uninstalled the drivers, you need to know that these drivers and devices will probably reappear once you restart your computer so we need to make sure to delete the file which is making them run.
- Use the Ctrl + Shift + Esc key combination in order to bring up the Task Manager. Alternatively, you can use the Ctrl + Alt + Del key combination and select Task Manager from the menu. You can also search for it in the Start menu.
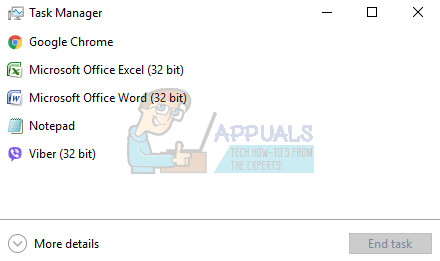
- Click on More details in order to expand the task manager and search for the AutoKMS entry on the list. Right-click on it and choose the Open file location option. After the folder where the file is located is opened, you can right-click on AutoKMS again and choose the End Task option.
- Locate the AutoKMS file in the folder which pops up and delete it by right-clicking on it and choosing the Delete option.
- Now the drivers won’t appear after you restart your computer and the issue is resolved.
Solution 2: Delete the Files and Registry Entries Related to It
The solutions above relates to users who were struggling with the issue being caused by the KMS software. However, the following method is universal and it tends to block these network connections from appearing ever again. Follow the instructions below:
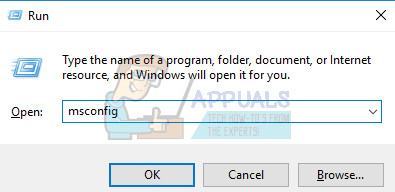
- Click on either Start menu or the search bar next to it and type “msconfig”. Click on the first result which should be named System Configuration and wait for the settings to appear. You can also type msconfig in a Run dialog box.
- Under the Boot tab, check the Boot options section and check the box next to the Safe boot option. This will enable you to choose between several radio buttons. Choose the last one called Network.
- Restart your computer in order to boot into Safe Mode.
- Type “Device Manager” into the search field to open the device manager console.
- Expand the “Network Adapters” field. Right click on the adapter you want to uninstall and select “Uninstall”. This will remove the adapter from the list and uninstall the device.
- Click “OK” when prompted to uninstall the device. This will remove the adapter from the list and uninstall the driver. Make sure you repeat the process for all of the suspicious network drivers you find. They will all probably share a similar name and they can be easily recognized.
Now that we have uninstalled these drivers, we will try to prevent them from appearing on your PC again. First of all, we will need to open System32.
- Navigate to the This PC Folder >> Local Disk where you should be able to see the Windows folder. If you can’t see it, you will need to enable the hidden files and folders.
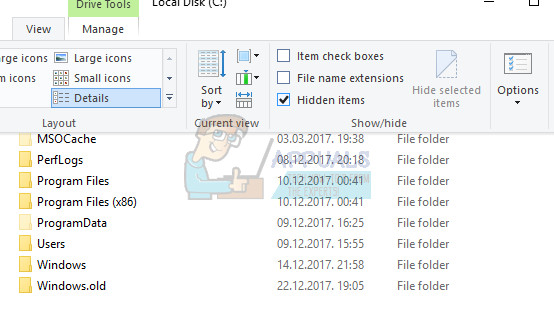
- Click on the “View” tab on File Explorer’s menu and click on the “Hidden items” checkbox in the Show/hide section. File Explorer will show the hidden files and will remember this option until you change it again.
- Navigate to Windows >> System32 and search for “tap0901”. One system file and two dll files might show up as results so make sure you delete all three of them.
The next thing you might want to do is to delete the registry entries related to these files in the Registry Editor. Note that you should be quite careful when editing the registry as a simple unwanted change can cause system instability.
Follow the instructions in this backup registry article in order to safely backup your registry!
- Open the Registry Editor by typing this into the Start menu or in the search bar located at the left part of the taskbar. You can also open the Run dialog box and type in “regedit”.

- Navigate to the following key in the registry editor:
Computer\HKEY_LOCAL_MACHINE\SYSTEM\CurrentControlSet\Services
Note: If some of these keys do not exist, you will need to create them manually by clicking on the destination key, right-clicking on the empty space in the right section of the screen and choosing the New >> Key option. Make sure you name it correctly.
- Locate and delete the entire “tap0901” key by right-clicking on it and choosing the Delete option. Make sure you click okay on any warnings that might appear.