Fix: Mediakit Reports Not Enough Space on Device for Requested Operation
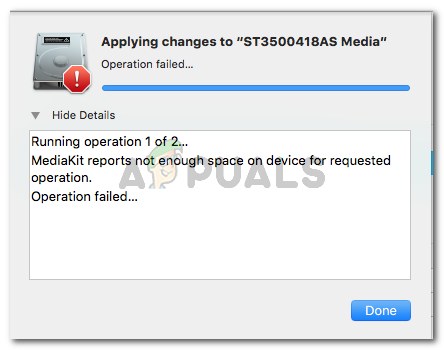
Several users have reported that they are unable to format or partition an NTFS drive using DiskUtility on MacOS. Affected users report that they encounter the following error: “MediaKit reports not enough space on device for requested operation. Most affected users report that the targeted drive has plenty of free space left, so the source of the problem lies somewhere else.
What is causing the MediaKit reports not enough space on device for requested operation error?
We investigated this particular issue by looking at various user reports and the repair strategies that they used to resolve the error message. From what we gathered, there are a couple of common scenarios that will trigger this particular error message:
- Leftover partitions automatically created during a Bootcamp installation – As per various user reports, partitions such as these are often responsible for this error since they can’t be deleted conventionally (most of the time).
- Disk Utility is unable to reformat the drive from NTFS to APFS – This can’t be done from Disk Utility, but you can use the terminal (either directly on Mac or by using a Linux Live CD) to circumvent the issue.
If you are struggling to find a way that will allow you to circumvent this particular issue, this article will provide you with several troubleshooting strategies. Below you have several methods that other users in a similar situation have used to get the issue resolved.
For the best results, follow the methods below in order until you find a fix that is effective in your particular scenario.
Method 1: Partition the drive from the terminal
Several users struggling to format the drive have been able to circumvent the “MediaKit reports not enough space on device for requested operation” error by using the Terminal to identify, unmount and partition that drive that is triggering the error in Disk Utility.
Note: Keep in mind that the procedure below cannot be used on one partition alone. It will affect the entire drive.
Here’s a quick guide on partitioning the drive using the Terminal:
- Click the search icon (top-right corner) and search for “terminal”. Then, double-click on Terminal to open the utility.
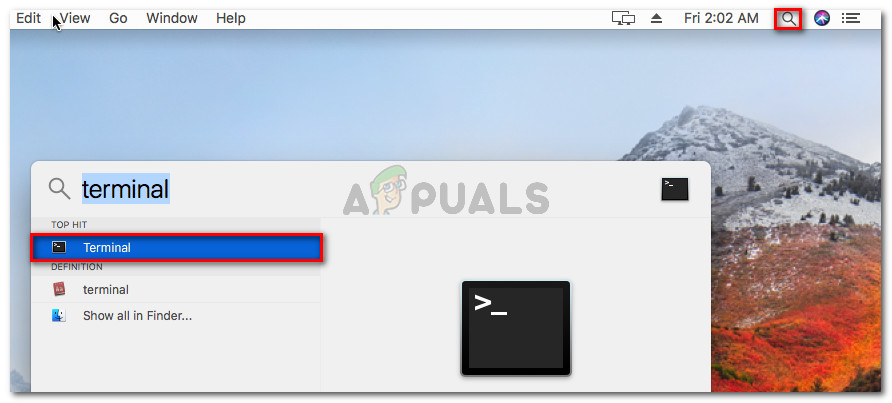
Opening the Terminal application on OsX - Start by typing the following command to get the name of the disk you’re trying to format:
diskutil list
- In our example, we need to format the disks03 disk. In order to ensure that you’re targeting the correct drive, replace disk0s3 with the correct disk.
- Now to unmount the disk, type the following command and press Enter:
diskutil unmountDisk force disk0s3
- Next, we’ll need to write zeros to the boot sector in order to ensure that the procedure will search for a more complex boot manager. To do this, type the following command and press Enter:
sudo dd if=/dev/zero of=/dev/disk0s3 bs=1024 count=1024
- Once the zeros have been written to the boot sector, attempt to partition again by typing the following command and pressing Enter:
diskutil partitionDisk disk0 GPT JHFS+ "Partition Name" 0g
Note: Replace partition name with the name you want to give to your new partition.
If this method didn’t allow you to circumvent the MediaKit reports not enough space on device for requested operation by using the Terminal to partition the disk, move down to the next method below.
Method 2: Using a Linux Live CD to partition the drive
Several users struggling to resolve the same issue have managed to get the issue resolved by booting from a Linux live CD and using the gdisk and GParted utility to create an NTFS partition from the free drive space.
Then, they used the gdisk utility again to order the partition table accordingly and enter the recovery & transformation menu. From there, they managed to create a new hybrid MBR that finally allowed them to complete the partitioning process.
This procedure is frequently used by users who are trying to install Windows on a drive that also has a partition reserved for OSX. If this procedure is applicable to what you have in mind, follow the steps down below to use a Linux Live CD to partition the drive:
- Boot a Linux Live CD into your Mac such as Ubuntu Live CD, Parted Magic of System Rescue CD. AnLinuxux-based free OS capable of Live USB booting should do the trick.
- If you’re using an Ubuntu Live CD, click on Try Ubuntu to load up the Live CD version.

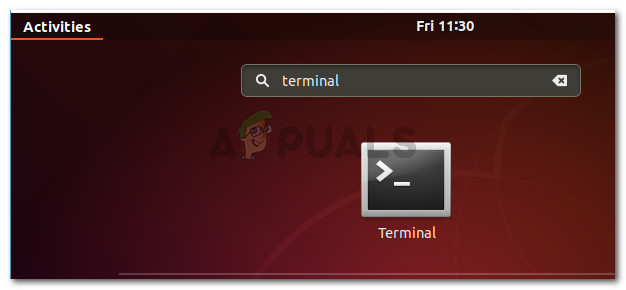
Click on Try Ubuntu to launch the Live CD version - Once the Linux Live CD is loaded, open a terminal Terminal window. You can do this by clicking the Show Application icon and searching for “terminal” using the search function.
Accessing the Terminal on Linux - Inside the Terminal window, type the following command to make sure that you are using root privileges:
sudo -i
- Once you have root privileges, type the following command to launch the Gdisk utility on the disk:
gdisk /dev/sda
- Once the gdisk utility is launched, type ‘v‘ and press Enter to verify disk structures. If you see a message telling you that no problems where found, move down to the next step below.
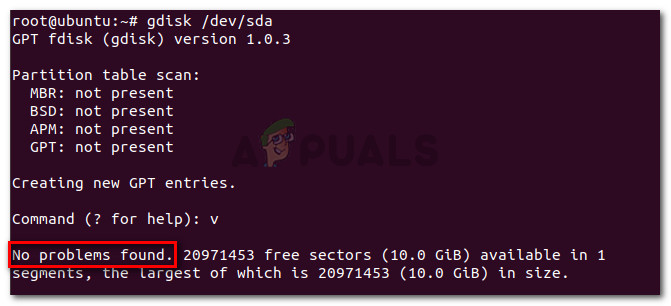
Verifying the Disk integrity Note: This is not mandatory, but it’s a precautionary diagnostic step that will help us identify any errors that might contribute to our issue.
- Once the verification is complete, exit the Gdisk utility by typing ‘q‘ and pressing Enter.

Exiting the gdisk utility - Next, launch GParted on the same disk by typing the command below in the same Terminal window. You can also launch GParted by opening it directly from the menu.
gparted /dev/sda
- Once the GParted utility opens, create an NTFS partition with your free space, but make sure to leave at least 128 MB of unpartitioned space between it and the OSX partition. Click the Add button to initiate the creation of the new partition.
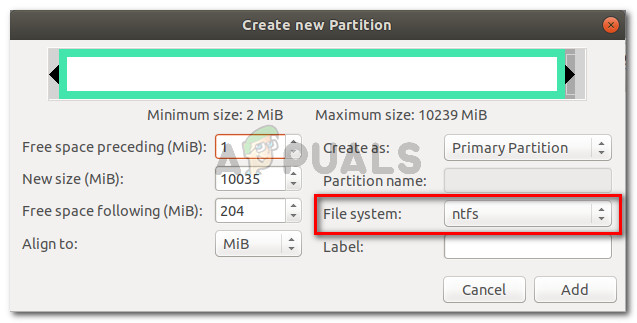
Create a new NTFS partition and click Add - Once the operation is completed successfully, exit the GParted utility and return to the terminal via step 3. Then, follow step 4 and 5 again to grant root privileges and launch the gdisk utility.
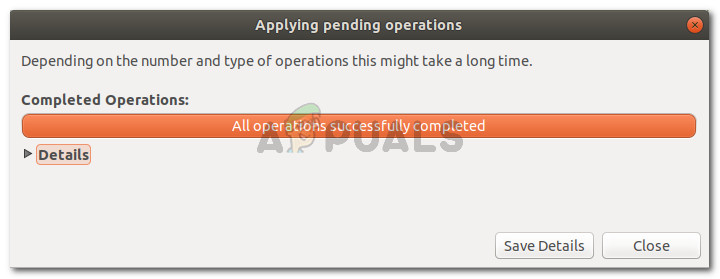
All operations completed successfully - Once you return to the gdisk utility, type “p” to view your partition table. By now, you should have three partitions: an EFI System Partition (ESP), a Windows (NTFS) partition – the one that we previously created- and an OS X partition.
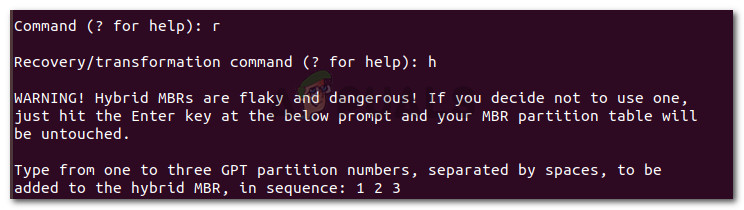
- If you confirm this, type “r” to enter the Recovery & Transformation menu. Then, type ‘h‘ and press Enter to create a new hybrid MBR. Next, type “1 2 3” and press Enter to form the three partition numbers.
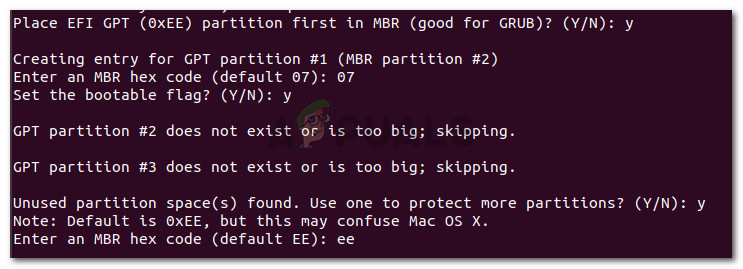
Establishing the three partition numbers - Next, type “Y” and press Enter (Return) at the EFI GPT (0xEE) prompt. When asked if you want to set a bootable flag, type “Y” and press Enter (Return) again. Then, type “Y” and press Enter (Return) when asked if you want to use free space to protect more partitions. Finally, enter the default MBR hex code (ee) and press Enter (Return) once again.
Configuring the Hybrid MBR partition settings - One the configuration part is complete, type the ‘w’ key and press Enter (Return) to save the changes and proceed with the final checks. When asked whether you want to proceed, type ‘y’ and press Enter (Return) once again.
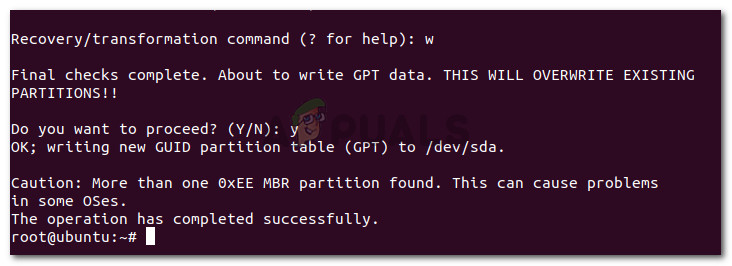
That’s it, the free space that was previously failing with the “MediaKit reports not enough space on device for requested operation” error has been partitioned with gdisk and Gparted.


Thank you SO SO SO much!!
Simple and direct introduction, easy step-by-step guide. Excellent write-up, kudos!