Fix: LAN Not Working on Minecraft
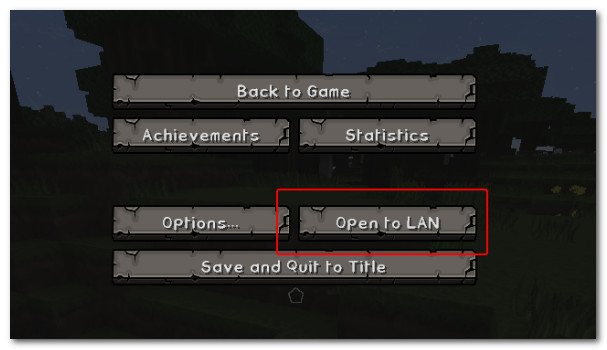
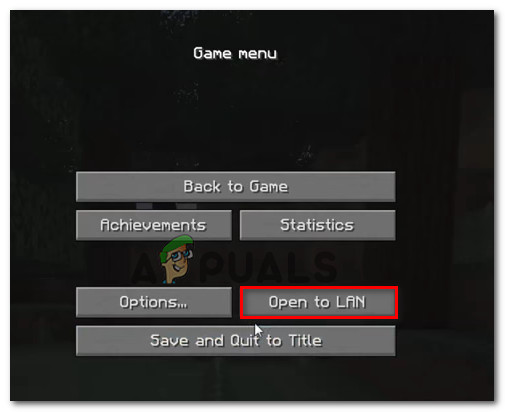
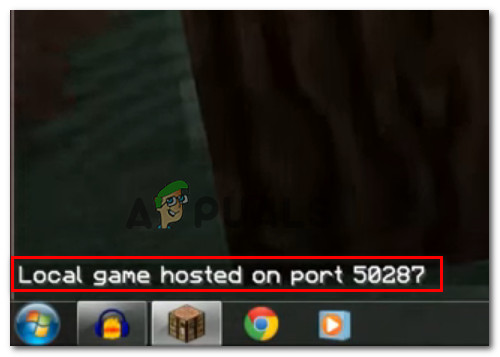
Several Minecraft Players are complaining that the LAN feature is not working for them so they are unable to play with their friends locally. This is mostly reported to occur when the users launch a single player world and then tries to open up the session to LAN (Settings > Open to LAN > Game More Creative). The game will then display the port that the session is hosted on (Local game hosted on port XXXX), but the session will remain invisible for the other LAN player/s.
What is causing the “LAN Not Working on Minecraft” error?
We investigated this particular issue by looking at various user reports and the repair strategies that they used to get around this particular problem. Based on what we gathered, there as several different scenarios that will end up triggering this particular error message:
- Firewall ends up blocking Java – UAC is not clear when asking the required permissions for Minecraft, so some users might hit Cancel at the permission prompt (which ends up instructing your firewall to block the incoming & outgoing connections of Minecraft. In this case, the solution is to configure your Firewall to allow the connection from and into Minecraft.
- Computers are on a different network – Another reason why this problem will occur is when the involved parties are connected to a different network. Since we’re talking about a LAN connection, you will not see the other person if you aren’t on the same network.
- AP Isolation is blocking the connection – Another possible reason why the LAN feature is not working on Minecraft is a feature called Access Point isolation. This security measure might be the culprit that prevents the involved devices from communicating with each other. If this scenario applies, the only fix is to disable AP isolation.
- Network discovery is disabled – Another usual problem that might end up causing this particular problem is if the network is set to public, but Network Discovery is disabled. This will end up preventing Minecraft from listening to broadcasts. In this case, the simplest fix is to turn on Network discovery.
If you’re currently struggling to resolve this particular problem with Minecraft, this article will provide you with several troubleshooting steps that other users in a similar situation have used to get the issue resolved.
If you want this process to be as straightforward as possible, we advise you to follow the methods below in the order that they are advertised. You will eventually stumble upon some steps that will help you resolve the error message.
Method 1: Ensuring that all the involved parties are connected to the same network
If you’re unable to host/join a LAN session, the first thing that you should check is if all the involved computers are connected to the same network. If one of the involved parties is a laptop, make sure that it’s not connected to a nearby Wi-Fi (different from the one intended).
And even if all computers are connected to the same network, it’s preferable that you use the same form of connection. For example, if you are hosting the session on a computer with an ethernet connection, it is advisable to connect the laptop with cable rather than using the Wi-Fi network.
If you’ve ensured that all involved computers are connected to the same network and you’re still encountering the same issue, move down to the next method below.
Method 2: Configuring your Firewall to allow Minecraft to be executed
Windows will ask for the necessary permissions required to run the online components. But this process will create some confusion for users because the UAC will ask permission for Java (since the game is executed by the Java program).
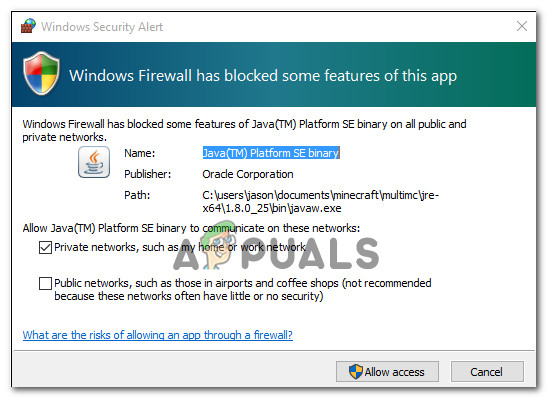
If you’ve hit Cancel at the initial permission prompt, then your Firewall is already configured to block the network features of Minecraft. As you can imagine, this will end up breaking any attempt of establishing a LAN session.
Fortunately, the steps of resolving the problem in this particular scenario are very simple. You’ll just need to ensure that you have administrative access. When ready, follow the instructions down below:
- Press Windows key + R to open up a Run dialog box. Then, type “control or control.exe“ and press Enter to open up Control Panel.
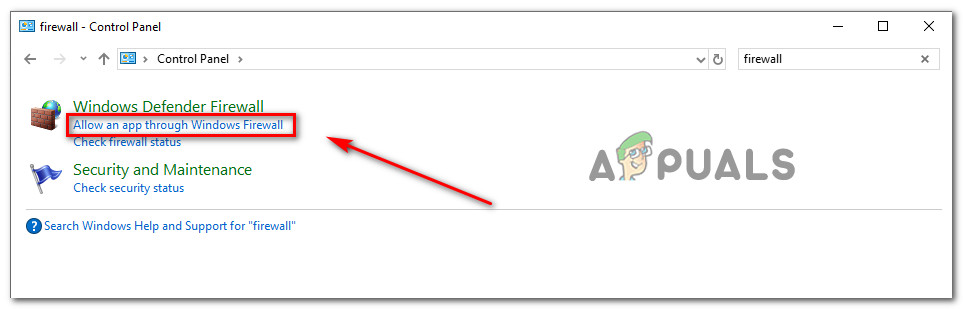
Running Control Panel from a Run box - Inside Control Panel, use the search function to locate Windows Defender Firewall (Windows Firewall). Once you see it, click on Allow an app through Windows Firewall.
Accessing the list of Allowed Firewall apps - Inside the Allowed apps window, click on Change Settings and start scrolling down the list. You need to make sure that the boxes associated with one (or multiple) entries are checked:
javaw.exe
Java(TM) Platform SE binary
Minecraft
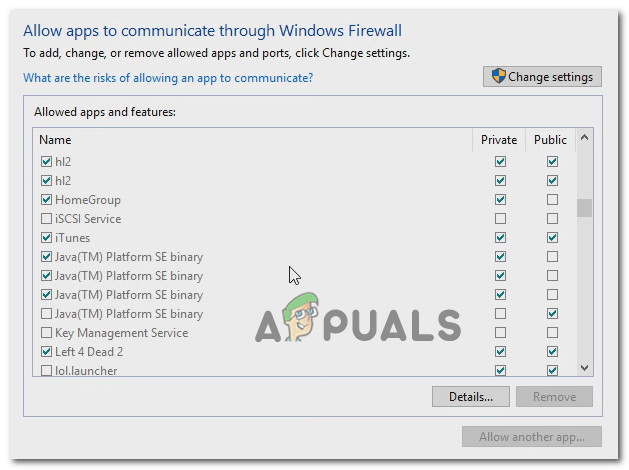
Allowing access to Java * Minecraft Note: If Minecraft is not on this list, click on Allow another app and use the next window to browse to the location of the main launcher (Magic Launcher or something different, depending on what version you’re using) and add that to the Allowed apps.
- Save the changes and launch Minecraft again and see if the LAN connection is now working.
If you’re still encountering the same issue, try to disable your Antivirus temporarily or edit your inbound rules for Minecraft to allow it completely through.
Method 3: Enabling Network Discovery
Several affected users have reported that they managed to resolve the issue after they discovered that although the network that they used was set to Public, Network discovery was disabled. This will end up breaking the LAN functionality of Minecraft since the game will not have the ability to listen to broadcasts.
Fortunately, you can resolve this issue very easily by enabling Network Discovery. Here’s how to do this:
- Press Windows key + R to open up a Run dialog box. Then, type “control” or “control.exe” and press Enter to open up the classic Control Panel window.
Running Control Panel from a Run box - Inside Control Panel, click on Network and Internet and then click on Network and Sharing Center.
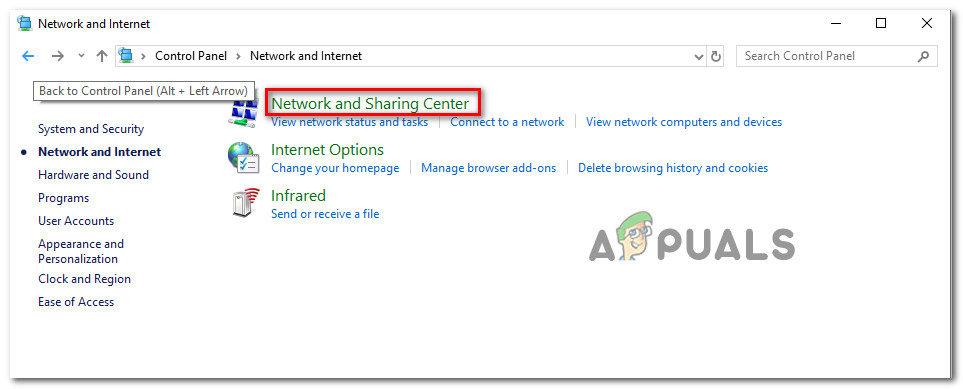
Accessing the Network and Sharing Center via classic Control Panel - Inside the Network and Sharing Center screen, click on Change advanced sharing settings.
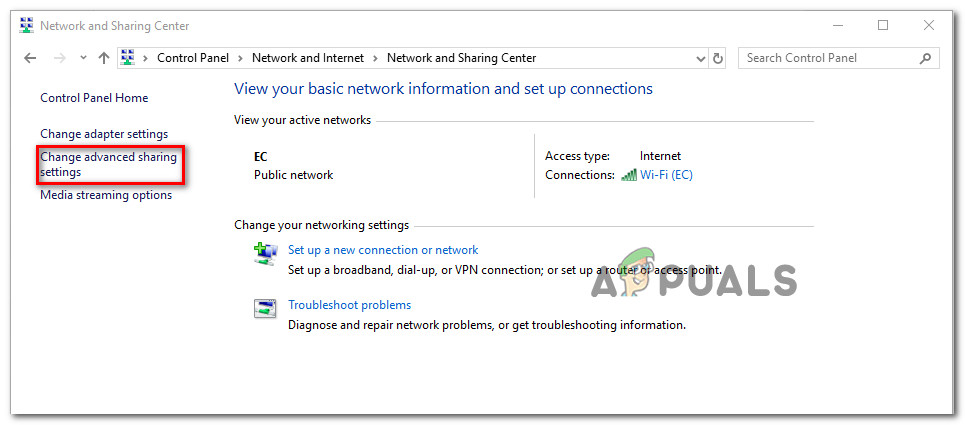
Changing the Advanced Sharing Settings - Inside the Advanced sharing settings, expand the Private tab and make sure that the Turn on network discovery feature along with it’s associated checkbox. then, expand the Public tab and Turn on network discovery under Network discovery.
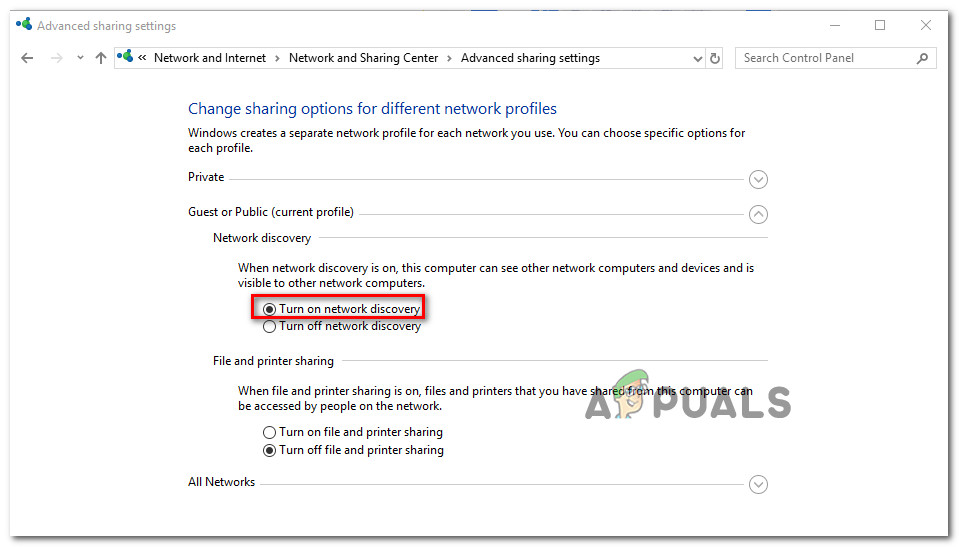
Enabling Network Discovery - Once network discovery has been enabled, attempt to host/join the Minecraft session again and see if the issue is now resolved.
- If it doesn’t make sure to check the “Turn on File and Printer Sharing” as well.
- Also, make sure that the “Allow Windows to Manage Homegroup” option is checked.
- Now check if the issue persists.
If you’re still unable to host or join the Minecraft session, move down to the next method below. But before doing that, try to change your NAT type to be a bit less strict and it might allow your connection to be established with the servers. Try to allow ports if the issue is still persisting and make sure to disable any network encryption/security services that might be blocking the connection. Also, uninstall the “Hamachi” application because it is known to cause such issues.
Method 4: Using Direct Connect
Direct Connect is one of the most reliable ways of establishing a LAN session. Sure, the steps or doing so are a little more tedious than the traditional approach, but his feature has allowed a lot of users that we’re unable to play locally to finally create a LAN (Local Area Network) session.
Here’s a quick guide on how to do this:
- Start Minecraft and launch a new world (Single Player > *YourWorld* > Play Selected World). Once the world is loaded, go to Settings and click on Open to LAN. Then, establish the server preferences and hit Start LAN World.
Opening the world for LAN - Shortly after the game is opened to LAN, you will see some text in the bottom-left portion of the screen (“Local game hosted on port XXXXX“). When you see it, note down the port number.
Noting down the port number - Press Windows key + R to open up a Run dialog box. Then, type “cmd” and press Ctrl + Shift + Enter to open up an elevated Command Prompt.
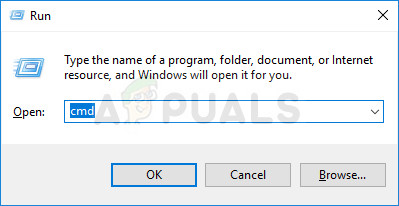
Running CMD as an administrator Note: When prompted by the UAC (User Account Control), click Yes to grant administrative privileges.
- Inside the Elevated Command Prompt, type the following command and press Enter to get a rundown with your network configuration addresses:
ipconfig
- Scroll down through your IP Configuration list and locate the network that you’re currently connected to. Then, note down the IPv4 Address associated with the network that you’re currently connected to.

Noting down the correct IP address Note: You’ll need to make sure that you’re targeting the correct network connection. If you have Hamachi or VirtualBox, you will see multiple IPv4 addresses for each network, so make sure that you choose the appropriate one (Wireless LAN adapter Wi-Fi or Ethernet adapter Ethernet).
- Now the job for the hosting player is done. So take the information that you previously fetched (IP address + Port number) and move to the computer that is trying to join the LAN party.
- From the computer that is trying to join, go to Multiplayer > Direct Connect. Then, inside the Server Address box, type the IP (previously fetched at Step 5) + ‘:‘ + port number (previously fetched at step 2).
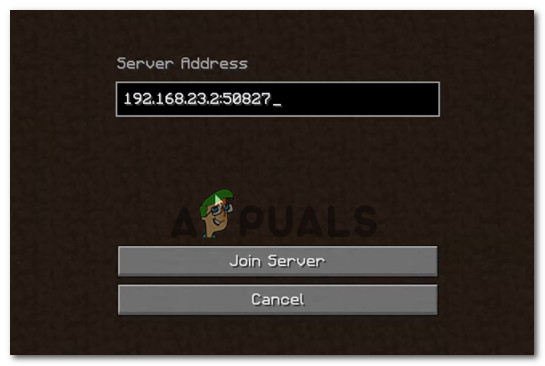
Typing the IP + : + port number - Click on the Join server to join the LAN hosted the session.
Method 5: Disabling AP Isolation
This will no longer occur with newer router/modem models, but it’s possible that a security feature (Access Point isolation) is what ends up blocking the LAN session from being hosted. This security feature is typically only applied to Wi-Fi users and excludes Ethernet users.
What happens with AP isolation – Connected users are isolated from each other. So everyone can connect to the internet from the same network, but they can’t connect to each other. This is typically referred to as AP isolation, but you might also see it as client isolation, user isolation or access point isolation.
Some routers will apply this security measure automatically while others will include a dedicated option that enables users to turn it On or Off.
There is a procedure that will allow you to confirm whether AP isolation is responsible for your Minecraft problem. Pinging both computers will help you determined if AP isolation is applied. If the involved computers fail the ping test, then you’ll need to access your router settings and look for a way to disable access point isolation.
To make this whole process easier for you, we’ve created a step by step guide through the whole thing. Here’s what you need to do:
- Press Windows key + R to open up a Run dialog box. Then, type “cmd” and press Ctrl + Shift + Enter to open up an elevated Command Prompt. When prompted by the UAC (User Account Control), click Yes to grant administrative privileges.

Running CMD as an admin - Inside the elevated Command Prompt, type “ipconfig” and press Enter to see all the data related to your IP configuration. Once the list is returned, note the IPv4 Address of the network that you’re currently connected to.
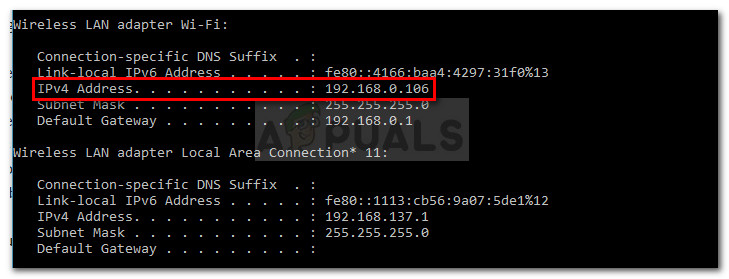
Making a note of the IPv4 address Note: Step 1 & step 2 must be done from all the computers involved in the LAN session of Minecraft. By the end of this procedure, you should be left with the IP addresses of all computers involved.
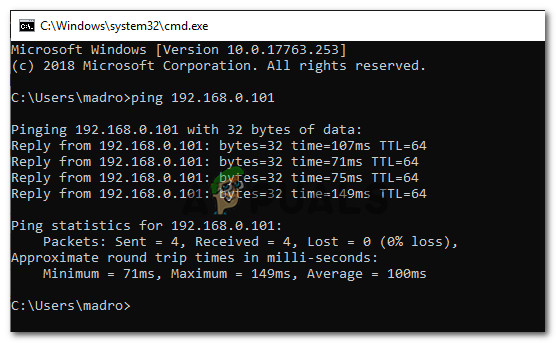
- Next, on the first computer the following command:
ping x.x.x.x
Note: Keep in mind that X is simply a placeholder for the IP address that you fetched at step 2.
- On the second computer, repeat the same procedure, but this time ping the address of the first computer.
If you get a Reply on your pinging attempt in both cases, it means that AP isolation is not the cause of your issue.
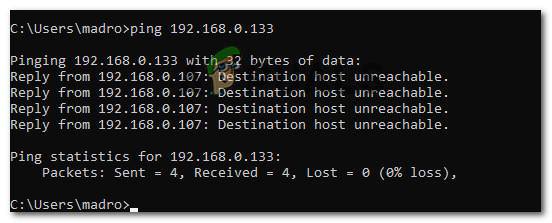
In the event that you see a message telling you that the Destination host is unreachable, chances are you’re dealing with a case of AP isolation.
If you’ve confirmed that you’re dealing with a case of AP isolation, follow the instructions below to disable it from your router settings:
- Open your browser and type the IP address of your router/modem inside the navigation bar. Most routers/modem will have 192.168.0.1 or 192.168.1.1 as the default address.

Accessing your router settings Note: If the default IP address is not applicable to your current situation, open a Run box (Windows key + R), type “cmd” and press Enter. then, type ipconfig and retrieve the Default Gateway IP – that’s the address of your router.

- In the next screen, you’ll need to insert your user credentials. On most routers/modem models, the default values will be the admin for username and admin or password for the password field. If the default credentials don’t match, search online for the default values for your specific router/modem model.
- Once you gain entry into your router settings, look for an option named AP isolation, access point isolation, user isolation or client isolation and turn it off. You can typically find it under the Advanced Wireless settings of your router.
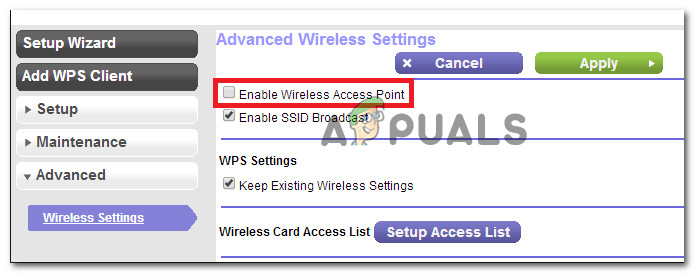
Ensuring that AP isolation is turned off - Once API isolation has been disabled, restart your router/modem and see if the LAN session in Minecraft can be established now.
Method 6: Selecting a Private Network
This issue is mostly triggered if the network from which you are trying to connect to the server is configured as a public network and due to the restrictions implemented on public networks, the game cannot detect the server. Therefore, in this step, we will be selecting the network as private. For that:
- Press “Windows” + “I” to open the settings.
- In the settings, click on the “Wifi” or “Ethernet” option depending upon your connection type.
- Click on the name of your network and then check the “Private” option to switch it from a public to a private network.
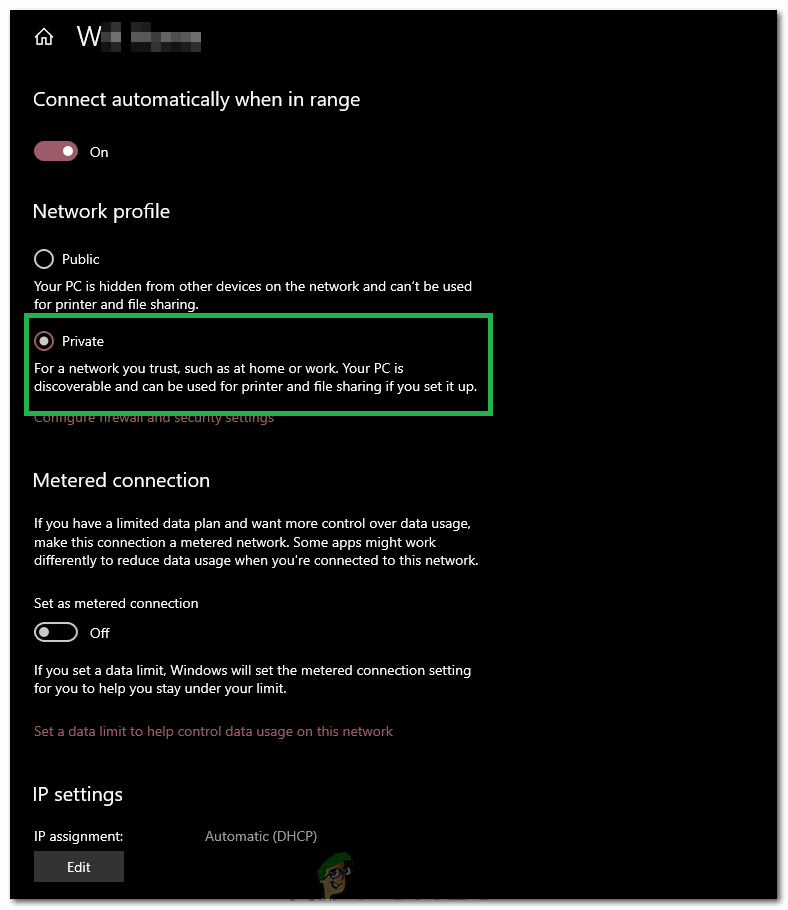
Changing the Connection type to “Private” - Save your changes and close this window.
- Check to see if the issue persists.


Still :failed to connect…” Nothing works. I can see the MC server but cannot connect. Sad.