Fix: IPVanish not Connecting to VPN
IPVanish might not connect to the VPN service if the connection protocol you are trying to use is not supported by your network or device. Moreover, conflicting applications (like Blokada) may also cause the issue at hand. The issue arises when the user fails to connect while using IPVanish. The issue is reported on Windows, mobile applications, Fire Stick, Android boxes, etc.

You can fix the IPVanish not connecting issue by trying the undermentioned solutions but before that, make sure your device supports IPVanish or IPVanish supports your device (e.g., Fire Stick Generation 1 does not support VPN and IPVanish). Moreover, check if trying another Country server (preferably, non-US) sorts out the issue for you. Additionally, IPVanish may fail to connect if your ISP or router is blocking access to its servers. You can check it by using another network (like the hotspot of your phone).

Change the Connection Protocol of the IPVanish Application
The IPVanish may fail to connect if the connection protocol you are trying to use is not supported on your device or network. In this scenario, changing the connection protocol of the IPVanish app may solve the problem. For elucidation, we will discuss the process for the Windows version of the IPVanish app.
- Launch the IPVanish app and select Settings (in the left pane of the window).
- Now, in the right pane, steer to the Connection tab and expand the dropdown of Active Protocol (under VPN).
- Then select OpenVPN and click on Connect to check if the connection issue is resolved.
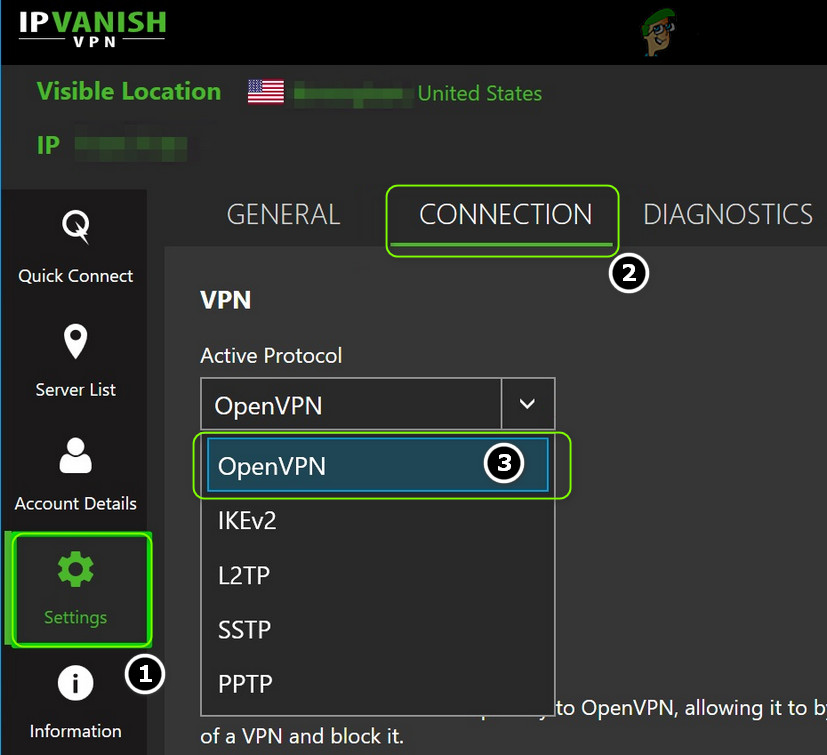
Set the Connection Protocol of IPVanish to OpenVPN - If not, then you may try other VPN protocols to check if any one of the other protocols sorts out the connection issue.
Update the IPVanish App to the Latest Release
IPVanish may fail to connect if its app is outdated as it can create incompatibility between IPVanish and OS modules. In this context, updating the IPVanish app to the latest release may solve the connection problem. For illustration, we will discuss the process for the Android version of the IPVanish app.
- Launch the Play Store and open its menu (by tapping on your user icon near the top right of the screen).
- Now select My Apps & Games and open IPVanish (you may have to scroll a bit to find the app).
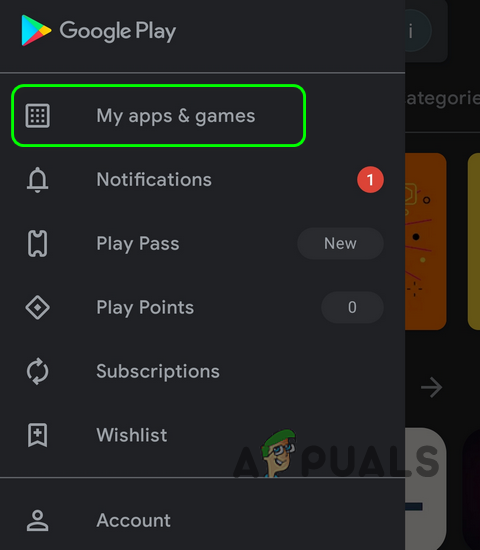
Open My Apps & Games - Then check if an update for IPVanish is available, if so, tap on the Update button and if asked to, tap on Accept.
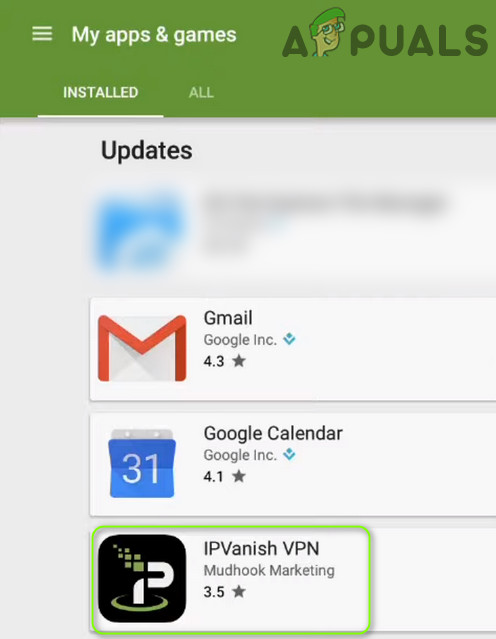
Open IPVanish in My Apps & Games - Once the app is updated, restart your device and upon restart, check if the IPVanish not connecting issue is resolved.
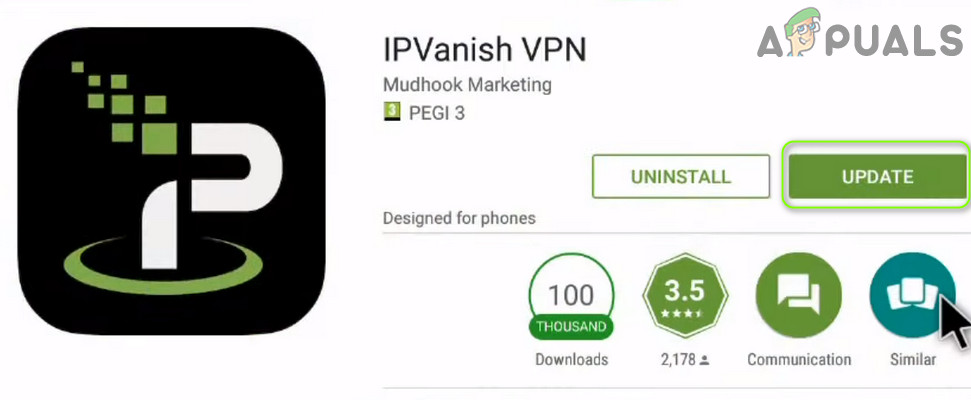
Update IPVanish in the Google Play Store
Re-log into IPVanish
The IPVanish connection issue could be a result of a temporary glitch in the communication modules of your device. The glitch may get cleared if you log out and then log back into IPVanish. For elucidation, we will go through the process for the Windows version of IPVanish.
- Launch IPVanish and head to the Account Details tab in the menu (in the left pane of the window).
- Then, in the right pane, click on Logout, and afterward, confirm to logout.
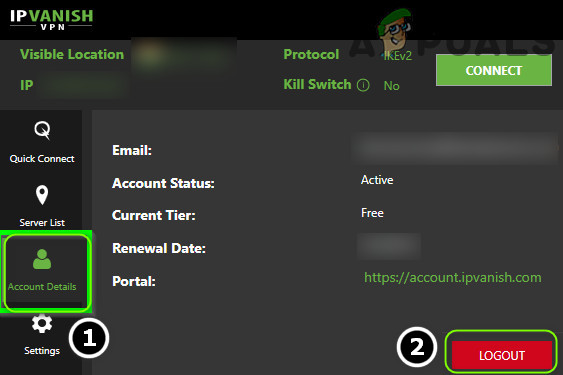
Logout of the IPVanish app - Now reboot your PC and upon reboot, log back into IPVanish and check if its connection issue is resolved.
Uninstall the Conflicting Application
The IPVanish not connecting to the VPN service could be a result of an app (like an adblocker) conflicting with the operation of the IPVanish app. In this context, uninstalling the conflicting application may solve the problem. The Android version of the Blokada app is reported to cause the issue (you may have to dig deeper to find the app causing the issue for you).
- Launch the Settings of your Android phone and select Applications.
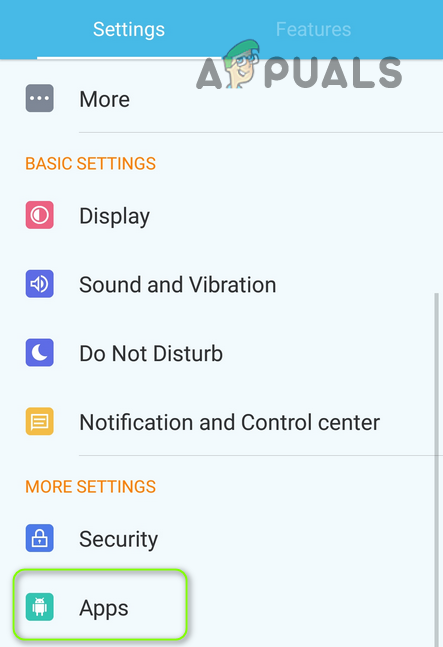
Open Apps in the Android Phone’s Settings - Now open Blokada (you may have to scroll a bit) and tap on the Uninstall button.

Uninstall Blokada - Then confirm to Uninstall the Blokada app and afterward, reboot your device.
- Upon reboot, launch IPVanish and check if it is clear of the connection issue.
If the issue persists, then you may try another VPN client.


