Fix: INTERNAL_POWER_ERROR BSOD
The error code “INTERNAL_POWER_ERROR” usually indicates that you have an incorrect or badly configured video card driver installed against your video hardware. This bluescreen came into the spotlight in 2015 when Windows released an update to Windows 10 and the AMD drivers somehow clashed with the new features or modules.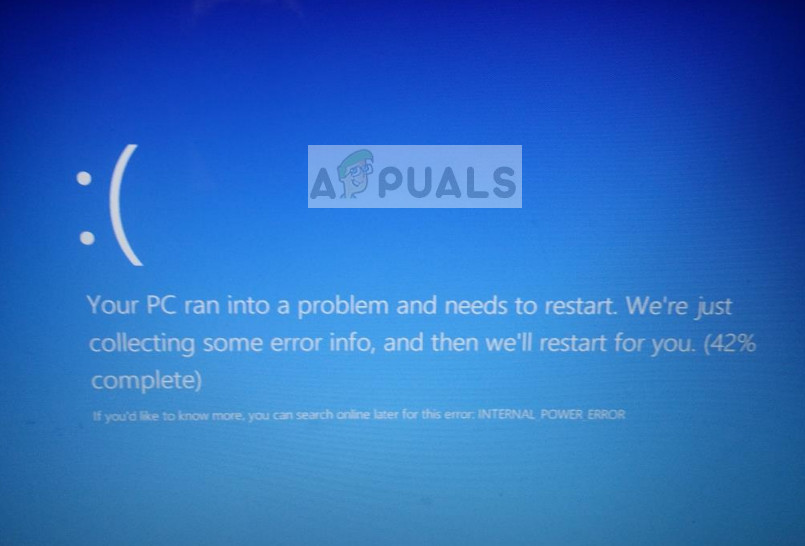
There are several fixes to fix this blue screen and almost all of them are related to removing AMD drivers from your computer or disabling the AMD services. Make sure that you backup all the important files on your computer before proceeding with the solutions listed below.
Note: If you are unable to access the desktop of your computer, you should boot into RE (recovery environment) and try to enter the safe mode. From there we can implement the changes. If even this isn’t possible, launch the command prompt from the RE and execute the commands there.
Solution 1: Disabling all AMD services
The very first thing which we will try is disabling all the AMD services running in the background and then checking if the error condition still comes and causes the blue screen. There are several reports indicating that AMD catalyst control panel causes the error because of compatibility issues. Let’s disable all AMD services and see where that leads us.
We are using this solution to make your computer accessible so we can update your AMD drivers. If this solution doesn’t let you, then move on to the next solution where we disable your AMD graphics.
- Power up your computer and let it boot into your profile. Do note that you have to perform the below steps ‘very’ quickly so we can disable the AMD services before they are even initialized.
- Press Windows + R, type “taskmgr” and press Enter.
- Once in the task manager, kill all AMD processes.
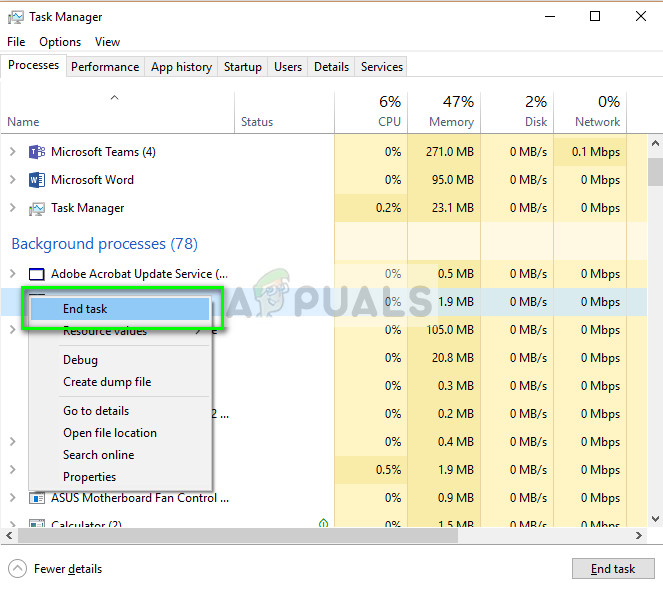
- Now check if you are able to use your computer.
If you are still facing an abrupt blue screen with the error code “INTERNAL_POWER_ERROR”, we will try clean-booting your computer. Clean-booting disables all third-party services from booting whenever you start your computer and only loads the necessary Windows driver files which are there to make sure that the computer functions. This option will disable the AMD services automatically when you boot.
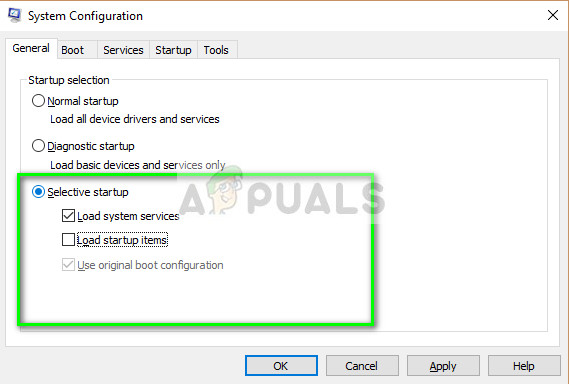
- Press Windows + R, type “msconfig” in the dialogue box and press Enter.
- Select the General tab and check the option Selective startup. Also only check Load system services.
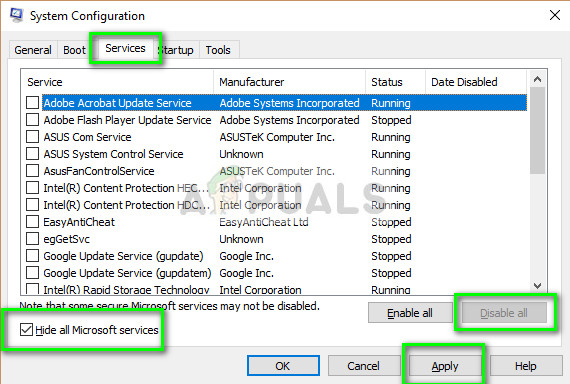
- Now select the tab services and check the option Hide all Microsoft services. Click on Disable all to disable all the other services and click Apply.
- Restart your computer and check if the error still persists. If it doesn’t, you can move on to the next solution to fix your AMD graphics drivers.
Solution 2: Uninstalling AMD Graphics
If you are still getting the blue screen after following the first solution, you have to execute this method really quickly before the graphics card gets configured into your system. We will first uninstall the graphics card and then restart the computer. This will install the default driver for the hardware. Later on, you can update the driver either to the latest build or you can roll back the driver.
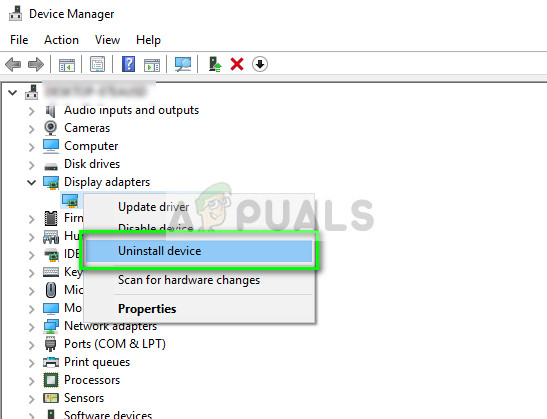
- Press Windows + R, type “devmgmt.msc” in the dialogue box and press Enter. Once in the device manager, expand display adapters, right-click on AMD graphics card and select Uninstall.
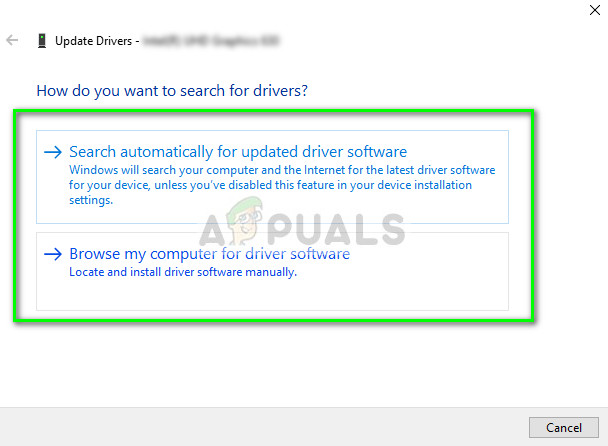
- Now reboot your computer and head back to the device manager. Either the hardware will have default drivers installed or it will be labeled as an unknown device. Right-click on it and select Update driver.
- You will be given two options. Either you can automatically update the driver or you can do it manually. If updating the driver caused the problem, you have to resort to manual updating. The steps listed below are for manual of update of the driver. For automatic, you just need to click the option and Windows will do the rest.
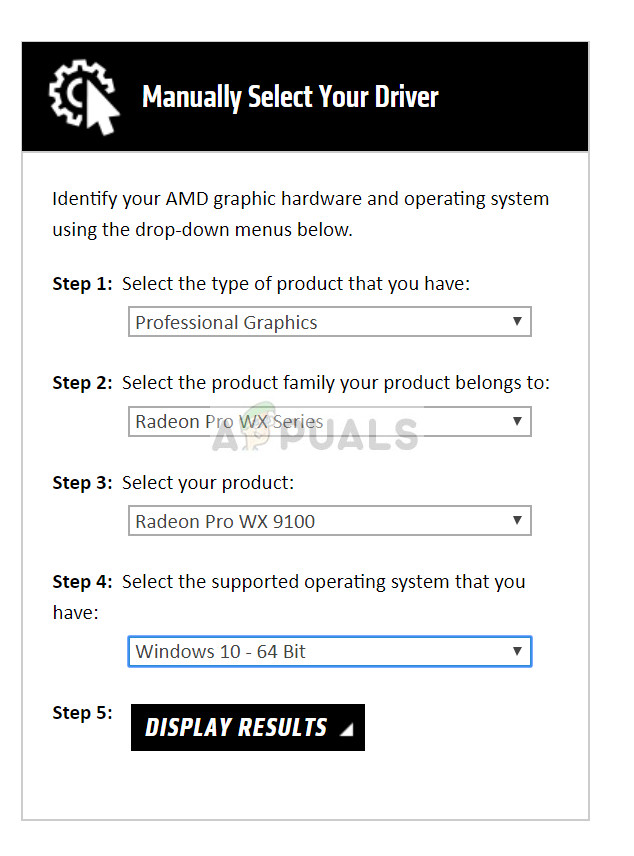
- Navigate to AMD’s official website and download the graphics according to your specification to an accessible folder.
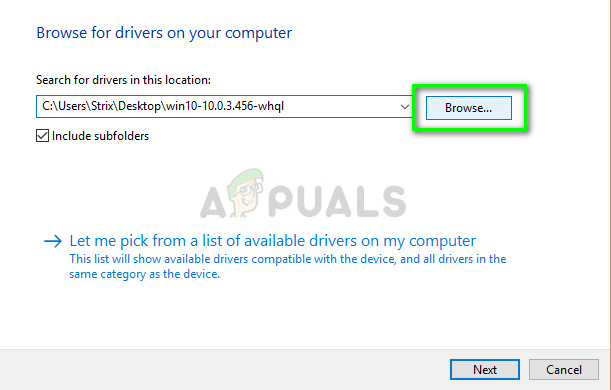
- Switch back to the device manager and click on manual Now select Browse to navigate to the file you downloaded and click it.
- After the update, restart your computer and check if the problem is solved.
An important decision which you must take is which version of the driver to install. You can even try using an older version if the newer version is causing you the BSOD. It mostly all depends on your system.
If Windows automatically updates your driver even after you have rolled it back to a previous version, you can stop Windows from checking updates against your drivers using the following steps.
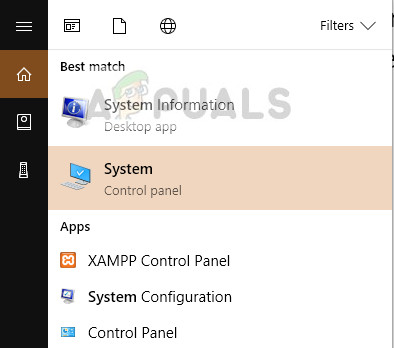
- Press Windows + S to launch the search menu of your start bar. Type “system” in the dialogue box and select the option associated with the control panel. You can also navigate to System using the control panel directly.
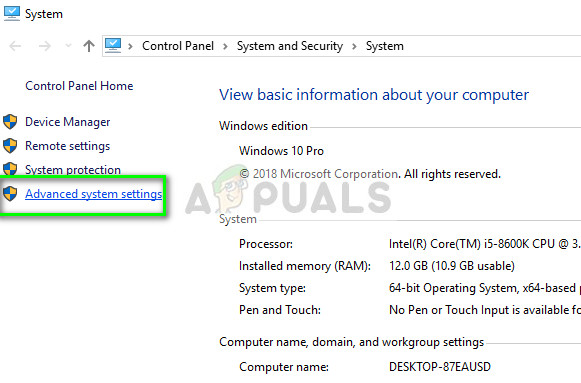
- Once in the system, click on “Advanced system settings” present at the left side of the screen.
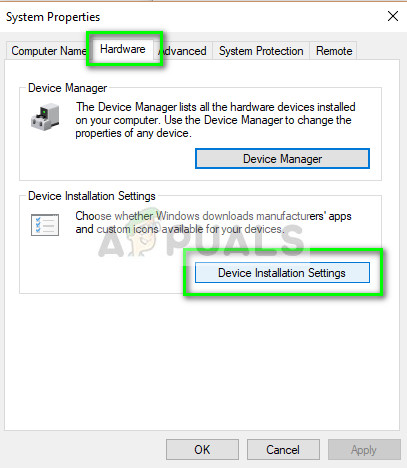
- Navigate to the Hardware tab and click on “Device Installation Settings”.
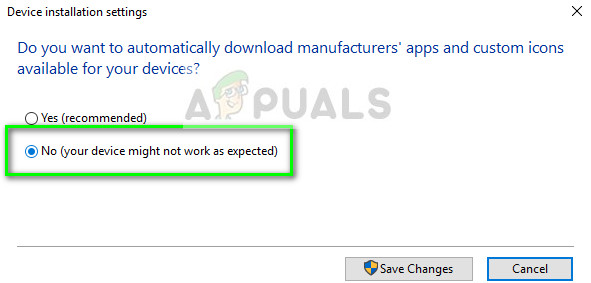
- Select the option of “No (your device might not work as expected)”. Press Save changes and exit. This will disable the Windows update from updating your graphics drivers automatically.
Solution 3: Setting hard drive timer to 0
Another solution which worked for some people was setting the hard drive sleep timer to 0. After a certain idle time, the computer sets the hard drive to a stop state. This saves power and helps minimize the energy user. However, in some cases, the hard drive fails to start operation after the sleep phase and the BSOD occurs. We can try to disable this feature and see if this does us any good.
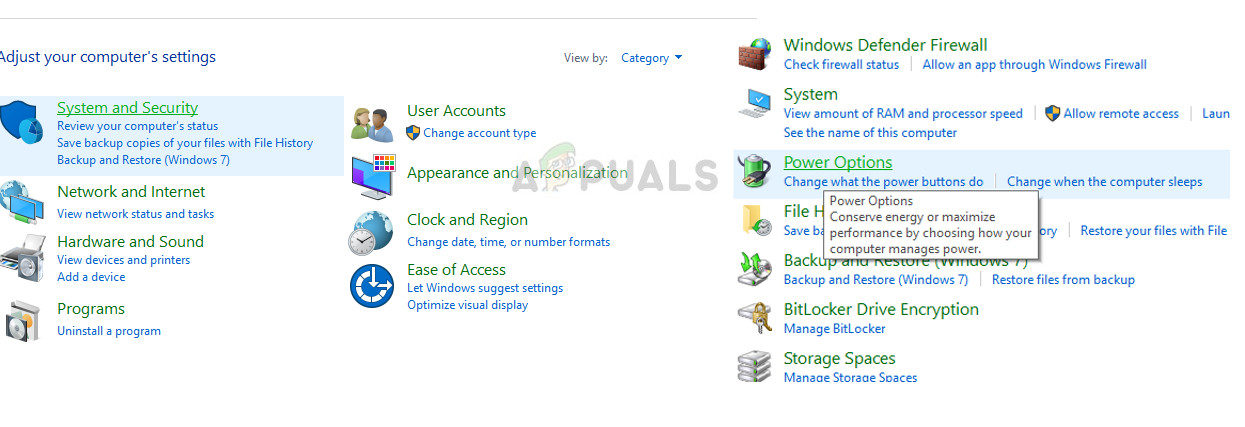
- Press Windows + R, type “control” in the dialogue box and press Enter. Once in the control panel, click on System and Security and then click Power Options.
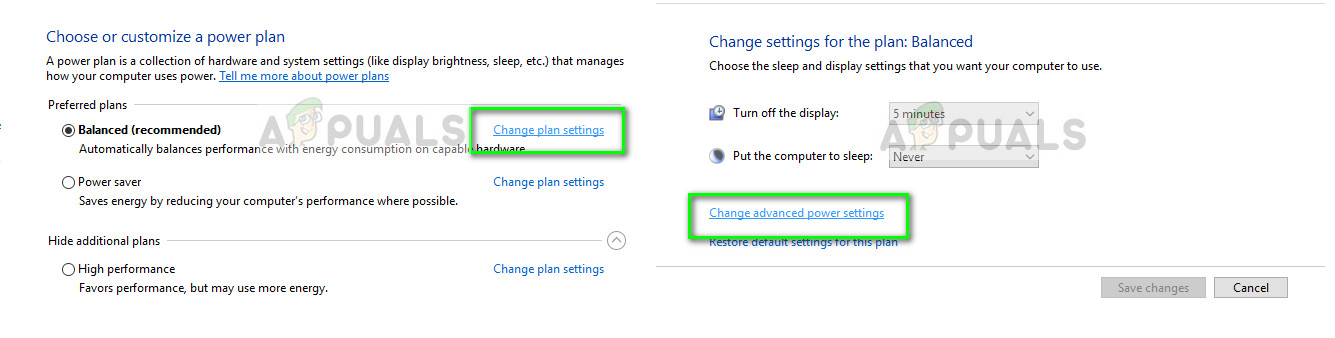
- Now select the power plan you are currently using and click Change plan settings. A new window will open up. Click Change advanced power settings.
- Click on Hard disk and set the Turn off hard drive after to 0 Minutes.
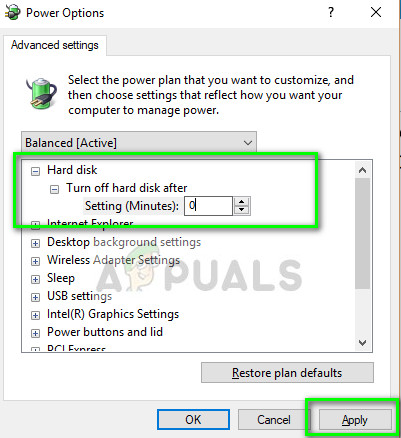
- Press Apply to save changes and exit. Restart your computer completely and check again if the error occurs.
In addition to the above solutions, you can also try the following:
- Perform an SFC check to see for any file discrepancies.
- Consider cleaning all the junk files in your system drive.
- You can also check for hard drive corruption. There are several tools available for this with memtest86 being the best one.
- You can also install Windows update if you are avoiding any updates.
- You can also consider increasing the size of the hibernation file by executing this command in elevated command prompt “powercfg /hibernate /size 100”.
- Installing a clean version of Windows.


What about PCs with Nvidia video cards?