Fix: Input Signal Out of Range
Setting up your computer to run peacefully and to be optimized maximally is a difficult thing to achieve, especially when you want to set up the proper graphics and video properties. These settings are usually at their default state but plenty of errors might appear if you try to change these settings a bit.
One of the most common errors which occur and is related to this topic is the Input signal out-of-range error which is common for any version of the Windows operating system. Luckily, the problem can be solved rather easily by one of the methods displayed below.
1. Change the Refresh Frequency or Resolution in Safe Mode
If you have just installed a new graphics card or if you have changes certain settings, a possible occurrence is that the graphics card or your PC is set to run on a refresh frequency or resolution higher than the monitor can handle which results in this annoying error code.
This problem is the most common among laptop users with smaller monitors. The best way to fix this problem is by starting your PC in Safe mode and changing these settings.
- Turn your computer on and insert a bootable Windows 10 DVD or a USB drive that has been configured correctly. It does not have to be your original Windows 10 DVD since you won’t need it to activate your version of Windows, only to access certain settings.
- Boot from the drive you just inserted by restarting your computer after insertion and follow the instructions.
- Windows Setup windows should open prompting you to enter the language and time and date settings.
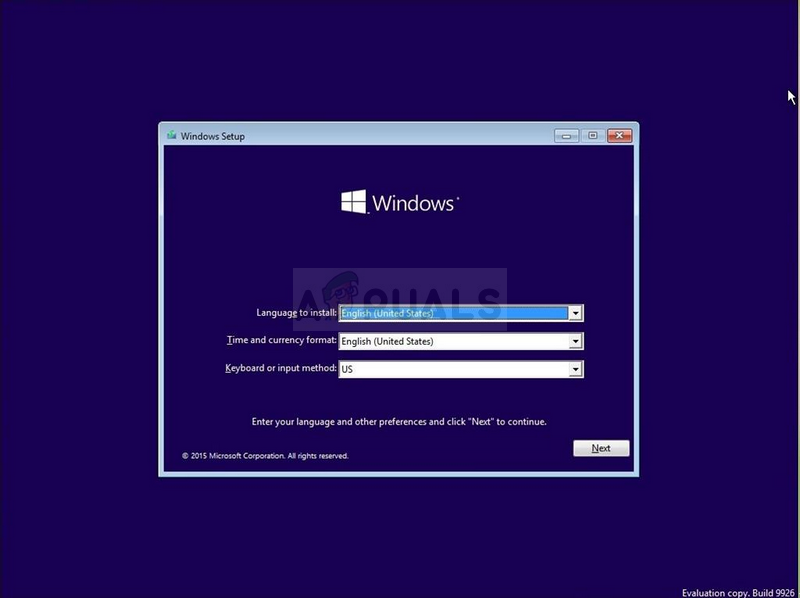
- Choose the Repair your computer option at the bottom after proceeding and choose to Troubleshoot >> Advanced options >> Startup settings.
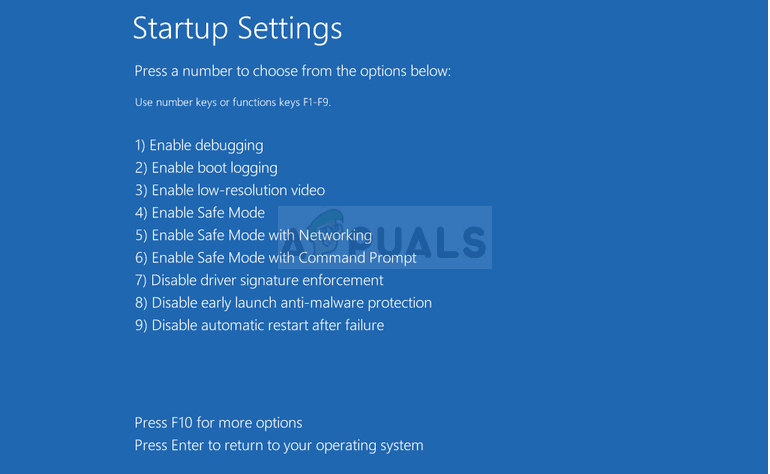
- Click the number 4 key or F4 to start your PC in Safe Mode.
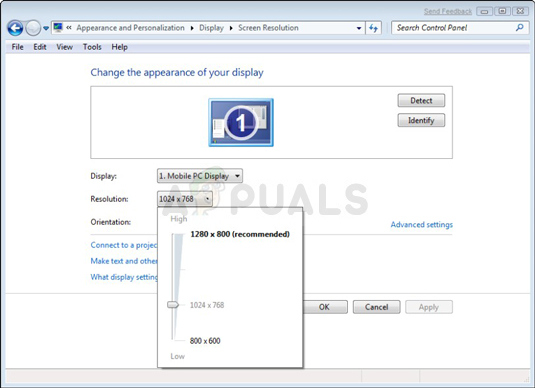
- Once the PC has started, right-click on your Desktop and choose Properties. Navigate to the Settings tab and tweak the resolution tab. Try lowering the setting insignificantly and restarting your computer in normal mode to see if the problem is solved.
- If nothing regarding the resolution settings managed to fix the problem, navigate back to Safe mode, right-click on your Desktop, and choose Properties >> Settings tab >> Advanced, and then navigate to the Monitor tab. If the refresh rate is set too high, try lowering it a bit. Note that the lowest recommended setting is 60Hz.
- Check to see if the problem is solved.
Note: If you don’t possess a Windows 10 bootable DVD or USB since you probably updated from an older version, you can easily create it by following the instructions below (for USB):
- Download the Media Creation Tool from Microsoft’s official website. Double-click on the file called MediaCreationTool.exe which you just downloaded file to launch the tool. Tap Accept.
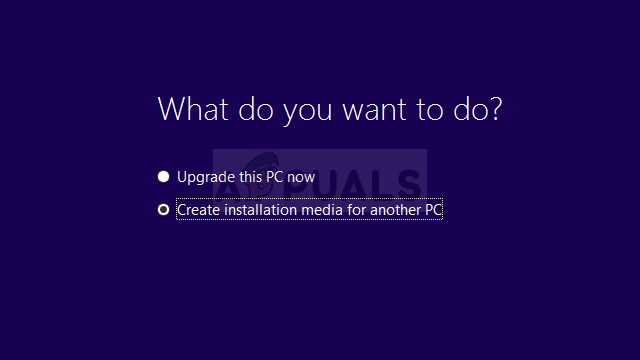
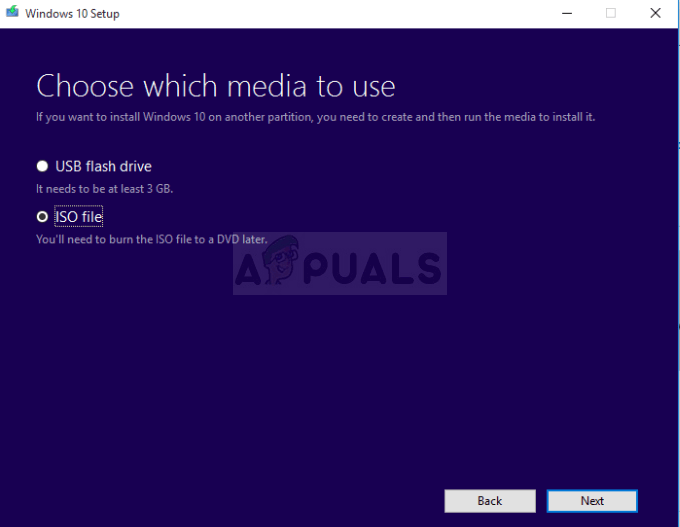
- Select the Create installation media (USB flash drive, DVD, or ISO file) for another PC option from the first screen which is displayed from the tool.
- The language, architecture, and edition of the bootable drive will be selected based on your computer configuration, but you can clear Use the recommended options for this PC setting to select the appropriate settings if the computer you want to use the USB for is of different settings.
- Click Next and click on the USB flash drive option when prompted to choose between USB or DVD.
- Click Next and choose the removable drive from the list which displays the storage devices connected to your computer.
- Click Next and the Media Creation Tool will proceed to download the files needed to install Windows 10, and it’ll continue to create the bootable media, which should work on most devices that use legacy BIOS as well as on the newer ones using UEFI.
2. Uninstall or Update Current Graphics Drivers
The first solution was quite popular among users who struggled with this awful error. However, sometimes this wasn’t enough and you will need to keep troubleshooting, still using the Safe mode. You will also need to keep your Windows 10 bootable USB drive you created in the previous method. If you haven’t you should do it now.
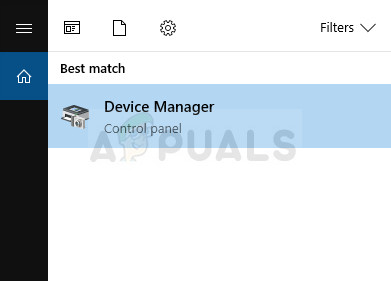
- Select the Start button once your PC has booted into Safe mode. If you are going to try and update the drivers, you should boot into Safe mode with Networking. Type Device Manager, and select it from the list of results.
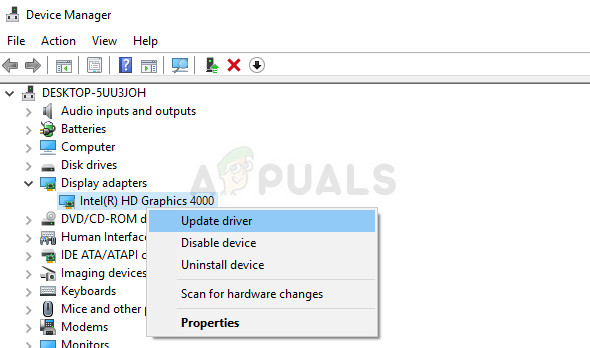
- Expand one of the categories to find the name of your device, then right-click (or tap and hold) it, and select Update Driver. For graphics cards, expand the Display adapters category, right-click your graphics card, and select Update Driver. If you have booted into regular Safe mode. Choose Uninstall device and skip the third step.
- Select Search automatically for updated driver software and follow the instructions on the screen to install it.
- Restart your computer into normal mode and check to see if the problem is solved. If you have uninstalled the driver, Windows should search for it and install it as it boots.
3. Error Occurs in Games
Here are some of the available solutions for certain games where the error appears to be quite common. Even though these methods are quite specific and are related to these games, other games’ settings can be accessed similarly. There is a feature you can use on some game launchers such as Steam and Origin that feature lets you apply some launch parameters to your game, you can take advantage of those launch options and start your game with custom resolutions. Follow these steps to apply the resolution parameters to your game:-
Steam
Steam allows you to change the resolution of the games by using those launch options, follow these steps to apply the resolution launch options:-
- Open Steam and head over to the “Library”.
- Find your game, right-click on it and click “Properties”.
- Now in Section named “Launch Options” type the following command:-
-screen-width 1280 -screen-height- 720
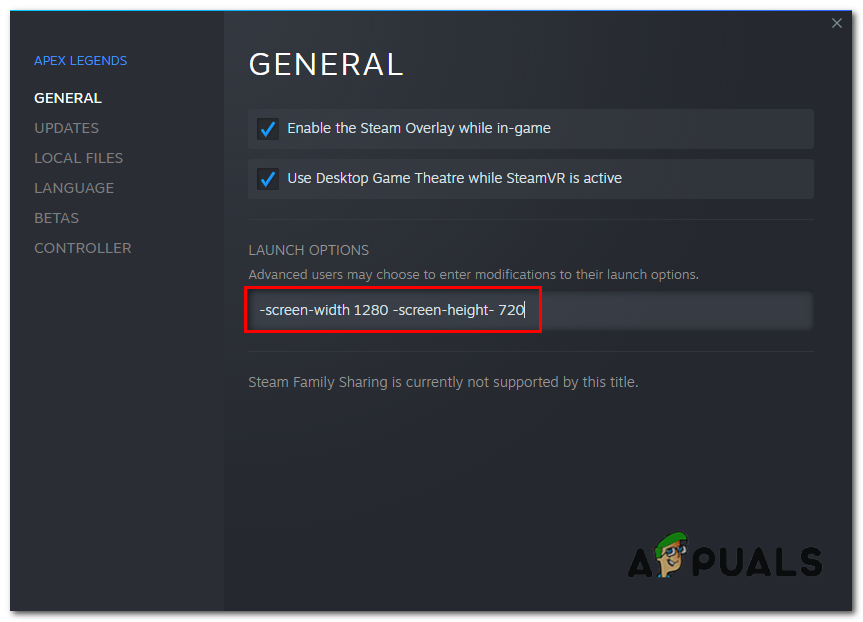
You can change the 1280 and 720 to whatever resolution is natively supported by your Monitor. There are some additional steps that are required for some games such as “StarCraft, Battlefield, and No Man’s Sky”. We have provided the Steps below.
StarCraft
Before proceeding with this solution, it’s recommended that you close all of your running programs and it’s advisable to create a backup of your registry just in case something goes terribly wrong while you edit it. Backup your registry by following the instructions in our article.
- Open the Registry Editor by typing “regedit” in either the search bar or the Run dialog box. Navigate to the following key in Registry Editor:
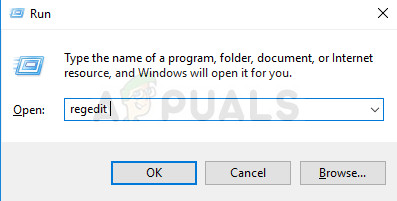
HKEY_CURRENT_USER/ Software/Blizzard Entertainment/StarCraft/WindowMode
- Right-click on the windowmode key, choose modify and set the Decimal value to 1.
- Apply the changes, restart your computer and check to see if the game is working again.
Battlefield One:
- Navigate to This PC >> Documents >> Battlefield1 >> Settings and locate a file with a name similar to PROFSAVE_profile. The name is different depending on your username.

- Right-click on the file and choose Open with >> Notepad. Locate the ResolutionHeight and ResolutionWidth options and change them to values you would like to use. If this doesn’t work do the same process for all PROFSAVE_profile files in the folder.
No Man’s Sky
- If you bought the game on Steam, navigate to C >> Steam >> steamapps >> common >> No Man’s Sky >> Binaries >> SETTINGS and look for a file called TKGRAPHICSSETTINGS.MXML.
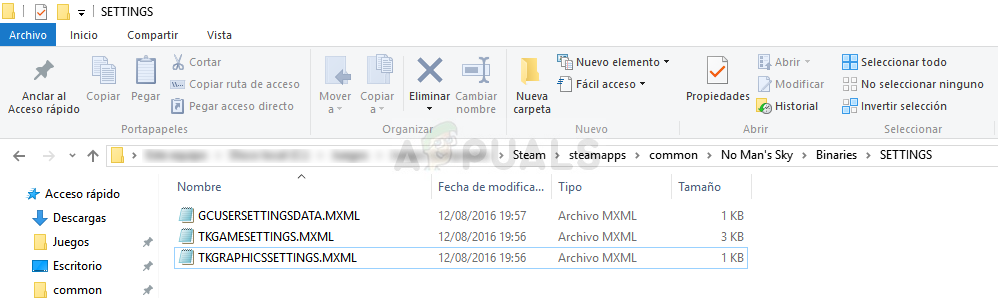
- Right-click on the file and choose Open with >> Notepad. Look for the following section which should look like:
<Property name=”ResolutionWidth” value=”xxxx” /> <Property name=”ResolutionHeight” value=”xxxx” />
- Here the ‘x’ letters represent the current setting. Change these values to whatever you want as long as it’s supported by your monitor and apply the changes.


