How to Fix the “Incorrect PSK Provided for Network SSID” Error?
The error “Incorrect PSK Provided for Network SSID” indicates that either the password you entered does not match the stored network credentials or you have outdated network profiles. When a device fails to recognize the password (PSK – Pre-Shared Key) for the network, this issue commonly arises.
While the most common cause is incorrect network credentials or a corrupted network profile, other factors could also contribute, such as misconfigured router security settings that do not match the network profile stored on the device.
Restarting the router is recommended before trying any solutions, as it will not only clear any temporary conflicts by refreshing the router settings but also fix potential communication issues between the router and devices, which should resolve the issue.
1. Forget and Reconnect to the Network
This is the simplest and easiest way to resolve the issue. Forgetting and reconnecting to the network will remove any outdated or incorrect network credentials and profiles stored on the device.
If the profile contains outdated settings, such as an incorrect password or mismatched encryption method that conflicts with the current network settings, forgetting and reconnecting to the network should resolve the issue.
By forgetting the network, you clear all outdated or misconfigured network settings saved on the device. This allows you to reconnect to the network with updated details.
- First, locate the Wi-Fi icon in the bottom-right corner of your screen (usually found in the system tray). Click on it to view the available networks.
- Find the Wi-Fi network that is currently connected to your device and causing the error. Click on that network, and then select Disconnect from the available options.
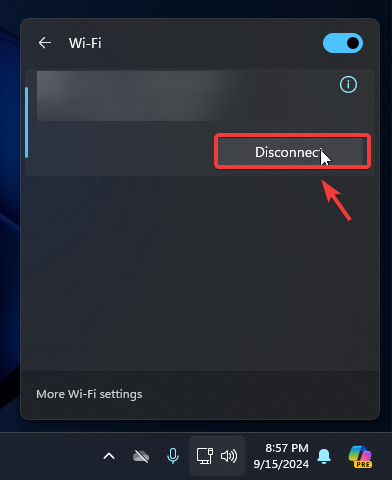
- Once disconnected, click on the same Wi-Fi network again and reconnect by entering the correct password, if prompted.
2. Update or Reinstall Network Drivers
If your network drivers are outdated or corrupted, they may not recognize modern security protocols such as WPA2/AES. Network drivers act as a bridge between your device and the router, establishing a secure and reliable network connection.
If they are incompatible or outdated, they might misinterpret the encryption process or cause connectivity issues. Therefore, ensure that your drivers are updated by following these steps:
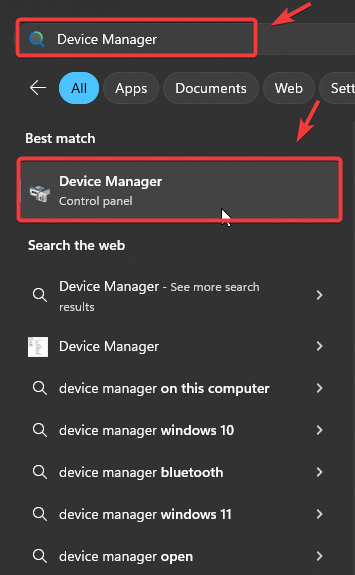
- Press the Win key (the key with the Windows logo) on your keyboard, and in the search bar, type Device Manager.
- Press the Enter key to open Device Manager.
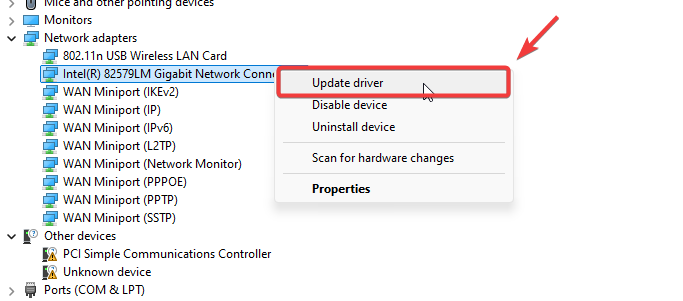
- In Device Manager, find and click the arrow next to Network Adapters to expand the list. Then, right-click on your network adapter (the one you’re using for Wi-Fi or Ethernet) and choose Update driver.
- A window will pop up. Select the option that says Search automatically for drivers. This will prompt your computer to find and install the latest driver available.
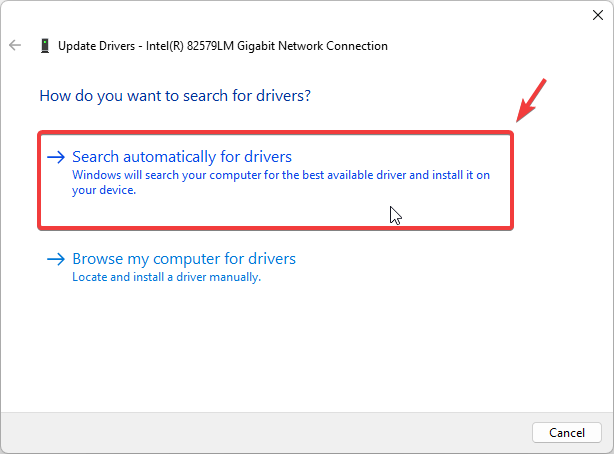
- If a new driver is found, it will automatically install. Once the installation is done, check if the issue is resolved. If no driver is found, go back to the list of network adapters, right-click the adapter again, and this time, select Uninstall device.
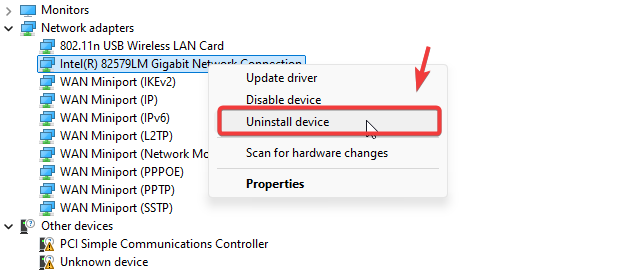
- A confirmation box will appear. Click Yes to confirm that you want to uninstall the device.
- Once the uninstallation is complete, restart your computer. When your computer restarts, Windows will automatically reinstall the network driver.
3. Set Up Manual Network Configuration
Manually adding a network can help resolve connectivity issues by allowing you to input the correct network details, such as the password, SSID, and security protocol. This process also ensures that the appropriate security protocols, such as WPA2-Personal and AES, are being used, which can help prevent authentication failures when connecting to the network.
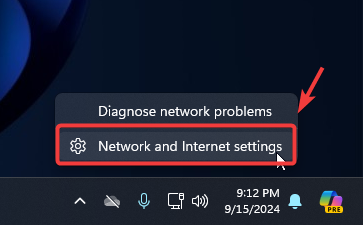
- Right-click the Wi-Fi icon located in the bottom-right corner of your screen and select Network and Internet settings.
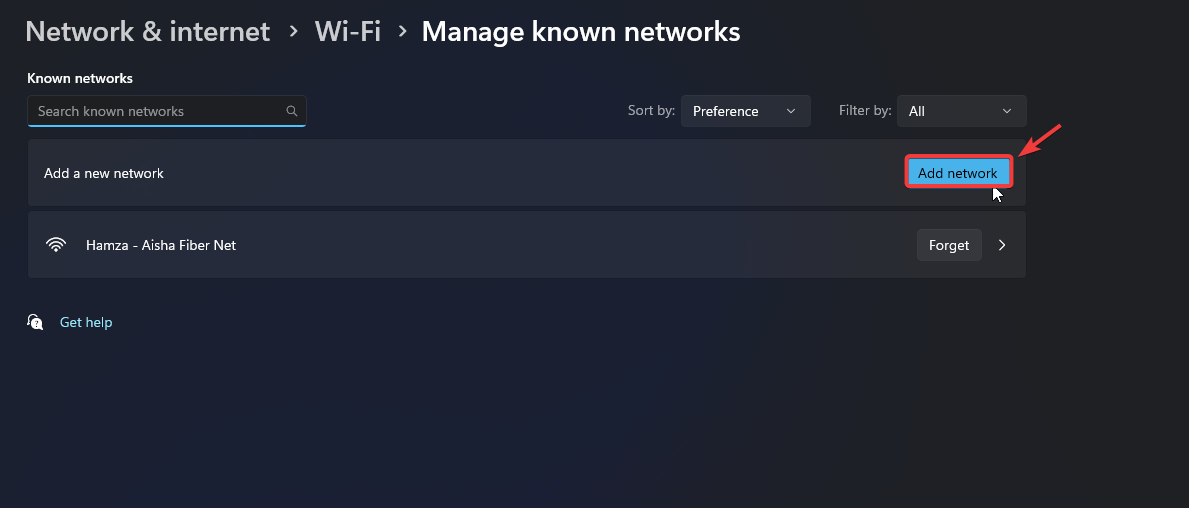
- In the Wi-Fi settings, click Manage known networks, then click Add network to add a new connection.
- Enter the name (SSID) of your network and select the security protocol. If you’re unsure of which security protocol to choose, you’ll need to check your router’s settings to confirm this information.
- To access your router’s settings, press the Win key on your keyboard, type Command Prompt, and hit Enter.

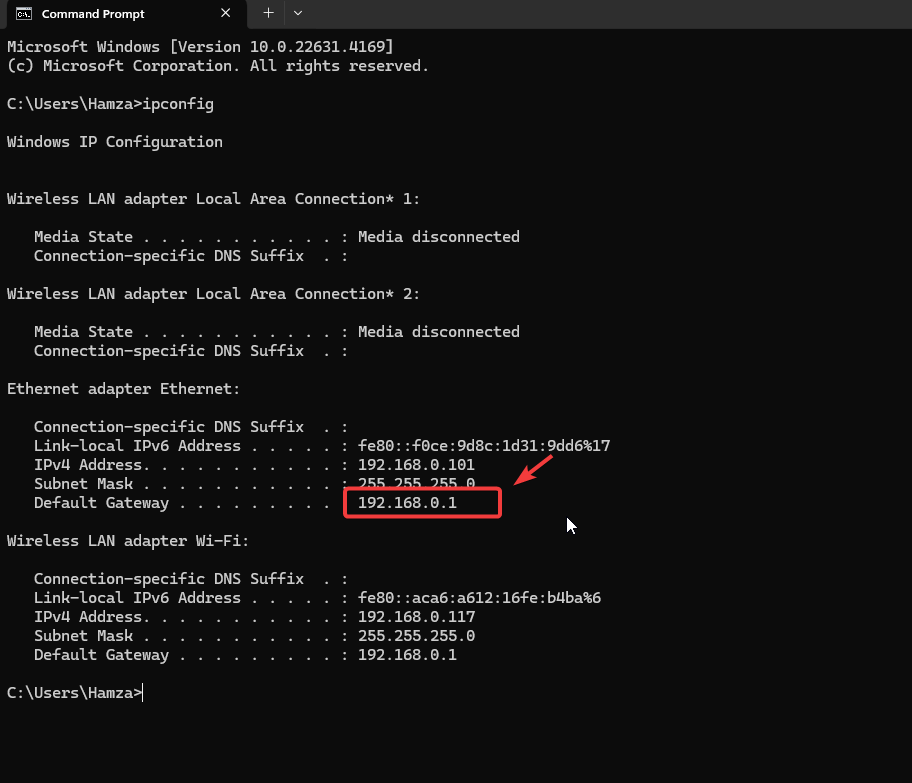
- In the Command Prompt window, type the command ipconfig and press Enter.
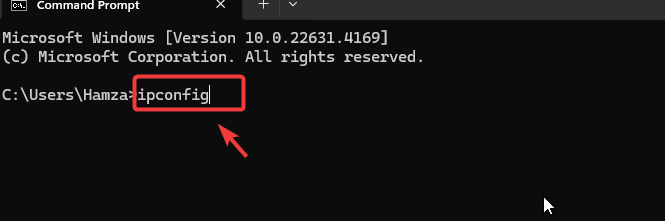
- Look for the “Default Gateway” address (usually a series of numbers like 192.168.x.x) and copy it. Open your web browser, paste this address into the URL bar, and hit Enter. This will open your router’s control panel.
- Enter your router’s login credentials. If you don’t know them, you can ask your ISP (Internet Service Provider) for assistance.
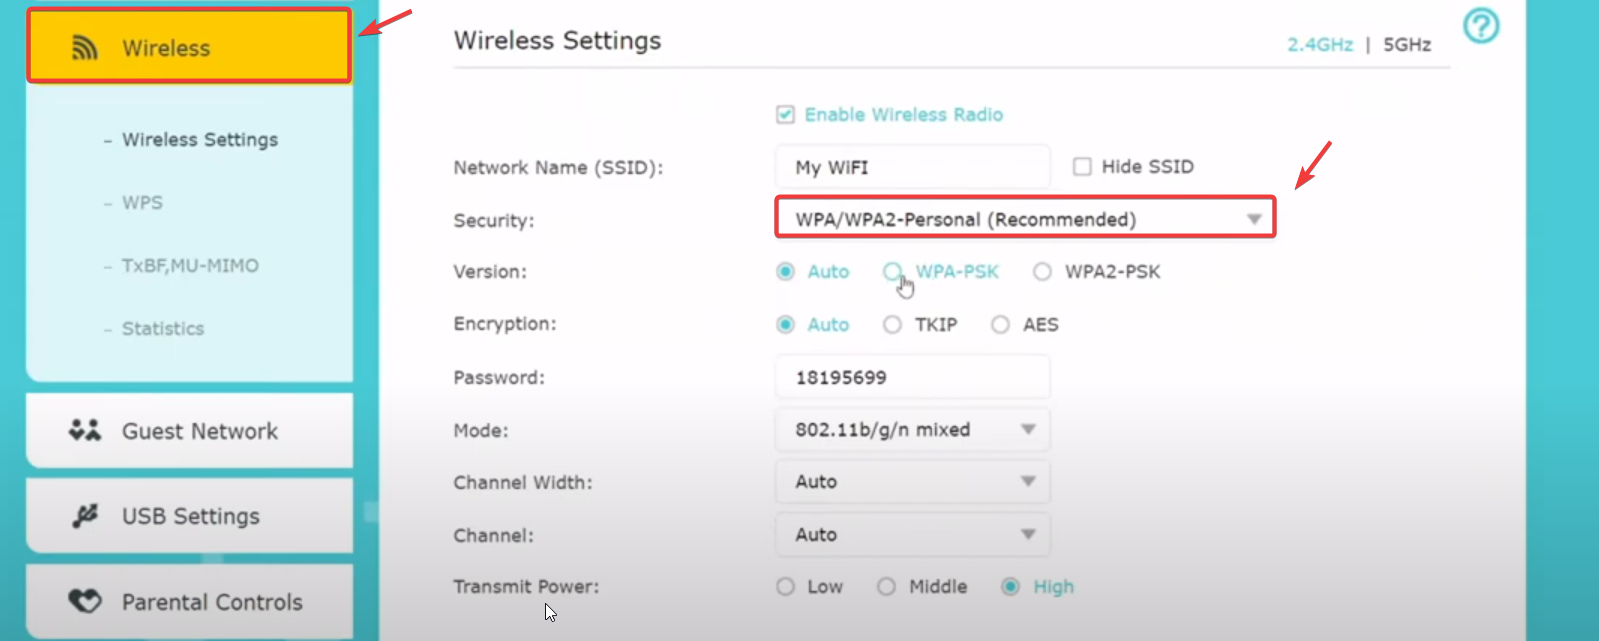
- Once logged in, look for an option related to Wireless Security settings. Select it and check what type of security your network is using (e.g., WPA2, WPA3).
- Go back to the “Add network” section on your computer, enter the correct security protocol, and type in your Wi-Fi password. Then, click Save.

If the problem persists, you can try resetting the network settings on your Windows device by following the steps in the linked article. However, since you have already reinstalled the network adapter, this might not resolve the issue. If resetting the network settings doesn’t work, you may need to reset your router’s settings. To do this, contact your ISP, describe the issue, and let them assist you in resolving it.


Check if you have Cisco AnyConnect, or a similar network management tool. They take precedence so windows changes don’t apply, and windows messages are misleading.