Fix: HDMI No Signal
As time proceeds, more and more companies embrace the concept of HDMI connection. What isn’t to like? It gets plugged in easily and transmits both video and sound with the capability to support huge resolutions. It has versatility and has more or less become the main medium for connection between electronic devices.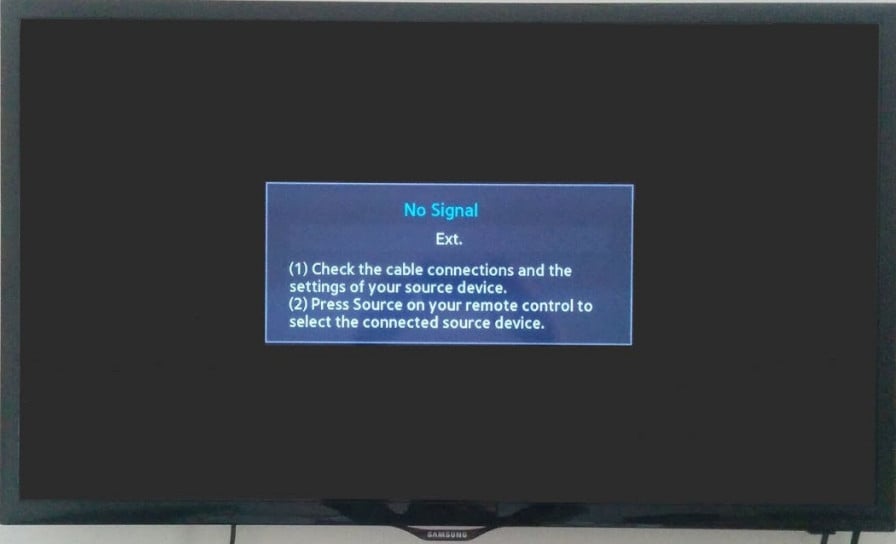
With more electronics embracing this concept, users are sure to run into problems where they are not able to connect with the Monitor, TV etc. and face the message “No signal” on their screens. Do not worry, you can fire up the connection between your electronics in no time at all. In most cases, the problem is only with the configuration of either the software settings or the port settings.
Solution 1: Checking Input Source
Before we move on to checking your cables and the system settings, it is advised that you check the input source on your monitor or TV. Display electronics do not have a single input source. They have the compatibility to be used by various different inputs such as VGA, HDMI, Display Port etc.
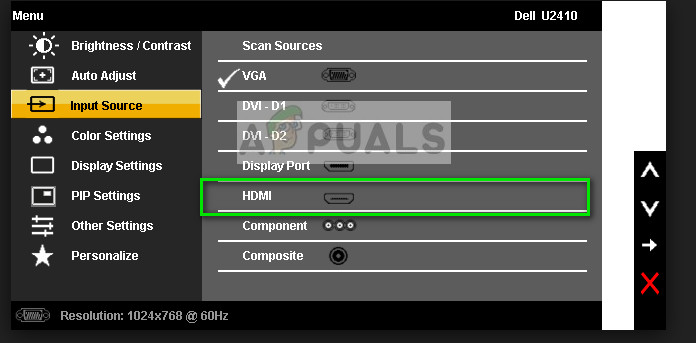
Make sure you have plugged in the cable correctly in the correct ports and change the input source of your monitor/TV from VGA to HDMI. Implement all the changes and exit the settings. If this was successful, you will be able to see the change instantly.
Note: Many TV’s and monitors have this input source button hidden away to the sides. Either look in the user manual, check physically or look up your model on the internet to determine where are these buttons located. You may also have an input switching button on your remote if you are using a TV.
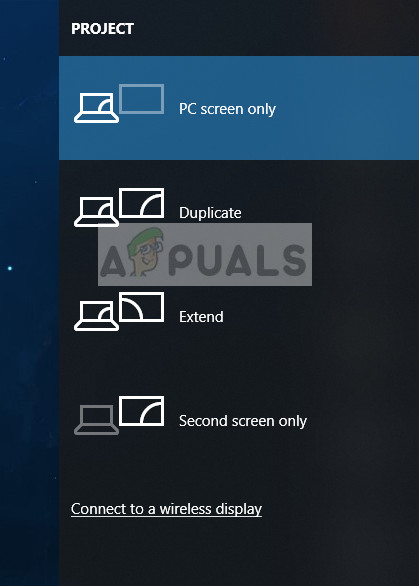
Solution 2: Checking Connections and Projections
If the correct input source is selected, we can check if the connections are plugged inside the correct port on both your output device and your input device. Furthermore, you should also check if the correct projections are set on your computer.
- Press Windows + P and select the correct projection which you are trying to obtain. You can choose Duplicate or Extend to use your second screen properly.
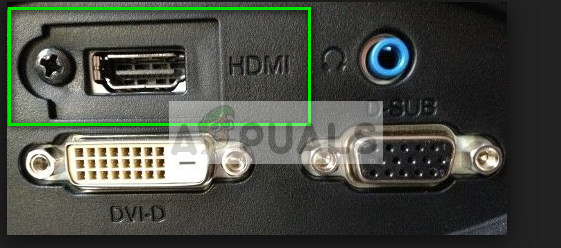
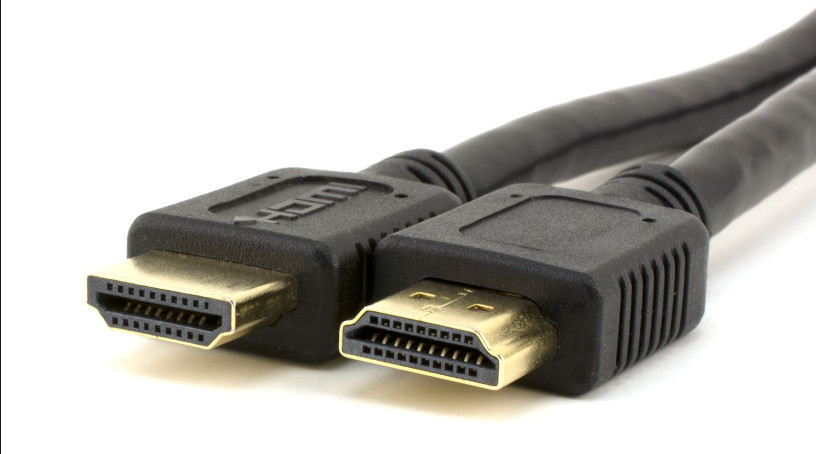
- Now check if the correct wire is plugged inside the correct HDMI port. As you can see in the image, the HDMI port is similar to the USB connection. Make sure that the wires are properly inserted in both the modules in the correct ports and that solution 1 is valid.
Solution 3: Power Cycling the Monitor/TV
Power cycling is an act of turning off an electronic completely off and then on again. Reasons for power cycling include having an electronic device reinitialize its set of configurations parameters or recover from an unresponsive state or module. It is also used to reset all the network configurations or other system configurations as they are all lost when you turn the electronic completely off.
- Disconnect all HDMI sources from the inputs.
- Now unplug the Monitor/TV from its main power supply and wait for at least 10 minutes.
- Now plug the Monitor/TV back in and connect all the HDMI cables once at a time.
- Turn on the input device (can be PS4, Xbox, Computer, Laptop etc.).
- Now repeat steps 3-4 for each HDMI device and check if the input is correctly being received.
Note: You can also try the following routine if normal power cycling doesn’t work:
- Power on the monitor/TV and the Blu-ray player (or any device which is being used by you).
- Make sure all the modules are on and the TV/monitor is set to receive the signals via the HDMI source.
- Rip both devices from power or switch off the power plug. We are trying to turn them off at the same time.
- Turn your power back on and magic will happen (if you are lucky).
You can also try removing the power cord, holding the power button for 2 minutes, connecting the power cord and turning everything back on.
Solution 4: Checking Hardware
If all the above steps don’t seem to work, it is the right time to check your hardware. It is possible that the HDMI cable you are using isn’t functional or it is damaged. Furthermore, it is also possible that the monitor/TV you are using isn’t functional or vice versa. We need perform some check before we move on with the other solutions.
- Replace your HDMI cable. Before buying a new one, try plugging the old one in another system and see if it works. If it doesn’t work, it probably means the cable is damaged. Replace the cable and try again.
- Try a different input source to the monitor or TV. If you are using a laptop as an input source, try making the connection with another laptop and see if this makes any difference. If the signal is detected from the other laptop, it means there are either some misconfigurations in your laptop or the HDMI port is not working.
- You can also try isolating the problem and see if the monitor/TV is working properly with other inputs.
- If you are using an HDMI to VGA converter, this can be bad news. In order to confirm that the HDMI module on both your input and output are working properly, use a pure HDMI cable and check.
Solution 5: Updating/rolling back drivers
This solution is specific for inputs which are being provided by a computer or laptops (not Xbox or PS4 etc.). If you are having this problem after updating your graphics drivers, you can try rolling them back to a previous version. Also, on the other hand, you can try updating them to the latest build.
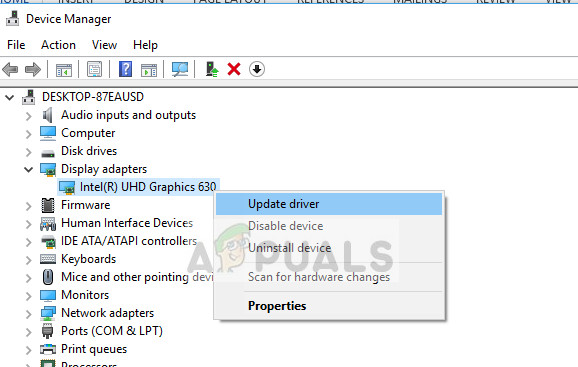
- Press Windows + R, type “devmgmt.msc” in the dialogue box and press Enter.
- Once in the device manager, expand display adapters and click “Update driver”.
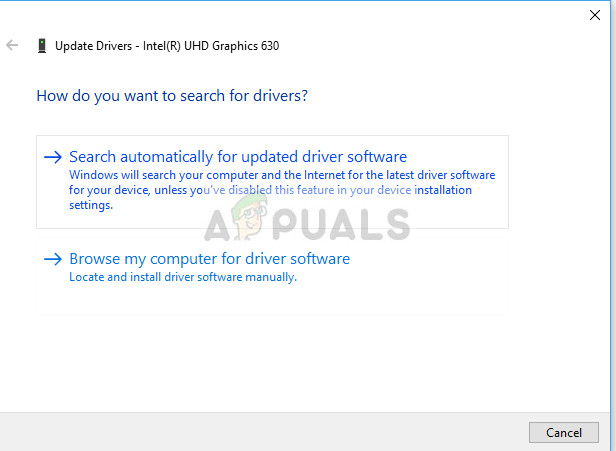
- Now you have two options; either you can automatically choose to update or first, download from the manufacturer and then select the driver file manually using the second method. If you are rolling back drivers, download the older version and select the second option to browse to the driver which you just downloaded.
- Restart your computer after making the necessary changes and check if the problem got solved.
In addition to these solutions, you can also try:
- Factory resetting your TV/monitor.
- Checking the PSU of your computer. Sometimes everything is working as expected but because of low power input to the graphics card, this phenomenon can occur.
- Check if your GPU is properly connected to your computer.


