How to Fix FaceTime Not Working on iOS 11
If you ever deal with FaceTime not available or FaceTime not working, check this article and learn what can you do to fix the problem.

FaceTime Explained
If you are not familiar, FaceTime is an Apple service that allows you to call anybody who has an Apple iDevice or Mac and lets you video-chat with each other for free, using your internet connection. Handy does it?
With that out of the way, take a look at some methods that my family and I do when FaceTime is not working correctly.
Facetime New Features on iOS 11
With the latest iOS version, FaceTime brings Live Photos to its portfolio. What it means is that now you can take Live Photos during FaceTime video chats. It may not sound stunning if you are not a hardcore FaceTime user. But, many iFolks wanted this, and finally, they have it. However, the feature works only on iPhones and iDevices capable of taking Live Photos. So, at least for now it is not available for Mac-FaceTime users.
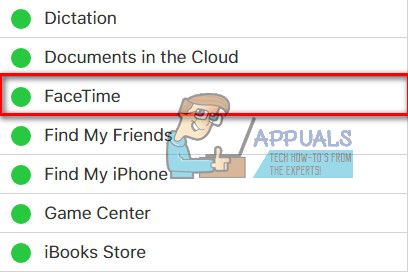
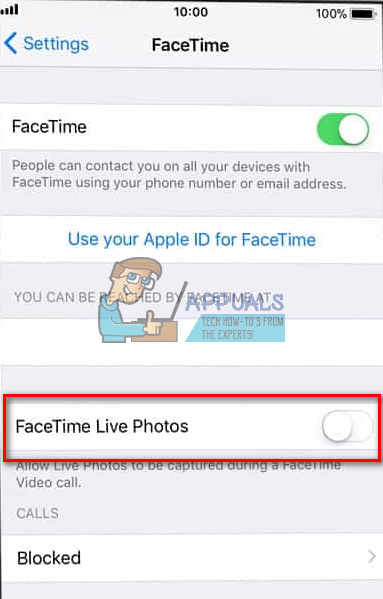
Another thing worth mentioning here is that FaceTime allows you to disable the Live Photos feature. So, if you would rather not have someone take Live Photos of you, there is a way to turn it off. Here is how.
- Go to Settings and tap on Facetime.
- Now, toggle OFF FaceTime Live Photos.
After you turn it off, no one would be able to capture you during FaceTime video calls.
And, for the folks who don’t know yet, FaceTime is still an Apple exclusive service. There is no Android version of it. Many users thought that this year is the Android-FaceTime-Year. But, nope. No FaceTime or iMessage out of the iOS ecosystem yet.
Facetime Not Working – Apple’s Servers Are Down
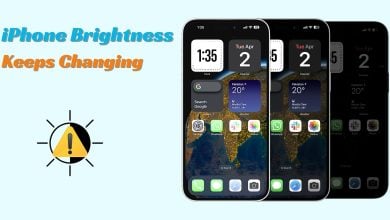
FaceTime is a service that needs Apple Servers to work properly. Before trying to perform any troubleshooting methods, check out Apple’s System Status Page and check if FaceTime is currently down or experiencing some problems. When everything is OK, you will see a large green dot next to FaceTime. If there is something else, like an exclamation point or yellow caution sign, there is a server problem. If there is an issue, Apple provides links and information such as approximate time problem first occurred, current status, the percentage of users impacted, etc. However, the messages are easy-understandable. So, always fist check Apple System Status Page.
Sometimes It May Be Your Fault
FaceTime (like most social apps) works when you have an active internet connection only (Wi-Fi or Celular data). Additionally, the signal must be strong enough to deliver audio and video. So if experiencing FaceTime problems while you are connected via Wi-Fi, try another cellular or Wi-Fi network. Just remember that you may be charged with extra fees when using mobile data.
Apple’s Rule of Thumb: Update!
The number one troubleshooting method when we talk about Apple’s services is ensuring that your operating system is up to date.
For iDevice users that would be checking their iOS version. To do that, go to Settings, tap on General, and open the Software Update section. Now, check if an update is available for your device. If so, click the download button and install it when the download finishes. Just make sure you backup before doing the update. Now, you can backup your iDevice even without using your computer or Wi-Fi – How to Backup an iPhone Without Wi-Fi or a Computer.
If you are a Mac-FaceTime user, make sure your macOS or OS X is up to date. To check for update, open your Mac App Store and click on the Update tab.
Once you have updated your iDevice or Mac, check if FaceTime is working. If not, continue with the following trick.

Check if FaceTime is ON
This may sound really simple, but often FaceTime issues with either the sender or receiver are because of turned off FaceTime toggle.
To check it out on your iDevice, go to Settings, tap on Facetime and make sure that the FaceTime toggle is ON (green). If it isn’t, turn it on and sign in with your Apple credentials. Also, check that your email, Apple ID, and phone number are listed underneath the section “YOU CAN BE REACHED BY FACETIME AT.” If something is missing, add the info.
For Mac users, open FaceTime and turn it on. Now check your FaceTime preferences. If you are not signed into iCloud, you can enter your Apple credentials and start the activation procedure.
If using FaceTime over cellular data, make sure that the Use Cellular Data toggle is on for Facetime. To check that, head on over to Settings, tap on Cellular, and open Use Cellular Data For. Now turn on Facetime if it is off.
Can’t Find the FaceTime App?
For those who can’t find the FaceTime app on their iDevices or Macs, open the App Store and check if you have downloaded it. In case you don’t have it, type “FaceTime in the App Store search bar, and install the very first result by tapping the cloud icon.
If you have already installed FaceTime, but you can’t find it, check that both FaceTime and Camera are not restricted on your device. To do that, go to Settings, tap on General, and open the Restrictions section. Now allow the restrictions for FaceTime and Camera or disable Restrictions completely.
Use One Apple ID for All Your Devices
If you have more devices on which you use FaceTime, make sure that you use the same Apple ID on all of them.
Check Your FaceTime Account on iDevices
Go to Settings, tap on Facetime and verify your Apple ID.
Check Your FaceTime Account on Mac
Open Facetime, click on Preferences. Check your Apple ID. Also, make sure you have enabled the checkbox next to “Enable this account.”
If any of your computers or iDevices do not match, sign out. Now, sign in again using the same Apple ID for all your computers and iDevices.

Sign Out and Sign In Again
Often, a simple signing out and back in can fix your troubles. Performing this simple action forces Apple FaceTime Servers to refresh your account authentication.
If you are using FaceTime on an iDevice
- Open Settings, tap on FaceTime, and turn OFF the toggle.
- Now, wait for at least 30 seconds, and turn the toggle back ON.

If you are using FaceTime on a Mac
- Open FaceTime’s top menu.
- Tap on Turn FaceTime Off and wait for at least 30 seconds.
- Now, repeat the procedure and click on the same button which now says Turn FaceTime On.
Are You Stuck on Activation?
If you are seeing the spinning circle “Waiting on Activation,” it means that your device is trying to activate your FaceTime account to Apple’s servers. However, if the message stays longer on your screen (a couple of minutes, or hours), you are probably stuck on FaceTime Activation.

How to Fix Stuck On Activation Problem
- First, try toggling off both FaceTime and Messages. Then, wait for at least 30 seconds, and toggle both back On.
- Got to Settings, tap on FaceTime and turn off the toggle. Do the same thing with Messages (Messages > iMessage > Toggle Off).
- After 30 seconds, turn both toggles ON.
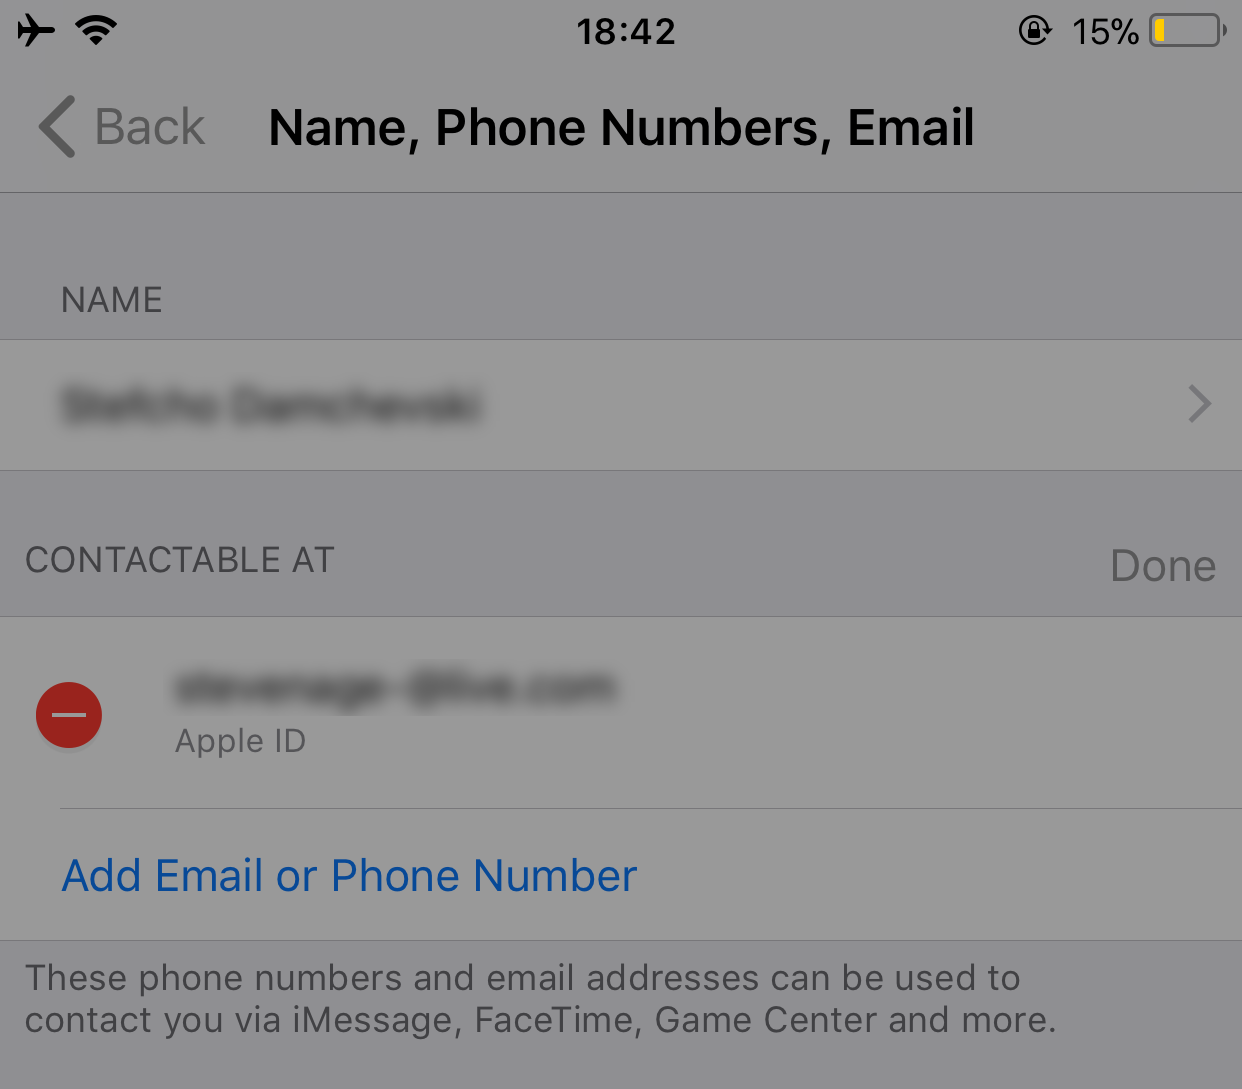
- Check if your Apple ID lists your iPhone’s phone number (and not a landline number).
- Go to Settings and tap on your Apple ID Profile.
- Now tap on Name, Phone Numbers, Email and click on Edit in the REACHABLE AT (CONTACTABLE AT) Section.
- Make sure you have your phone number and email connected
- If something is missing, click Add Email or Phone Number and type your info.
- Once you are done, toggle FaceTime off and then turn it back ON.
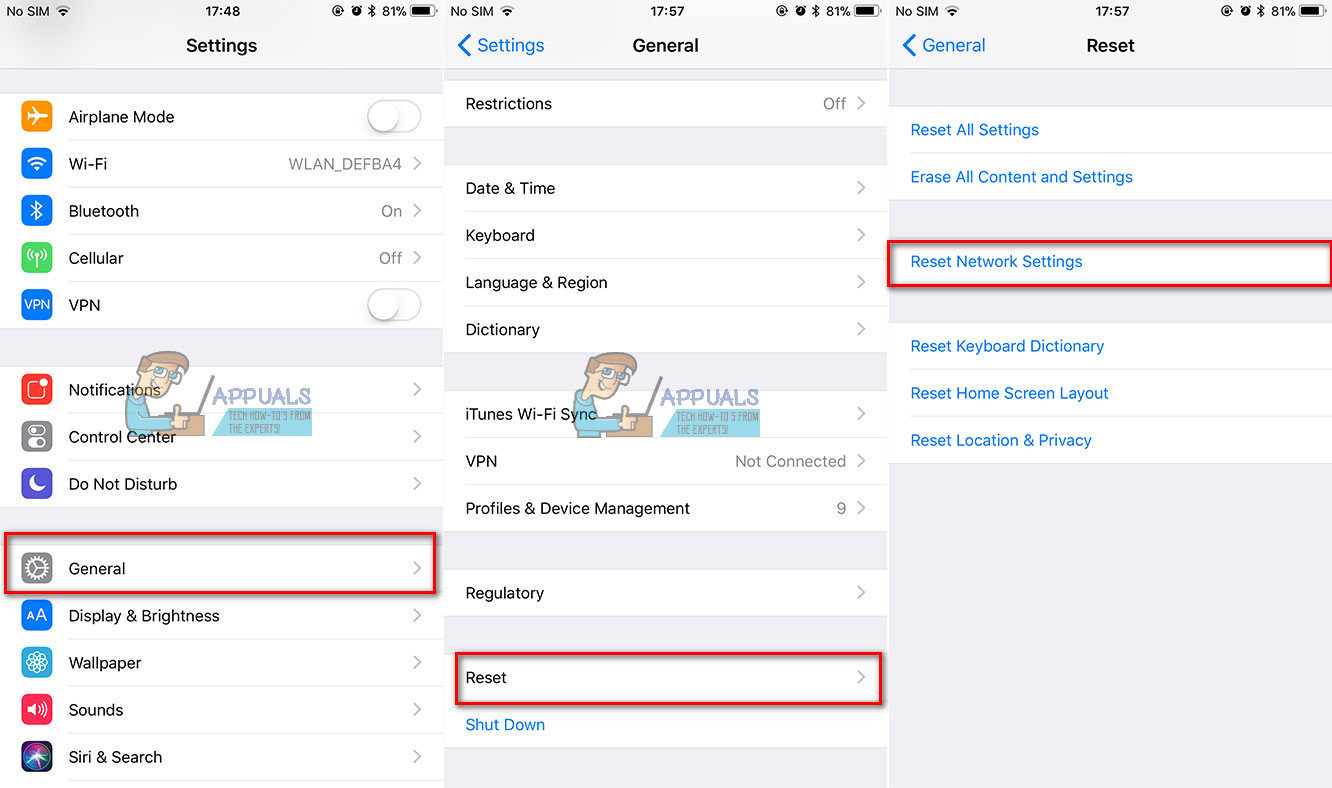
- Reset All Settings
Note: This Procedure removes all your personalized iPhone settings and Wi-Fi passwords.
- Head on over to Settings, tap on General, and then choose Reset.
- Now, tap on Reset All Settings.
Live Photos Not Working on Facetime?
First, you should know that both the caller and receiver, must use iOS 11 or macOS High Sierra to capture Live Photos in FaceTime. If you are unable to make Live Photos, the odds are that the person you are calling is not using iOS 11 or High Sierra. Make sure you check which operating system version you use before doing any further troubleshooting.
Another thing worth mentioning here is that FaceTime Live Photos requires that you open the Photos app at least once before taking FaceTime Live Photos. To make sure this does not stop you from using Live Photos, open your Photos app. And, if you are interested why it works like that, here you can find the reason. Your Live Photos require the Photos app to have a default storage set before it can take and save any pictures.
If you read the above parts of this article, you know that FaceTime Live Pictures can only work when the person on the other end of the video-chat has enabled their iDevice’s FaceTime Live Photos. If you haven’t enabled already, here is how to do that.
iOS Users
- Go to Settings, tap on Facetime, turn on the toggle iDevice’s FaceTime Live Photos.
Mac Users
- Open FaceTime, and go to Facetime, then Click on Preferences and tick the checkbox “Allow Live Photos to be captured during Video calls.”
Without having enabled FaceTime Live Photos on both the devices, Live Photos in FaceTime won’t work. So, tell your friends and family members who use iDevices to toggle this feature on. Also, make sure you have it enabled on your iDevice. Then do a test. When it works, both you and your video partner, will get a notification that Live Photo was taken. All the Live Photos taken save directly into your Photos library. I hope, these tips solved any issues using FaceTime’s Live Photo.
Can’t FaceTime Certain Contact, Am I Blocked?
If you can’t use FaceTime to video call only a few folks and FaceTime not working only for certain contact, then you might be blocked, or blocking the other person.
- To check, go to Settings, tap on FaceTime, then open Call Blocking & Identification, and tap on Blocked Contacts.
- Check if there is listed any of the contacts you can’t call with FaceTime.
- Remove the contacts you want to FaceTime from the Blocked list.
- Ask the person you FaceTime problems with, to do the same and check if the service works.
Also, do not forget that FaceTime can’t be used on Android and Windows devices. It is an iOS-only service.

Try iMessaging Before Starting FaceTime
Before using FaceTime with your friends or family, try using iMessage. Just, ask your video-call partner to send you an iMessage before starting the video-call. This may sound too simple to be true, but it jump starts Apple Servers, your iDevice, and your router. And that usually helps.

Check The Date and Time on Your Device
One of the most common reasons why FaceTime experiences issues is because Apple’s FaceTime Servers cannot verify the correct date and time. If Apple Servers detect a mismatch between their server’s date and time and your device’s date and time (in your area), FaceTime, as well as some other services, will not work properly. So, make sure that the time on your iDevices and Macs is adjusted correctly. It is a starting point for many Apple’s services.
How to Set the Date and Time
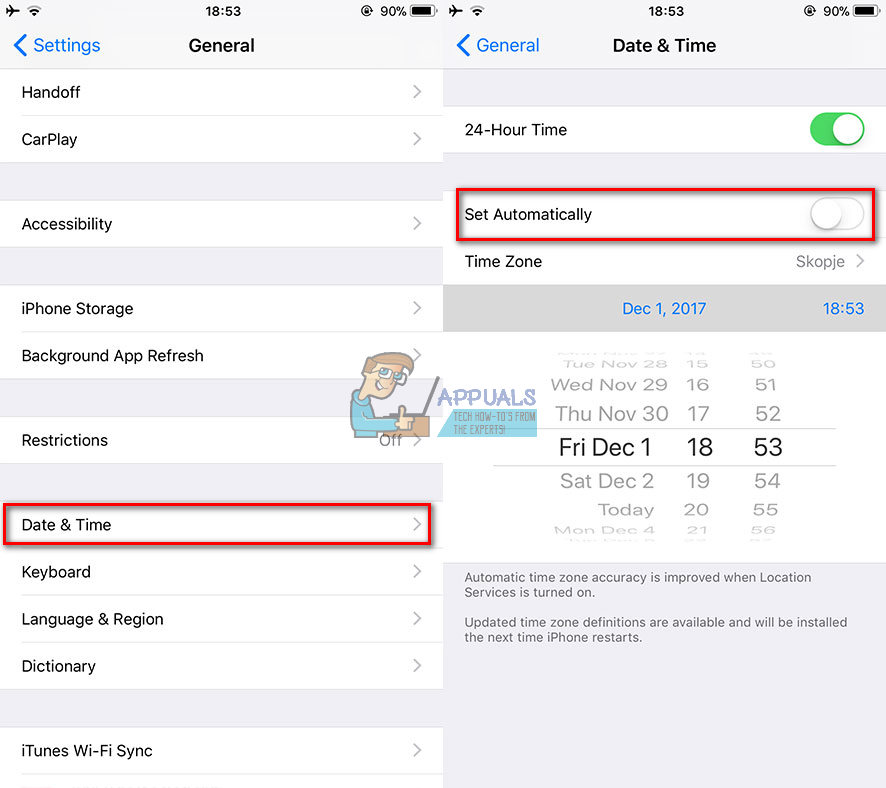
- If you use an iDevice, it is the best to let Apple do the heavy lifting here. Go to Settings, tap on General, select Date & Time, and turn on Set Automatically. This feature automatically sets the date and time based on your current time zone.
- To check if your device shows the proper time zone, open Settings, tap on General, then open Date & Time and select Time Zone.
- For Macs, click on Apple logo on the menu bar. Go to System Preferences, open the Date & Time section and click on Set date and time automatically.
- You can check your Mac’s time zone in the same window. Just, select the Time Zone
If after adjusting the date & time settings to automatic, you sill has an incorrect time zone, date, or time, then you can set these manually. Once you verify that your Date and Time are correct, try Facetime again.
Can Apple’s FaceTime Servers Store My Info?
If you are afraid of the fact that FaceTime uses Apple Servers to transfer your data, instead of direct transfer, rest assured. Your information is protected by highly sophisticated end-to-end encryption across all your Apple devices. Even apple has no way to decrypt your FaceTime data when it transfers between your iDevice or Mac and your video-partner device. This means that Apple is not able to look at any of your communications. Also, FaceTime calls are not saved on any servers.
Try Restarting Your Device
Sometimes a simple restart may be the cure for many FaceTime issues. This means for both iDevices and Macs.
So to restart your Mac, go to Apple Menu and click on Restart. You can also choose Shut Down and then manually turn on the device.
To restart your iDevice, press the sleep/wake button until the slide appear. Then slide to power off. Now, hold the sleep/wake button again to power up your iDevice as usual.
Force Restart Your iDevice
Another thing that may save your day is the Force Restart procedure. However, different iDevices have different methods for performing the Forced Restart procedure. Check the Forced Restart section in the following article to find the appropriate process for your iDevice model Fix: iPhone’s Dead ‘Won’t Turn On’.
Update DNS Settings
If still experiencing FaceTime problems, try changing your DNS settings to Google’s open DNS.
For iDevices
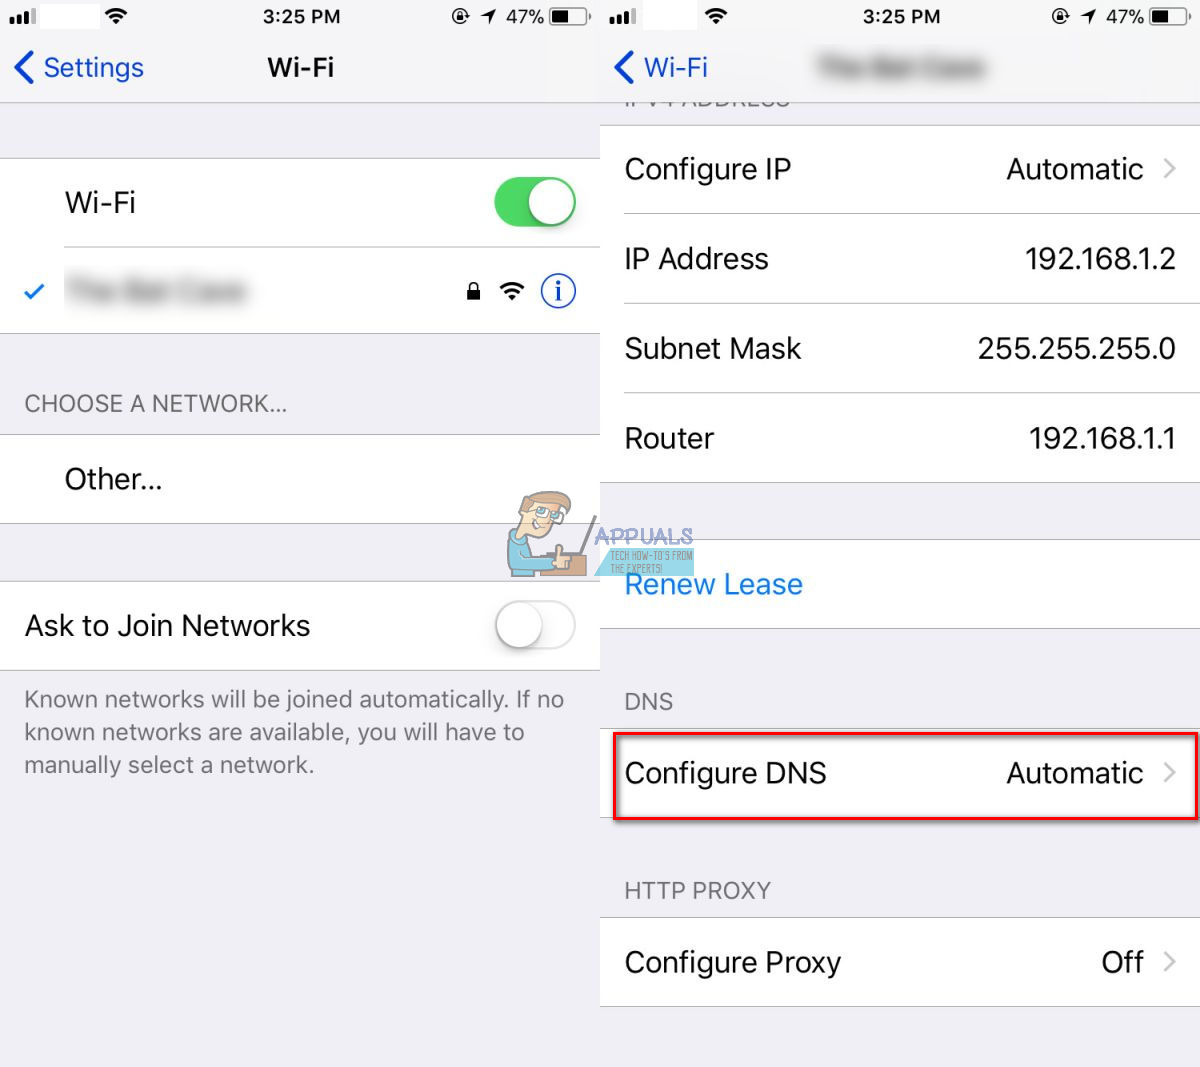
- Go to Settings, tap on Wi–Fi, select your network, and tap on Configure DNS.
- Now, choose manual, tap on Add Server, enter 8.8.8 and 8.8.4.4, and press Save.
- Make sure you delete your old DNS by tapping on the red minus and choosing Delete.
For Macs
- Click on System Preferences, choose Network, and select your network.
- Now, click on Advanced, tap on the DNS Tab, click on the “+” button to add Google DNS.
- Type 8.8.8 and 8.8.8.4 then click OK and Apply.
If you don’t like to use Google’s Puglic DNS, you can ansl try OpenDNS. To do that, follow the instructions from above and type 208.67.222.222 and 208.67.220.220 in the DNS tab.
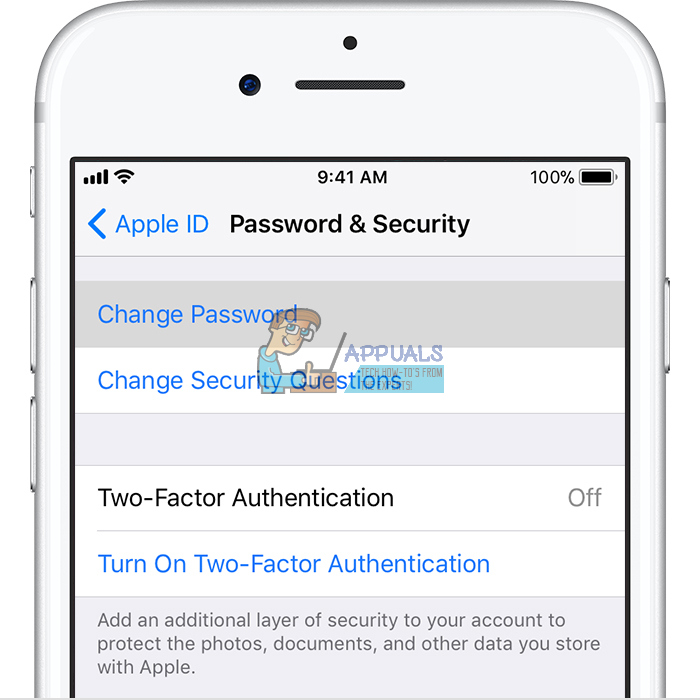
Try Changing Your Apple ID Password
This trick was discovered by our readers! After performing a bunch of different methods from toggling FaceTime On and Off to restoring their network, the last thing before calling Apple Support, they changed their Apple ID password. Surprisingly, it worked. So, if you get to this point without any success from the previous tips, give this idea a shot and change your Apple ID password. Just don’t forget to update all your Apple devices and services with the new password.
FaceTime Not Ringing
If you often miss FaceTime calls on your iDevices, but you have never heard the FaceTime ringtone, check if the following feature is enabled in your Mail settings.
Go to Settings, tap on Accounts & Passwords and make sure that Fetch New Data is set to Push. If it isn’t, change it. Apple’s servers require a recent internet address for the location service of your iDevice to work.
Also, check if your sound is up, mute switch is off, and DND (do not disturb) is disabled. If you want to enable DND, check that you allow calls from FaceTime.
Open the Settings app, tap on Do Not Disturb, select Phone, tap on Allow Calls From, and select Everyone or All Contacts.
Make sure you allow your notifications. Go to Settings, tap on Notifications, choose Facetime, and click on Allow Notifications.

FaceTime Cannot Connect or is Continually Trying to Connect
If you get the message “Connecting” or you cannot connect to FaceTime, try reactivating your account.
For iDevices
- Go to Settings, tap on Facetime and toggle the switch Off.
- Now, wait for a couple of moments and toggle it back On. If the message “waiting for activation appears,” enter your Apple ID and password.
If this does not work, try resetting your Wi-Fi network.
Note: This procedure resets all your network settings to a factory state. You will need to enter your Wi-Fi passwords again, after the reset.
- Open the Settings app, tap on General and choose Reset.
- Now tap on Reset Network Settings.
For Macs
- Open FaceTime and click on Preferences.
- Now, turn FaceTime Off, wait for approximately 30 seconds and turn FaceTime On
Are you still having problems?
- Go back to Preferences and click on Settings.
- Now, sign out of your Apple ID, wait a few moments and sign back in with your Apple ID
FaceTime Can’t Recognize Your Phone Number?
Some iOS users reported this issue. Whenever they open FaceTime, their iPhone shows the email but not the phone number. If you are suffering from the same problem here is what you should do.
Make sure you test FaceTime after performing each of the tips.
- Go to Contacts, change your phone number from Home to Phone. Now, turn off the FaceTime service and turn it back on.
- Go to Settings, tap on General Settings, choose Reset, and tap on Reset All Settings. (You won’t lose any data while doing this method. However, you will lose all of your saved Wi-Fi passwords and personal setting preferences.)
- Set the correct area code on your Apple ID account.
- Make sure you don’t have any outstanding debts on iTunes, App Store or any other Apple services/products.
- Reinsert your SIM Card (remove it, wait for a couple of minutes and insert it again).
- Log out of all Apple services that use your Apple ID and password.
- Perform a Force Restart (check this Force Restart section in the following article for detailed info about your device Fix: iPhone’s Dead ‘Won’t Turn On’).
- Log into FaceTime using your Apple ID.
- Log out of all Apple services that use your Apple ID and reset the network settings (this process will delete all your Wi-Fi passwords).
- Go to Settings, tap on General and choose Reset.
- Tap on Reset Network Settings and type your passcode if required.
- After the process finishes, log into your network.
- Log into FaceTime.
- Try inserting another SIM card in and check if FaceTime recognizes the phone number and the email address. If it works with the new SIM card, you will need to contact your mobile provider and replace your SIM card.
For Macs Users Only
You can use FaceTime on most networks, even on the ones behind a firewall. However, you might need to enable particular ports. If using a firewall on your Mac, make sure you enable the following ports.
FaceTime Firewall Ports
- 16393 through 16402 (UDP)
- 16384 through 16487 (UDP)
- 3478 through 3497 (UDP)
- 5223 (TCP)
- 80 (TCP)
- 443 (TCP)
Your Terminal to Fix FaceTime Not Working
Launch the Terminal app (Applications > Utilities > Terminal). Now, enter the following: “sudo killall VDCAssistant” (without the quotes) and hit Enter. Type your admin password and press on Enter again. Close the Terminal app and restart your Mac. This method fixes problems with FaceTime as well as problems with your built-in camera.

If You Don’t’ Want to Use Terminal, Try Activity Monitor
- Go to Applications, open the Utilities folder and double-click on Activity Monitor.
- Now, enter VDC in the search bar.
- Find and tap on VDC Assistant
- Click on the X button to quit VDC Assistant.
![]()
Restart Your Mac in Safe Mode
If killing the VDC Assistant didn’t get the job done for you, restart your Mac in Safe Mode.
- Press and Hold the Shift key while you are restarting your Mac.
- Release the Shift key when the login window appears on the screen.
- Safe Mode performs a serious diagnostics checks. Once it is done, with all these processes, restart your Mac normally and see if the problem is solved.

Final Words
I hope one of these methods helped you to fix your issues with FaceTime not working on iOS 11. These are tricks that resulted in fixing the FaceTime problems for many of our readers. If you get to this point and you are still experiencing FaceTime not working problems, feel free to let us know in the comment section below. We would examine your particular situation and give some additional tips. Also, we would like to hear if you have any other suggestions for fixing FaceTime issues on iDevices and Macs.