Fix: Facebook Notifications not Working
When Facebook notifications stop working, the app isn’t alerting users about new activities like messages, friend requests, or tags. This usually happens because of incorrect notification settings in the app or device. Common causes are disabled push notifications, limits on background app refresh, or corrupted app cache.
Sometimes, it might also be an account issue, where notifications work for one account but not another on the same device.
In this article, we will discuss different ways to solve this error.
1. Enable Auto-Sync on Android
When notifications stop, apps may not be syncing data. Enabling Auto-Sync on Android lets apps like Facebook refresh and fetch data for real-time notifications. Without it, notifications can be delayed or missed since the app only updates manually. Auto-Sync keeps the app and server connected for timely updates.
- Go to the home screen and tap on Menu.
- Tap on Settings and scroll down to find Accounts and Sync.
Note: The name of this menu option may differ by manufacturer. You may also find it under “Accounts”.
- Check if your Facebook account is configured for this device. If you see Facebook listed among the accounts, you’re good to go.
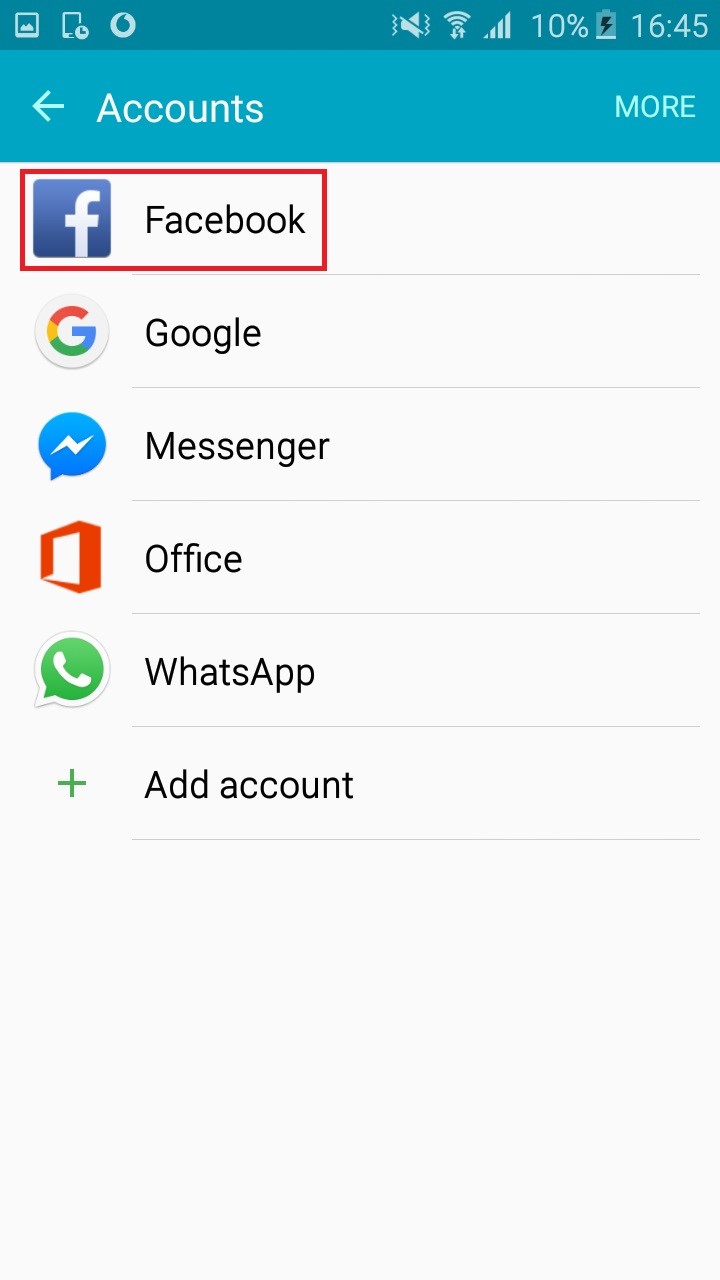
Note: If you don’t see Facebook listed, tap on Add account and enter your Facebook user credentials.
- Tap the three-dot icon in the top right section of the screen (More on some custom versions of Android).
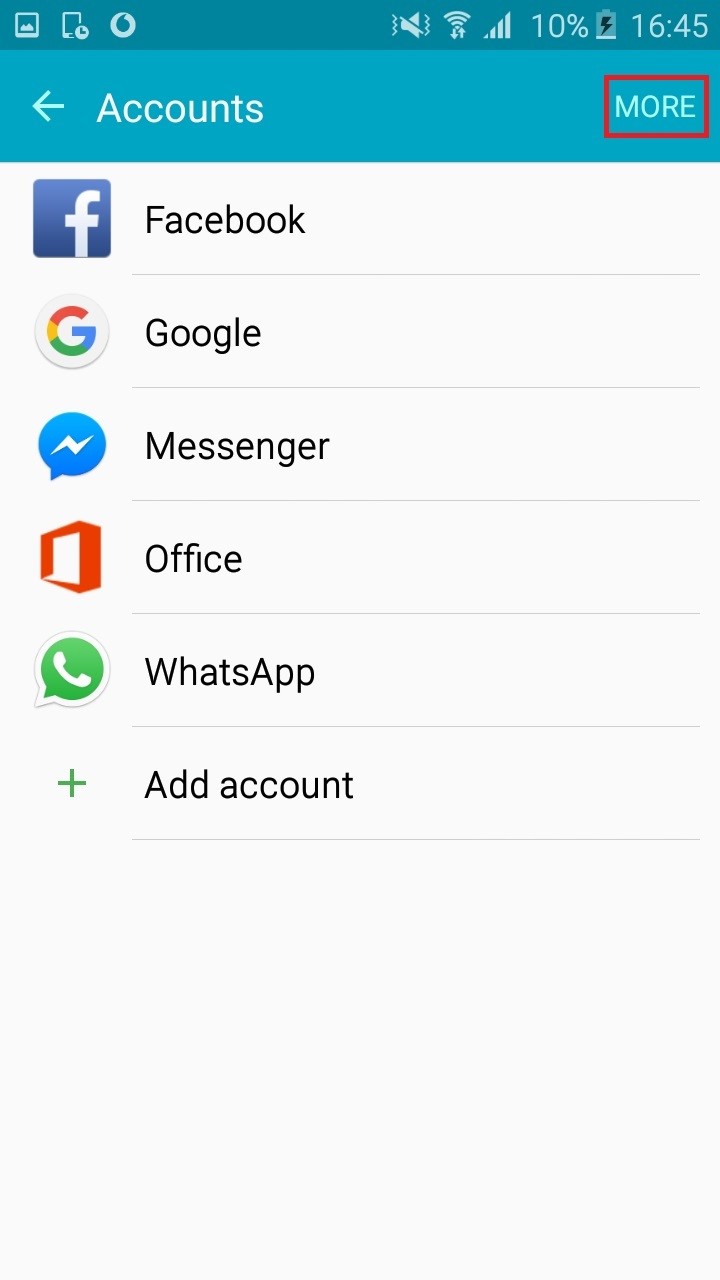
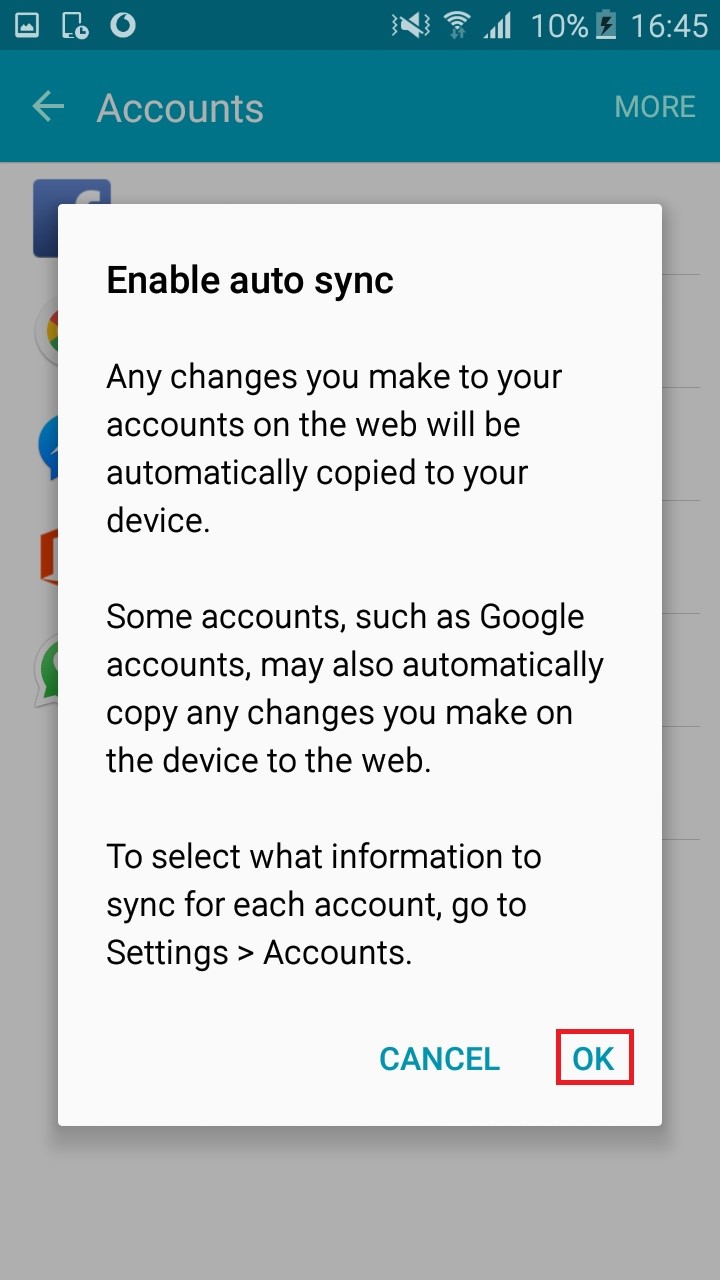
- Check if auto-sync is enabled. If it isn’t, tap on Enable Auto Sync and hit OK to confirm your selection.
That’s it. Wait for a new notification to come in to see if they are working properly.
2. Enabling Push Notifications on iPhone, iPad, and iPod
If you’re not getting Facebook notifications, turn on push notifications on your iPhone or iPad. This keeps your device connected to the app’s server, sending real-time alerts even if the app is closed.
- Go to Menu > Settings and scroll down to find the list of installed apps.
- Tap on Facebook and select Push Notifications.
- Toggle the slider next to Messages to turn it ON.
- Repeat this for other notifications you want, such as Friend Requests, Comments, or Wall Posts.
Now, check to see if notifications are appearing properly on your iOS device.
3. Fix Facebook Notifications on Huawei’s EMUI
To get Facebook notifications on Huawei devices with EMUI, allow Facebook to run in the background and disable battery optimization for it. This prevents EMUI from blocking updates.
- Go to Settings > Advanced Settings > Battery Manager > Protected Apps, find Facebook and Facebook Messenger, and add them to the protected list. This ensures that background data for these apps isn’t restricted.
- Go to Settings > Apps > Advanced and tap Ignore Battery Optimizations. Add Facebook and Facebook Messenger.
Note: “Ignoring” an app lets it run without any battery restrictions.
- Go to Settings > Notification Panel & Status Bar > Notification Center, find the Facebook app, and enable Allow Notifications and Priority Display. Do the same for the Messenger App.
Facebook notifications should now be working on your Huawei device.
4. Fix Android Notifications from the Desktop Version of Facebook
Managing notifications on Android through Facebook’s desktop version syncs app behavior with account settings. This can fix missing notifications by setting them correctly across platforms. Desktop adjustments override local app issues causing notifications to be blocked or delayed, resolving account-specific problems on all devices.
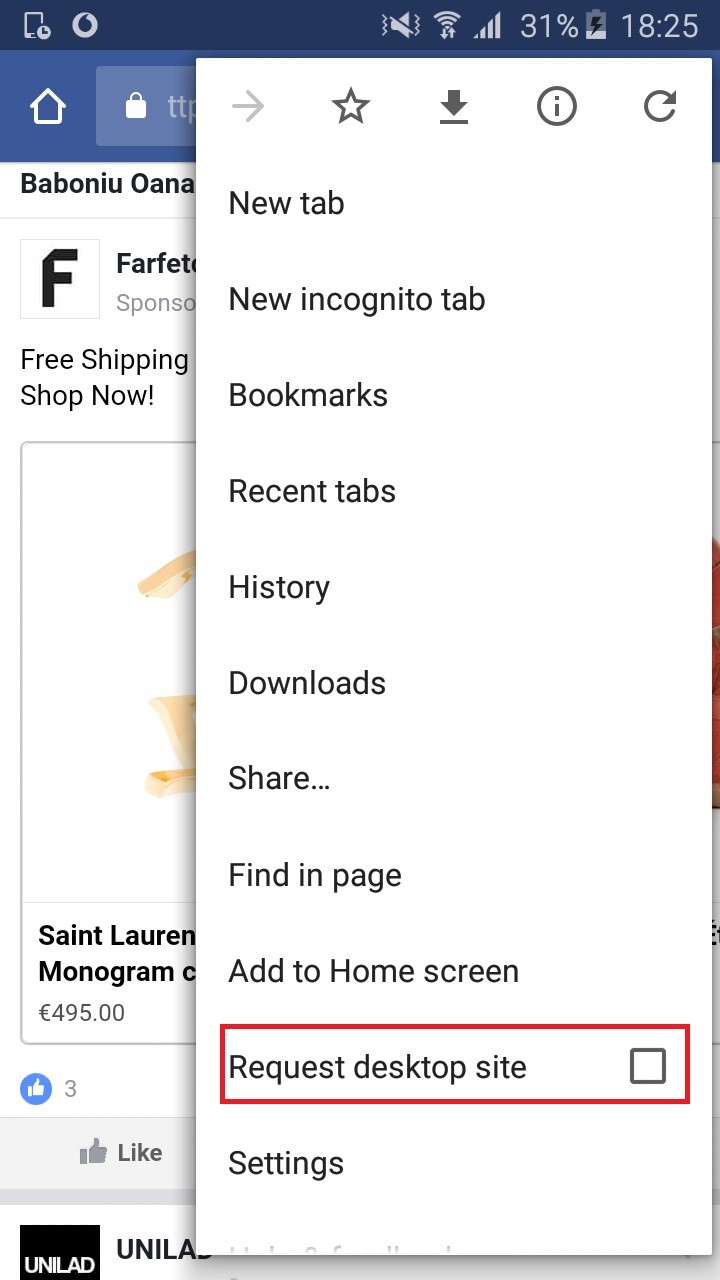
- Log in to your Facebook account from a PC or use Chrome on Android and enable Request Desktop Site.
Note: Enter Facebook’s address in the address bar, tap the action button, and enable Request Desktop Site.
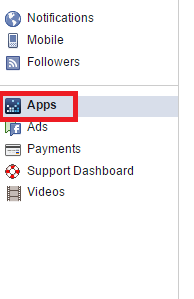
- Go to Settings and click on Apps.
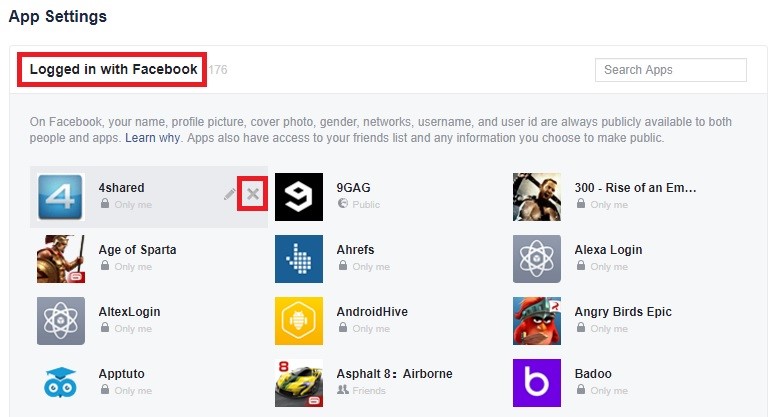
- Remove all accounts under Logged in with Facebook. This will not close any accounts or remove any purchases.
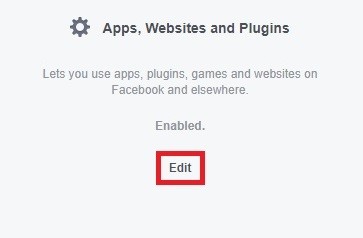
- Click Edit under Apps, Websites and Pages, then select Disable Platform.
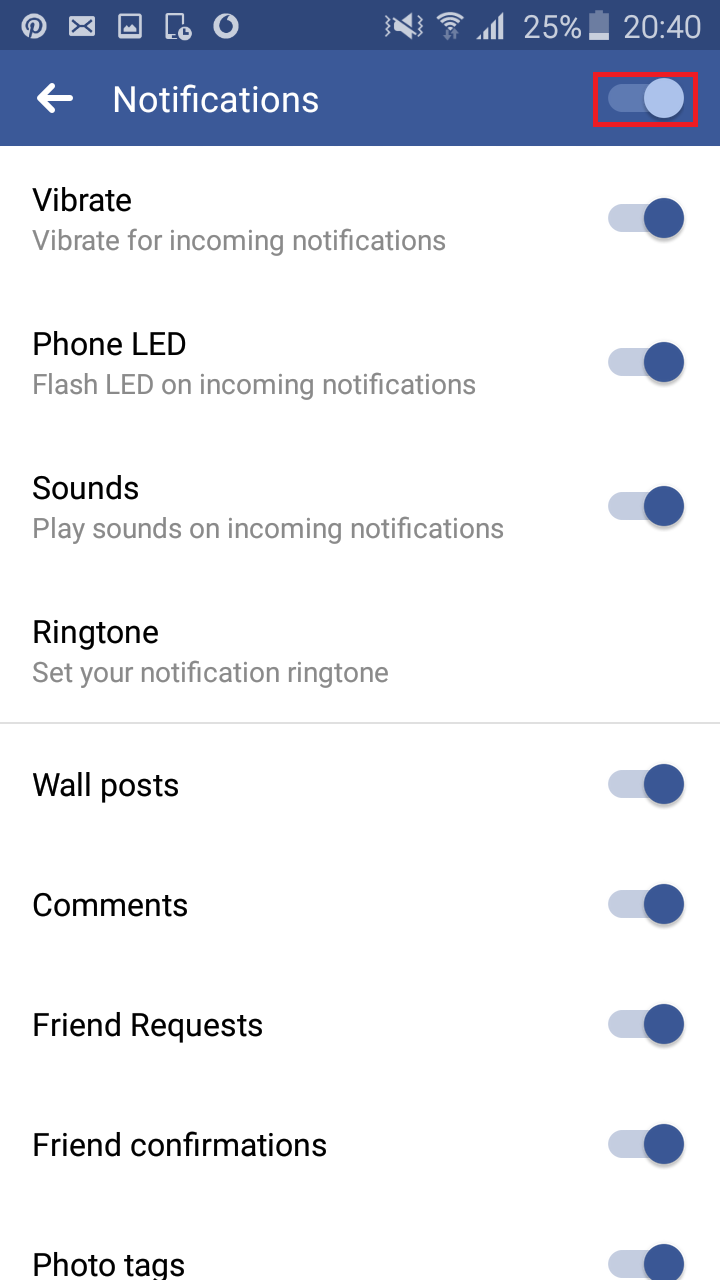
- On your phone, open the Facebook app, expand the action bar in the top-right corner, tap on Notifications, and toggle it OFF and ON.
That’s it. Wait for a notification to come in and see if it shows. Don’t forget to re-enable Apps, Websites, and Plugins from the desktop version of Facebook.
Nothing here helps