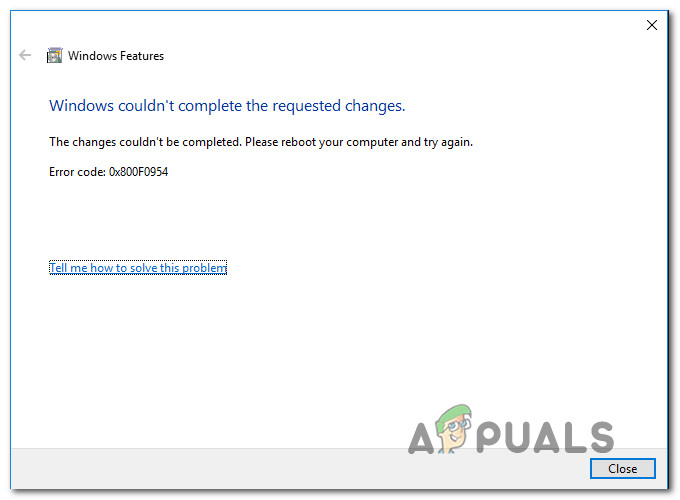
Fix: Error Code 0x800f0954
Some users are getting the Error Code 0x800f0954 when attempting to install .NET Framework 3.5 or a different optional feature in Windows 10. Most users are reporting that this error occurs while they trying to install the package via Windows Features, but others are getting it while using the DISM command-line tool. The error doesn’t seem to be exclusive to a certain Windows version since it’s confirmed to occur on Windows 7, Windows 8.1 and Windows 10.
What is causing the Error Code 0x800f0954?
We looked into this particular issue by trying to replicate the issue on our testing machines and by looking at various user reports that have encountered this exact problem. As it turns out, there are several different potential culprits that might end up triggering this error code:
- The computer cannot access the Windows Update server – In some cases, the error message occurs because the system is not able to reach the WU server. This is typical in situations where there’s a whole network of domain-joined computers configured to download updates from a WSUS server. In this case, you can resolve the issue by bypassing the WSUS.
- DISM CBS logs are triggering the issue – Sometimes, the CBS logs generated by the DISM utility can point towards a problem that doesn’t actually exist. In this case, you can resolve the issue by deleting the Component Based Servicing logs and re-running the DISM command that was previously failing with this error message.
- .NET Framework needs to be installed via Powershell – If you’re trying to install an older .NET Framework package, you might have to do it from a PowerShell window in order to avoid the 0x800f0954 error.
- Group policy is preventing the installation – There’s one policy that has the potential of triggering this particular error if it’s disabled from the Local Group Policy Editor. If this scenario is applicable, you can resolve the issue by enabling the ‘Specify settings for optional component installation and component repair’ policy.
If you’re currently searching for a fix for the 0x800f0954 error, this article will provide you with several troubleshooting steps. Down below, you’ll find a collection of methods that other users in a similar situation have successfully used to fix this particular issue.
Keep in mind that the methods below are ordered by efficiency and severity, so we encourage you to follow them in the order that they are presented. Chances are not every potential fix will be applicable to your current situation, so feel free to skip the methods that cannot be followed.
Method 1: Bypassing the WSUS
If you get the 0x800f0954 error while trying to install optional Windows features, it’s probably because your system cannot access the Windows Update server. This seems to have occurred for a lot of users in a similar situation – especially in situations where there’s a whole network of domain-joined computers that are configured to download updates from a WSUS server.
If your situation is similar, it’s possible that the issue occurs because your computer was once a part of a domain network and the group policy setting is still in place. If this scenario is applicable, you can resolve the issue by temporarily bypassing the WSUS server. You can do this easily by performing the following registry edit:
- Press Windows key + R to open up a Run dialog box. Then, type “regedit” and hit Ctrl + Shift + Enter to open up the Registry Editor with administrative privileges. When prompted by the UAC (User Account Control), click Yes to grant administrative privileges.
- Inside the Registry Editor, use the left-hand pane to navigate to the following location:
HKEY_LOCAL_MACHINE\SOFTWARE\Policies\Microsoft\Windows\WindowsUpdate\AU
Note: You can also paste the address directly into the navigation bar and press Enter to get there instantly.
- If the WindowsUpdate key doesn’t exist, you’ll need to create it manually. To do this, right-click on the Windows key, select New > Key and name it ‘WindowsUpdate’. Then, right-click on the newly created key and select New > Key and name the newest key AU.
- With the AU key selected, move over to the right-hand pane, right-click on an empty space and choose New > String value. Next, rename the newly created string value to UseWUServer.
- Once the UseWUServer key has been created, double-click on it and set it’s Value Data to 0.
- Close the Registry Editor, restart your computer and see if the issue has been resolved at the next system startup.
If this method didn’t resolve the issue or it wasn’t applicable, move down to the next method below.
Method 2: Cleaning the CBS logs
Some users that we’re encountering this exact issue have reported that they managed to resolve the issue after deleting the CBS (Component Based Servicing) logs related to DISM. After doing this and re-running the DISM command, some affected users have reported that the 0x800f0954 error was no longer occurring.
Here’s what you need to do:
- Open File Explorer and navigate to the following location:
C:\Windows\Logs\CBS
- Once you get inside the CBS folder, select everything there and choose Delete.
- After every file .log and .cab file is deleted, you can close the CBS folder.
- Press Windows key + R to open up a Run dialog box. Then, type “cmd” and press Ctrl + Shift + Enter to open up an elevated Command Prompt. When you see the UAC (User Account Control), click Yes to grant administrative privileges.
- Inside the elevated Command Prompt, type the following command and press Enter to rerun the DISM command once again:
Dism.exe /online /enable-feature /featurename:NetFX3 /source:C:\
- After hitting Enter, the .NET Framework should install without the 0x800f0954 error.
If you’re still encountering the same error message or this method wasn’t applicable to your current scenario, move down to the next method below.
Method 3: Using PowerShell to install .NET Framework 3.5
If you’re encountering the 0x800f0954 error while trying to install the .NET Framework 3.5 by using DISM (Deployment Image Servicing and Management), you might be able to circumvent the error message by using Powershell.
Several affected users have reported that the error code was no longer occurring after they ran a powershell command that ended up fixing the problem. Here’s what you need to do:
- Press Windows key + R to open up a run command. Then, type “powershell” and press Ctrl + Shift + Enter to open up an elevated Powershell prompt. When prompted by the UAC (User Account Control), click Yes to grant administrative privileges.
Run dialog: powershell Then press Ctrl + Shift + Enter - Inside the elevated Powershell prompt, type the following command and press Enter to run it:
Add-WindowsCapability –Online -Name NetFx3~~~~ –Source D:\sources\sxs
- Close the elevated Powershell prompt and restart your machine.
- At the next system startup, attempt to install the .NET Framework 3.5 once again and see if the issue has been resolved.
If the same error is still occurring, move down to the next method below.
Method 4: Using the Group Policy Editor
If you get the 0x800f0954 error while trying to add the RSAT Toolset, chances are you’ll need to make some changes using the Group Policy Editor tool. Several users have managed to solve this issue by running the Gpedit tool to modify some settings related to Component Installation and Component Repair.
After enabling a certain local policy and allowing the OS to download repair content and optional features directly from WU, several users have reported that the issue was resolved.
Note: Keep in mind that the Group Policy Editor tool is not available for all Windows versions. If you have Windows 10 Home or another version that doesn’t include it, you’ll need to follow this article (here) to install the policy editor on your computer.
If you have the Group Policy Editor on your Windows version, here’s a quick guide on how to make the necessary edits:
- Press Windows key + R to open up a Run dialog box. Then, type “gpedit.msc” and press Enter to open up the Local Group Policy Editor. If you’re prompted by the UAC (User Account Control), click Yes to grant administrative privileges.
Typing “gpedit.msc” in the Run prompt - Once you’re inside the Local Group Policy Editor, use the left-hand pane to navigate to the following location:
Computer Configuration\Administrative Templates\System - Then, with System selected, go over to the right-hand pane and double-click on the Specify settings for optional component installation and component repair.
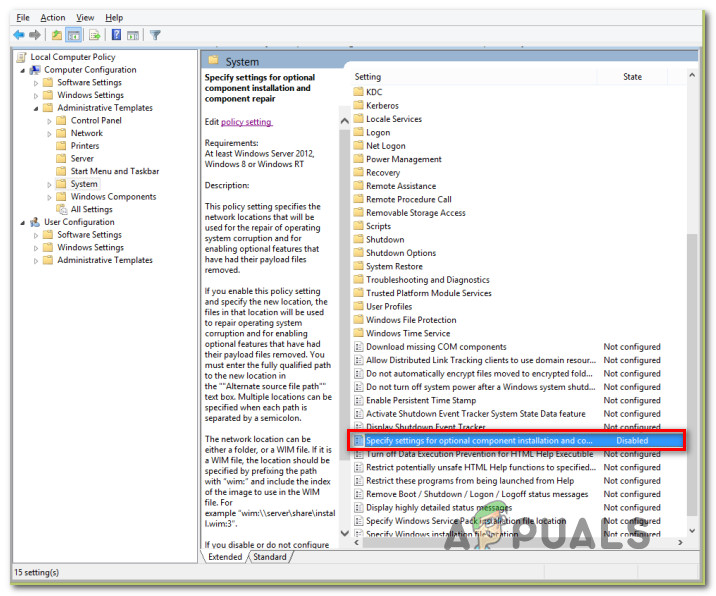
Specify settings for optional component installation and component repair - Next, set the policy to Enabled and make sure to check the box associated with Download repair content and optional features directly from Windows Update instead of Windows Server Update Services (USUS).
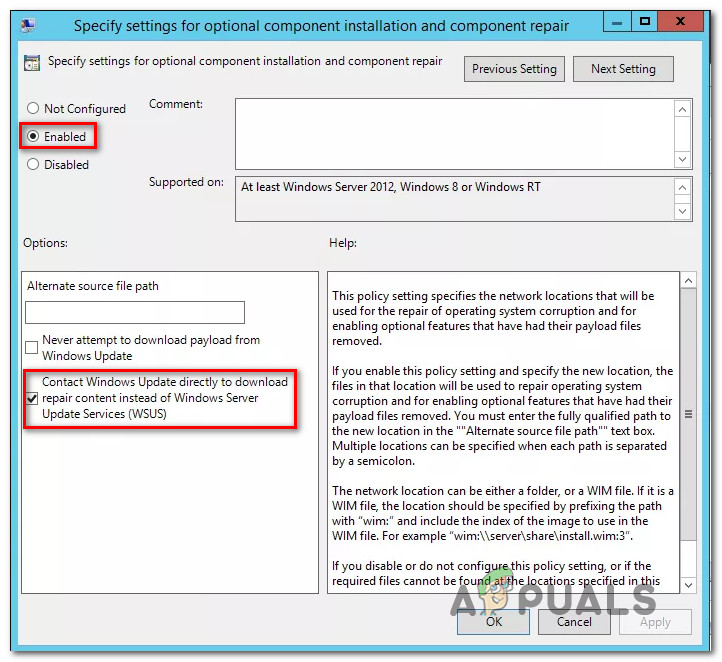
Enable the required Policy - Hit Apply to save the configuration, then close the Local Group Policy Editor and restart your computer.
- At the next system startup, the error should no longer occur.
Solution 5: Changing Registry Value UseWUServer
If none of the above methods work, we will attempt to change the UseWUServer registry entry and change it to disabled. Apparently, after a recent Windows update, this key was conflicting with Windows update service and causing the error message under discussion. Make sure that you are logged in as an administrator before proceeding further and backup your registry just in case.
- Press Windows + R, type “regedit” in the dialogue box and press Enter.
- Once in the registry editor, navigate to the following path:
HKLM/Software/Policies/Microsoft/Windows/WindowsUpdate/AU/UseWUServer
- Now, change the value from 1 to 0.
- After making the following changes, restart your computer and start the update service again. Check if the issue is resolved.


in method 1 above, the key to create is “UseWUServer”, not “UserWUServer”