How to Fix ‘ERR_SSL_VERSION_INTERFERENCE’ Error on Google Chrome
Fix: ERR_SSL_VERSION_INTERFERENCE
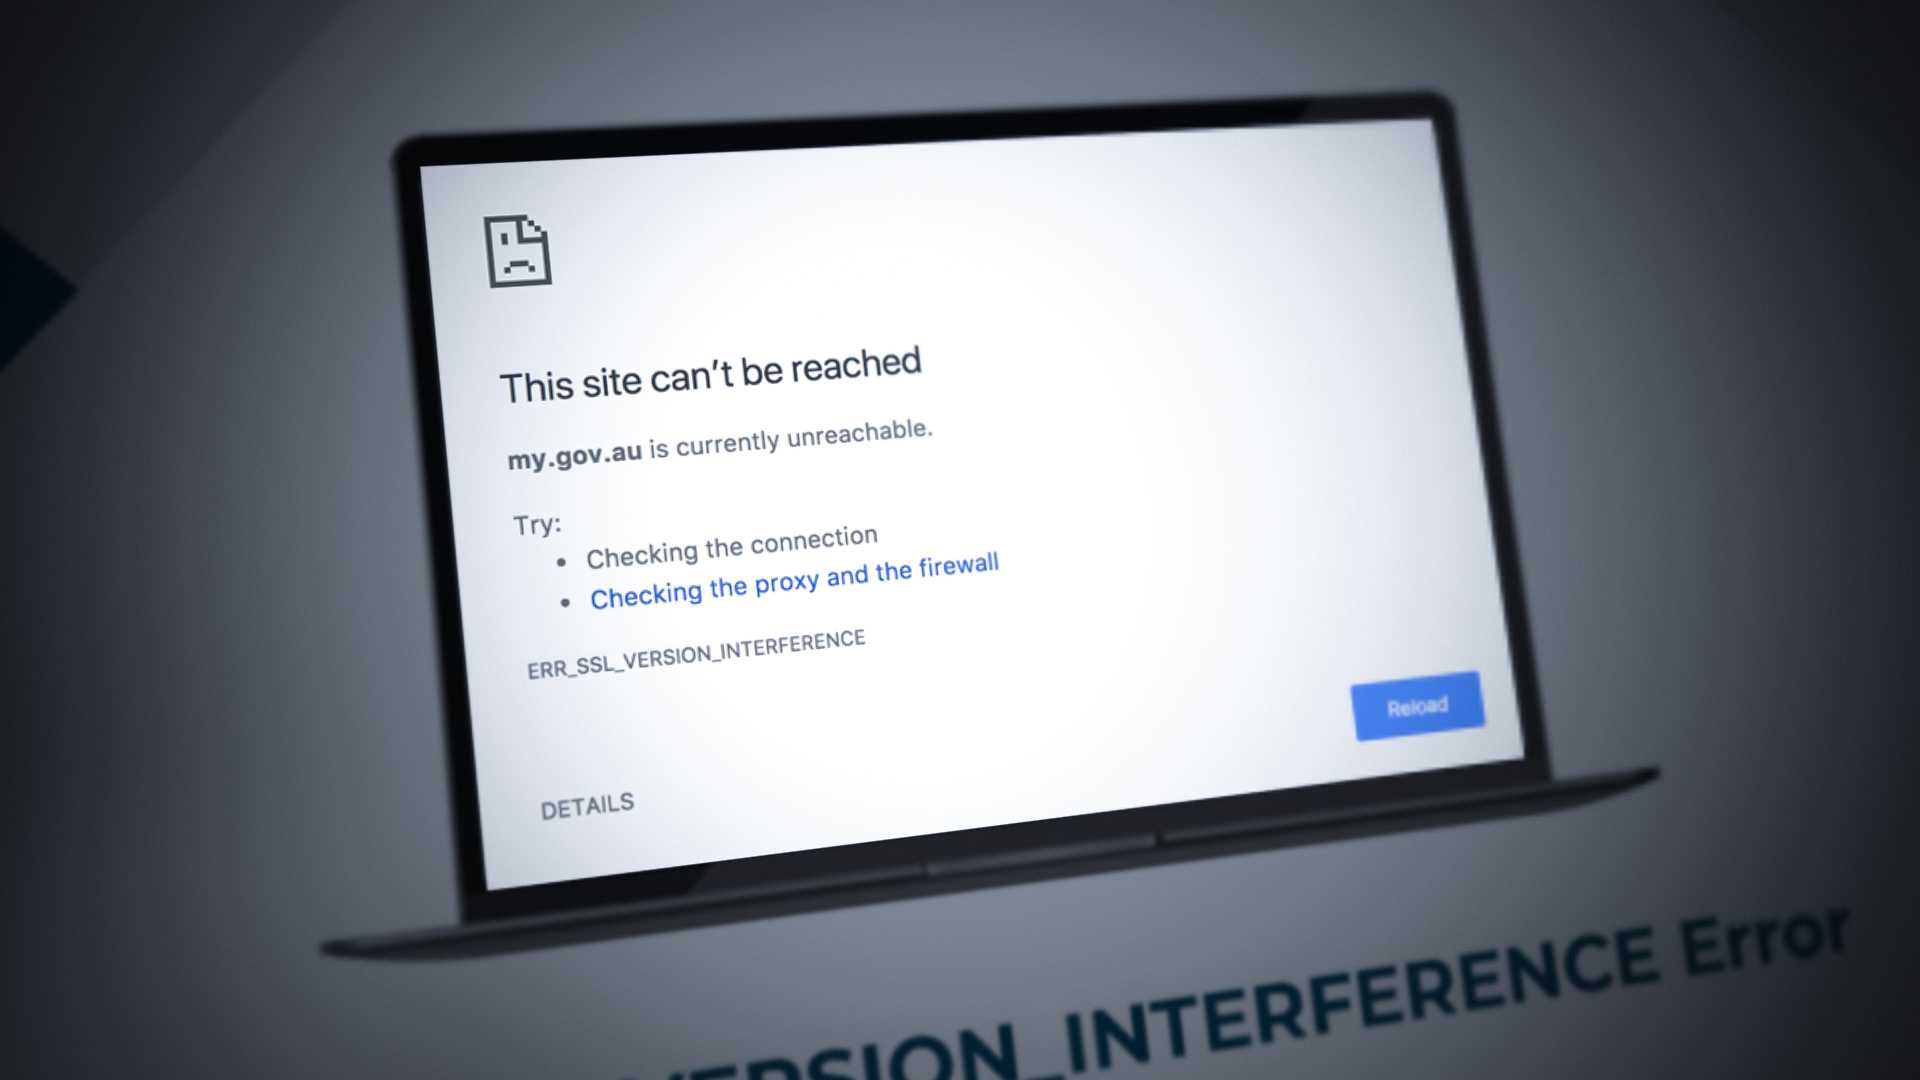
The error message ‘ERR_SSL_VERSION_INTERFERENCE’ is quite old and dates back to the old days of the Chrome browser. This error primarily signifies that there is a problem in either determining the SSL version or there is an SSL version conflict on your computer. This error message is usually solved instantly without any hassle.
SSL stands for Secure Sockets Layer and is used actively in transmitting information through TCP sockets. Google Chrome also uses SSL in communicating with secure websites such as Google, YouTube, Facebook, etc.
What causes the error message ‘ERR_SSL_VERSION_INTERFERENCE’ in Google Chrome?
This error message is usually traced back to Google Chrome settings including TLS etc. However, we also noticed that third-party Antivirus software was also responsible for triggering this error. Some of the reasons why you might experience this error message are but not limited to:
- TLS 1.3: Disabling TLS 1.3 fixes the error message instantly. Transport Layer Security often clashes with SSL on Google Chrome.
- Antivirus software: Several Antivirus software often have web protection enabled. They may be trying to secure your browsing but might instead clash with SSL.
- Temporary Data: Chrome stores temporary data now and then to provide a better experience and feature to users. This temporary data might conflict with the SSL settings and cause an error message.
- Corrupt installation files: In very rare cases, Chrome might have corrupt or incomplete installation files.
Before we start with the solutions, make sure that you are logged in as an administrator on your computer and have an active open internet connection. An active internet connection means that you are using a private network without any firewalls and proxies (unlike public networks usually present in hospitals and public places).
Disable TLS 1.3
TLS (Transport Layer Security) is a cryptographic protocol that aims to provide end-to-end security to connections over the internet. TLS predecessor, SSL (Secure Socket Layer) is also vastly used even today and its version 3.0 provided the foundation for TLS 1.0. We saw numerous cases where disabling the TLS 1.3 from Chrome solved the error message instantly. We can try this and see if this fixes the problem.
- Open a new window in Chrome and type the following address in the address bar and press Enter.
chrome://flags
- Now search for TLS in the search box at the top. You will see the entry of TLS 1.3 appears in the results below.

Disabling TLS 1.3 Chrome - Now set the option to Disabled. Save changes and exit. Now restart your computer and try accessing the website again which was causing the issue.
Disable Antivirus software
Another reason why this error occurs is because of interference from Antivirus software installed on your computer. Several options protect your computer by also filtering web services. Some of these services include ‘Avast Web Shield’ and ‘Kaspersky Internet Security’ etc.
In this solution, you have to check yourself and look if there are any settings in your antivirus which might be providing internet protection. Basically, you are looking for anything which monitors your internet activity.

Therefore, it is recommended that you disable your antivirus or prevent some of its shields that scan your activity on the internet. You can always turn it back on after you are sure this isn’t causing the problem.
Check Date and Time
SSL uses some parameters provided by your system to function properly such information about your browser and system settings. Within these settings is also the date and time of your system which acts as a timestamp. If the time isn’t set correctly, you will receive this error message. Therefore, it is recommended to correct your time and check if that fixes this issue.
- Press Windows + R, type “control” in the dialogue box, and press Enter.
- Once in the control panel, select “Date and Time” or “Clock and Region” according to the type of control panel selected (category or large icons).

Accessing Date and Time
- Once the clock is opened, click “Change date and time”. Now set the correct time and also select the correct region.
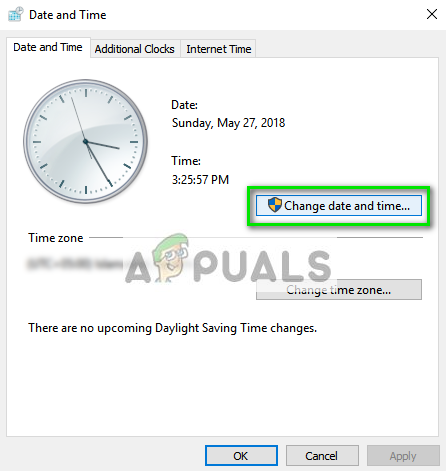
Changing Date and time – Control Panel
- Save changes after correcting the time and date and restart your computer. Now try accessing the website and see if the issue is resolved. You can also set the time zone to be automatically
Clear Browsing Data
Before we re-install Chrome completely from your system, we will attempt at clearing all the browsing data and other temporary information the browser stores on your computer. This might fix the issue if the issue is only occurring due to bad files on your computer. The browsing data will be deleted from your account logged into Chrome. If you do not want to clear your data from your entire account, you can log out of your account and then proceed.
- Press Ctrl + Shift + Del from your keyboard while Chrome is opened.
- Select the tab of Advanced, select the time range as All time. Check all the items and click Clear data.
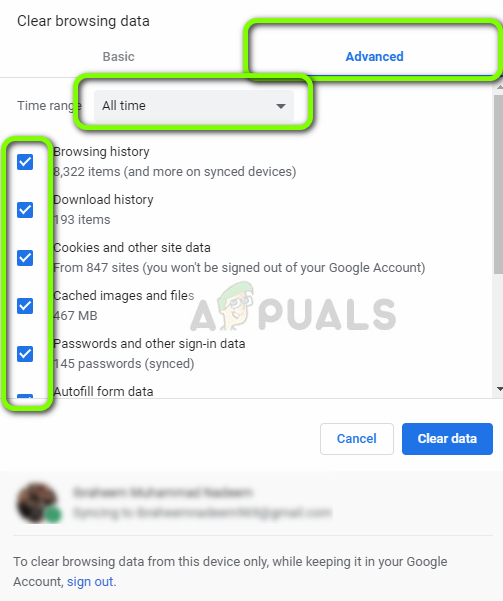
Clearing browsing data – Chrome
- Restart your computer properly and open Chrome. Try accessing the website and check if the issue is fixed completely.
Reinstall Chrome
Instead of resetting Google Chrome, we can dive straight to reinstalling it on your system. If any installation files of the application are corrupt or missing, you will receive unexpected behavior like the one under discussion. We will first uninstall Chrome properly and after deleting the AppData, install a fresh version.
- Press Windows + R, type “appwiz.cpl” in the dialogue box, and press Enter.
- Once in the application manager, locate Google Chrome, right-click on it and select Uninstall.

Uninstalling Google Chrome
- Now press Windows + R and type “%appdata%” in the address and press Enter.
- Once in the Application data, search for Google > Chrome. Delete the Chrome folder from the directory.
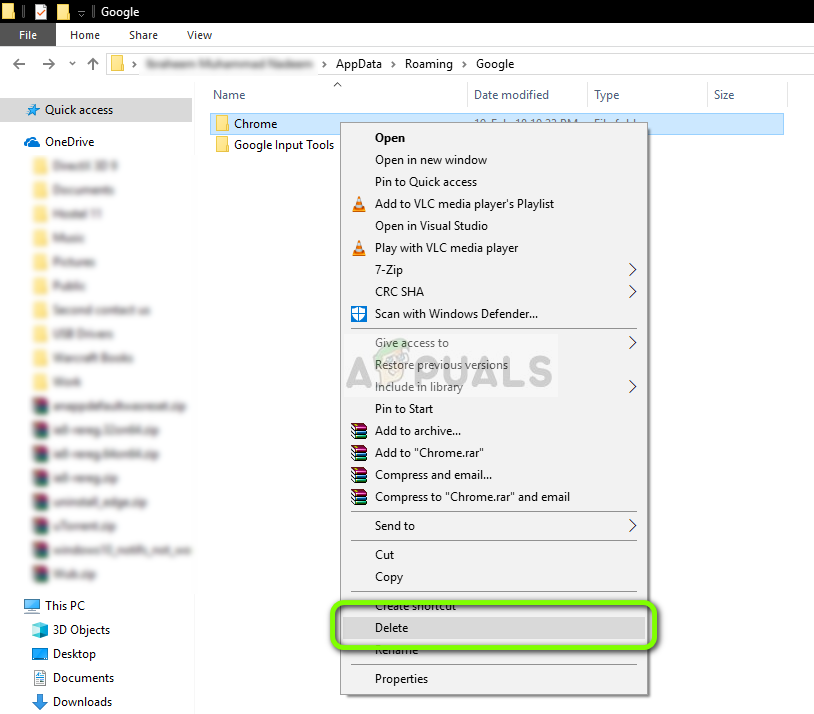
Deleting Google Chrome AppData
- Now navigate to the official Google Chrome website and download the latest version to an accessible location.

Downloading fresh Chrome
- Run the executable and install Chrome. Now try accessing the website using it and check if you still receive the error message.
Disable Hardware Acceleration
In some cases, the hardware acceleration in Chrome might be causing this particular issue therefore, in this step, we will be disabling it completely and then we will check if this error is fixed. For that:
- Open Chrome and launch a new tab.
- Click on the “Three Dots” in the top right corner and select “Settings” from the list.
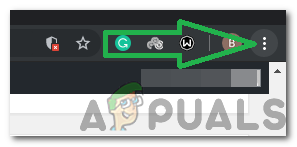
Clicking on the three dots in the top right corner - Scroll down and click on “Advanced”.
- Under the “System” heading, disable the “Use Hardware Acceleration When Available” option.
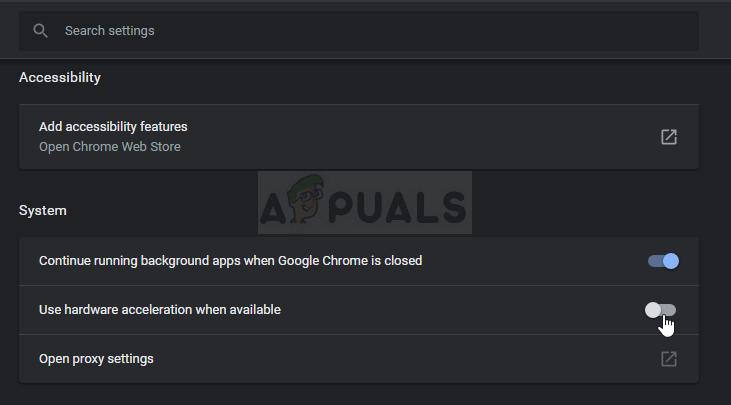
Disabling hardware acceleration - Check to see if the issue persists.
If none of these methods worked for you it’s possible that your Firewall is not configured correctly. You will have to enable the app through your Windows Firewall, you can learn more about it in another article. We have a dedicated article on how to allow chrome to access the network in your firewall. This should fix your issue hopefully.


