How to Fix Google Chrome “ERR_CACHE_MISS”?
 Reviewed by Kamil Anwar
Some users have been experiencing the ERR_CACHE_MISS error code while trying to use Google Chrome. This is not really an error code but rather a warning that is prompted by your web browser. As it turns out, this behavior is aimed at stopping the web browser i.e. Google Chrome from duplicating information on a web form.
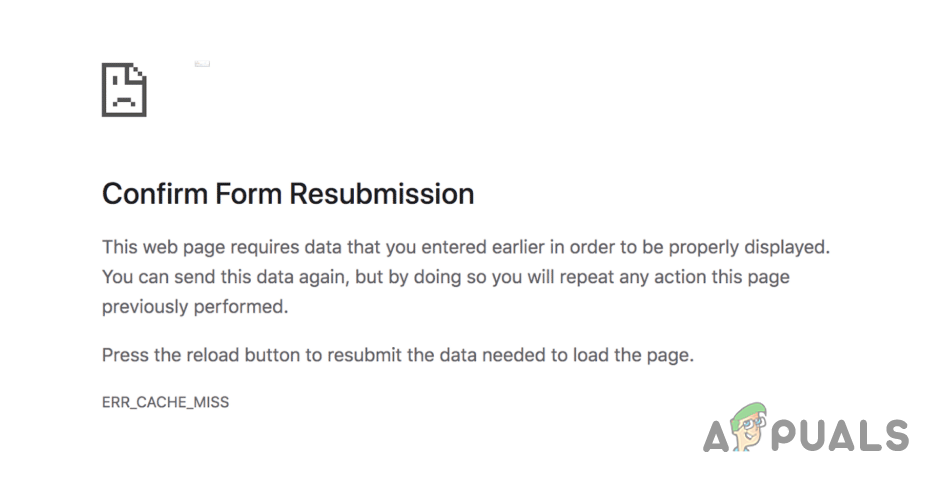
This is because you will most likely encounter the issue when you are submitting a form to a website. In any case, you can get around this pretty, and thus, in this article, we are going to show you how to do just that so follow through.
As it turns out, in case you come across the ERR_CACHE_MISS code, there isn’t anything to worry about unless it keeps repeating. That’s when this can be an issue, much like the error codes of the web browser, such as ERR_QUIC_PROTOCOL_ERROR.
In some cases, when you enter some data into a web form, it might be required again. You can usually get around this by simply refreshing the page. However, as we have mentioned, when the mentioned code keeps repeating, then that can refer to a problem with your browser or the cached data.
In addition to that, the issue can also originate from the web server’s end as well. Thus, if by the end of this article, you are still not able to get rid of the issue, it is very likely that the issue is originating from the web server and not your end. With that said, let us get started with the different methods that you can use to get around this issue.
Update Google Chrome
The first thing that you should do when you encounter the issue in question is to make sure that you are running the latest version of the web browser on your system.
Having an outdated web browser can often cause various issues with your browsing experience and as such, it is always a good idea to keep your web browser up to date. To update Google Chrome, follow the instructions that are given down below:
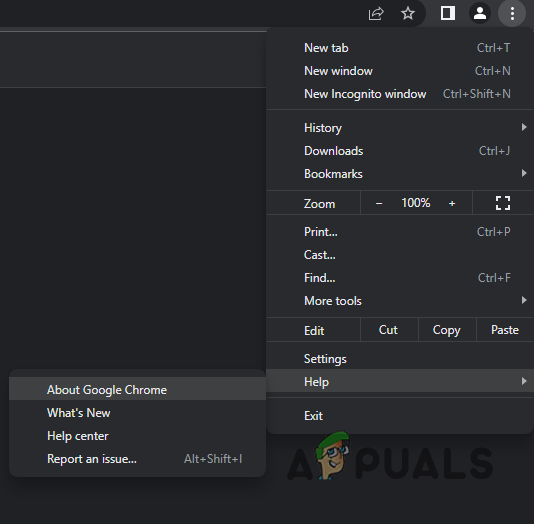
- First of all, on your browser, click on the More menu (three dots) in the top right corner.
- From the drop-down menu, choose Help and then click on About Google Chrome.
Navigating to Google Chrome About Page - On the follow-up page, Google Chrome will automatically for any available updates and install them.
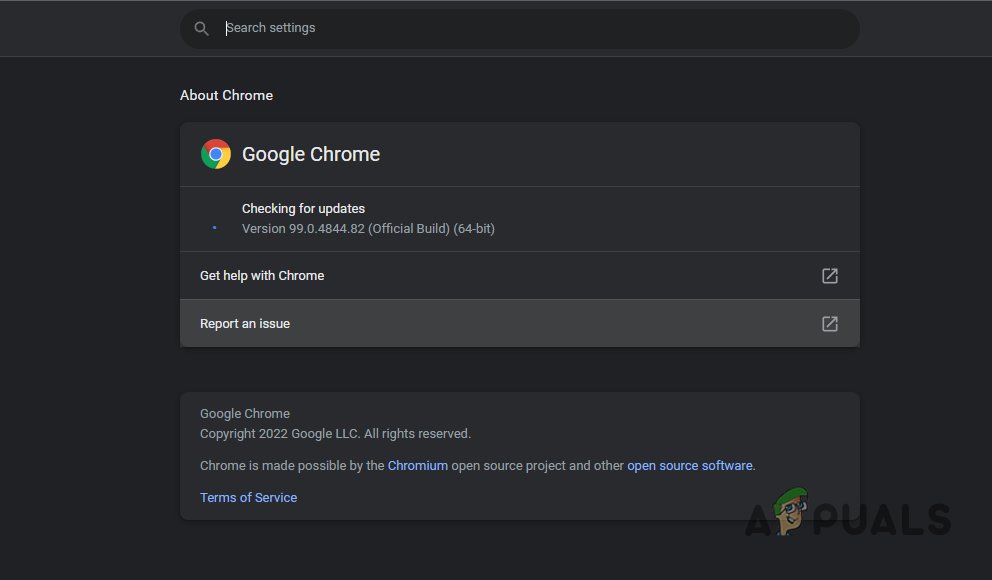
Google Chrome Checking for Updates - Your browser will be restarted after the updates have been installed. See if the problem persists after that. In case your browser is already up to date, move on to the next method down below.
Disable Third-Party Extensions
One of the reasons that Google Chrome may be repeating the mentioned error code can be due to the third-party extensions that are installed on your browser. While extensions can be really useful most of the time, there are cases where they can cause certain issues as well.
When this happens, you can check if the problem persists after disabling the installed extensions. One way of doing this would be simply using the incognito mode where all of the add-ons are disabled by default unless enabled manually.
That said, we are going to go through the more thorough approach that lets you disable extensions on your own. Follow the instructions given down below to do this:
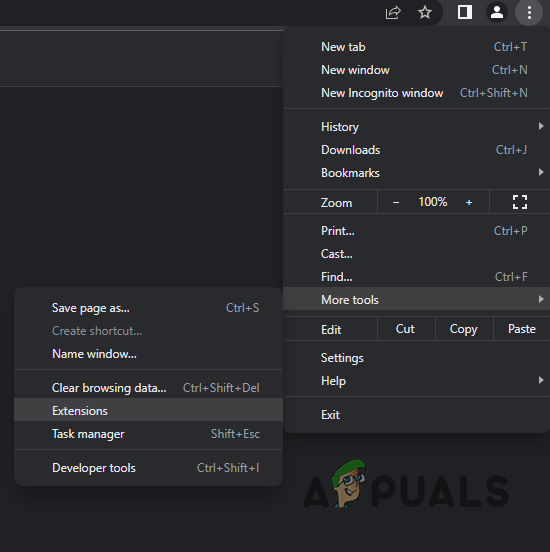
- To start off, click on the More menu at the top right corner of your browser.
- From the drop-down menu, go to More tools and then click on Extensions.
Navigating to Extensions Page - After that, on the Extensions page, disable all of the installed add-ons.
- With that done, restart your browser.
- Finally, see if the problem is still there.
Clear Browsing Data
Another thing that you can try in order to resolve the issue in question is clearing your browser data. Since the issue is related to caching, clearing out your cache on your browser can sometimes get your issue sorted. Doing so is pretty easy, simply follow the instructions given down below:
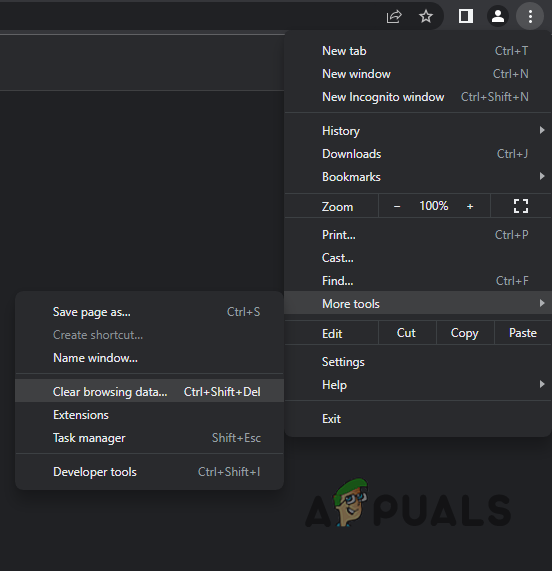
- To start off, on your browser, click on the More menu icon in the top right corner.
- From the drop-down menu, go to More tools and then choose Clear browsing data.
Navigating to Clear Browsing Data Page - On the follow-up screen, make sure the Time range is set to All Time.
- In addition to that, make sure Cookies and other site data, as well as Cached images and files, are checked.
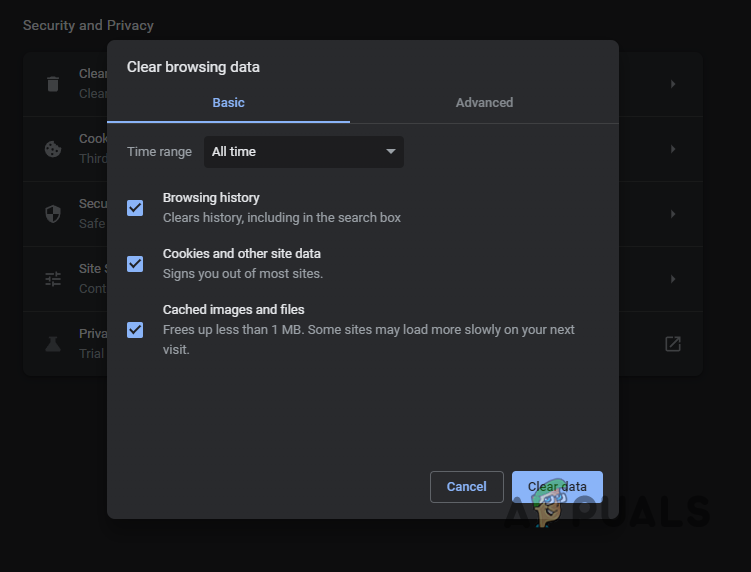
Clearing Browsing Data - With that done, click the Clear data button.
- Once you have done that, see if the problem is still there.
Reset Browser
In some cases, the issue can be triggered by your browser configuration or settings. If clearing your browsing data does not resolve the issue, the next step should be to reset your browser. Resetting your browser will reset it to the default settings.
As such, you will be able to ensure that the problem is not originating from your browser. To reset your browser, follow the instructions given down below:
- On your browser, click on the More menu icon at the top right corner.
- From the drop down menu, choose the Settings option.
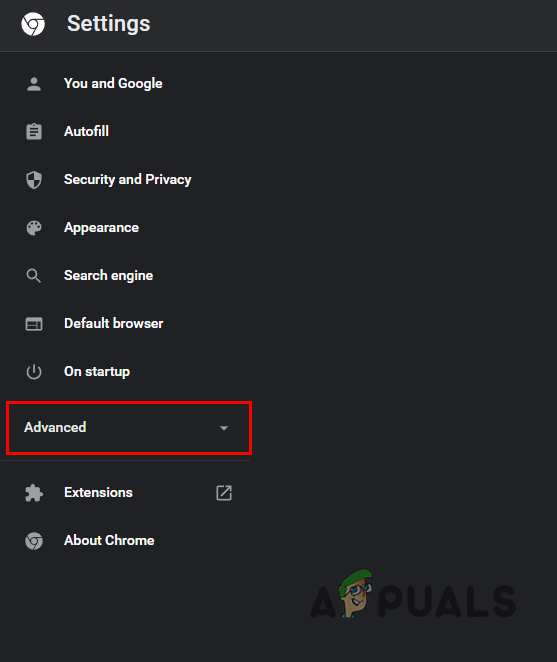
- Now, on the Settings page, click on the Advanced option given on the left hand side.
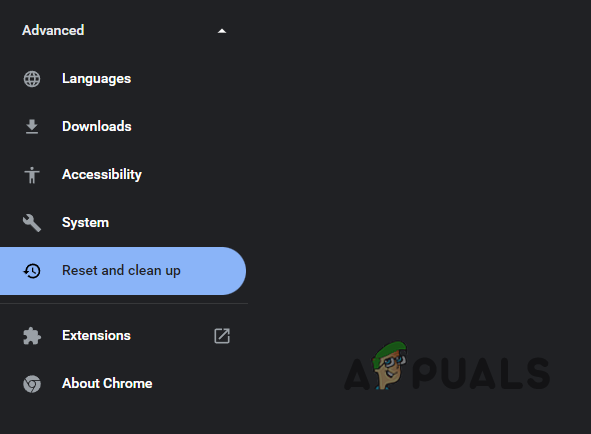
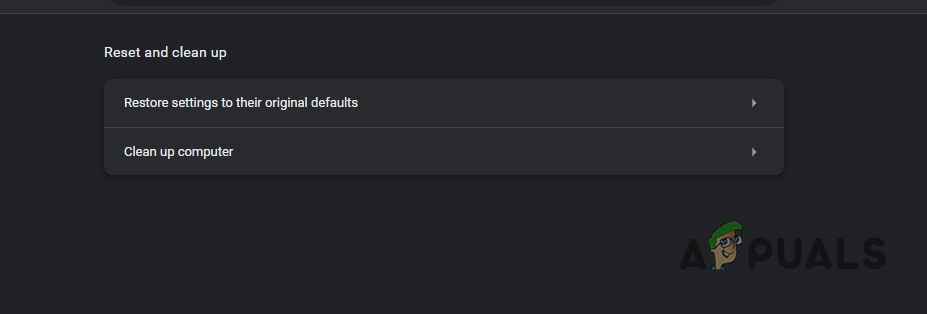
Viewing Advanced Options - With that done, you will be able to see a few extra options. Click on Reset and clean up.
Navigating to Reset and clean up - Finally, click the Restore settings to their original defaults option.
Resetting Chrome to Original Defaults - Then, click on Reset settings to reset your browser.
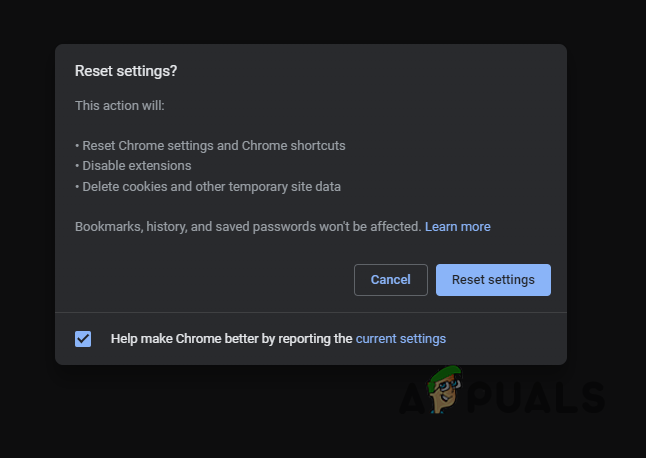
Resetting Google Chrome - Once you have done that, see if the problem is still there.
Reset Network Settings
Finally, if none of the above methods has worked out for you, it is very likely that the issue is being caused by your network settings. In such a case, you can reset your network settings quite easily.
When you reset your network settings, your network adapters will be reinstalled and every other networking component will be set back to its default settings. Follow the instructions given down below to do this:
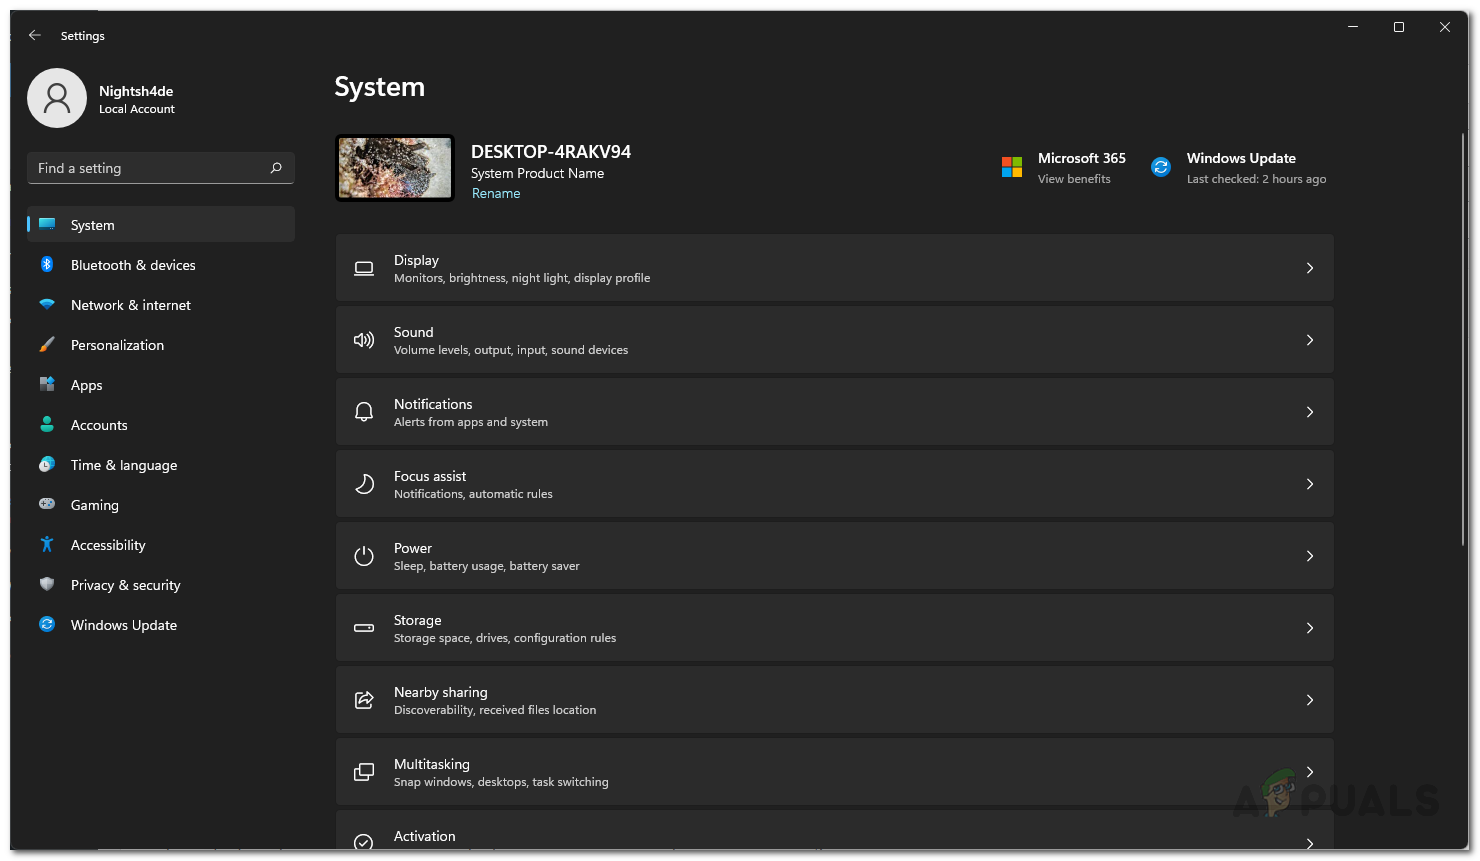
- First of all, press Windows key + I on your keyboard to bring up the Windows Settings app.
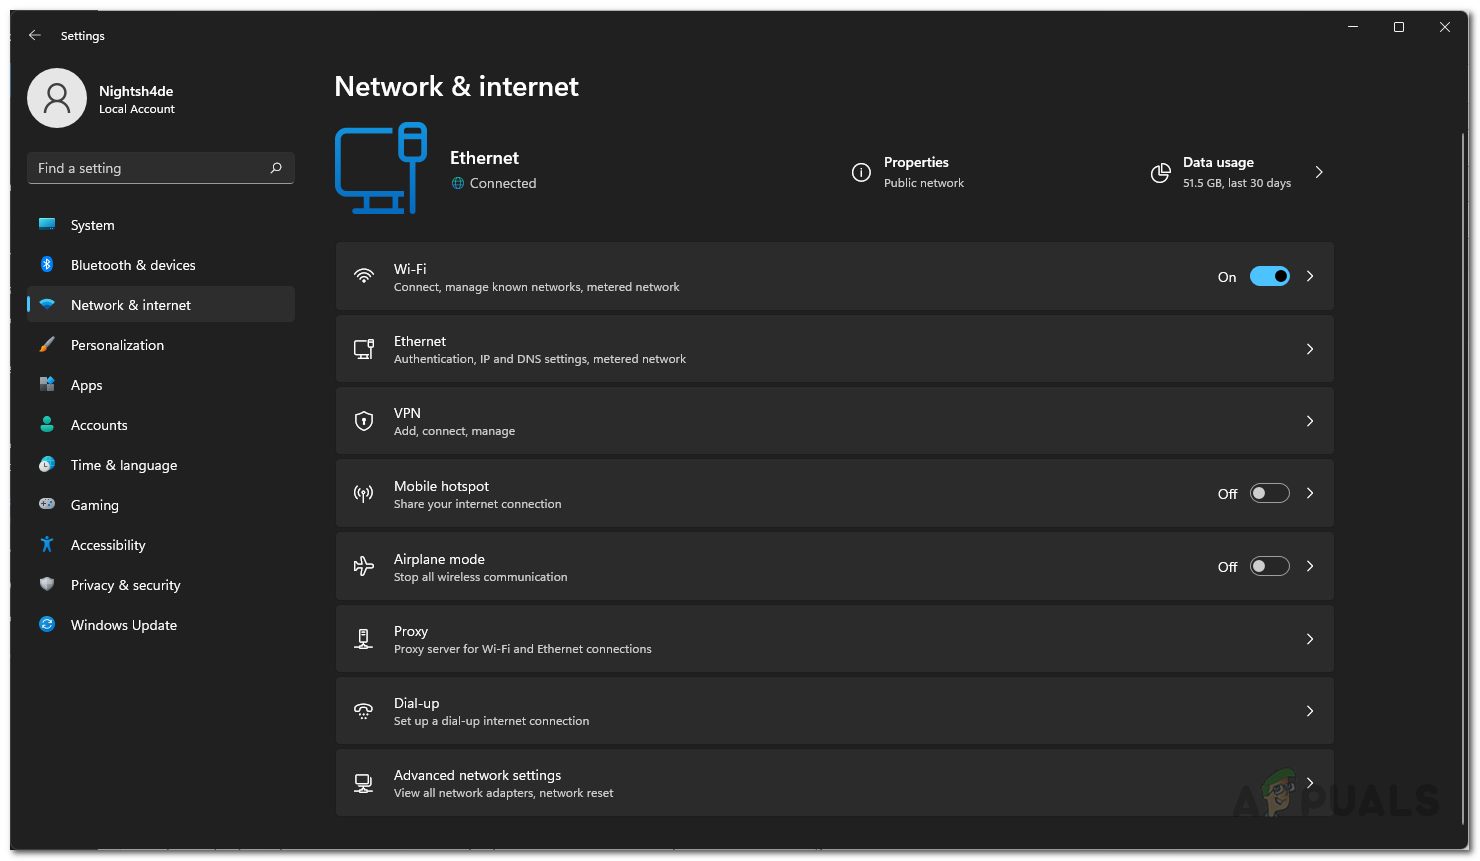
- On the Settings window, make your way to Network and Internet.
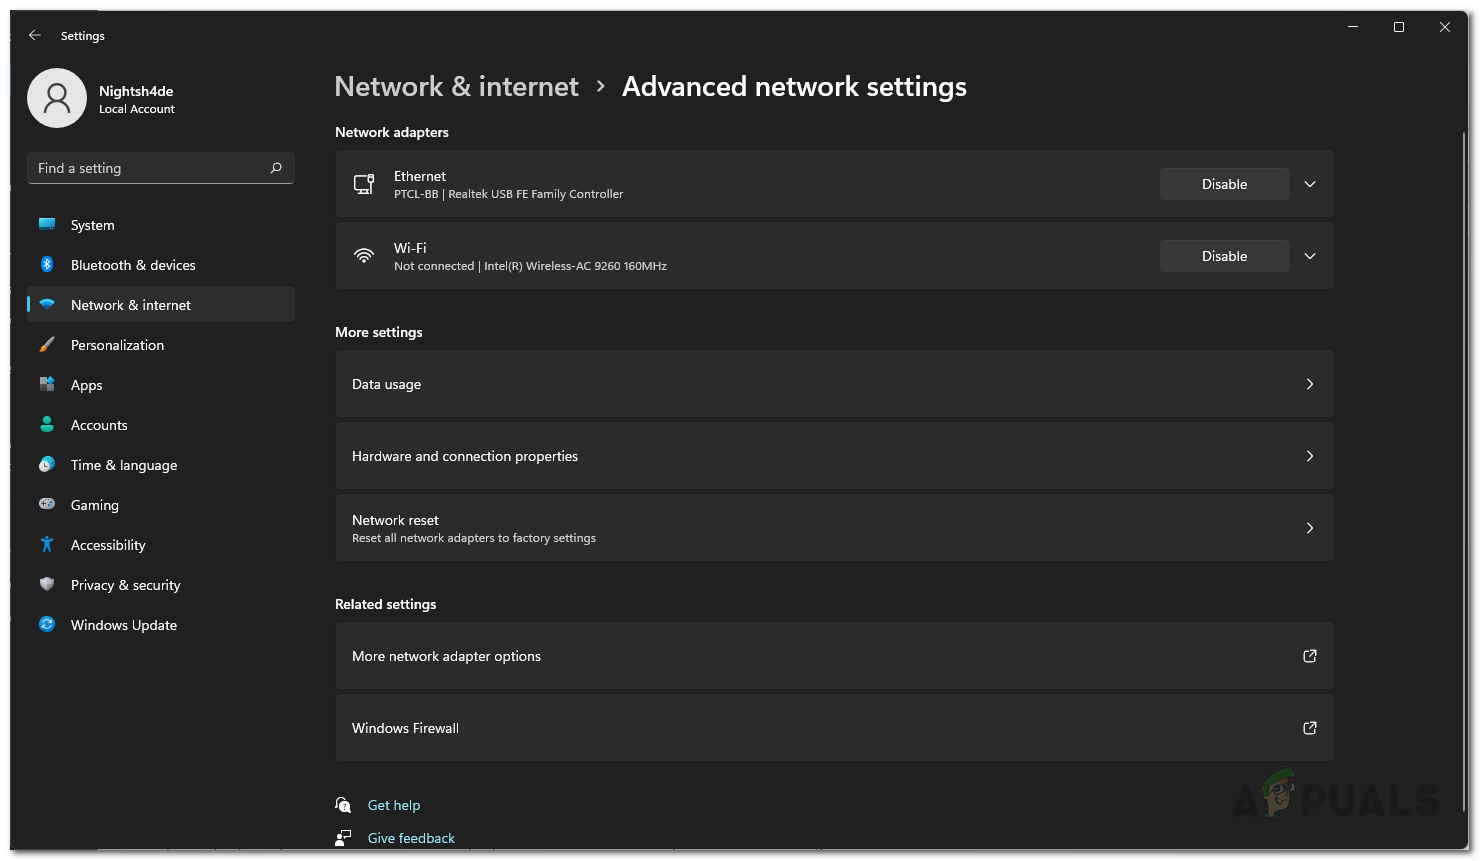
Windows Settings - There, click on the Advanced network settings option.
Network Settings - On the Advanced network settings screen, choose the Network Reset option.
Advanced Network Settings - Finally, click the Reset now option to reset your network settings.
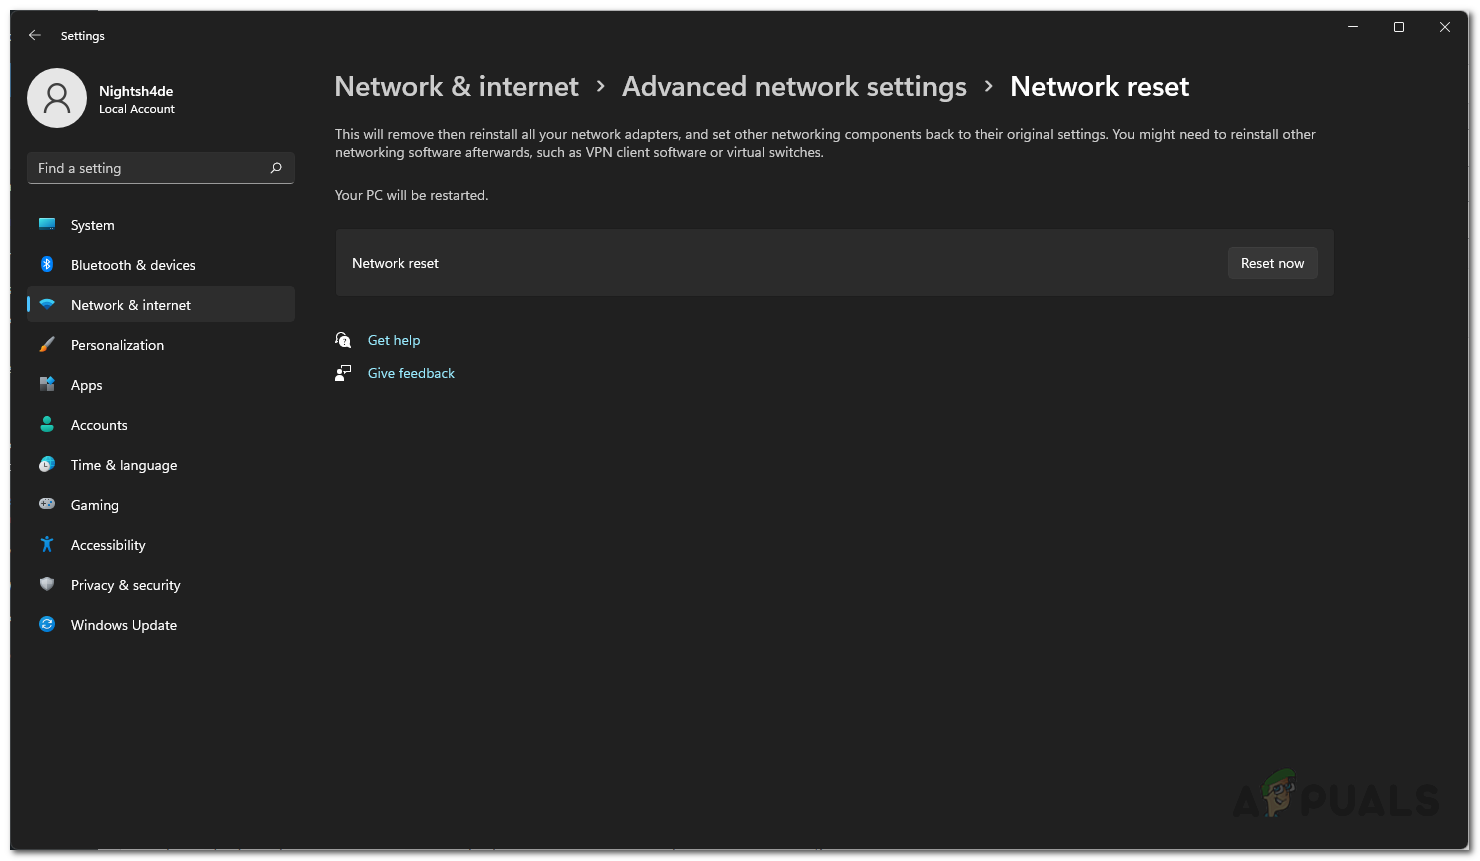
Resetting Network Settings - Once your PC has restarted, see if the problem is still occurring.
Reviewed by Kamil Anwar