Fix: Windows Update Error 0x800F081F
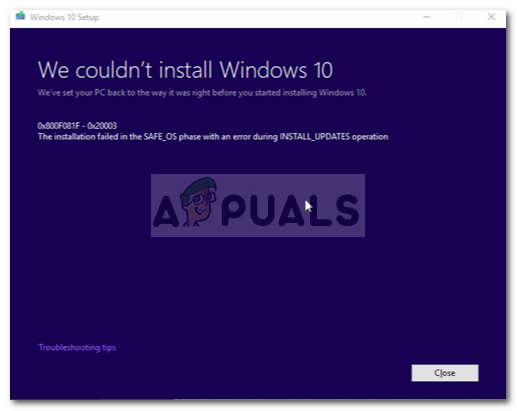
The installation failed in SAFE_OS phase with an error during INSTALL_UPDATES operation
The Windows update error 0x800F081F – 0x20003 is usually caused by developer mode which interferes with your system while it is being updated. Recently, many users have faced this problem while updating their system to the Windows 1809 update released in October. Windows updates are mandatory and everyone knows that, however, there are people who like to wait till the update is cleared of any errors whatsoever before they initiate the update themselves. The full error message is “The installation failed in SAFE_OS phase with an error during INSTALL_UPDATES operation”.
Running a Windows update usually results in an error for some people. The error 0x800F081F – 0x20003 is not a big hurdle and can be dealt with pretty easily as the workaround is quite simple. Besides Developer mode, the error can also be caused by other services etc. This article will show you how to fix the issue with ease.
What causes Windows Update Error 0x800F081F – 0x20003 on Windows 10?
Windows update errors are quite common yet unanticipated. This error can be caused due to the following —
- Developer mode. The error is somehow caused by the Developer mode turned on in which case you’ll just have to disable it temporarily.
- Windows update components. Any other reason could be your Windows update components which are responsible for updating your system. If the components aren’t working properly, the error might occur.
Now, without wasting any more time, let us get into the solutions:
Solution 1: Turn Off Developer Mode
As we mentioned, the major cause of the error is the Developer mode. Most of the users have reported that their error was fixed after turning off their Developer mode. Therefore, this is something you should try first. Here’s how:
- Press Winkey + I to open Settings.
- Navigate to Update and Security.
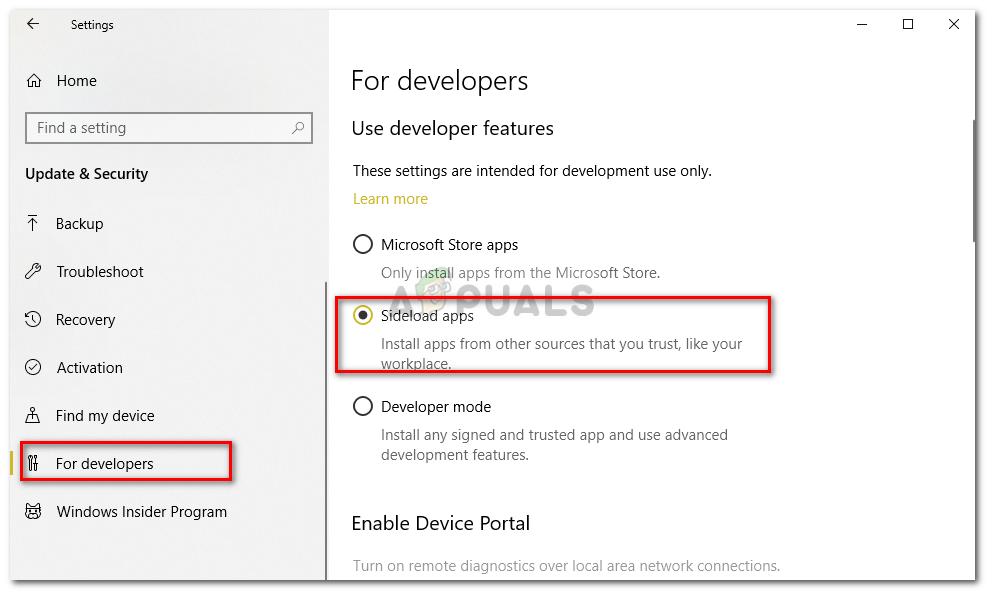
- Now, on the left-hand side pane, click ‘For Developers’.
- There, check the ‘Sideload apps’ option.
Disabling Developer Mode from Windows Settings - Click Yes when prompted.
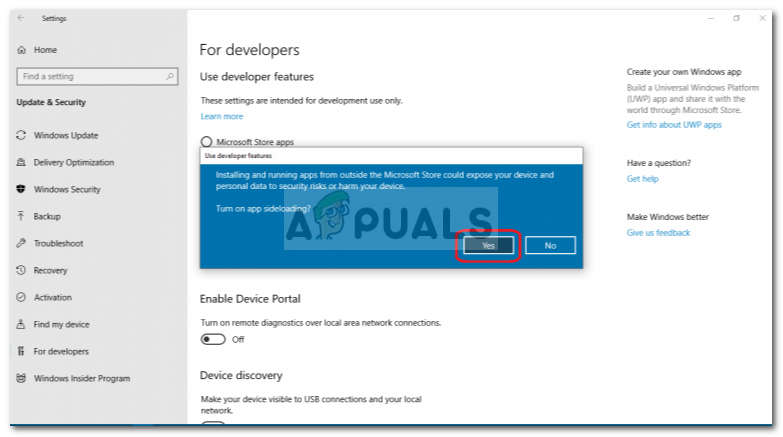
Disable Developer Mode Popup
After you’ve disabled Developer Mode, you’ll have to uninstall a developer component to make sure that the mode will not intervene with the update again. For this, do the following:
- Press Winkey + I to open Settings.
- Navigate to Apps.
- Under Apps & features, click ‘Manage optional features’.
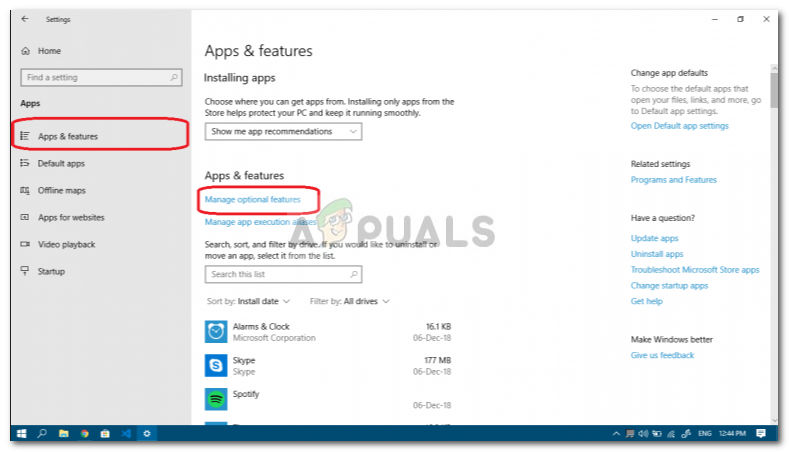
Manage optional features to uninstall Developer Mode - From the list, locate Windows Developer Mode, highlight it and click Uninstall.
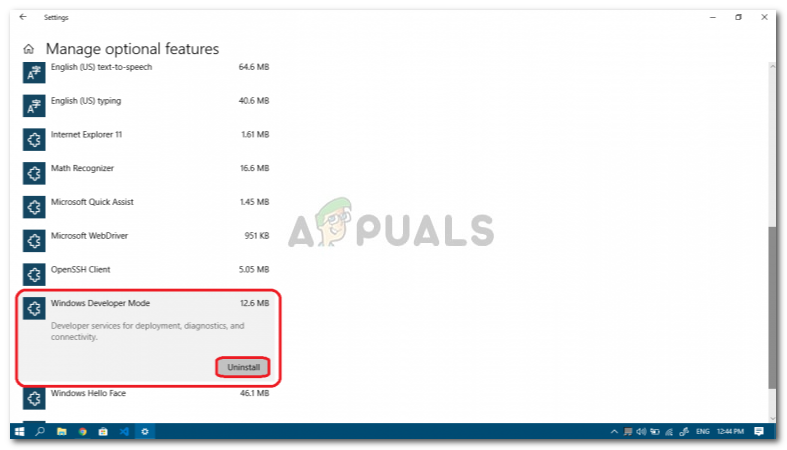
Uninstalling Developer Mode – Windows Apps - After you’ve done that, reboot your system.
- Try installing the update now.
Solution 2: Running Windows Update Troubleshooter
If disabling Developer mode didn’t work out for you, what you can do is utilize Windows built-in troubleshooter for Windows update. The troubleshooter can sometimes be really helpful and fix potential errors for you without any difficulties. Here’s how to run Windows Update troubleshooter:
- Open Settings like mentioned above.
- Go to Update and Security.
- Now, navigate to Troubleshoot on the left-hand pane.
- Click on Windows Update and hit ‘Run the troubleshooter’.
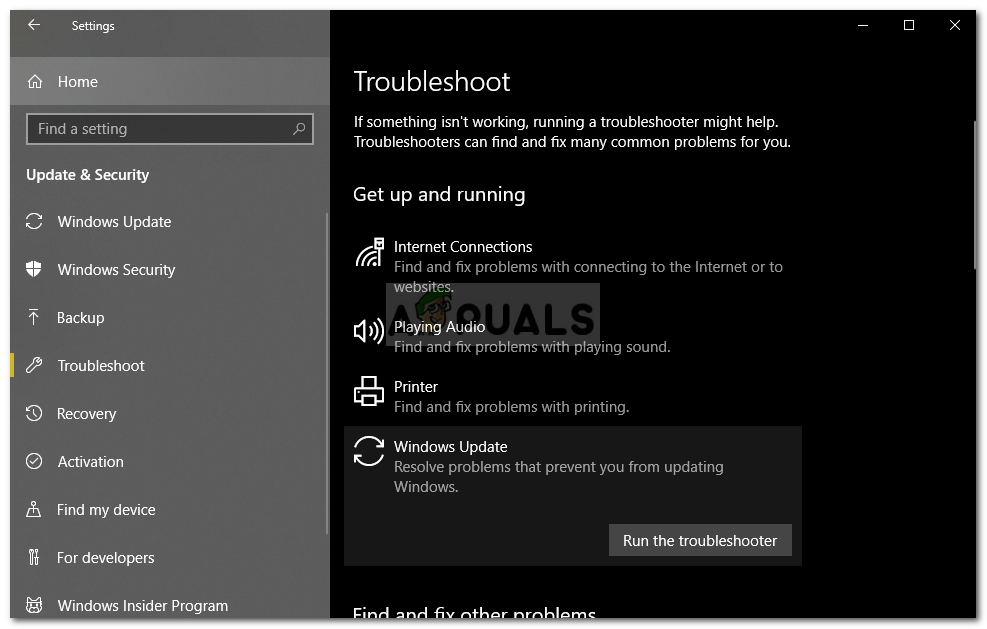
Running Windows Update Troubleshooter
Solution 3: Resetting Windows Update Components
Sometimes, if your Windows Update components aren’t functioning properly, the Windows update will most probably fail in which case you’ll have to reset the Windows Update components. Here’s how to reset your Windows update components:
- Open up an elevated command prompt by pressing Winkey + X and selecting ‘Command Prompt (Admin)’ from the list.
- Once it loads up, type in the following commands one by one:
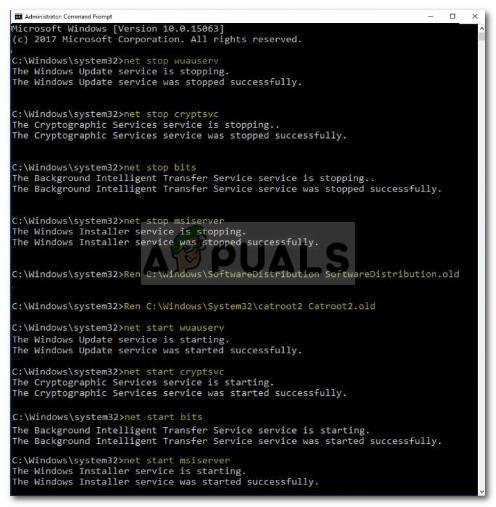
Reset Windows Update Components - net Stop bits net Stop wuauserv net Stop appidsvc net Stop cryptsvc ren %systemroot%\SoftwareDistribution SoftwareDistribution.bak ren %systemroot%\system32\catroot2 catroot2.bak net Start bits net Start wuauserv net Start appidsvc net Start cryptsvc
- Try to update your system now (might want to reboot).
Solution 4: Downloading the Update Manually
If the above solutions don’t work for you, your last resort would be to install the update manually. There’s a website named Microsoft Updates Catalog where most of the updates are uploaded so that the users can download and install them manually if need be.
To know how to install your update manually, please refer to solution 5 on this article published on our site.


