Fix: Windows Update Error 0x8007042b
Updates are supposed to bring new content and features to the users from the developers. Every software out there requires regular updates, no matter how small the project is, it is going to need updates. Windows 10 is no exception here. However, what really pains is not being able to update your system while others enjoy it.
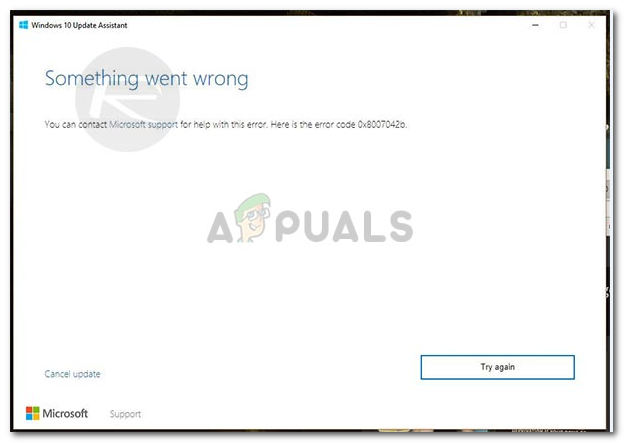
Error 0x8007042B can be taken as an example. Windows updates are supposed to fix known errors but when updating the system itself becomes an error, that’s where it really gets a hurdle. Below are the known causes of the error. and instructions that will help you get rid of it.
What causes Update Error 0x8007042B?
While using the Windows Update Assistant, one cannot prophesy the fact that later down the road, errors can emerge by using the Assistant itself. Consequently, the causes of Error 0x8007042B are —
- Updating via Windows Update Assistant. This error might pop up when you are updating your system using Windows Update Assistant.
- Corrupted system files. Another cause of this error is corrupted system files. If you are caught with corrupted windows files, you should try to repair your files as quickly as possible for they hold a real threat.
Now that we have dealt with the causes, let us get to the solutions:-
Solution 1: Removing or Disabling your Antivirus
Some users have reported that certain antiviruses such as Kaspersky, Comodo, Avast etc caused the error pop up, so your first step should be to disable your antivirus. If your error still persists, it is time to completely remove the anti-virus from your system. You can do this by:
- Open Start Menu and click on Control Panel.
- In Control Panel, switch to ‘Uninstall a program’ under Programs.
- Locate your antivirus and double click to uninstall.
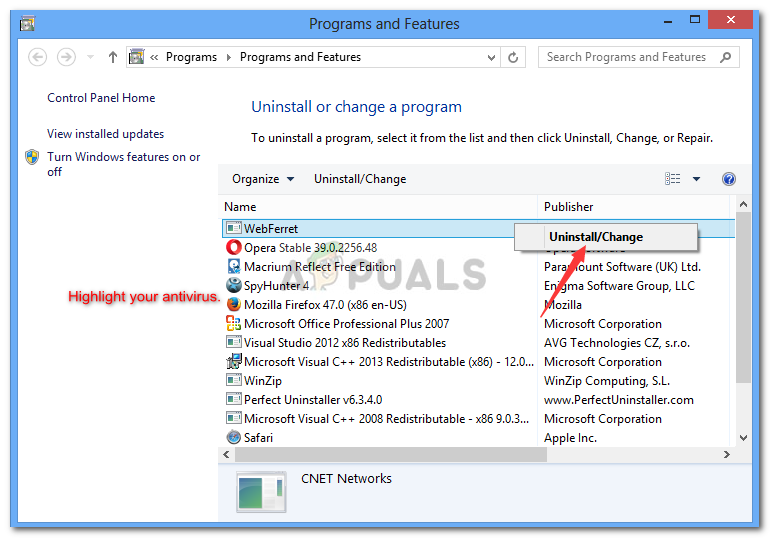
Select and uninstall antivirus
Try updating your windows now to see if this has fixed your solution. If it did fix your problem, I think you should fathom if you really need the anti-virus again.
Solution 2: Reboot BITS
Background Intelligent Transfer Service (also known as BITS) is a Windows component which is responsible for checking Windows updates and downloading them. Your error might have appeared due to bugged BITS, therefore, you should try rebooting the service. To reboot, here’s what you have to do:
- Press Winkey + R to open Run.
- Type in services.msc in Run.
- In the services list, locate BITS.
- Double click on it to open Properties.
- Under the General tab in Properties, select ‘Automatic (Delayed)’ in the drop-down list of Start-up type.
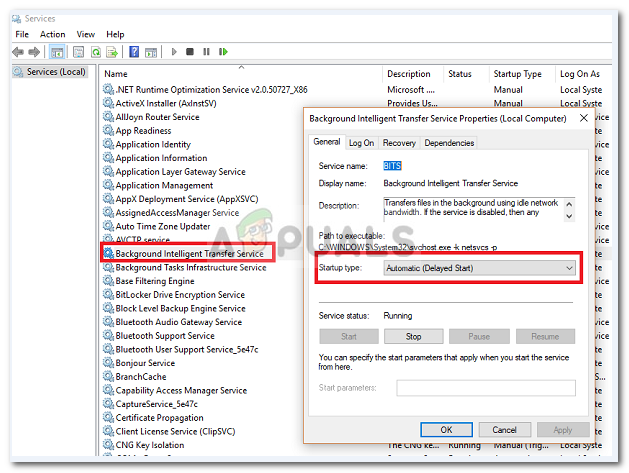
Locate and restart BITS - Click Apply and then click on Stop.
- Start the service again by clicking ‘Start’ and then click OK.
Give updating your Windows a go again to check the results.
Solution 3: Run DISM and SFC
As we mentioned above, the error could appear due to corrupted system files. To repair your system files, Windows has a built-in tool that lets you do it pretty easily. Here’s how you can repair your files:
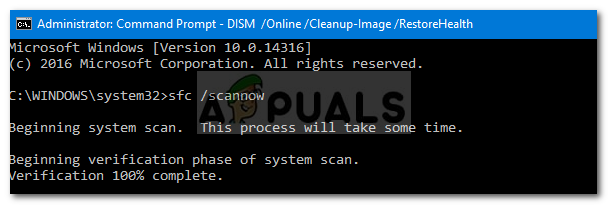
- Open Start Menu and type cmd.
- Right click on cmd and select ‘Run as an Administrator’.
- Type in the following command:
SFC Scan
Sfc /scannow
- This will take a while so make sure to give it time.
- Try updating your windows. If the problem is still there, then enter the following commands in cmd:
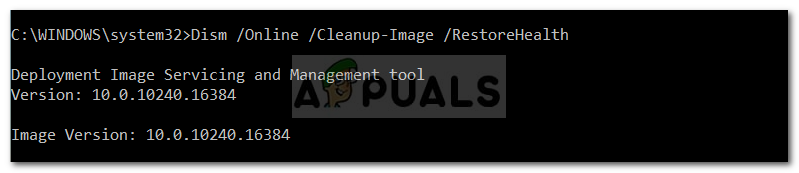
DISM Cleanup
DISM /Online /Cleanup-Image /RestoreHealth
Once this completes, try running Windows updates again.
Solution 4: Resetting Windows Update Components
There have been some reports from users claiming that their problem was fixed by resetting Windows Update components. You can reset your Windows Update components by doing the following:
- Press Winkey + X which opens a menu. Click on ‘Command Prompt (Admin)’.
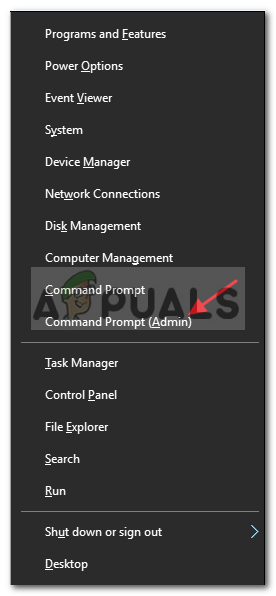
Choose Command Prompt (Admin) - Enter the following commands one by one in command prompt:
net stop wuauserv

net stop cryptSvc

net stop bits

net stop msiserver

ren C:\Windows\SoftwareDistribution SoftwareDistribution.old

ren C:\Windows\System32\catroot2 catroot2.old

net start wuauserv

net start cryptSvc

net start bits

net start msiserver

pause
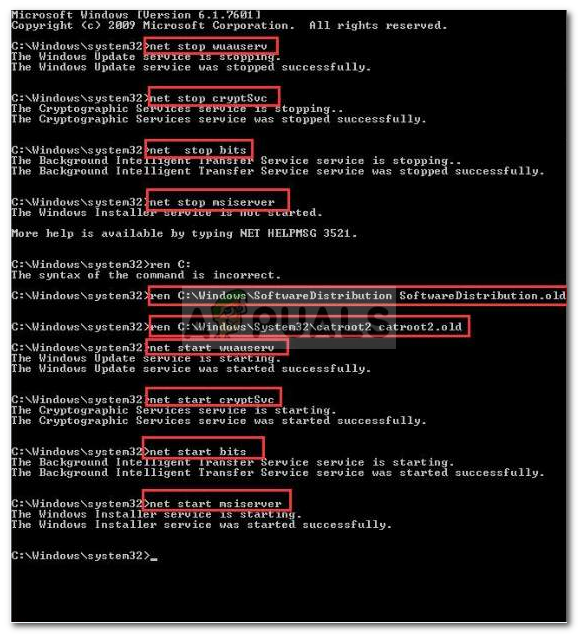
After entering all of these commands, check if your problem is resolved.
Solution 5: Manually Downloading the Update
If your error keeps on popping up, you can try downloading and installing the update manually. To get the code of the update you are looking for, do this:
- In the Windows Search Bar, type in ‘updates’.
- Select ‘Check for updates’ which is shown under Best match.
- Copy the update code from there (present in the KB2131231 form).
Copy the update code - Go to Microsoft’s Update Catalog.
- Type in the update code in the Search Bar and press enter.
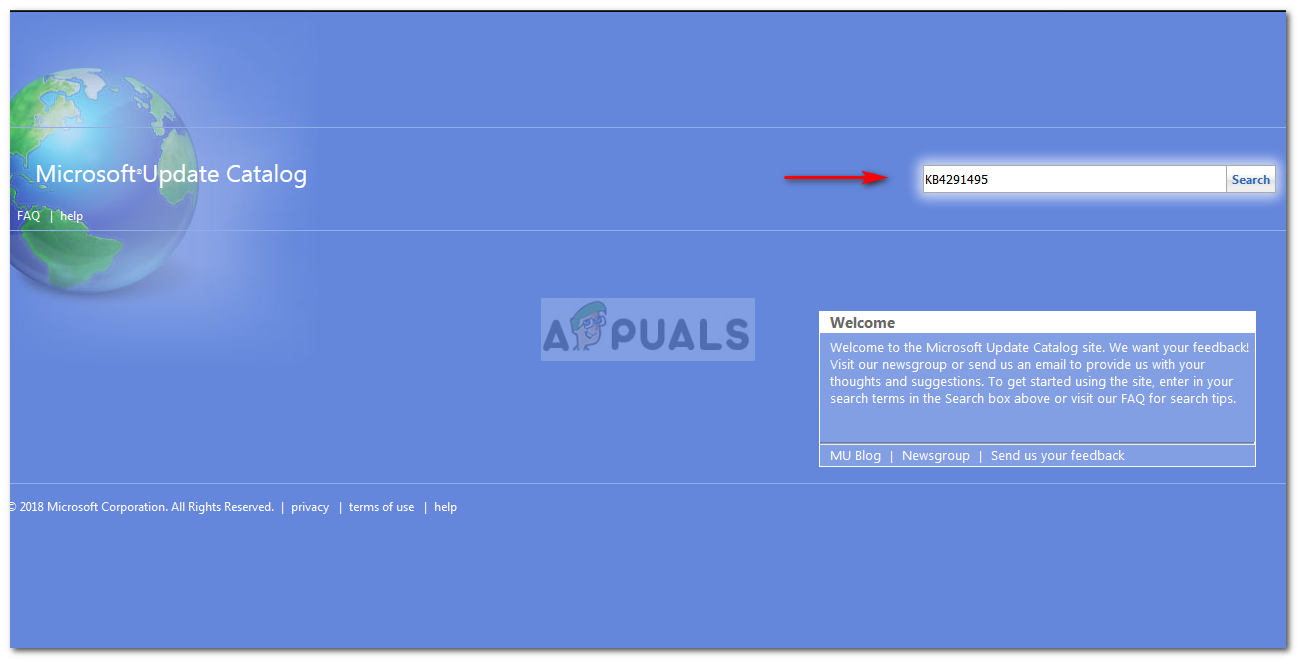
Enter the update code and search - Download the update for your respective Windows version.
- To install the update, run the downloaded file and install it
You might be asked to restart your device during or once the installation has finished.


