Fix: Destiny Error Code Centipede
The Error Code Centipede on Destiny Occurs when your network fails to contact the data centers of Destiny. This is a really common issue and there are a lot of reasons for this issue to occur. It can be an issue from the servers or it can be a client-side issue. You can check to see if the servers are up and running from (here). If the servers are down we can’t really do anything instead of waiting. However, if the servers are working fine and it’s a client side issue. Follow the steps shown below, in order to resolve it.
Solution 1: Update Your Game Entirely
Bungie often releases in-game patches which help improve your overall game performance while also fixing some of the error codes which appear to be the most often during that period. Several users have reported that the game actually improved its performance after they have installed all pending patches to the game so make sure you try this solution out first.
If you have turned off the automatic updates option or if it was turned off by default, you can fix this by following the steps below:
- Turn on the Xbox One system and sign into your desired Xbox profile.
- Press left on the D-Pad and navigate to the Settings menu. Locate the All Settings option and click on it.
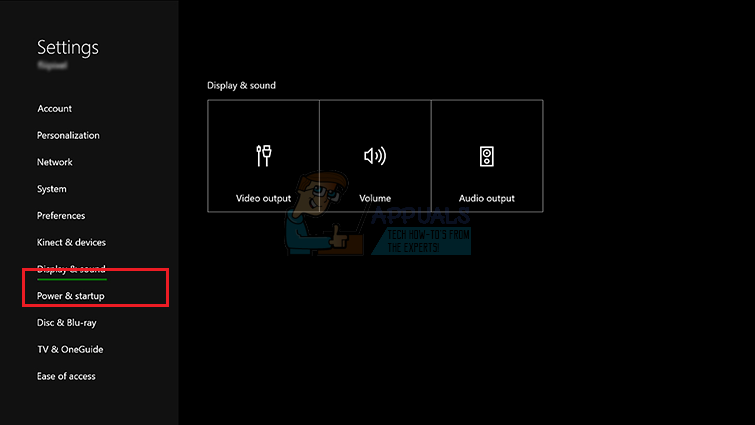
- Navigate to the Power and Startup menu and click on the Power Mode and Startup option.
- Select the “Keep my console, games & apps up to date” option.

If you are having problems with turning the option above on or if you simply can’t keep your games automatically updated due to a variety of reasons, you can also manually update Destiny in a couple of easy steps:
- Turn on the Xbox One system and sign into the desired Xbox profile.
- On the Xbox Home menu, select My Games and Apps and navigate to the Updates section of the menu.
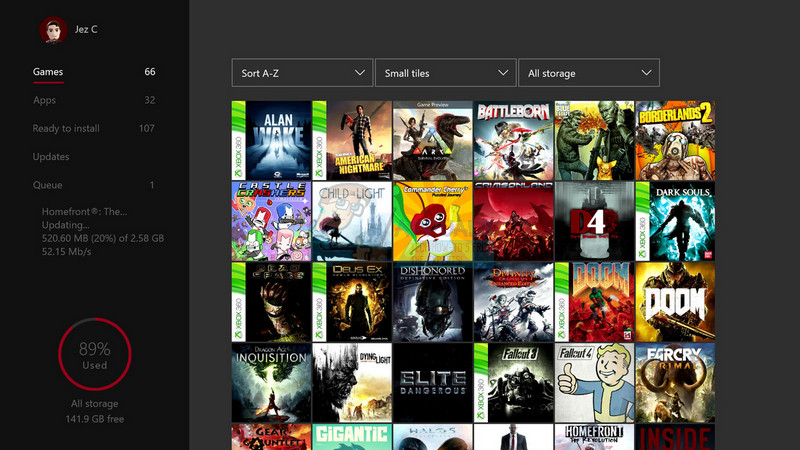
- Select Destiny and then select Update. You can follow the download progress in the Queue section of the menu.
Solution 2: Restart Your Console Completely
This solution has helped quite a few people deal with their Centipede error code and this solution is quite a general method for fixing almost all Xbox-related issue. Naturally, this method can only be applied to users playing Destiny on Xbox.
However, make sure all of your games are synced online and backed up since this process may end up deleting them from your local Xbox One memory. There are two ways to delete the cache on Xbox One and reset your console completely:
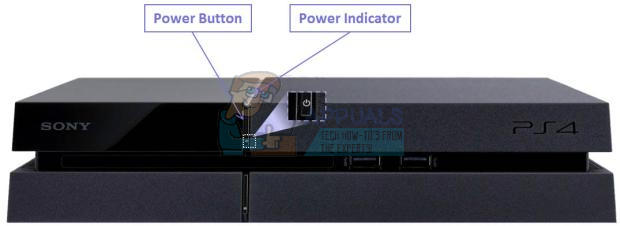
- Press and hold the power button at the front of the Xbox console until it shuts down completely.
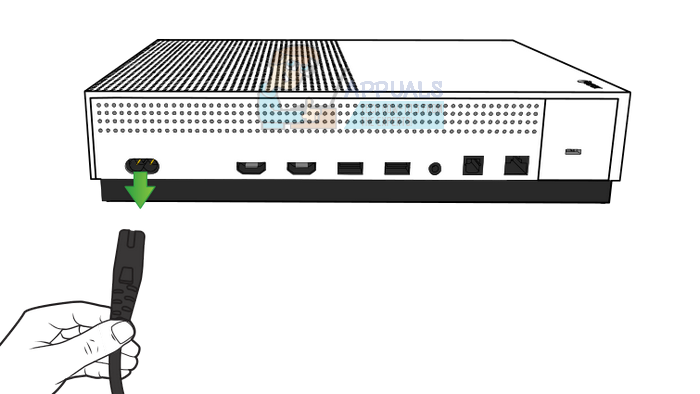
- Unplug the power brick from the back of the Xbox. Press and hold the power button on the Xbox several times to make sure there is no remaining power and this will actually clean the cache.
- Plug in the power brick and wait for the light located on the power brick to change its color from white to orange.
- Turn the Xbox back on as you would do normally and check to see if the Centipede error code still appears when you start Destiny or Destiny 2.
Alternative for Xbox One:
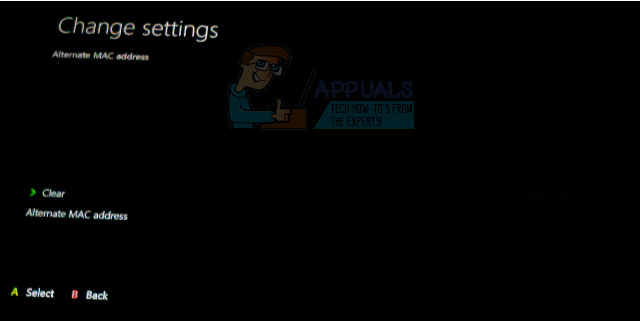
- Navigate to your Xbox One settings and click on Network >> Advanced Settings.
- Scroll down to Alternate Mac Address option and choose the Clear option which appears.
- You will be prompted with a choice to really do this as your console will be restarted. Respond affirmatively and your cache should now be cleared. Open Destiny or Destiny 2 after the console has restarted and check to see if the Centipede error code still appears.
If you are using a PlayStation 4 to play Destiny, make sure you follow the instructions below to hard reset your PlayStation 4 since PS4 does not possess an option to clear the cache:
- Completely turn off the PlayStation 4.
- Once the console is completely shut down, unplug the power cord from the back of the console.
- Let the console stay unplugged for at least a couple of minutes.
- Plug the power cord back into the PS4 and turn it on the way you normally do.
Solution 3: Port Forwarding
Port forwarding is actually a great fix for these types of issues because of a simple fact that Destiny uses quite odd router ports which are quite high and some routers block these ports by default and some don’t. It’s important to perform these changes quite carefully as you will need to open these ports on your router, if you have the necessary permissions to do so. Follow the instructions below carefully and get rid of your Centipede error code:
First of all, we will need to manually assign a static IP address to your console for the router you are currently using and the process is somewhat different of PS4 than it is on Xbox One.
PlayStation 4 Users:
- You can try to permanently assign your PS4 to the IP address that it is currently using. To find the IP address, power up your PS4 console.
- In the PlayStation 4 main menu select Settings >> Network >> View Connection Status.
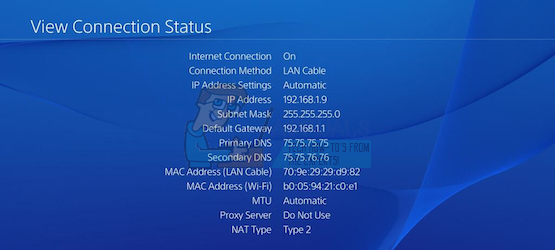
- Locate the IP address in the screen which opens up and make sure you write it down somewhere since you will need it to enable port forwarding. Make sure you also write down the MAC address of your PS4.
Xbox One Users:
You can try to permanently assign your Xbox One to the IP address that it is currently using. You can find the current IP address under advanced settings in the Xbox One Dashboard menu. To find the IP address, power up your Xbox One.
- Navigate to the home screen and push the menu button on the controller of your Xbox one.
- Navigate to Settings >> Network >> Advanced Settings.
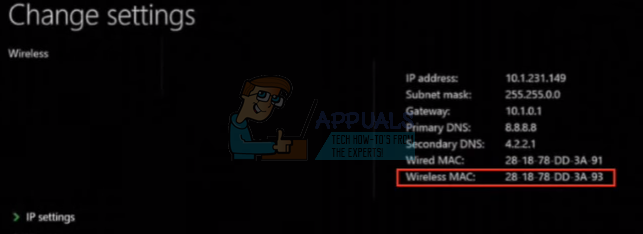
- In the IP settings section you should see the IP address listed. Write down this number because you will need to assign the IP address later.
- You should see Wired MAC address or Wireless MAC address listed under IP settings as well. Write down the 12-digit address for the connection that you are using.
That was the first step where we collected information about the respective consoles. Now we will need to assign static IP addresses to the consoles by following the steps below:
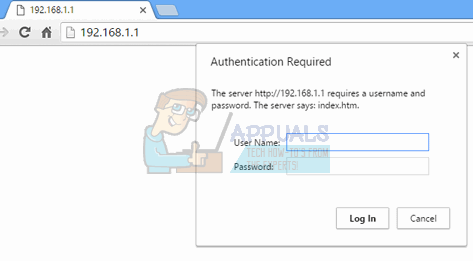
- Open a Web browser, type your Default Gateway number (IP address) into the address bar, and press Enter.
- Enter your username and password to access your router’s interface. The default username and password should be listed in your router’s documentation, on a sticker on the side of your router, or on the Port Forward website. If the username and password have been changed from the defaults and you don’t remember them, you’ll need to reset your router.
- The screen which enables you to add new IP addressed differs from router to router and there are no general rules to this.
- First of all, locate the Enable Manual Assignment option and click on the radio button next to Yes. The name of the option may be different or the option may not be present at all.
- Locate the window which allows you to type in the MAC address and the IP address of your choice so type in the addresses which you have gathered in the previous steps for your respective console.
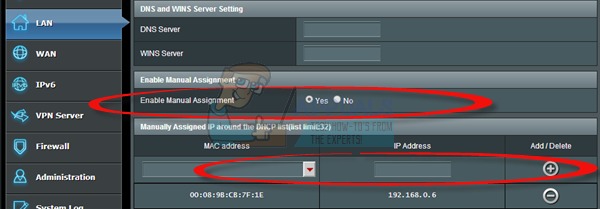
- After you have done that, click on the Add option and you have now added your console’s IP address to your router.
The last step consists of actually forwarding the ports used by Destiny through your router and via your console in order to get the game running properly again. Again, these settings may differ from router to router but the basis is the same. If you are having problems following these settings, make sure you search for the help page of your router’s manufacturer where these settings may be explained more clearly.
- Find the Port Forwarding section while still logged into your router. Each router will be slightly different. Common menu labels for the section of settings that contains Port Forwarding are “Port Forwarding”, “Applications”, “Gaming”, “Firewall”, and “Protected Setup”. If you don’t see one of these or something similar, try “Advanced Settings” and look for a Port Forwarding subsection.
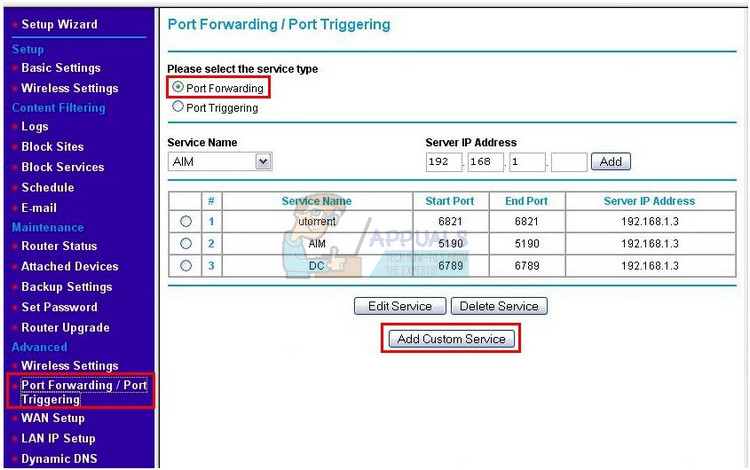
- No matter what the router or interface, you’ll need to enter the same basic information. Enter the port you want to open under Internal and External, or enter a range of ports to open under Start and End. Specially, for the Destiny and Destiny 2, there are several ranges you will need to open in your router and they are presented below:
7500-17899 (TCP) Outbound
30000-40399 (TCP) Outbound
35000-35099 (UDP) Inbound and Outbound
- The TCP and UDP abbreviations are the options you should select under the Type of Service Type option. Since you can only select one of the options (or both), repeat these steps several times until you have covered all of the ranges presented above.
- Enter the static IP address you created for you console in the steps above and make sure you click on the Enable option if it is available.
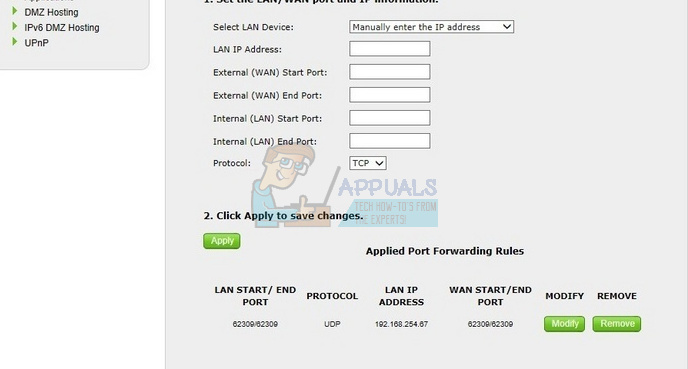
- Click on the Save of Apply button and make sure you restart both your router and your console in order to fully apply these changes.
Solution 4: Using a VPN and A Hotspot on Your PC
Some users who wanted to play the game on their college campus or on a different location where they didn’t possess the access to the router reported that they were completely unable to play because of the Centipede error code.
Some routers are simply not optimized to support Destiny’s high range of ports needed to connect. However, users have come up with a great plan on avoiding this but make sure you first contact the owner of the network you are using before doing this on your own and using a VPN is sometimes against the rules of the institution where you are located.
- Click on the Network connection icon in the computer’s System tray. If the computer is connected to a WiFi network, the icon will look like a WiFi signal. If the computer has an Ethernet connection, the icon will look like a computer with an Ethernet cable on its left side. In the menu that pops up, click on the blue Network settings option at the bottom.
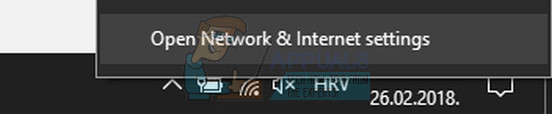
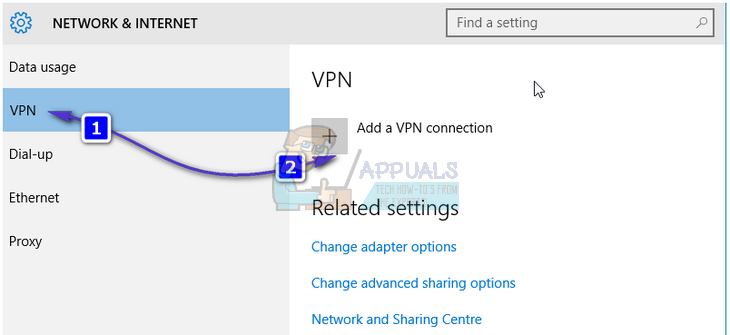
- This will open the Network & Internet settings. Navigate to the VPN tab in the left pane of this window. In the right pane, click on Add a VPN connection.
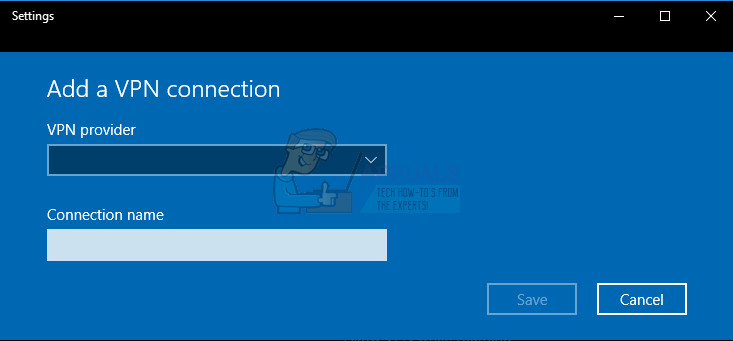
- Populate the Add a VPN connection window by typing in the following information:
VPN Provider: Windows (built-in)
Connection name: <Type in the name you want to give your VPN connection>
Server name or address: <The name or IP address of the VPN server you want to connect to>
VPN type: Point-to-Point Tunneling Protocol (PPTP)
Type of sign-in info: User name and password
User name (optional): <The user name you have registered on the VPN server>
Password (optional): <The password for your account on the VPN server>
- Enable the Remember my sign-in info option by clicking on the empty checkbox beside it and checking it and click on save.
- As soon as you click on save, the VPN connection will have been created. All you need to do in order to connect to the VPN connection and connect to the VPN server once the connection has been created is to simply navigate to the VPN tab in the Network & Internet settings window, click on the VPN connection that you created and click on the Connect button.
Now that you have created a VPN connection using the info you may have purchased or received online, know that there are a couple of useful tools which can perform this process automatically and easier. After you have successfully setup a VPN connection, it’s time to launch a local hotspot on the PC where you installed a VPN connection.
Microsoft Virtual Wi-Fi Mini Port Adapter is a feature added into Windows 7 and onwards. Using this feature, you can turn the physical network adapter that a computer has into two virtual network adapters. One will connect you to the internet, and the other will turn into a Wireless Access Point (Wi-Fi hotspot) for other Wi-Fi devices to connect with.
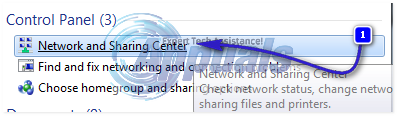
- Click the Start button and type Network and Sharing Center in the search box. Click on it to open it.
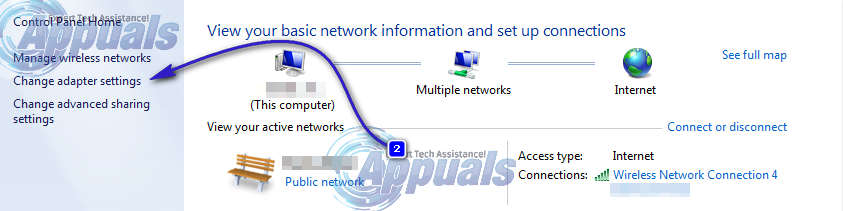
- Now click on the Change adapter settings option in the left pane.
- Right click on the adapter you are using to connect with the internet and click on Properties. In case you use Wi-Fi it will be similar to Wireless Network Connection and in case of wired internet access it will be similar to Local Area Connection.
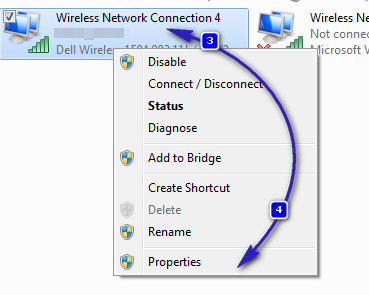
- Go to the Sharing tab in the properties window, and check the box beside Allow other network users to connect through this computer’s internet connection. If there is an option to select an adapter next to Home networking connection, select the adapter name for the Microsoft Virtual Wifi Mini port.
- Click on Settings. Check all the listed options and press OK for each to confirm. Press OK >> OK. If there is no such option, simply click OK to apply changes.
- Run Command Prompt as Administrator and copy the following code into its window. Make sure you click Enter afterwards to enable Wi-Fi hosting:
netsh wlan set hostednetwork mode=allow ssid=VirtualNetworkName key=Password
- Replace VirtualNetworkName with the name you want for your Wi-Fi hotspot, and Password is its password.
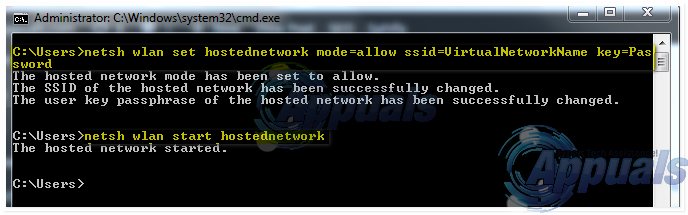
- Now type the following to start broadcasting your new Wi-Fi Hotspot:
netsh wlan start hostednetwork
- You will get a message that the network started. To stop broadcasting your Wi-Fi hotspot, type:
netsh wlan stop hostednetwork
Now you can connect your console to this hotspot and check to see if the error code Centipede still appears.
Solution 5: Make Sure Nobody Is Torrenting on the Same Network
Some users have reported that torrenting programs use the same ports as Destiny and sometimes they block the connection from your computer to Bungie servers. If you are actively encountering the Centipede error code, make sure no one on your home network is using some torrenting tools.
If someone is, indeed, using similar tools, exit them and check to see if the issue is resolved. If it is, try using a different tool to download torrents.