Fix: CLOCK_WATCHDOG_TIMEOUT Blue Screen of Death on Windows 10
Blue Screen of Death (BSOD) is a popular name referring to the screen you receive after a serious error occurs which doesn’t allow you to continue using your computer and you have to restart. These screens usually provide some information about why it occurred and they usually display an error message or code which you can use to research the issue and hopefully fix it.
However, the real issue occurs when these BSODs occur way too often and they make it impossible for you to even use your computer properly, let alone try to fix the problem manually. Let’s see what the following BSOD is all about!
CLOCK_WATCHDOG_TIMEOUT Blue Screen of Death
This particular error message causes your system to freeze and it demands a complete reboot in order to get your PC to work again. BSODs are a little less intimidating on Windows 10 since they managed to make it user-friendly but they are still serious.

Users who have been working on some important files and documents may lose them forever since all the files which were running when the error occurred risk becoming corrupt. However, there are several ways to fix this problem but make sure you try out all of them and follow the instructions carefully.
Solution 1: Stop Overclocking Your CPU
Overclocking your CPU usually causes these errors. First of all, you should know that the CLOCL_WATCHDOG_TIMEOUT BSOD is usually caused by processor problems and you should consider checking this out.
Overclocking is a process where you change the frequency and speed of your processor to a greater value and above the factory settings. This can give your PC a significant speed boost but you have to absolutely careful since there were occasions where entire PCs went down in flames after users overclocked them too much or because they were careless.
Returning your CPU’s rate and frequency to its original state depends on which software you used to overclock in the first place. Intel and AMD have their own applications available to download which let users overclock their CPUs but there are dozens of programs available to choose from.
Stop overclocking your PC and check to see if the BSOD appears again.
Solution 2: Use Windows Driver Verifier
Driver verifier is a built-in tool in the Windows Operating system which diagnoses Windows kernel-mode drivers and graphic drivers if they are using any illegal function calls or any other procedures that might corrupt the system files. In this method, we will detect any unsigned drivers that are not provided by Microsoft and will try to verify them or delete them.
- Go to the Windows Menu and type in Verifier and open the utility as an administrator.

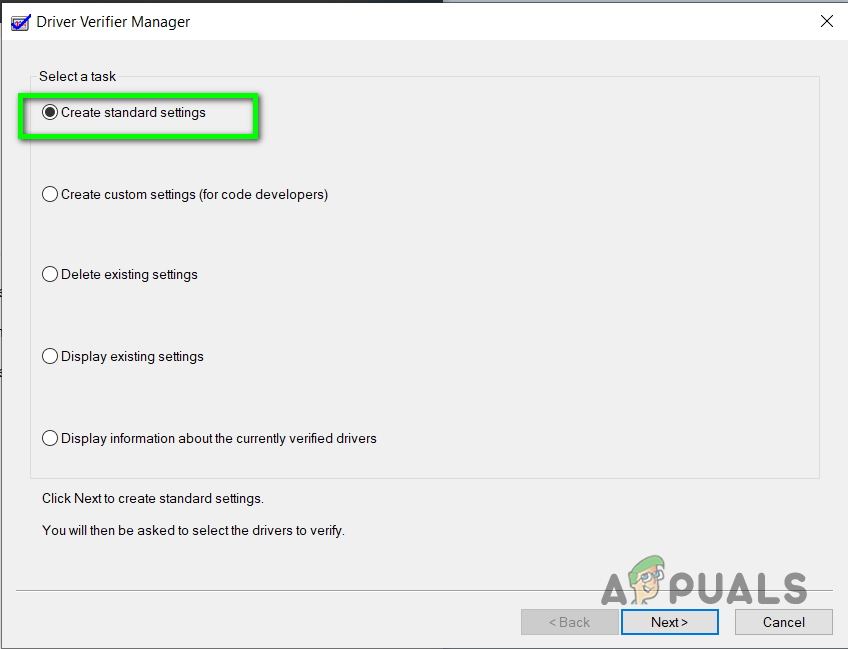
Open Verifier as administrator - Select the option to Create Standard Settings and click Next.
Choose create standard settings - Select the option Automatically Select Unsigned drivers and Click Next, you should see the message that says No Unsigned drivers has been found
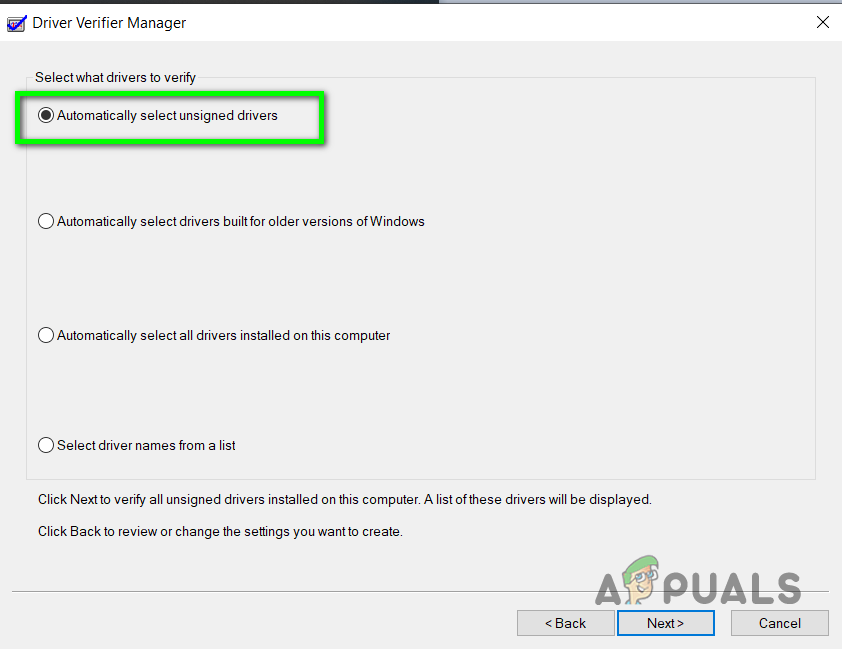
Automatically select unsigned drivers - Now close the Driver Verifier Manager and open it again and click the option Create Standard Settings and click Next
- Choose select Drivers from the list and click Next
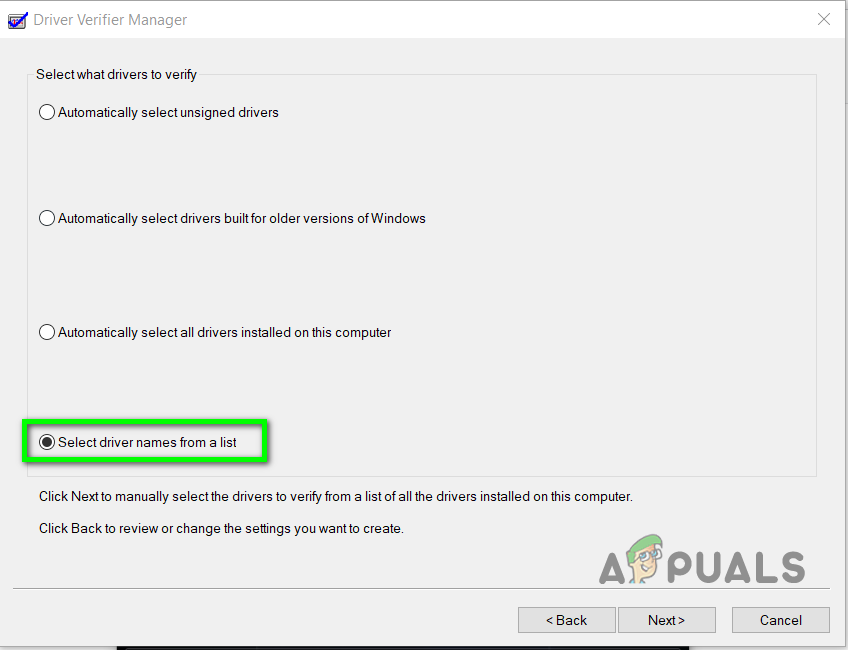
Select drivers names from the list - Select all the drivers that show the Provider as unknown and click Finish

Select all the drivers that show the Provider as unknown - You will be prompted to restart your computer. Once you restart reopen the Driver Verifier and choose the option Delete existing Settings and Click Finish.
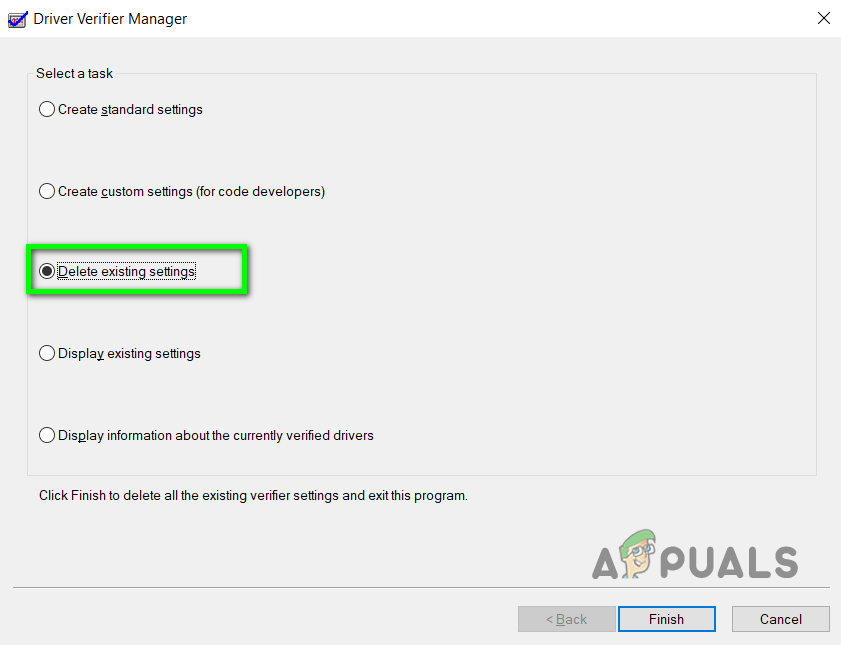
Verifier delete existing settings - Now again restart your computer
Solution 3: Checking Disk for System File Corruptions
In this method, we will use the Command Prompt to detect and fix any logical File System error on the hard drive. We will use the CHDSK command which works depending on the type of your file system partition.
We will try to fix both the logical errors and also recover any readable information that might have been corrupted due to bad sectors on the disk. This process will take some time from few minutes to an hour.
- Open Command Prompt as an Administrator
- Type in the command chkdsk /f /r E: (Replace E with the Volume letter you want to Fix errors for)

Run Chkdsk on Command Prompt - Once this process is complete restart your computer
- If the volume is currently is used by another program then it will be checked for errors when you restart your computer.

Disk Checking on computer restart
Solution 4: Use Windows Memory Diagnostics
Clock Watchdog Timeout error also occurs when there is incompatible Random Access Memory on the PC. Windows 10 has a utility called Windows Memory diagnostics which scans the RAM to find out possible errors. Windows memory diagnostics run after rebooting the system and may take several minutes to complete the process.
- Go to the Start Menu and Type in Windows Memory Diagnostics and open the program
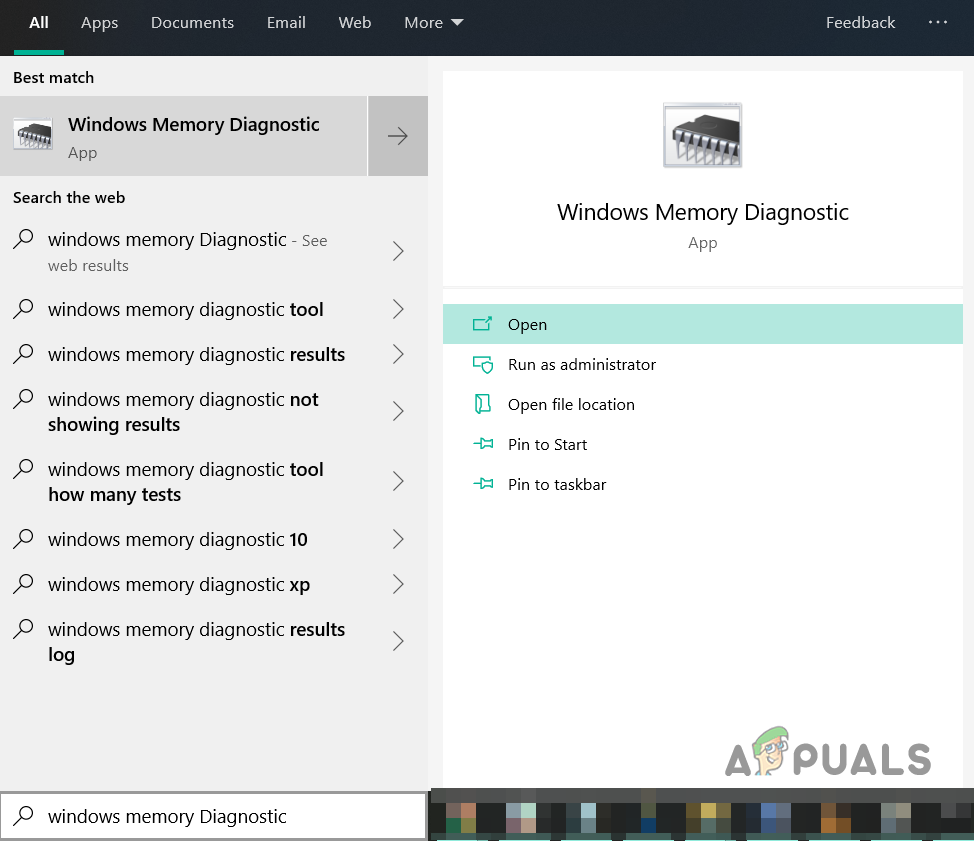
Run Windows Memory Diagnostics - Choose the option restart now and the computer will automatically check for problems when the computer restarts.
Solution 5: Fix Outdated External Devices and Drivers
This is probably the most common issue to all BSOD problems. Outdated drivers and incorrectly configured external devices such as a mouse, keyboard, webcam, and printer can cause system instability in no time and it’s no wonder that these errors just keep on occurring every couple of hours or even minutes. This can be fixed easily if you are willing to invest some time.
- Open Device Manager by searching for it in the Search bar which you can access in the Start menu.
- Click on View and enable the option called “Show hidden devices”.
- After that, scan the device manager for devices showing an error message next to their name.
- Expand all menus by clicking on the arrow next to their name and continue your search.
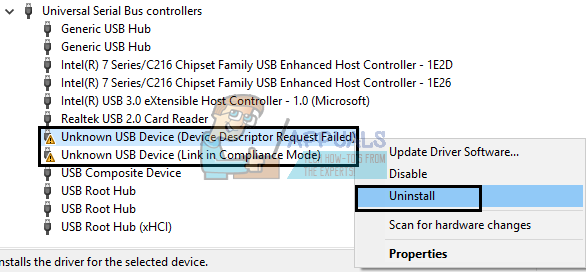
- In 90% percent of all BSODs caused by hardware, the issue is in the Universal Serial Bus controllers with an error in their name saying:
Unknown USB Device (Device Descriptor Request Failed)
- Keep your PC turned off and your Device Manager opened and remove USB devices one by one (mouse, keyboard, webcam, etc).
- When you remove the hardware component that caused the BSOD, this particular error Unknown USB Device should disappear.
- If it doesn’t, reconnect all devices, uncheck the “Show hidden devices” option from the View menu, and check to see if the Unknown USB Device is showing. If it is, disconnect devices one by one until it disappears.
- If you have been following the instructions successfully, you should have realized just which of your external devices is causing the BSOD.
- Make sure the hidden devices are showing. Keep the problematic device disconnected, locate it in the Universal Serial Bus controller, right-click on it and select Uninstall device.
- Restart your computer and check to see if the issue has been resolved.
As for the troubled device goes, you should be able to reinstall the updated driver for it simply by googling the name of your device and downloading it from the manufacturer’s website.
Solution 6: Switching Your Sounds to External Speakers
If you are using a laptop or a computer with two pairs of speakers (internal and external ones), this issue may occur when Windows tries to swap between the internal and external speakers. This can be fixed easily but you might not be able to use your internal speakers after disconnecting the other pair.
- Right-click on the Volume icon at the bottom right part of your taskbar and select Playback devices.
- Sound settings should open so make sure you stay in the Playback tab.
- Right-click on the pair of speakers you wish to disable and click on Disable.
- Make sure your other speaker is working properly as you won’t be able to play sound if both of them start malfunctioning.
- Restart your computer and check to see if the issue still appears.
Solution 7: Use System File Checker
In this method, we will use Windows File Checker as a System Utility to fix the damaged or corrupt Windows files in the System. It is a built-in feature in all modern versions of Windows OperatingSystem. It allows you to fix the damaged or corrupt Windows files in the System. In order to run SFC, you need to run cmd with elevated mode (with administrator privileges).
- In the search menu type cmd and open command prompt as administrator
- In the Command Prompt Window type, sfc /scannow and press enter to execute the command
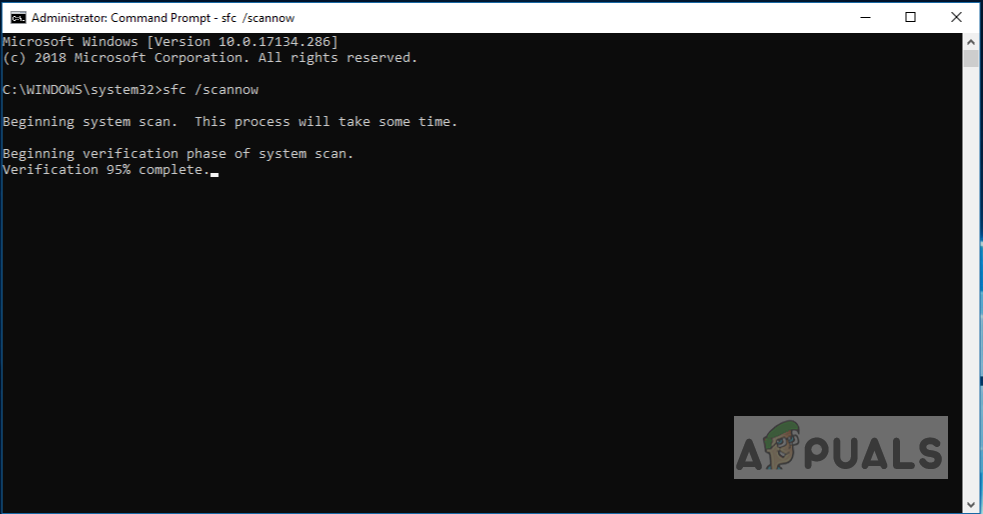
Run sfc scannow - The System File Checker will start running to check the integrity of all the system files and will repair the corrupt .dll files if found.
- Once the SFC has finished scanning the system it will display one of the following messages:
- Windows did not find any integrity violations
- Windows Resource Protection found corrupt files and repaired them
- Windows Resource Protection found corrupt files but was unable to fix some (or all) of them (not a good thing)
- If you see the first or second message then that means there were either no corrupt files found on the system or if there were any corrupt files then they were fixed.
Solution 8: Update BIOS
A computer’s Basic Input-Output System (BIOS) is embedded software on a motherboard. It is the first software your PC loads so that it can use things like CD drives, mice, and keyboards practically from the moment you turn it on.
Updating BIOS can help you deal with certain issues regarding BSOD as any instability regarding BIOS settings will prevent your PC from running or functioning normally. Take a look at the instructions below!
- Find out the current version of BIOS you have installed on your computer by typing msinfo in the Search bar in the Start menu,
- Locate the BIOS version just under your Processor model and copy or rewrite anything to a text file or a piece of paper.
- Find out whether your computer was bundled, pre-built, or assembled manually by purchasing all components individually. This is important because you don’t want to use BIOS made for one component of your PC when it won’t apply to your other devices and you will overwrite BIOS with the wrong one, leading to major errors and system problems.
- Prepare your computer for the update. If you are updating your laptop, make sure its battery is fully charged and plug it in just in case. If you are updating a computer, it’s advisable to use an Uninterruptible Power Supply (UPS) to make sure your computer doesn’t turn off during the update because of a power outage.
- Follow the instructions we prepared for various desktop and laptop manufacturers such as Lenovo BIOS Update, Gateway BIOS Update, HP BIOS Update, Dell BIOS Update, and MSI BIOS Update.
Solution 9: Check to See if Your CPU is Faulty
If your CPU is faulty and it’s experiencing errors all by itself, it might be time to replace it. This can be an expensive purchase but it’s worth it if it’s going to keep your computer stable.
- Get your CPU checked by a professional IT expert and let them deduct if there is anything wrong with it.
- If it is, listen to their suggestion about what model would suit your setup the best.
Solution 10: Providing a Kernel Memory Dump to IT Experts
A kernel memory dump can be read by IT experts with a Windows debugger which will immediately show just where the issue is and how to fix it. The tool can be run easily with Command Prompt.
- Open Command Prompt by searching for it in the Search bar, right-clicking on it, and selecting the Run as administrator option.
- Copy and paste the following command in the Command Prompt and make sure you click Enter after it.
Verifier.exe /standard /all
- This process will trigger the Blue Screen of Death and record a log file that is located in the C:\Windows\Minidump\ folder
- This file can be somewhat difficult to open but there is a tool made by Microsoft that can be downloaded for free from this site. Locate it under the Debugging Tools for Windows 10 (WinDbg) section under the Get Debugging Tools for Windows (WinDbg) (from the SDK)
- After downloading the SDK file, make sure you deselect everything except Debugging Tools for Windows from the installation wizard if you don’t want to use any other components.
- Locate the tool after installing it under the name of windbg and run it.
- Navigate to File > Open Crash Dump and locate the minidump file located in the C:\Windows\Minidump\ folder.
- Look toward the bottom of the resulting file, where the line says Probably Caused By. This is a good indicator of which driver is causing the problem.
- Uninstall this driver from Device Manager by right-clicking on it and selecting the Uninstall device option. Make sure this device is disconnected beforehand.
- You can also update it by selecting the Update driver button if you want to save time from downloading and installing it yourself.

Solution 11: Resetting BIOS to Default
If your BIOS is already up to date or if you are just too worried that something might go wrong during the installation process, leaving your PC bricked, you can always just reset BIOS settings to their defaults and hope for the best.
- Restart your computer and click the F8 button in order to open BIOS. It’s not necessarily the F8 key in all cases but make sure you click the button in the message at the bottom of the boot screen (the one where the logo and name of your PCs manufacturer is listed):
Press __ to run Setup
- BIOS settings are not the same for all manufacturers but make sure you are familiar with the controls because you are not able to use your mouse in BIOS.
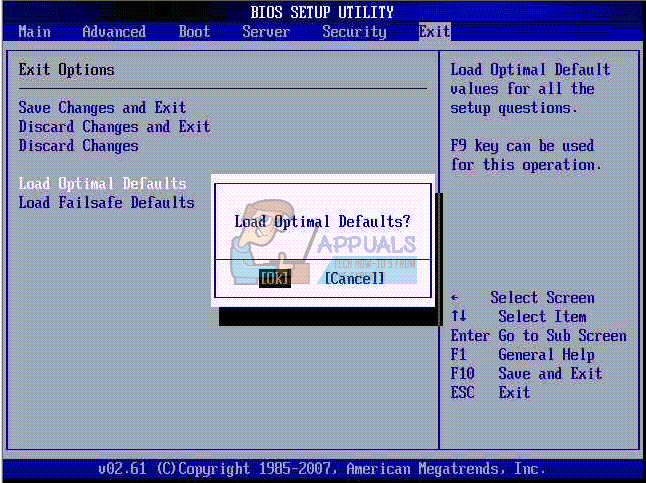
- The first method is to try and locate the button for Setup Defaults at the bottom of the BIOS screen. It’s usually the F9 key. Press it and select Enter.
- If this is not listed, navigate to the Exit tab in BIOS and select the Load Setup Defaults option. Click Enter when prompted.
- Navigate to the Exit Saving Changes option and let your computer boot.
- Check to see if the BSOD appears again.
Solution 12: Uninstall Virtual Image Managers
Programs such as Daemon Tools and Alcohol 120% are usually used to create virtual disks and images in order to manage ISO files, etc. However, most of these tools have been linked to this particular Blue Screen of Death so it’s advisable to install them for the time being or to replace one of them with an alternative (e.g. replacing Daemon Tools with Alcohol 120%).
- Open the Settings app by clicking on the gear icon in the Start menu.
- Open the Apps section, locate the program you want to uninstall, and click on Uninstall.
- Follow the instructions on the screen in order to run the uninstall wizard.
Solution 13: Prevent Your PC From Overheating
Overheating is a major cause of system instability, crashes, and freezes, especially if you are using your laptop excessively with a weak cooling system, in a warm room while running a video game or some other resource-heavy process.
- The easiest thing you can do to help keep your computer cool is to give it a little breathing room by removing any obstacles to airflow.
- One of the most effective ways to cool your PC is to clean the internal fans. There’s a fan on top of the CPU, one inside the power supply, and usually one or more on the front and/or back of the case.
- Unless you’ve replaced your CPU fan already, the one that’s in your computer now is probably a bottom-of-the-line fan that cools your processor just enough to keep it working properly, and that’s assuming it’s running at full speed. Replace it with a powerful alternative.
- Stop overclocking your PC if it’s causing your computer to overheat. Check Solution 1 for more information.
- In very high-end computers, heat buildup can become such a problem that even the fastest and most efficient fans can’t cool the PC. In these cases, installing a water cooling kit can help.
Great! Thanks Kevin. In my case, a BIOS update was necessary.