Fix: CCleaner won’t Open
If you have been using Windows for a long time, then CCleaner is no stranger to you. It is a computer utility program that is used for cleaning the potentially unwanted files and invalid Windows Registry entries from a computer. By cleaning the temporary and unwanted files it makes your computer more secure and faster. But there can be a problem with running this software; like a situation where the user keeps clicking it to open but it just won’t open or appears then vanishes back.

What causes CCleaner not to open?
According to our investigation, this sort of issue happens because of malware on your system or after the malware is cleaned out by the security software on your system, but it has already done its damage. These malware use some registry hack where it will prevent you from opening certain apps in your computer.
We will solely focus on the registry editor in the solution because that is where the problem is causing for the software that we are trying to open. And we will solve that in the solution below.
Removing the CCleaner entries from Registry Editor
Here we will be providing a solution where you can get rid of these affected registry files of certain applications that you are facing the problem about. In our case, it’s the CCleaner which won’t open no matter what you do. But the same thing can happen to other applications which we will use in this solution. Moving on to the steps:
- Hold Windows Key and Press R to open Run, then type “regedit” in the text box and click OK

Open run and type regedit and click OK - Select Yes for the User Account Control popup window
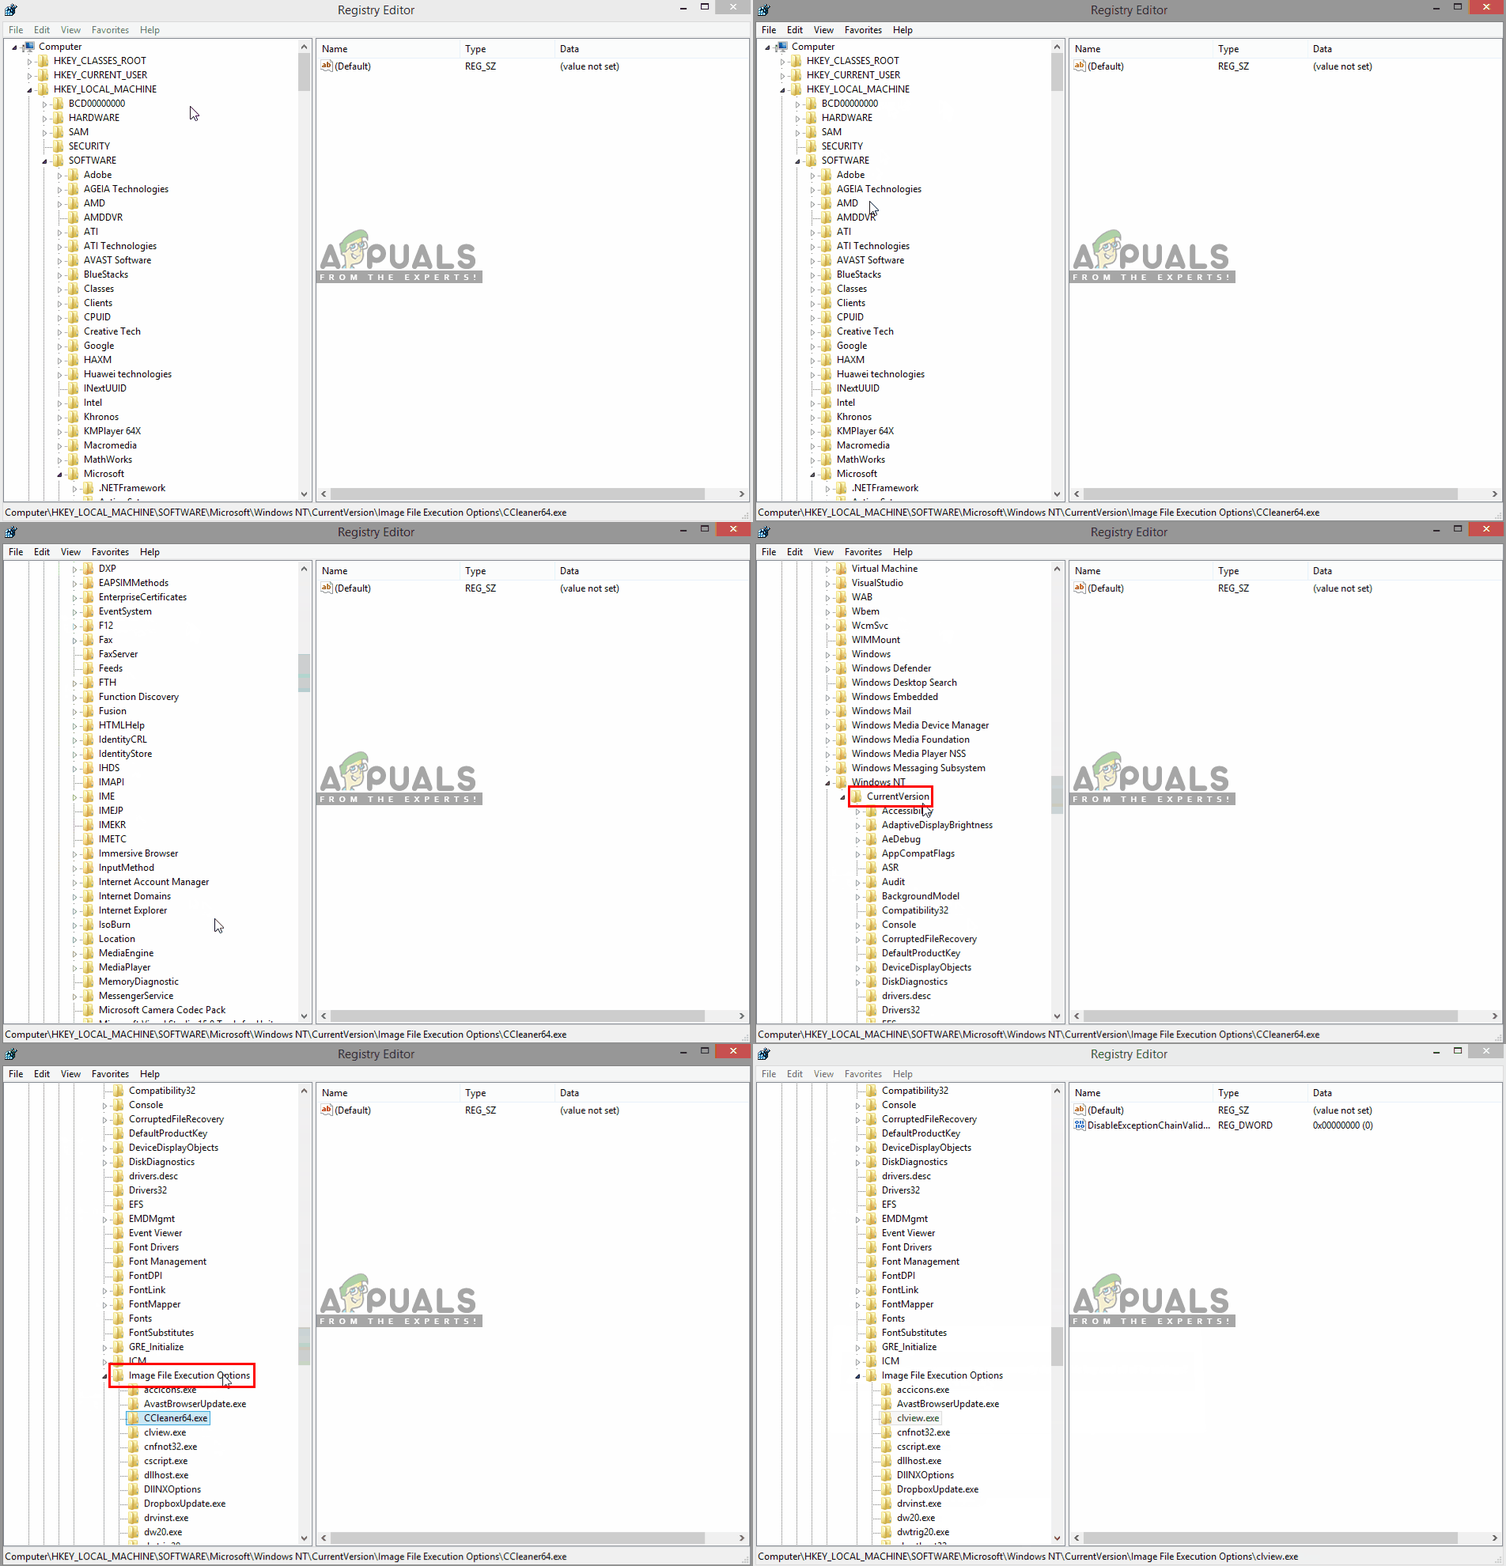
- Now go to the following path:
HKEY_LOCALMACHINE\SOFTWARE\Microsoft\Windows NT\CurrentVersion\Image File Execution Options\
- Find the “CCleaner” entry in the list
- Right-click on it, then select “Delete” and confirm Yes

Deleting CCleaner from registry editor - Now close the regedit and go open the CCleaner
For those who are unable to open “regedit” just like the CCleaner, check the method for that below.
If Registry Editor “regedit” is also not opening, try this:
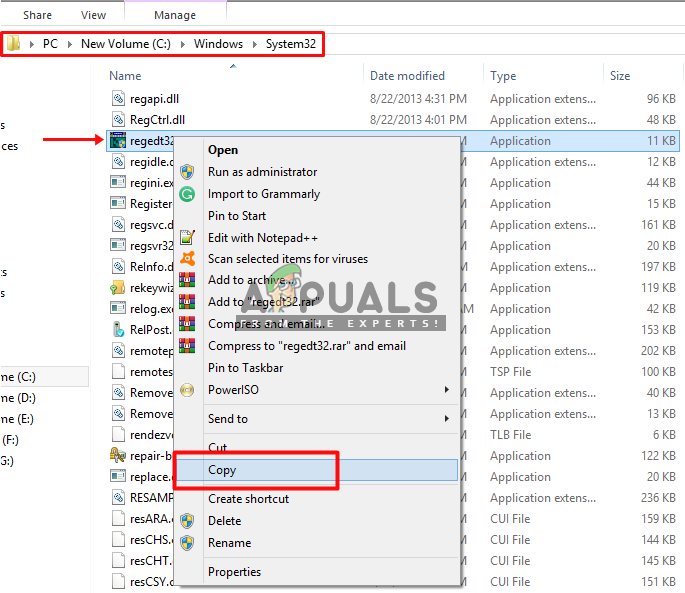
- Go to your “regedit” file path in your system:
C:\Windows\System32
- Scroll down and find the file “regedit32.exe“, then right-click and copy it

Copying the regedit file from system32 to Desktop - Paste it on “Desktop“, then right-click the file and select Rename
- You can rename the file to anything you want

Renaming the regedit file after copied to the desktop - Now run the “regedit” file and follow the steps of the solution
For some least users, they might get the error “You require permission from TrustedInstaller to make changes to this file” when they will try to rename the file. Then you can check our guide about that here. Or you can run “adwcleaner” and “Malwarebytes” which will find the conflicts and you will be able to run regedit after that.


