Fix: Can’t See Other Computers on Network
Windows enables you to connect to other people’s computers easily just by sharing the same network. Setting up this process is quite easy and you can easily share files across computers connected to the same network. However, the process sometimes simply fails to complete successfully and you are suddenly unable to see or connect to other computers on the same network.
This error is present in all versions of the Windows OS and it can be solved in a number of quite different ways. That is why it’s important that you follow the rest of the article carefully in order to solve the problem.
Solution 1: Restart Your Computer Several Times
Even though this one sounds like the basic IT suggestion, people have solved the problem this way but sometimes took more than one restart. Some of the parts in the chain which runs this process have gone corrupt and restarting the computer fixed this problem.
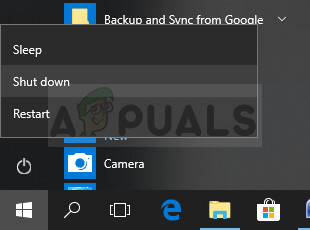
- On your running PC, click on Start >> Power button at the bottom of the menu and choose the Shutdown option.
- Once your PC has shut down completely, unplug the Ethernet cable from your PC if you are using it to connect to the Internet and let the cable stay unplugged for at least a couple of minutes before plugging it back in. Meanwhile, restart your router and your modem by clicking the Power buttons located on them before you plug the cable back into the computer.
- Turn the PC on normally by pressing the power button.
Solution 2: Verify SMB 1.0/CIFS File Sharing Support is Installed
In order for the process to succeed, there are several components that absolutely need to be installed properly on your computer. One of these components is definitely SMB 1.0/CIFS File Sharing Support which is a built-in component that is turned on by default on some computers and disabled on others. You should definitely check if the process is enabled on your computer by following the instructions below:
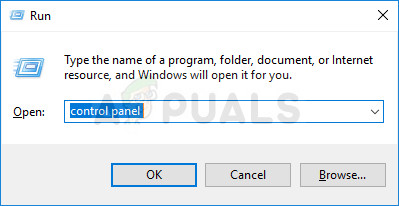
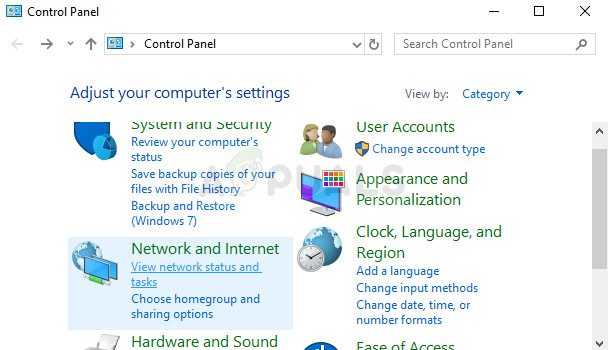
- On your keyboard, use the Windows Key + R key combination to open the Run dialog box. Also, you can search for the Run box or the Control Panel directly in the Start menu.
- Type in Control Panel and click OK in order to open it.
- Change the view in Control Panel to Category and click on Uninstall a program under the Programs section.
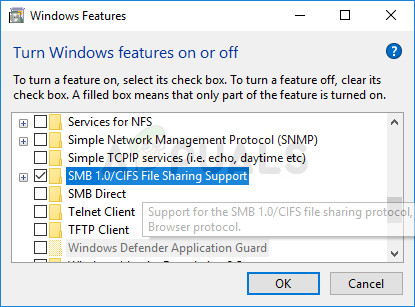
- At the right side of the screen which opens, click on Turn Windows features on or off and locate the SMB 1.0/CIFS File Sharing Support entry on the list. If it is set to disable, make sure you mark the checkbox next to it. Click OK in order to save the changes.
Solution 3: A Workaround for Windows 10 Users
Since a lot of useful features present in the older versions of Windows have been dropped in some of the latest Windows 10 updates, Windows 10 users will never be able to use this feature the same again, meaning that the browsing functionality of networks cannot be fixed properly. Fortunately, there is a workaround suggested by some users who rely on making one computer on the network the Master Browser which will actually solve the problem.
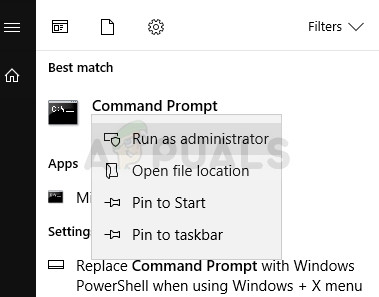
- You can check which computer is the master browser in Command Prompt. Search for “Command Prompt”, right-click on it, and select the “Run as administrator” option. Copy and paste the following command and make sure you click Enter afterward:
nbtstat -a ComputerName
- You should repeat the same process for each computer on the network. The computer which is indeed the master browser will have the __MSBROWSE__ value in the list which appears. In order to set which computer should be the Master Browser, you will need to use the registry editor in order to change this.
Before proceeding with this solution, it’s recommended that you close all of your running programs and it’s advisable to create a backup of your registry just in case something goes terribly wrong while you edit it. Backup your registry before proceeding.
- Open the Registry Editor by typing “regedit” in either the search bar or the Run dialog box. Navigate to the following key in Registry Editor:
HKEY_LOCAL_MACHINE\SYSTEM\CurrentControlSet\Services\Browser\Parameters
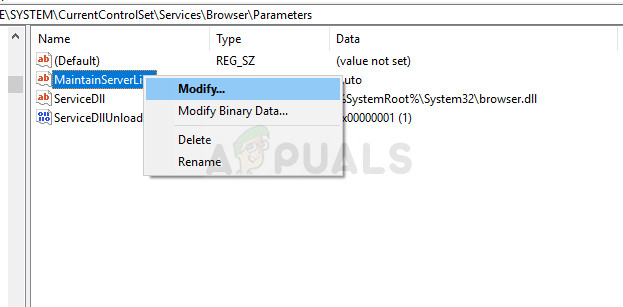
- Change the value of MaintainServerList from Auto to Yes by right-clicking on it, choosing the Modify option, and typing Yes in the Value data field.
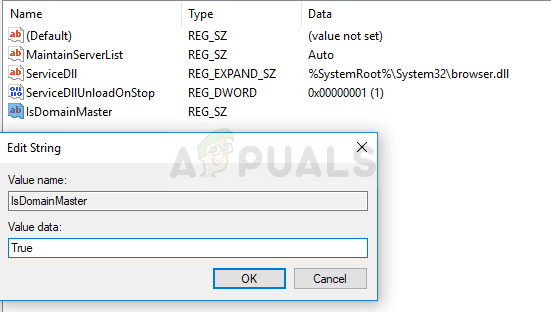
- Locate the IsDomainMaster value and change its value to True in the same manner. If this key is not available in this location, right-click anywhere at the right side of the Registry Editor’s window, select New >> String Value and name it IsDomainMaster. Right-click on it, choose Modify and set its value to True.
- Restart your computer and apply the changes. If you don’t want any other computer to take the Master Browser role, you can change the MaintainServerList value to No.
Solution 4: Disable the Internet Protocol Version 6 on Your PC
This Windows network error sometimes occurs if you have enabled IPv6 and you don’t have a local gateway that is needed to connect. There are several users who were able to solve the problem by disabling IPV6 whereas it didn’t work for others. Your safest bet is to try and see if it’s working yourself.
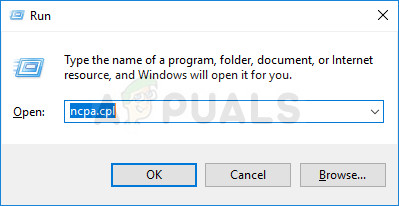
- Open the Run dialog box by pressing the Windows logo key + R key together. Then type “ncpa.cpl” in it and click OK.
- Now that the Internet Connection window is open, double-click on your active Network Adapter.
- Then click Properties and locate the Internet Protocol Version 6 entry on the list. Disable the checkbox next to this entry and click OK. Restart your computer in order to confirm the changes and check to see if the error appears again.
Solution 5: Disable Any VPN Connection You May Have Running
This is a vital step since some users have reported that certain Windows Updates have initialized a VPN connection which prevents homegroup from starting properly. VPN is always a big no if you want to have working local connections. Follow the instructions below in order to turn off Windows VPN:
- Open the Settings app by clicking the Start menu button and clicking the gear icon at the lower left part of the Start menu.
- Click on the Network & Internet section in the Settings window and switch to the VPN section.
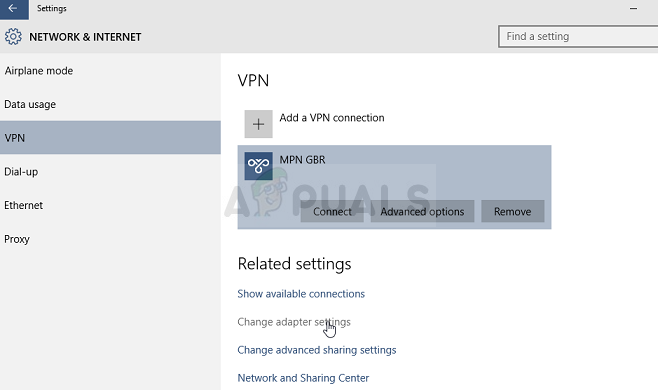
- Locate the VPN connection you have running, click on it, and click on the Remove button. Accept any dialog options Windows may throw at you and restart your computer in order to apply the changes. Check to see if you are now able to see and connect to other computers in the network.
Solution 6: Restart a Certain Service
There is a service called Function Discovery Provider Host which is vital to this process and come users have reported that tweaking this service has helped them connect to the homegroup again and see other computers on the network.
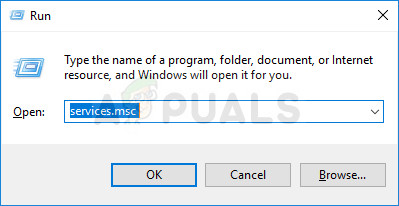
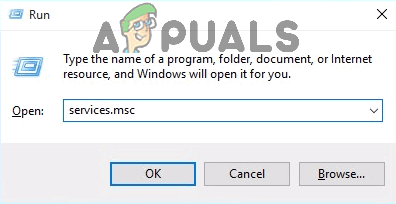
- If you are using a version of Windows older than Windows 10, the easiest way for you to access the services running on your PC is by clicking on the Start button and navigating to the Run dialog box.
- Type “services.msc” in the dialog box and wait for the list of services to open.
- If you are using Windows 10, you can also access Services by using the Ctrl + Shift + Esc key combination in order to bring up Task Manager.
- Navigate to the Services tab in Task Manager and click on Open Services at the bottom of its windows, next to the gears icon.
After you have successfully open Services, follow the instructions below.
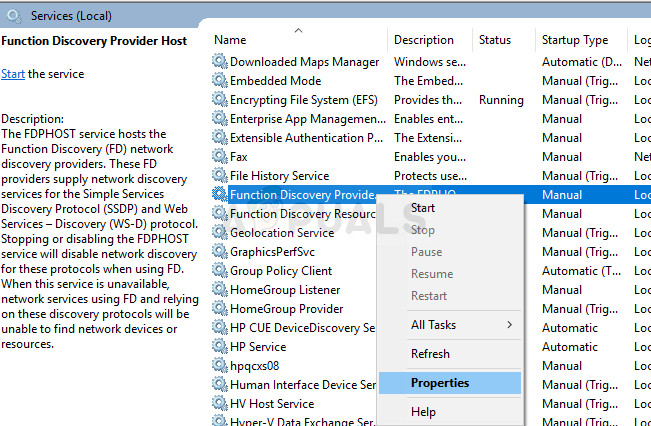
- Locate the Function Discovery Provider Host service by clicking on the Name column in order to sort the services in alphabetical order.
- Right-click on the service and click on Properties.
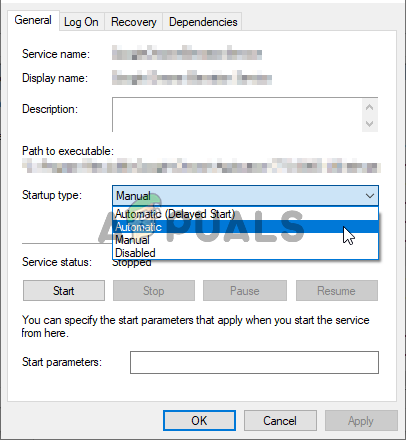
- Navigate to the Startup type and set it to Automatic but make sure it’s service status is Running or Started.
- If the status says Stopped you will have to click on the Start button located in the Properties window before proceeding.
- Next, click on the recovery tab, locate the First failure option and choose to Restart the Service. This option makes sure that the service will restart automatically if it fails. Do the same for Second Failure and Subsequent failures.
The service should start now and you won’t have any problems dealing with it in the future. However, you may receive the following error message when you click on Start:
“Windows could not start the Function Discovery Provider Host service on Local Computer. Error 1079: The account specified for this service differs from the account specified for other services running in the same process.”
If this occurs, follow the instructions below to fix it.
- Follow steps 1-4 from the instructions below in order to open the service’s properties.
- Navigate to the Log On tab and click on the Browser… button.
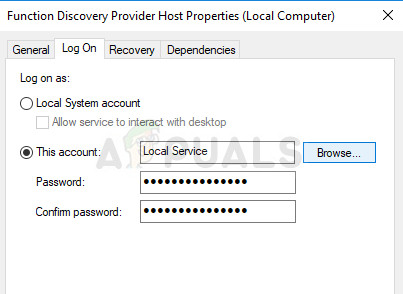
- Under the “Enter the object name to select” box, type in your computer’s name and click on Check Names and wait for the name to become authenticated.
- Click OK when you are done and type in the administrator password in the Password box when you are prompted with it.
- Click OK and close this window.
- Navigate back to Function Discovery Provider Host properties and click Start.
- Close everything and check to see if you are able to establish a proper connection to the Internet.
Solution 7: Network Reset
This simple method worked for few users. This simply resets your network settings and you may need to tweak other things you have changed in the meantime. Follow the instructions below:
- Open the Settings app by clicking the Start menu button and clicking the gear icon at the lower left part of the Start menu.
- Click on the Network & Internet section in the Settings window and switch to the Status section.
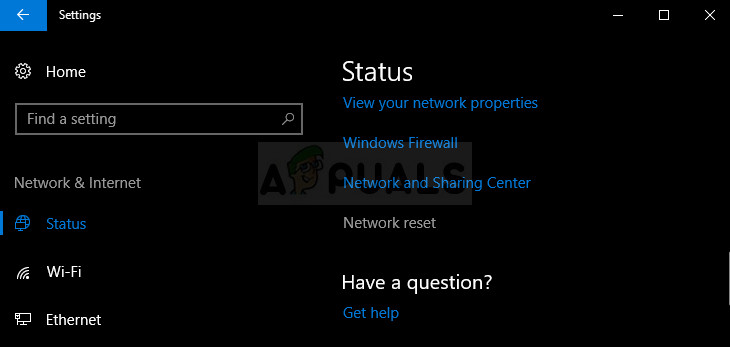
- At the bottom of the page on the right side, you should see a Network Reset button. Click on it and accept any dialogues that appear. Restart your computer and check to see if the problem has been resolved.
- Open the File Explorer and navigate to the network. When the alert appears, click the button to enable Network Discovery.
Solution 8: Reinstall Drivers and Command Prompt Tweaks
There are quite a few other things you can try to solve your problem. Reinstalling the drivers related to networking should solve the problem along with certain Command Prompt tweaks which are quite easy to run and to maintain.
- Type “Device Manager” into the search field to open the device manager console.
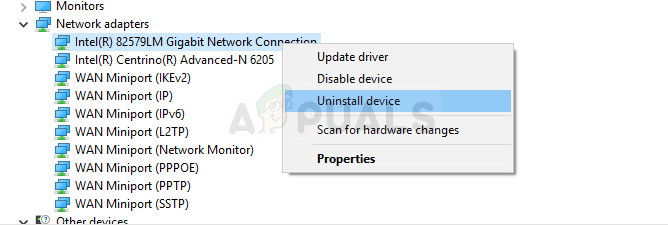
- Expand the “Network Adapters” field. This will list all network adapters that the machine has installed. Right-click on the adapter you want to uninstall and select “Uninstall”. This will remove the adapter from the list and uninstall the device.
- Click “OK” when prompted to uninstall the device. This will remove the adapter from the list and uninstall the driver. Make sure you repeat the process for all of the network drivers you find. They should all be listed under the Network Adapters section.
- Search for “Command Prompt”, right-click on it, and select the “Run as administrator” option. Copy and paste the following commands and make sure you click Enter after each one:
ipconfig /flushdns
ipconfig /registerdnsipconfig /release
ipconfig /renew
netsh int ip reset
netsh winsock reset
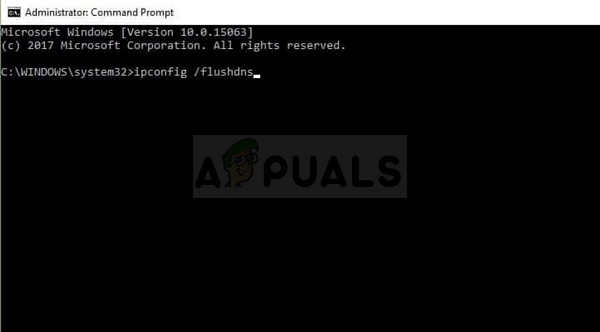
- Restart your computer and Windows should reinstall the drivers automatically. Check to see if the problem is gone.
Solution 9: Enable the Guest Account on Your PC
A weird trick that worked for several users who had the guest account on their PC disabled for some reason.
- Open the Registry Editor by typing “regedit” in either the search bar or the Run dialog box. Navigate to the following key in Registry Editor:
HKEY_LOCAL_MACHINE\SYSTEM\CurrentControlSet\Services\LanmanWorkstation\Parameters
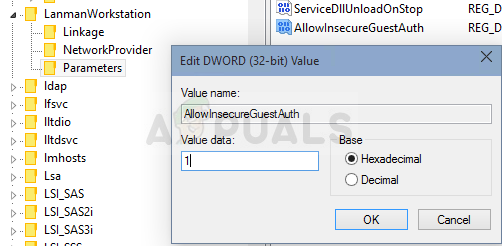
- Change the value of AllowInsecureGuestAuth to 0x1 by right-clicking on it, choosing the Modify option, and typing 0x1 in the Value data field.
Solution 10: Control Panel Tweak
- On your keyboard, use the Windows Key + R key combination to open the Run dialog box. Also, you can search for the Run box or the Control Panel directly in the Start menu.
- Type in Control Panel and click OK in order to open it.
- Change the view in Control Panel to Category and click on View network status and tasks under the Network and Internet section.
- Click on Advanced sharing settings and, in your current network profile, look for the Turn on Automatic Setup of Network Connected Devices options and uncheck the box next to it.
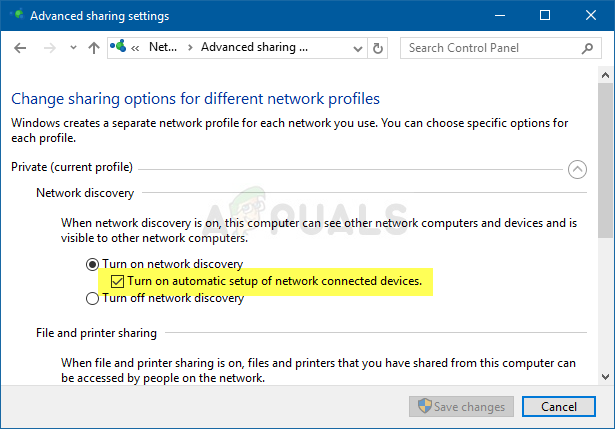
- Restart your computer and check to see if you are able to see other computers on your network.
Solution 11: Allowing Through Firewall
In some cases, some features of the operating system might be getting blocked by your computer’s Firewall due to which this issue is being triggered. If the Firewall blocks your computer from being able to properly connect to a network, the issue arises where you are unable to see the other computers on the network. Therefore, in this step, we will be allowing this feature through the Firewall. For that:
- Press “Windows” + “R” to open the Run prompt.
- Type in “Control Panel” and press “Enter” to launch the classical Control Panel interface.
- In the Control Panel, click on the “View By:” option and then select the “Large Icons” button.
Switch to Large Icons View - Click on the “Windows Defender Firewall” option and then select the “Allow an app or Feature through Firewall” option.
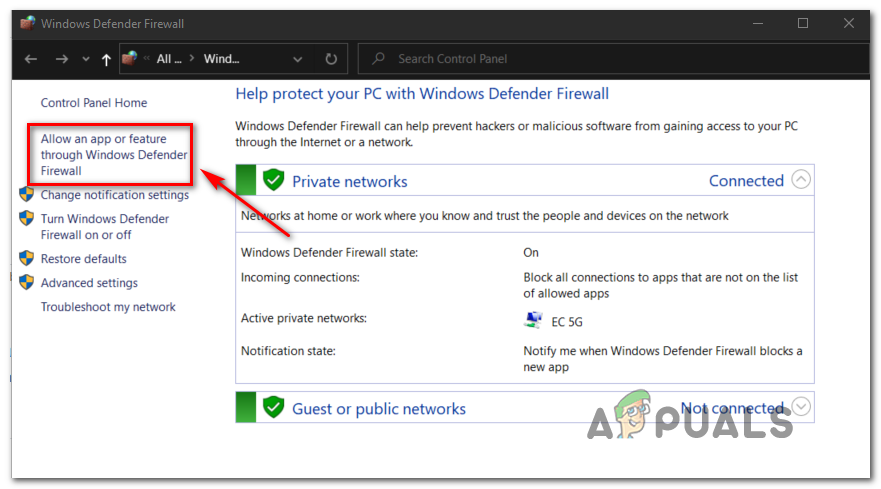
Allowing an app or feature through Windows Defender - Click on the “Change Settings” option and grant the admin permissions to be able to change these settings.
- Make sure to check both the “Public” and the “Private” options for the “File and Printer Sharing over SMB Direct” option.
- Save your changes and then close out of the window.
- Try to check if you can now see the other networks on the computer.
Solution 12: Starting Service
In some cases, it might be possible that the computer browser service on your computer might be configured in such a way that it may either be disabled or it might be configured to be started manually. Therefore, in this step, we will be allowing the service to startup automatically on its own. In order to do that:
- Press “Windows” + “R” to launch the run prompt.
- Type in “services.msc” and then press “Enter” to launch the service management window.
Type “services.msc” into the Run dialog and press Enter - In the service management, scroll down and double click on the “Computer Browser” service.
- Click on the “Startup Type” dropdown and select the “Automatic” button.
Set the service’s startup type to Automatic - After selecting automatic, click on the “Start” button and wait for Windows to start this service on your computer.
- Save your changes and check to see if doing so fixes your issue.
Solution 13: Diagnosing Network Problems
It is possible that your computer network configurations might not be properly setup due to which this issue is being triggered. Therefore, we will be using the command prompt to identify if a network issue exists on your computer and then we will solve it by running the troubleshooter. For that:
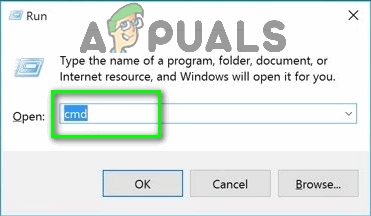
- Get on the computer you want to connect to and press the “Windows” + “R” keys on its keyboard to launch the run prompt.
- Type in “Cmd” and press “Enter” to launch the command prompt.
- In the command prompt, type in the following command and press “Enter” to display the IP information for the computer.
- Note the IP address listed under the “Default Gateway” heading which should be in the “192.xxx.x.xx” or a similar format.
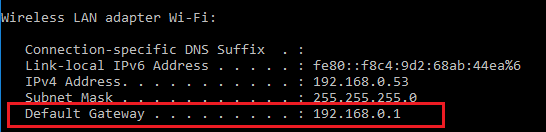
How to check your Default Gateway - Once you have acquired the IP address of the computer that you are trying to connect to, you can come back to your own computer for further testing.
- On your personal computer, press “Windows” + “R” to launch the Run prompt and type in “Cmd” to open the command prompt.
- Type in the following command in the command prompt and press “enter” to execute it.
ping (IP ADDRESS of the computer that we want to connect to) - Wait for the command prompt to finish the pinging of the IP address and note down the results.
- If the ping is successful, it means that the IP address is accessible.
- After this, if the ping is unsuccessful, we will have to run the network troubleshooter.
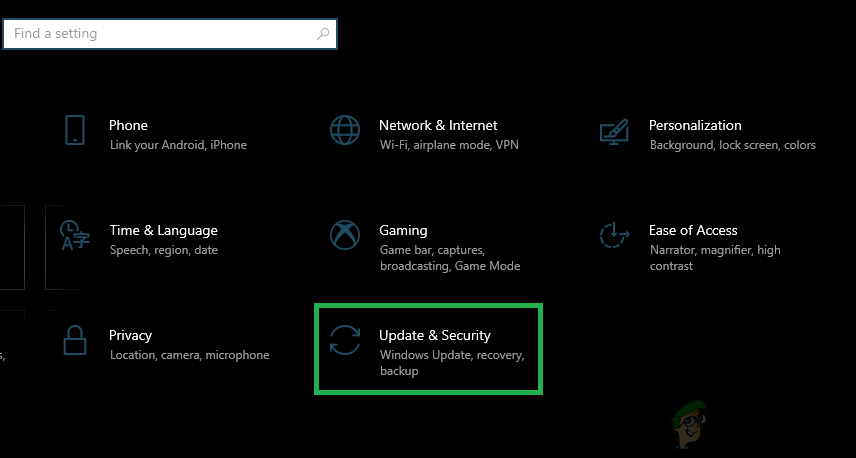
- Press “Windows” + “I” to launch the settings.
- Click on the “Update and Security” option and then click on the “Troubleshoot” button on the left side of the window.
Clicking on the “Update and Security” option - Click on “Internet Connections” and then click on the “Run the troubleshooter’ option.
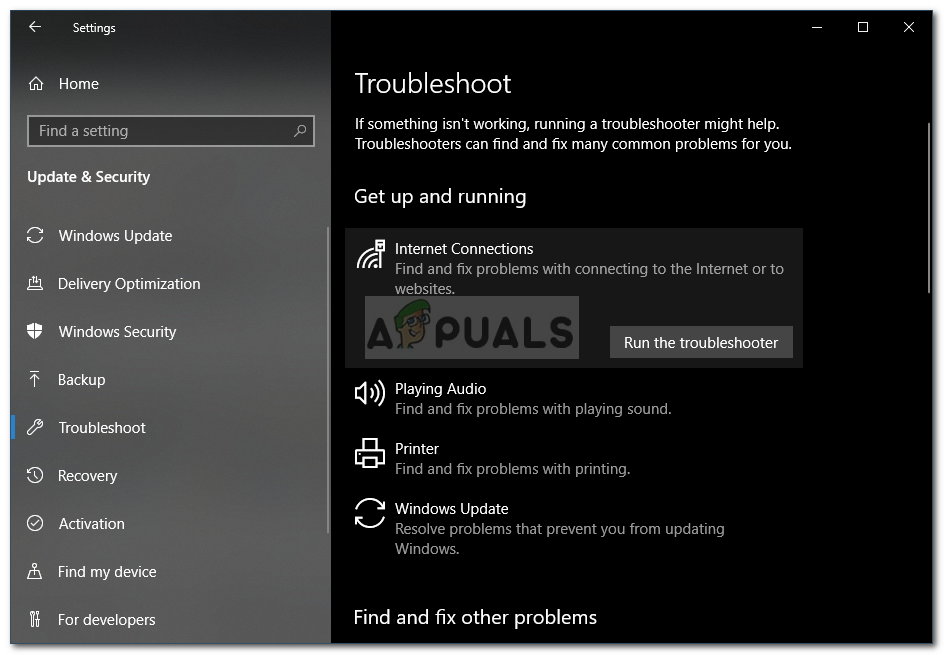
Running Internet Connections Troubleshooter - Follow the on-screen instructions to fully run the troubleshooter and check to see if you are able to see other computers on the network.
Solution 14: Changing Router and DNS Settings
It is possible that you might not have configured your DNS settings properly and if you have made a manual change to the DN servers that the computer is using for your internet connection, the error can be triggered if they do not match up with the DNS servers that the other computer on the network is using.
Also, Some routers contain a Wireless isolation feature that prevents other computers connected to the same internet from being able to connect or see your computer. Therefore, in this step, we will first be changing the DNS settings and then we will reconfigure these router settings to allow for optimal connectivity. For that:
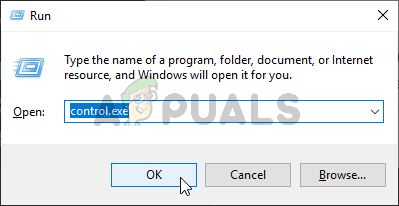
- Press the “Windows” + “R” buttons simultaneously on your keyboard.
- A run dialog box would appear on your screen, type “Control Panel” in the empty box, and click “OK”.
Running the Control Panel - Click on the “View By:” option and select “Small Icons” from the list. After that, click on the “Network and Sharing Center”.
- Select “Change adapter settings”.
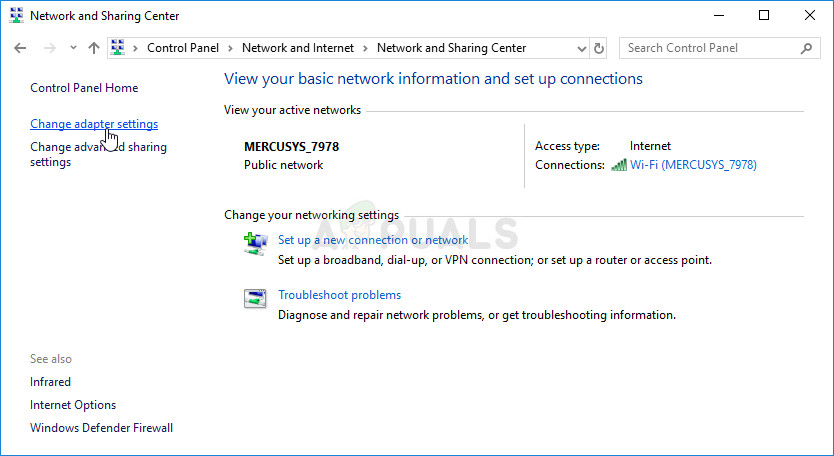
Change adapter settings - Select your specific connection icon (either Local Area or Wireless Connection), right-click it, and click on the “Properties”.
- Now click on the “Internet Protocol Version 4 (TCP/IPv4)” and then click on the Properties icon.
- Inside the properties, the “Obtain DNS Server Address” automatically shouldn’t be checked if you have changed this setting before.
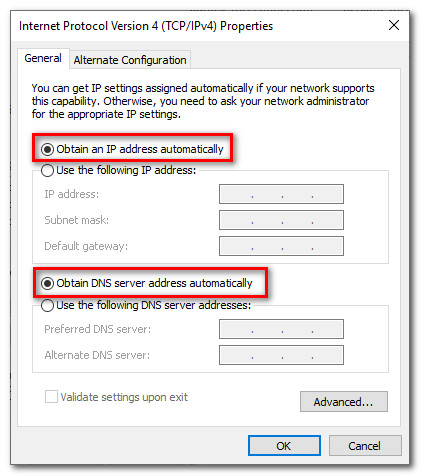
Configuring Windows to obtain IP and DNS Automatically for IPv4 - Make sure to check this option for both the IP address and the DNS server so that your computer uses automatic DNS detection.
Now that we have enabled automatic detection for DNS, we will have to change the router settings. For that:
- Launch your browser and type in your IP address in the address bar.
- In order to find our IP address, press “Windows” + ” “R” to launch the run prompt. Type in “CMD” and press “Shift” + “Ctrl” + “Enter” to provide admin permissions. Also, type in “ipconfig/all” in the cmd and press “Enter”. The IP Address that you have to enter should be listed in front of the “Default Gateway” option and should look something like “192.xxx.x.x”.
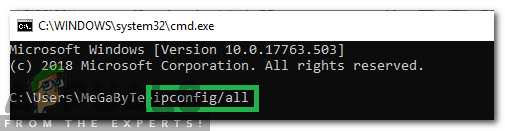
Typing in “ipconfig/all” - After entering the IP Address, press “Enter” to open the Router login page.
- Enter your username and password in the respective categories on the router’s login page both of which should be written on the back of your router. If they aren’t, the default values should be “Admin” and “admin” for both the password and the username.
- Now that you have logged into the router page of your network, look for a “Client Isolation, AP Isolation, or a Wifi Isolation” setting.
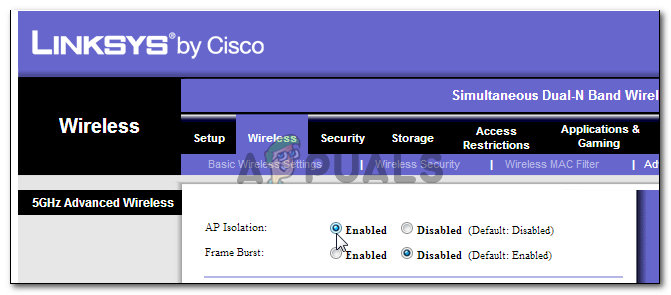
Disabling AP Isolation - Once you find it, uncheck or disable this setting and save your changes.
- Check to see if you are able to see other computers on your network after disabling this setting.
Solution 15: Changing Network Profile
It is possible that in some cases, you might not have selected the proper network profile which allows the sharing of printer and files on a network, and due to this, you are unable to see other computers on your network. Therefore, in this step, we will be changing the Network Profile and then we will check if doing so fixes this issue on our computer. For that:
- Press “Windows” + “I” to launch the settings and click on the “Network and Internet” option.

Selecting “Network and Internet” Options - In the network and internet option, click on the “Status” button from the left side and then select the “Change Connection Properties” button.

Selecting “Change Connection Properties” - From here, check the “Private” profile to communicate to the computer that you trust the network that you are connected to and other computers on the network should be able to see and communicate with your computer.
- Check to see if the issue persists after doing so.
Solution 16: Reconfiguring Sharing Services
It is possible that your computer might’ve automatically configured some services to be disabled at startup and due to this, your network discovery function on the computer might not work properly. Therefore, in this step, we will be reconfiguring these services from the services management window and then we will check if doing so fixes this issue. For that:
- Press “Windows” + “R” to launch the run prompt.
- Type in “services.msc” and then press “Enter” to launch the service management window.
Type “services.msc” into the Run dialog and press Enter - Now, scroll through the list and one by one, double click on the following services, and perform the below-mentioned steps.
Function Discovery Provider Host
Function Discovery Resource Publication
SSDP Discovery
UPnP Device Host
Workstation
- Click on the “Startup Type” dropdown and select the “Automatic (Delayed Start)” button.
Set the service’s startup type to Automatic - After selecting automatic, click on the “Start” button and wait for Windows to start this service on your computer.
- Save your changes and check to see if doing so fixes your issue.
Solution 17: Execute Command
It is possible that in some cases the network discovery feature might not be enabled on your computer even after being enabled from the settings. Therefore, in this step, we will be running a command inside an elevated command prompt and then we will check if doing so fixes the issue with our computer. For that:
- Press “Windows” + “R’ to open the Run prompt.
- Type in “Cmd” and pres “Shift” + “Ctrl” + “Enter” to open it with admin permissions.

Running the Command Prompt - Type in the following command inside the command prompt and then wait for it to be executed on the computer.
netsh advfirewall firewall set rule group="Network Discovery" new enable=Yes
- Closeout of the command prompt and check to see if the issue still exists.
Solution 18: Change Master Browser
It is possible that your computer might not be set to be the Master Browser on the computer due to which this issue is being triggered for you. Therefore, in this step, we will be changing some registry configurations and then we will check to see if doing so has fixed this issue on our computer. For that:
- Press “Windows” + “R” to open the Run prompt.
- Type in “Regedit” and press “enter” to open the registry editor.
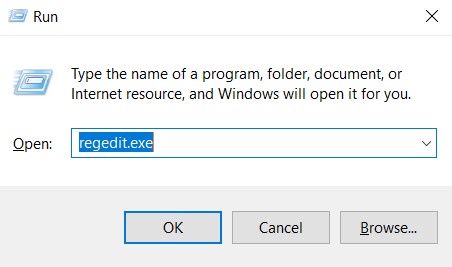
regedit.exe - In the Registry Editor, navigate to the following location.
HKEY_LOCAL_MACHINE\SYSTEM\CurrentControlSet\Services\Browser\Parameters
- Double click on the “MaintainServerList” option and set it to “Yes”.
- Right-click on an empty space and then click on the “New” option.
- Select “String Value” from the list and name it “IsDomainMaster”.
- Set its value to True and exit out of the registry editor.
- Check to see if doing so has fixed the issue on your computer.
Solution 19: Changing Adapter Configurations
It is possible that in some cases the adapter might not be properly configured due to which this error is being triggered on your computer. Therefore, in this step, we will be changing some adapter configurations to allow the computer to be able to see other computers on the network. For that:
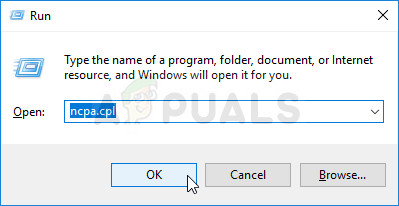
- Press “Windows” + “R” to open the Run prompt.
- Type in “ncpa.cpl” and press “Enter” to launch the network configuration panel.
Run this in the Run dialog box - In the network configuration panel, right-click on the “Network Adapter” that you are using and select “Properties”.
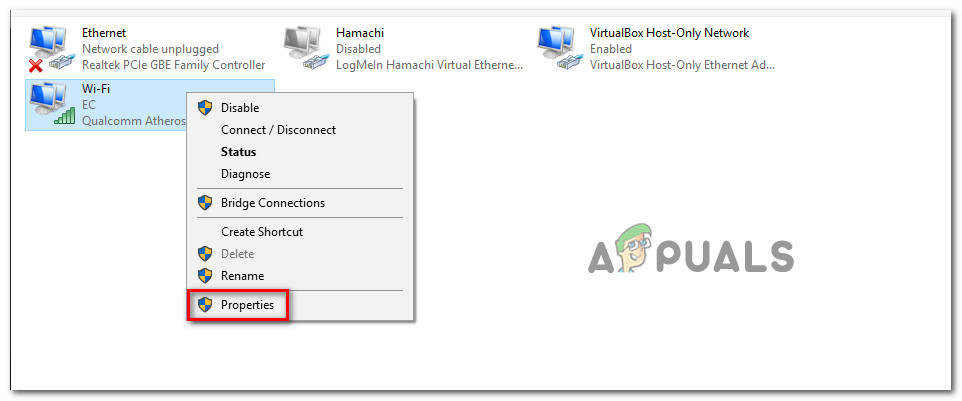
Opening the Properties screen of your network - In the properties, check both the “Link-Layer Topology” drivers in the list and select “Install”.
- Closeout of the network configuration panel and check to see if the issue still persists.


Solution 2 : is working for me. thank you so much…
i can use windows 10 pro many days to can’t access network in my office finally got it