Fix: Can’t Right Click on Windows Taskbar Icons
Some users have been experiencing a very peculiar Windows 10 behavior after upgrading from an older version (Windows 7 or Windows 8) or after applying the KB4034674 Windows Update. Users encountering this bug complain that they are unable to right-click on any Taskbar icon.
While for some users this behavior seems to only happen from time to time, other users are reporting that they completely lost the ability to right-click anything on their taskbar. However, all users are reporting that the left-click functionality still works.
If you’re currently struggling with the same kind of issue, the following methods might be of help. We have managed to identify a few potential solutions that have been confirmed to work by several users struggling with the same type of problem.
Method 1: Applying the latest Windows 10 updates
Because this bug is fairly old, Microsoft has already addressed it via several cumulative updates so far. Sadly, users still report encountering this bug even on Windows 10 computers with the latest updates already applied.
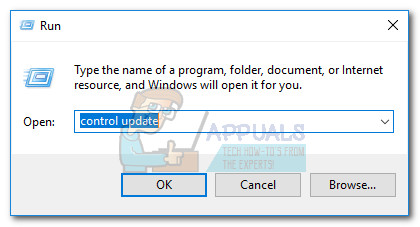
However, If you’re looking for a permanent fix, this is definitely your best shot. Make sure your Windows 10 is updated by opening a Run window (Windows key + R), typing “control update” and hitting Enter.

In the Windows Update screen, click on Check for updates and follow the on-screen prompts to apply all of WU’s pending updates. Once all updates have been installed, reboot your computer once again and see whether you regain the right-click functionality in your Taskbar. If you don’t, move down to the method right below.
Method 2: Using Shift + right-click
Some users have reported that holding the Shift key while right-clicking an icon in the taskbar. But keep in mind that even if this method works, it should be considered a workaround rather than a fix.
If you’re looking for a more lasting fix, continue with the other methods below.
Method 3: Restart the Windows Explorer service via Task Manager
Some users have managed to resolve the issue by promptly restarting the Windows Explorer process. While most users have reported this fix to be effective, some have said it doesn’t produce any effect.
However, it’s certainly worth a try, here’s a quick guide to doing this.
- Press Ctrl + Shift + Esc to open up Task Manager.
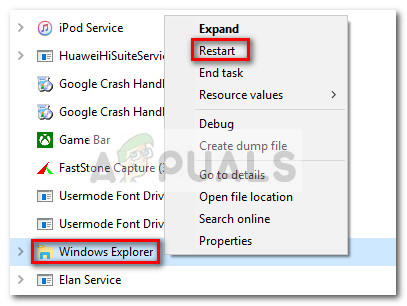
- In Task Manager, locate the Windows Explorer process, right-click on it and choose Restart.

- See whether the fix was effective by right-clicking an icon on your taskbar.
Method 4: Restarting the Tile Data model server from the Services screen
Some users have found that restarting the Tile Data model server service manages to restore this functionality. However, others have found that even this fix is only temporary as the old, bugged behavior might soon return.
Here’s a quick guide to restarting the Tile Data model server in order to restore the right-clicking ability:
- Press Windows Key + R to open up a Run command. Then, type “services.msc” and hit Enter to open the Services window.

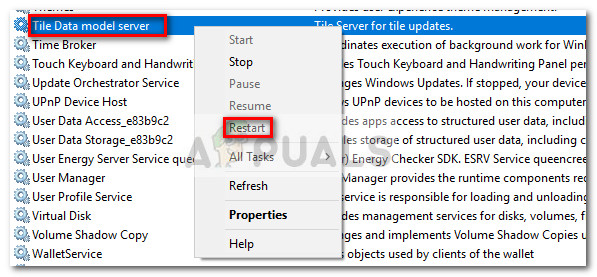
- In the Services window, scroll through the Local Services list and locate Tile Data model server.
- Right-click on Tile Data model server and choose Restart, then wait for the service to be restarted.

- Go ahead and right-click anything in your taskbar to see if the fix has been effective.
If you’re still without a fix, continue with the other methods below.
Method 5: Removing any malware from your system
As some users have pointed out, this particular issue can also be caused by a virus. Users that faced this kind of problem reported that the infection made the start menu and any taskbar icon inaccessible.
If you’re suspecting that the issue is caused by a malware infection, we strongly recommend that you scan your system with a powerful malware remove. You can use Microsoft’s Safety Scanner for this, or better yet, follow ours in-depth article (here) on using Malwarebytes to clean your system of any Malware infection.
Method 6: Using a System Restore point
Some users have reported managing to fix the problem after reverting to a previous system restore point in which the right-click functionality within the taskbar was functioning properly.
A system restore point is a Windows feature that allows users to revert the entire computer state to that of a previous point in time. If you have the right system restore point, you can use this feature to revert your computer to a state where the right-click functionality was functioning properly. Here’s a quick guide to doing this:
- Press Windows key + R to open a Run command. Type “rstrui” and hit Enter to open the System Restore wizard.

- Hit Next at the first prompt, then check the box associated with Show more restore points.
- Select a restore point that was created before you started to experience the bug and hit the Next button again.

- Hit Finish to start the restoring process.
In the event that you’re unable to find an acceptable restore point, the only other acceptable method that will enable you to fix this abnormal behavior is to perform a clean reset. To do this, open a Run window (Windows key + R), type “ms-settings:recovery” and hit Enter to open the Recovery window. Then, hit the Get started button and follow the instructions to reset your PC.

Method 7: Using Command
Sometimes, a simple command that reconfigures some system settings can help you in fixing this issue on your computer. Therefore, in this step, we will be executing a command inside the PowerShell to fix this issue on your computer. For that:
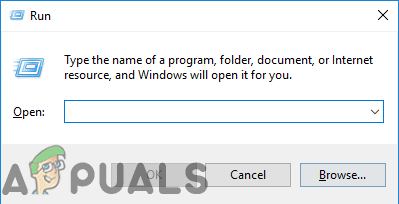
- Press “Windows” + “R” to open the Run prompt.

Opening Run Prompt - Type in “Powershell” and press “Shift” + “Ctrl” + “Enter” to provide admin privileges.
- Type in the following command and press “Enter” to execute it.
Get-AppXPackage -AllUsers | Foreach {Add-AppxPackage -DisableDevelopmentMode -Register "$($_.InstallLocation)\AppXManifest.xml"} - After the command has been executed, check to see if the issue still persists.


