Fix: Broadcom Netlink Gigabit Ethernet Driver Stops Working in Windows
Some users have been reporting a problem with the Broadcom NetLink Gigabit Ethernet Driver Network Adapter. As it turns out, whenever this issue occurs, the LAN connection will effectively stop functioning, momentarily, interrupting the network connection. While the network connection is interrupted, it will show as a connection with Limited access.
This particular issue seems to mainly occur with users that have recently made the upgrade from an older Windows version to Windows 10 and there have been cases where Realtek Network Adapters haven’t been detected either so it isn’t specific only to Gigabit Adapters. Most users affected by this issue have reported that the problem can be fixed by restarting the computer. However, this fix is only temporary, as the same issue can return in a matter of minutes after the next startup.
If you’re currently struggling with this error, the methods below will most likely help you to resolve the problem and restore your internet connection. The fixes below are confirmed to be working by users who found themselves in a similar situation. Please follow the methods below in order until you find a fix that manages to solve your problem.
Method 1: Manually installing the updated Ethernet adapter driver
As it turns out, the upgrading to Windows 10 process is not as smooth as advertised and in some cases, it doesn’t detect your Network Adapter. It seems like the upgrading wizard is failing to install the proper ethernet adapter driver for the NIC that you’re using – hence the internet connectivity problems.
However, some users that are using the Broadcom Netlink Gigabit Ethernet adapter driver have managed to get around this problem by installing the proper driver themselves. Here’s a quick guide on how to do this:
- Download the latest Broadcom network adapter from this official link (here) and extract it somewhere accessible.
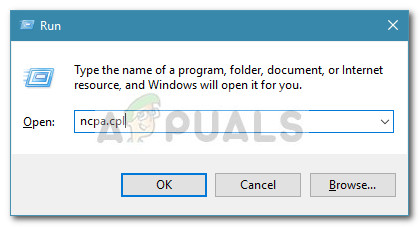
- Press Windows key + R to open up a Run box. Then, type “ncpa.cpl” and hit Enter to open the Network Connections window.
- In the Network Connections window, right-click on the Local Area Connection (Ethernet) and click on Properties.
- Next, go to the Networking tab and click the Configure button, then go to the Drivers tab.
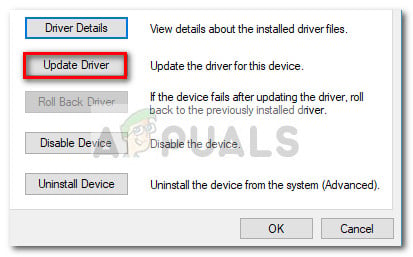
- In the next window, go to the Driver tab and click on Update Driver.
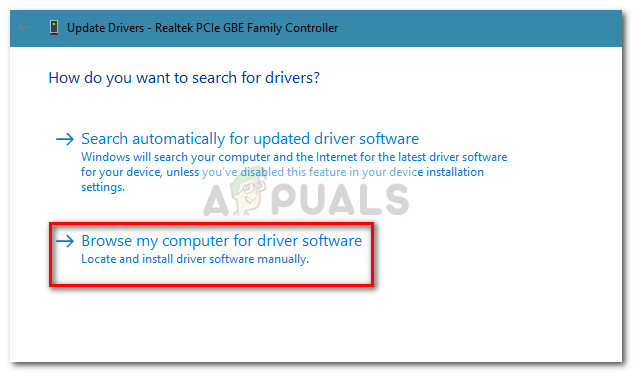
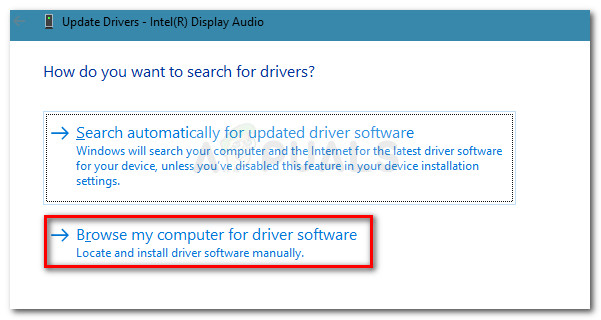
- Click on Browse My Computer for driver software, then click on Let me pick from a list of available drivers on my computer.
- Next, click the Have Disk button, locate the downloaded driver file (the one that ends with .inf) via the Browse button and hit OK.
- You should then see a long list of drivers. From that list, select Broadcom Netlink (TM) Gigabit Ethernet and hit the Next button.
- Once the driver has been successfully installed, reboot your computer and see wither your internet connection is functioning properly at the next restart.
If this method hasn’t managed to help you resolve the constant interrupting of your network connection, move down to Method 2.
Method 2: Using a dedicated NIC
Keep in mind that you might be experiencing this problem if your machine’s onboard internet controller is not compatible with Windows 10. If you burned through all the methods above without a result, your only hope is to try out a dedicated NIC (network interface card) and see whether it’s capable of handling your network connection.
If you don’t have a dedicated NIC laying around in the house, you can order one online. This one (here) only costs around $12 and is compatible with all the recent Windows versions (including Windows 10).
Just keep in mind that before you install the dedicated network interface card, you’ll need to enter your BIOS settings and disable the onboard Broadcom Netlink Gigabit Ethernet controller. On most motherboards, you will be able to disable the integrated network interface card under Onboard Devices (or a similar name).
Once the onboard NIC has been disabled, install the new dedicated network interface card in a free PCIe slot, connect your network LAN cable and reboot your computer again. At the initial startup screen, it will appear like you don’t have internet, but don’t worry. Once Windows 10 loads up fully the operating system will find it and install the driver for it. After a while, you will have a working network connection.
Method 3: Running the Network Troubleshooter
In some cases, the adapter might just be facing some glitches in its configuration. Running the Network Troubleshooter can sometimes fix this sort of glitches. In order to run it, we will have to execute the program from the Control Panel. For that:
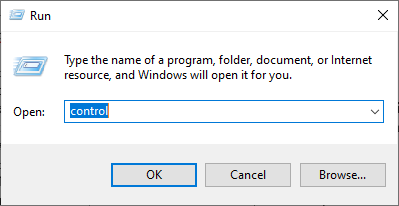
- Press “Windows” + “R” buttons simultaneously to open the Run prompt.
- Type in “Control Panel” and press “Enter” to open it.
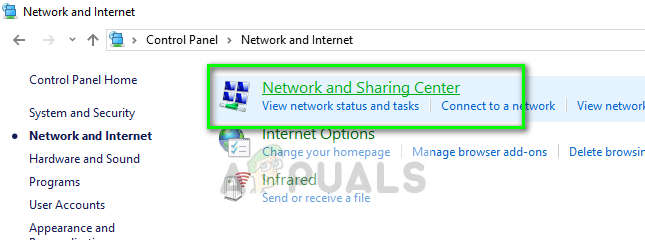
Accessing the Classic Control Panel interface - Click on the “Network and Internet” option and select the “Network and Sharing Center” button.
Network and sharing center – Control panel - Click on the “Troubleshoot Problems” button to let the Troubleshooter run.
- Check to see if the Troubleshooter has fixed your problem after completing the onscreen instructions.
Method 4: Reset Network Settings
In some cases, the Network settings that you have configured your computer to use on your computer might actually be the reason that this error is being triggered on your computer. It is possible that the DNS cache or some other network configurations are corrupted or misconfigured to the point that the driver stops working. Therefore, in this step, we will be performing a complete reset of network settings. For that:
- Press “Windows” + “R” to open the Run prompt.
- Type in “Control panel” and press “Enter” to launch the classical control panel interface.
- Inside the Control Panel, click on the “View By:” option and select the “Large Icons” from the list of available options.
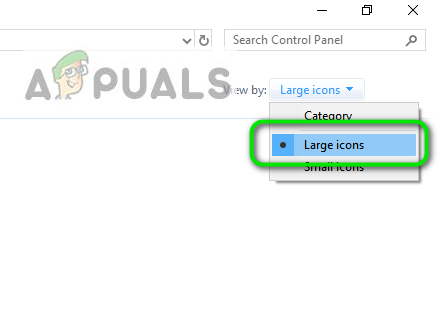
Viewing Control Panel using Large Icons - After selecting the Large Icons, click on the “Network and Sharing Centre” option.
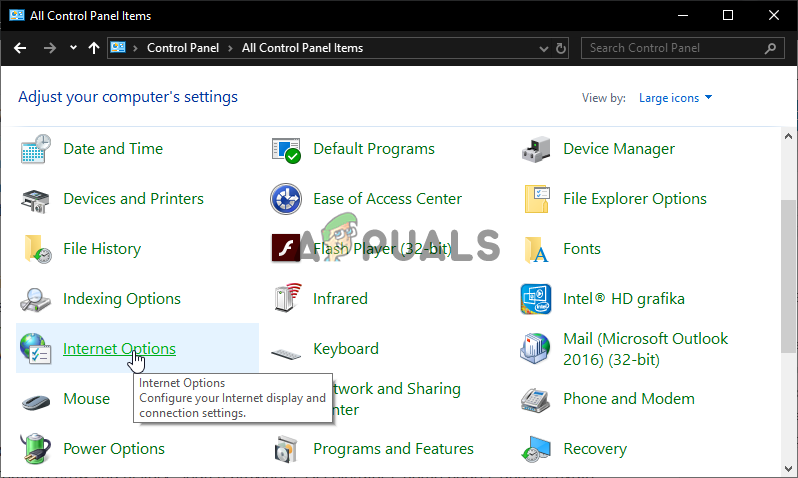
- In the Network and Sharing Centre, select the “Internet Options” option and from the left navigation pane at the bottom.
Opening Internet Options from Control Panel - In the new window that opens up, click on the “Advanced” tab, and then select the “Restore Advanced Settings” option to reset the advanced network settings.
- After this, press “Windows’ + “I” to open the Windows Settings.
- In the settings, click on the “Network and Internet” option and select the “Status” button on the left side of the next screen.

Selecting “Network and Internet” Options - Scroll down on the next screen until you reach the “Network Reset” option.
- Click on the “Network Reset” option to prompt the computer to initiate the reset request and select the “Reset Now” button on the next screen.

Press Reset Network Button - Confirm any prompts that ask you if you really want to initiate a network reset and prepare to restart your computer.
- The automatic prompt should wait for some time before initiating a restart so you should have some time to back up or save any work that you have unsaved.
- When the computer restarts, you’ll notice that your network connection isn’t active. This is because your network card is firstly reset and then released its previous connection. Just select the network icon, pick the network you want to reconnect to, and choose “Connect”.
- If your TCP/IP settings are set to automatically detect, your network connection should detect the appropriate network settings.
- Check to see if the issue still persists.
Method 5: Update Broadcom Network Drivers using Third-Party App
Sometimes, the matter at hand isn’t as easy as downloading the latest driver from the website and installing it on your computer. There are different pieces of hardware on your computer and one of them might not be comfortable with you running the latest available adapter. So in this step, we will be installing the most compatible driver on our computer using a third-party installer.
Driver Booster is a professional driver finder, downloader, and updater, so you can use this software to find all the outdated, missing, and erroneous drivers for your desktop or laptop to make sure all the hardware run normally. If your desktop or laptop has no network, you can use the network failure tool to fix it at first.
- Download, install, and run Driver Booster on your computer from here.
- Click “Scan” and then Driver Booster will run on your system to show you the outdated, missing, and erroneous drivers including the Broadcom adapter driver.

Clicking on “Scan” - Click “Update”. Find the Broadcom Ethernet Adapter and click Update to update the network driver.
- So after you updated Broadcom Ethernet adapter driver or Broadcom wireless adapter driver and hopefully you will be able to connect to the Internet successfully.
Method 6: Enable Ethernet Adapter Through BIOS
By default, the Ethernet adapter should already be enabled on your computer. If the Windows operating system is reporting that your Ethernet is not working then you can try re-enabling the adapter from within your computer’s BIOS.
- Make sure to completely shut down your computer and turn it back on after a while.
- While the computer is being started, pay close attention to the “Press “X” button to get into the Bios” message that might appear during the startup.
- Press the indicated key quickly and repeatedly to enter your computer’s BIOS. Once in the BIOS, you can use the arrow keys on your keyboard to navigate through the available options.
- Find “Integrated Peripherals,” “Onboard Devices,” “On-Chip PCI Devices,” or a similar option and press the “Enter” key to access the menu. Depending on the type and year of your BIOS, the exact menu text will vary.
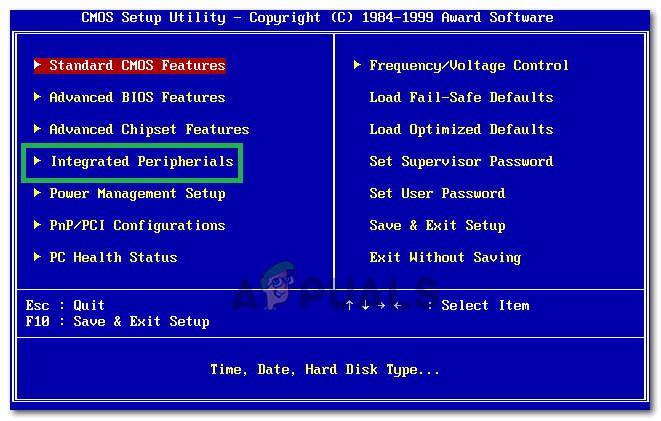
Selecting the Integrated Peripherals option Note: Generally, you should find something that indicates the settings are related to your onboard integrated peripherals.
- Find and select “Integrated LAN,” “Onboard Ethernet,” or a similar option and use the left and right arrow keys to cycle through the available options. In most cases, these are either “Enabled” or “Disabled.”
- Press the “F10” keyboard key, this should display a dialog asking if you would like to save your settings and exit the BIOS. Press the “Y” keyboard button to confirm. This causes the computer to reboot. Windows should now automatically detect your driver and the ethernet driver should be working now.
- Check to see if the issue still persists.
Method 7: Install 802.11n Driver
Broadcom 802.11n Network Adapter Driver is an important driver package that might actually be the solution to all of your issues because this driver is the most stable one out there. Most of the users reported that they were able to resolve this issue by upgrading their Ethernet driver to the 802.11n one that is available on the official manufacturer website. Therefore, follow the steps listed below to install it on your computer.
Note: From the Broadcom site, select the 32- or 64-bit driver library, depending on whether you’re running a 32 or 64-bit machine. Download the file. It will be saved as a compressed zip file, so once it is been downloaded, highlight the file and select Extract from the windows menu and then select “Extract all”. This will uncompress the files. Once this is finished, you should be able to follow the instructions for updating your Broadcom driver.
- Download the Latest Ethernet Adapter from here.
- After that, proceed to Network Settings and click Change Adapter Options.
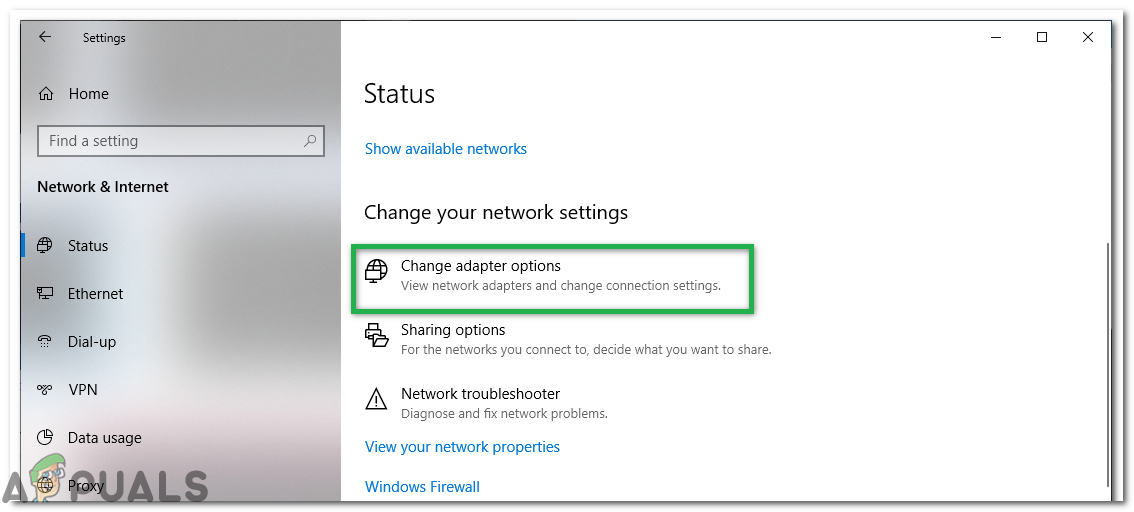
Clicking on the “Change Adapter Options” button” - Right-click on the Ethernet/Local Area Connection device and select Properties.
- Click on Configure and go to the Drivers Tab
- Click on Update Driver and then select Browse My Computer.
- Select “Let me pick from a list…” and then select Have Disk.
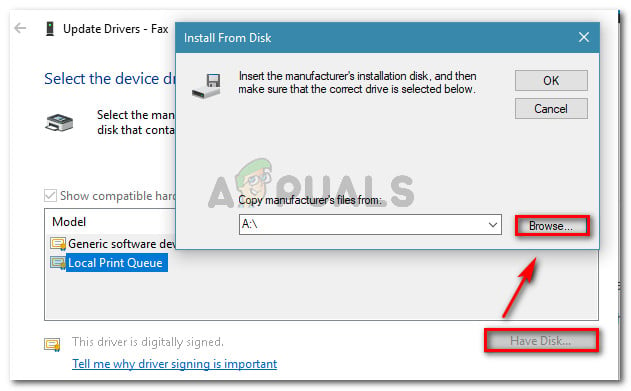
Click on Have Disk… and then on Browse - Locate the downloaded driver file (inf) and select OK.
- You will now see a long list of drivers: Select Broadcom Netlink (TM) Gigabit Ethernet
- Click Next and the driver will begin to install.
- Check to see if installing this driver fixes your issue.
Method 8: Uninstall the network adapter driver and restart
When you uninstall the network adapter driver and restart the computer, Windows will automatically look for a stored driver from your system and get it installed even if there is no network connectivity. Try to uninstall the network adapter driver, and then restart your computer and let Windows automatically install the latest driver. Here’s how:
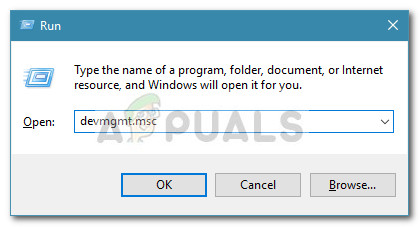
- Press “Windows’ + “R” to open the Run prompt.
- Type in “Devmgmt.msc” and press “Enter”.
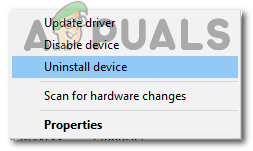
Run dialog: devmgmt.msc - In the device manager, expand the “Network Adapters” option and right-click on the “Adapter” that you are currently using.
- Select the “Uninstall Device” option and follow the on-screen prompts to uninstall this driver from your computer.
Clicking on the “Uninstall Device” option - Wait for the setup to completely remove the driver from your computer.
- Restart your computer and Windows should automatically replace it with a different one.
- Check to see if the connection is fixed by doing this.
Method 9: Diagnose PC in Safe Mode
Safe mode starts Windows in a basic state, using a limited set of files and drivers. If the problem doesn’t happen in safe mode, this means that default settings and basic device drivers aren’t causing the issue. Observing Windows in safe mode enables you to narrow down the source of the problem and can help you troubleshoot problems on your PC.
Before you enter the safe mode, you need to enter the Windows Recovery Environment (winRE). To do this, you will repeatedly turn your device OFF, then ON:
- Hold down the power button for 10 seconds to turn off your device.
- Press the power button again to turn on your device.
- On the first sign that Windows has started (for example, some devices show the manufacturer’s logo when restarting) hold down the power button for 10 seconds to turn off your device.
- Press the power button again to turn on your device.
- When Windows restarts, hold down the power button for 10 seconds to turn off your device.
- Press the power button again to turn on your device.
- Allow your device to fully restart. You will enter winRE.
Now that you are in winRE, you will follow these steps to take you to safe mode:
- On the Choose an option, screen, select “Troubleshoot” and then “Advanced options.”
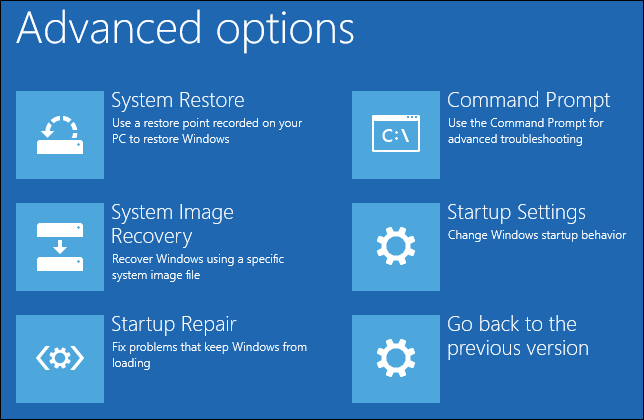
Advanced Recovery Options - Now click on “Startup Settings” and click on “Restart.”
- After your device restarts, you’ll see a list of options. Select option “4” from the list or press “F4” to enter Safe Mode.
Note: If you need to exit safe mode, simply restart your device, or:
- Press the “Windows logo key + R.”
- Type “msconfig” in the Run box and then select “OK”.
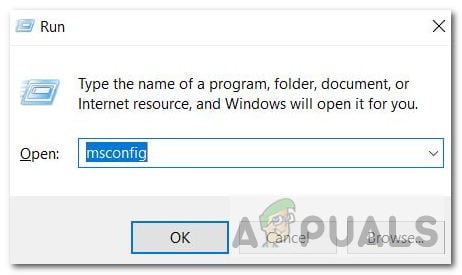
msconfig - Select the Boot tab and under Boot options, clear the Safe boot checkbox.
After entering the safe mode, check to see if the driver is working, we can diagnose if third-party applications are interfering with the computer in the safe mode and all third-party applications are disabled. Therefore, check if the driver is working, if it is, it means that a third-party app is interfering with your driver. In order to uninstall your applications:
- Press “Windows” + “R” to open the Run prompt.
- Type in “Appwiz.cpl” and press “Enter” to open the application manager.

Type appwiz.cpl and Press Enter to Open Installed Programs List - Right-click on the application that you think might be causing this issue and select the “Uninstall” button.
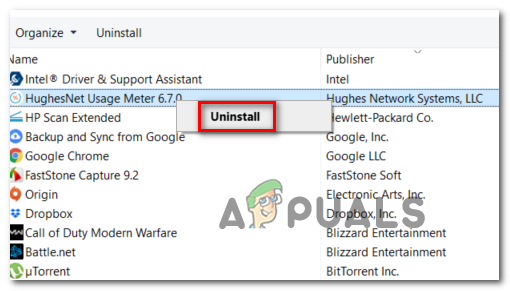
Uninstalling the HughesNet Usage Meter app - Follow through with the on-screen instructions and remove it completely.
- Check to see if uninstalling the third-party apps fixes this issue.
Method 10: Diagnose in Clean Boot
If you are unable to properly diagnose the PC in safe mode, a clean boot might actually be the thing that you require. A clean boot starts Windows with a minimal set of drivers and startup programs so that you can determine whether a background program is interfering with your network driver or program. These steps might look complicated at first glance, but following them in order, step-by-step, will help you get you back on track.
- Sign in to the computer as an administrator. If you don’t have an administrator account, you can create one.
- Press “Windows” + “R” to open the Run prompt, type in “MSConfig” and press “Enter” to open the Microsoft Management window.
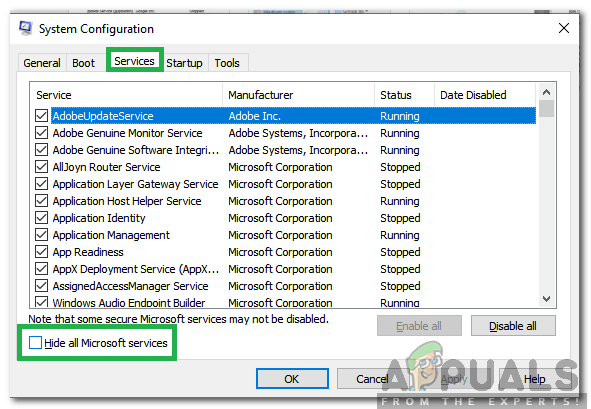
msconfig - In the Microsoft Management window, click on the “Services” option and then uncheck the “Hide all Microsoft services”, and then select “Disable all.”
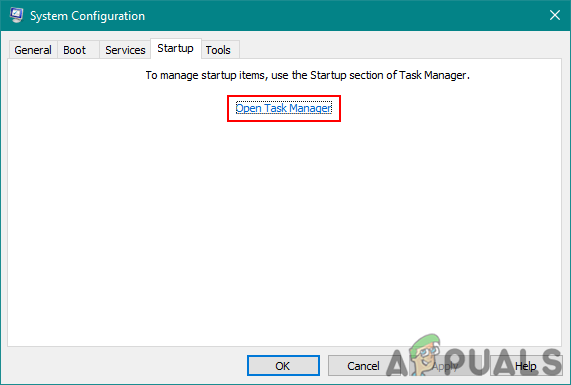
Clicking on the services tab and unchecking the Hide All Microsoft Services option - Click on the “Startup” tab and in the startup tab, select the “Open Task Manager” option.
Opening the Task Manager - Under Startup in Task Manager, for each startup item, select the item and then select “Disable”.
- Close Task Manager.
- Click on “Apply” and then on “OK” to save your changes and exit out of the window.
- Restart your computer to successfully boot into the clean boot state.
- In this state, since the services and the third-party interference is limited, check to see if the drivers work properly.
- If they do, start enabling one or two services at one startup and start diagnosing which service or applications causes this issue on your computer.
- Disable the service that causes this issue or uninstall it from your computer.
- Check to see if the issue still persists.
Method 11: Create A New Account
In some situations, a corrupted user profile might also be causing this issue on your computer, therefore, it is sometimes recommended to try and create a new user account and check if the new user profile is able to work correctly with the drivers. This however, comes with two choices, the choice to create a new microsoft account and the choice to create a local account. You can choose which one suits you better and implement that by following the guide below.
Creating A Microsoft Account:
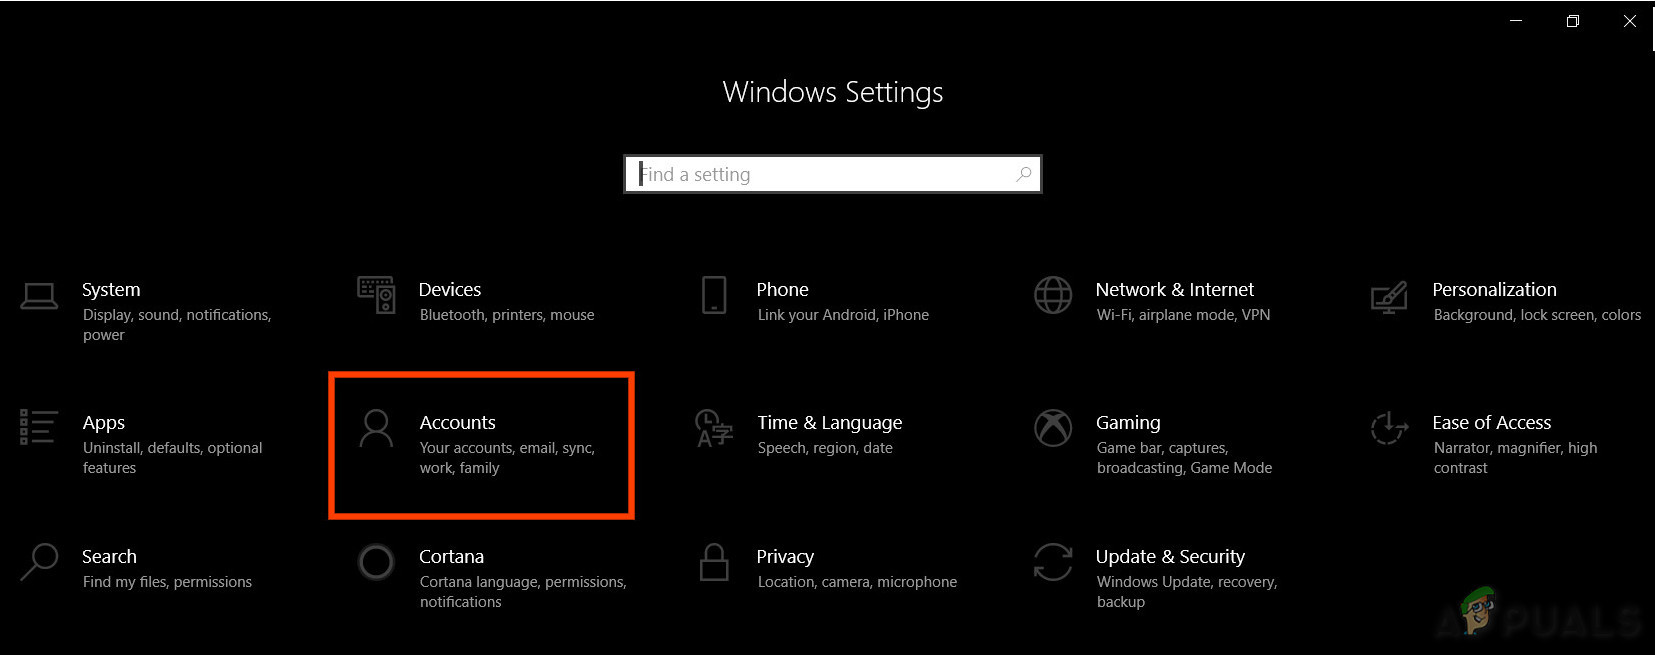
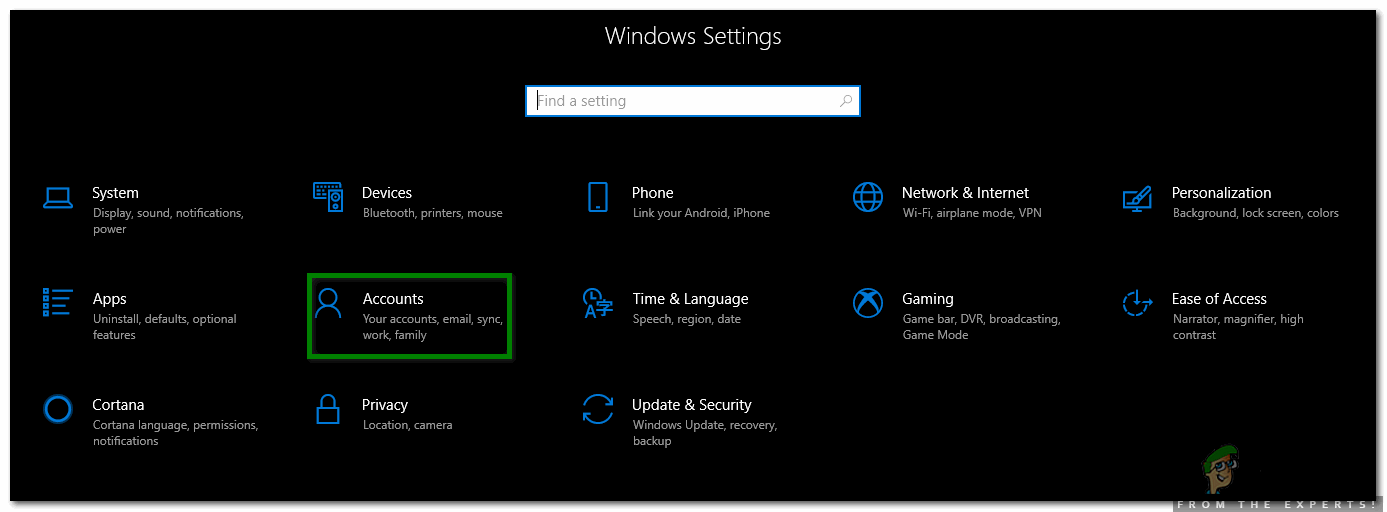
- Press the “Windows” + “I” keys on your keyboard to open up the settings.
- Inside the settings, click on the “Accounts” option and from there, select the “Family and Other Users” button.
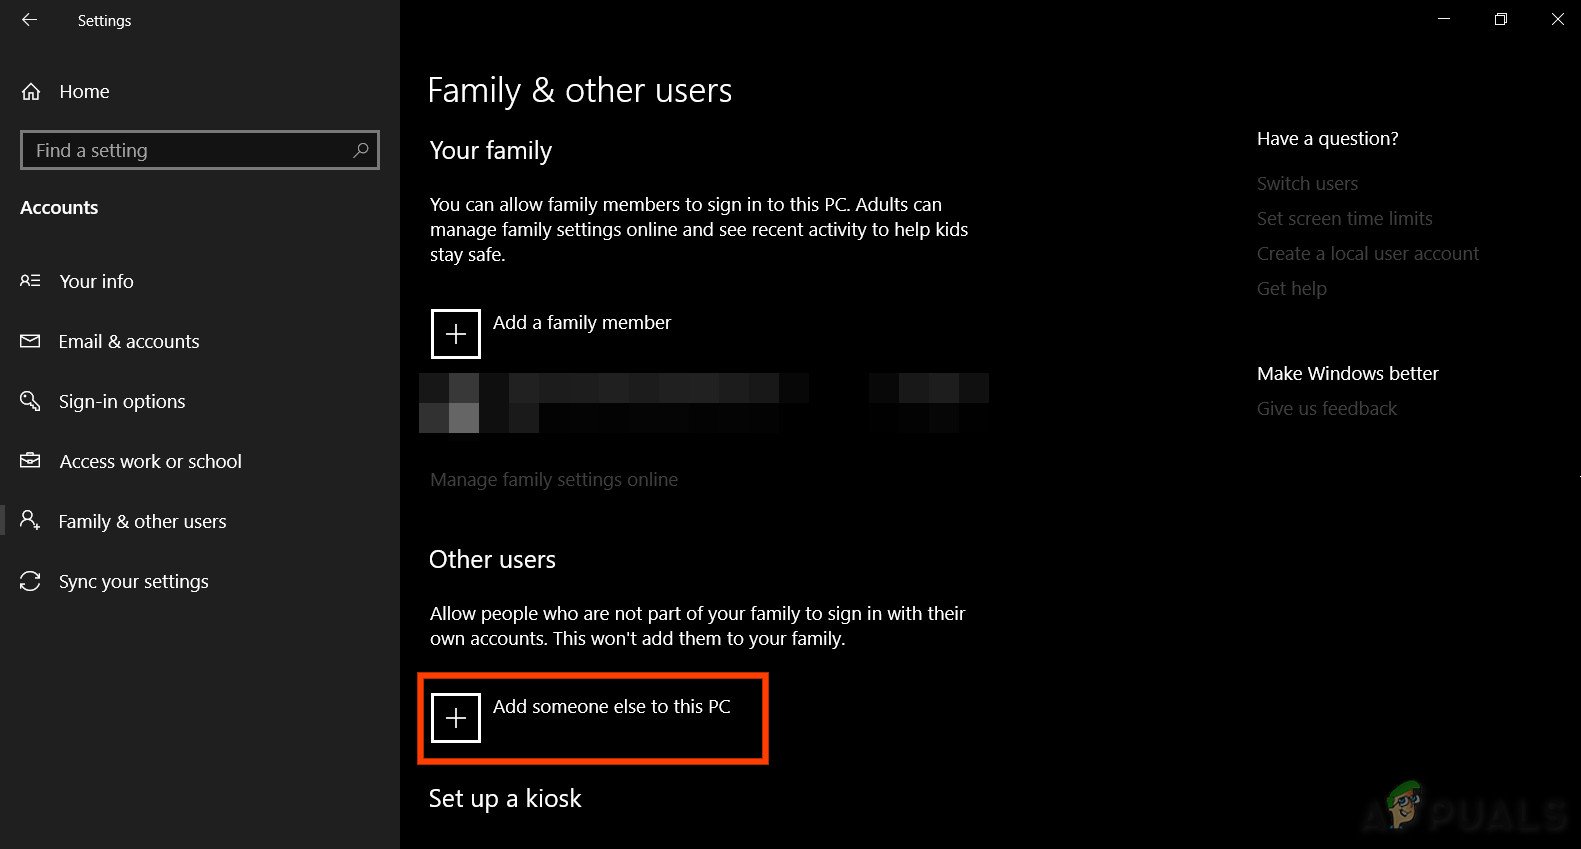
Accounts in Windows Settings - Click on the “Add someone else to this PC” option and you should see the “Enter the account info for this person” option.
Add Someone Else to This PC - You can either enter their Microsoft account information if it already exists to sign them in on your computer or you can create a new Microsoft account for them using their email address.
If they don’t have an email address or if you don’t have access to it, you can create a new email address and sign up with the Microsoft account with that. - Finish setting up the account on your device and check to see if the issue still persists in this new account of yours
Create a local account:
- Press the “Windows” + “I” keys on your keyboard to open up the settings.
- Inside the settings, click on the “Accounts” option and from there, select the “Family and Other Users” button.
Click on the Accounts tab from the Settings Window - Click on the “Add Someone else to this PC” option and you should see the “Enter the account info for this person” option.
Add Someone Else to This PC - From this screen, select the “I don’t have this person’s sign-in information” option and then select the “Add a user without a Microsoft Account” button.
- Enter the login information of the new account and assign it a username and a password.
- Add the password hint for the user and also make sure to assign it some security questions just in case you need to reset it later on.
- Tap or click “Finish”.
Method 12: Turn OFF Antivirus Protection
In some cases, it is possible that the Firewall or the Antivirus software that you are using on your computer might be preventing the driver from functioning properly and it might be interfering with important Windows components. Therefore, in this step, we will first be disabling the Firewall and then we will disable the Windows Defender Antivirus. For that:
- Press “Windows” + “R” to open the Run prompt.
- Type in “Control Panel” and press “Enter” to launch the classical Control Panel interface.
Accessing the classic Control Panel interface - In the Control Panel, click on the “View By:” option and select the “Large Icons” button.
Viewing Control Panel using Large Icons - After making this selection, click on the “Windows Defender Firewall” option to launch the Firewall and then select the “Turn Windows Defender Firewall On or Off”.

Opening Windows Defender Firewall from Control Panel - Make sure to uncheck the “Turn On Windows Defender Firewall” for both the available options to turn the Firewall Off.
- After making this selection, save your changes and close out of the Window.
- Press “Windows” + “I” to open the windows Settings.
- Inside the settings, click on the “Update and Security” option and select the “Windows Security” button from the left side.

Open Windows Settings and Click Update & Security - On the next screen, click on the “Virus and Threat Protection” option and click on the “Manage Settings” option below the “Virus and Threat protection settings” heading.
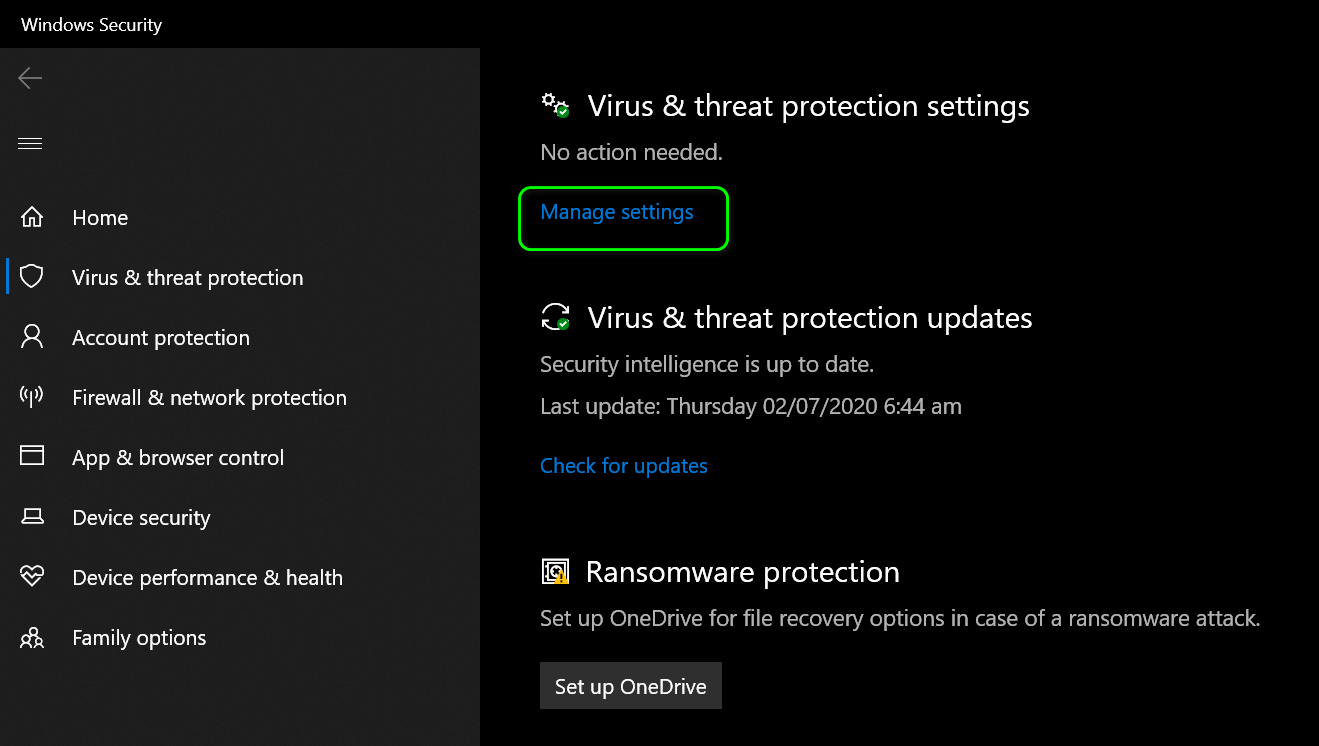
Click on Manage Settings Under Virus & Protection Settings of Windows Defender - After clicking on this option, turn the toggle off for “Realtime Protection”, “Cloud-Delivered Protection”, “Automatic Sample Submission” and “Tamper Protection”.
- After disabling the Antivirus and the Firewall, check to see if the driver starts working normally.
- If it does, either keep them disabled or try to add exclusions for it in both of them
- Check to see if the issue is fixed.
Method 13: Install Network Driver In Compatibility Mode
In some cases, the driver that you are trying to install on your computer might not be properly compatible with it or its setup might not be properly compatible with the system. Therefore, in this step, we will be installing this driver in the compatibility mode to try and emulate an evironment with which it is fully compatible. In order to do this, follow the guide below.
- Navigate to your manufacturer’s website and download the Driver’s setup file for your computer.
- Press “Windows Key + R” on your desktop screen to go to run box.
- Type in “Devmgmt.msc” and press “Enter” to open the device management screen.
Type devmgmt.msc and Press Enter to Open Device Manager - Inside the device manager, expand the “Network Adapters” option and then right click the network adapter and select “Uninstall Device”.
Clicking on the “Uninstall Device” option - If you are prompted to Confirm the action then click on “Confirm.”
- Go to the location where you had saved your downloaded setup files of the drivers and right click, then select “Properties”.
- Select Compatibility Tab and place a check mark next to Run this program in Compatibility mode and select a different operating system.
- Let the driver be installed on your computer and follow through with hte on-screen instructions.
- Check to see if the issue persists after installing this driver.
Method 14: Reset Network Stack
It is possible that the network stack protocls on your computer might have been misconfigured or they might have been corrupted due to which the driver isn’t being recognized by the system properly. It is also possible that they have acquired some corrupted cache which is preventing proper functioning. Therefore, in this step, we will be resetting the Network Stack. For that:
- Press “Windows” + “R” to open the Run prompt.
- Type in “Cmd” and then press “Shift” + “Ctrl” + “Enter” to provide admin permissions.
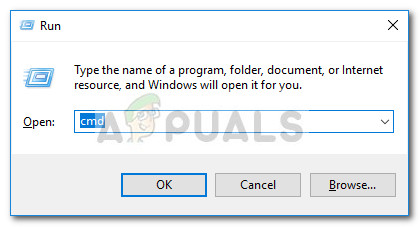
Run dialog: cmd, then press Ctrl + Shift + Enter - Inside the command prompt, type in the following commands and press “Enter” after each to execute it on your computer.
ipconfig /release
ipconfig /flushdns
ipconfig /renew
netsh int ip reset
netsh winsock reset
- After executing these commands on your computer, make sure to perform a complete restart to ensure that they are properly executed.
- Check to see if the issue still persists.
Do not worry if the commands after being executed show a particular error message or any other info on the screen because these commands affect the virtual and the physical adapters installed on the computer and sometimes some of the adapters might not respond well to the commands due to which they might not have an effect on all adapters.
Method 15: Tweak Registry Editor Settings
It is possible in some cases, that the registry of your computer has been misconfigured and there are some changes that have to be made before we can get it back working again. Therefoire, in thsi step, we will be tweaking some registry settings which should get the driver back up and working again. In order to make these changes, follow the guide below.
- Press “Windows” + “R” to open the Run prompt.
- Type in “regedit” and press “Enter” to open the registry editor.
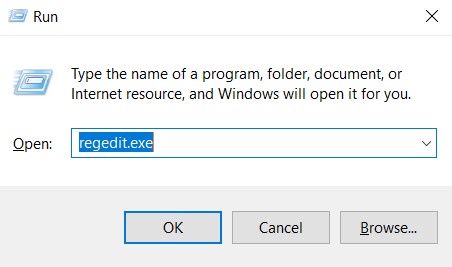
regedit.exe - Inside the registry editor, navigate to the following location.
HKEY_LOCAL_MACHINE\System\CurrentControlSet\Control\Class{4d36e972-e325-11ce-bfc1-08002be10318} - Locate the subfolder path that has the correct Adapter Model.
- In that subfolder, right-click anywhere on the right pane and create a new REG_DWORD key.
- Set the name of this key to “ScanWhenAssociated”, and set its value to “0”.
- Check to see if doing so fixes your issue.
Method 16: Update Intel Chipset Drivers
Chipset drivers play an important role in controlling communications between many components in your system. This issue may be triggered on your system due to outdated chipset drivers because they are not only responsible for slowing down your system’s performance but they also cause networking issues.
There are 2 major ways to update chipset drivers. You can update chipset drivers automatically in Device Manager or download and install them manually from its official website.
Update Chipset Drivers Automatically in Device Manager:
The first and simplest method to update chipset drivers is to use the Device Manager. Here’s how to do that:
- Press “Windows” + “R” to open the Run prompt and type in “Devmgmt.msc” and press “Enter”.
Run dialog: devmgmt.msc - In the Device Manager window, expand the System devices categories and right-click the chipset driver like SMBus device or any other that you want to update, then select the “Update driver option” from the context menu.
Clicking on the “Update Driver” option - Then there are 2 options to update chipset drivers. Here you can select the “Search automatically for updated driver software” option, which can help you install the updated chipset drivers automatically.
- Windows will search for the updated chipset drivers automatically, and then you can follow the on-screen prompts to install the drivers on your computer.
- After installing these drivers on your computer, check to see if the issue still persists.
Update Chipset Drivers Manually:
You can download the motherboard drivers from their official website and install it on your computer manually. To do so, you need to check the computer’s system information firstly. It is important to download the right chipset driver that is suitable for your Windows system, whether it’s Windows 10, 32- bit or 64-bit version, etc. For that:
- Press “Win + I” keys to open the Settings window, and then click on the “System” option.
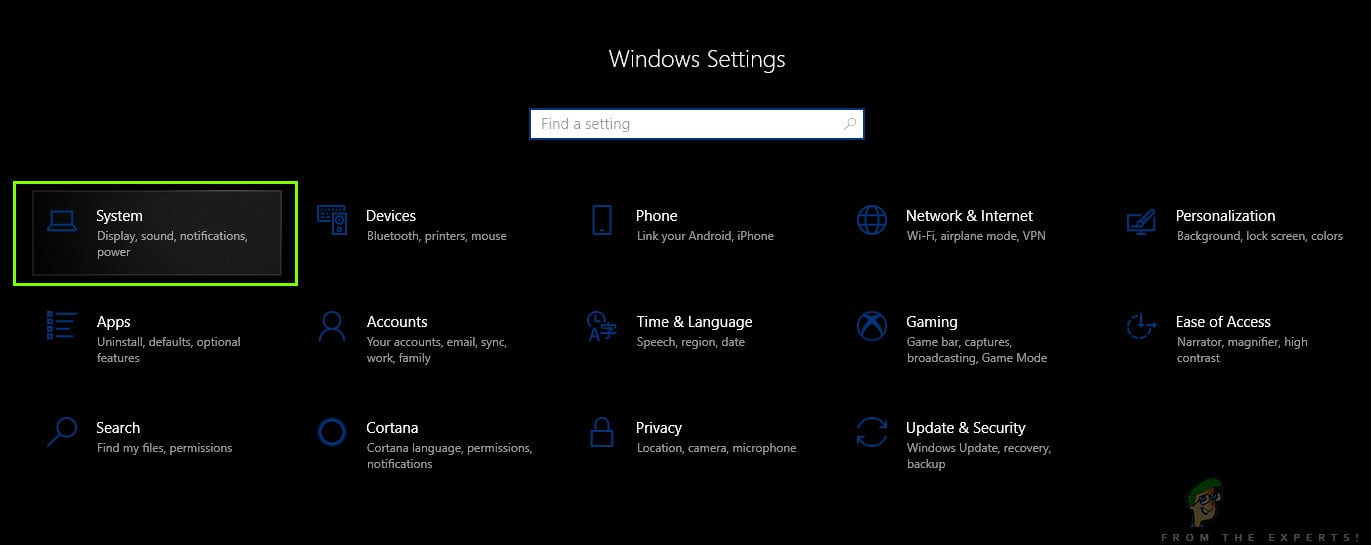
System – Windows settings - Click on the About button from the left pane, and then scroll down the right sidebar to the Device specifications section where you should find the system type is 64-bit or 32-bit.
- Navigate to the official website of your motherboard manufacturer. Click here to visit its official website.
- Then select the “Chipsets” section to go on.
- In the pop-up window, you can select the Product type and Operating system type form the down-down menus to filter the chipset drivers that you want to download. Alternatively, you can type the product name or keywords in the search bar.
- Select a suitable chipset driver and click on “Download” in the next window.
- Run the downloaded executable on your computer and follow through with the on-screen instructions to install them on your computer.
Method 17: Update Network Adapter From CD Installer
In some cases, it is possible that the correct network adapter for your motherboard has been already included in the CD that came with the motherboard that you are using. Therefore, in order to fix this issue with the Network adapter, you might have to use the CD to install it on your computer. For that:
- Press “Windows” + “R” to open the Run prompt and type in “Devmgmt.msc”.
Type devmgmt.msc and Press Enter to Open Device Manager - Afterward choose Network Adapters and then right-click on the “Ethernet Connection”.
- Click on the “Update Driver Software” and choose “Browse my computer for driver software”.
Browser for the driver manually - Now, select the folder location of the Network Driver from the CD Installer included in the motherboard pack.
- Let the computer search for any compatible software and follow the on-screen instructions to install them on your computer.
- Check to see if doing so fixes this issue.
Method 18: Decrease Your network adapter’s power output
The network adapter allows the device to communicate over the local area network (LAN), connecting to the internet or to other computers. Some computer geeks reported that they were able to get around this problem by reducing the power output of their network adapter, therefore, follow the steps throughout to get rid of this problem:
- Press “Windows” + “R” to open the Run prompt, type in “Devmgmt.msc” in the run prompt and press “Enter” to launch the device manager.
Type devmgmt.msc and Press Enter to Open Device Manager - Double click on the “Network Adapters” panel to expand it and right-click on the network adapter that your computer is using.
- Select the “Properties” option to launch the network properties.
- Navigate to the “Advanced” tab.
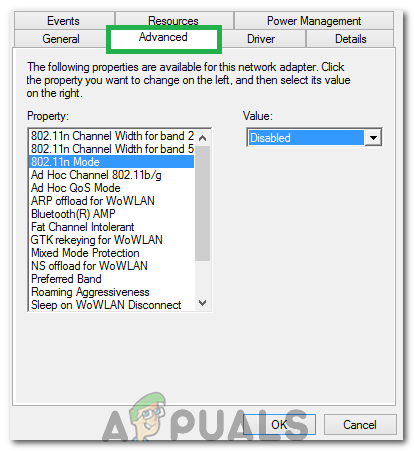
Clicking on the “Advanced” tab - Under Property, locate the “Power Output property” and click on it to select it.
- Open the dropdown menu under Value and change it from 100% to 75%. If you are also going to be using an external monitor while your laptop is docked, change the value to 50% instead of 75%.
- Click on “OK”, close the Device Manager, and restart your computer. Now check whether or not the issue has been resolved once your computer boots up.
Method 19: Enable QoS Feature
You might be able to solve this problem by enabling the QoS feature. This feature is in charge of limiting your network speed, but a couple of users reported that the issue was resolved after enabling QoS on their router. To do this, you need to open your router’s configuration page and enable QoS. We have to mention that QoS is an advanced feature, so it might require some configuration before you can properly use it. It’s also worth noting that this feature might not be available on your router, so be sure to check your router’s instruction manual for more information. In order to enable it:
- Launch your browser and type in your IP address in the address bar.
- In order to find our IP address, press “Windows” + ” “R” to launch the run prompt. Type in “CMD” and press “Shift” + “Ctrl” + “Enter” to provide admin permissions. Also, type in “ipconfig/all” in the cmd and press “Enter”. The IP Address that you have to enter should be listed in front of the “Default Gateway” option and should look something like “192.xxx.x.x”.
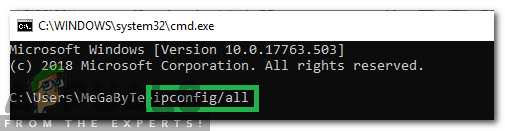
Typing in “ipconfig/all” - After entering the IP Address, press “Enter” to open the Router login page.
- Enter your username and password in the respective categories on the router’s login page both of which should be written on the back of your router. If they aren’t, the default values should be “Admin” and “admin” for both the password and the username.
- After logging in to the router, look to configure the QoS settings as mentioned above and check to see if configuring it fixes this issue.
Method 20: Disable Virtual Ethernet Devices
If you haven’t found a solution yet and are still receiving Ethernet port error then you should try to remove any virtual Ethernet drivers on your PC as these can cause major issues with how your PC connects to the internet. A virtual Ethernet driver could be anything from a VPN to software designed to improve ping or packet loss. You can find virtual Ethernet devices and disable them by following the steps below.
- Press “Windows” + “R” to open the Run prompt.
- In the Run prompt, type in “ncpa.cpl” and press “Enter” to open the network configuration panel.

Run this in the Run dialog box - In the network configuration, right-click on any entry that seems to belong to software and is not a physical connection that your computer is connected to.
- Select the “Disable” option to disable the virtual network connection.
- If you’re unsure, you can Google the name of each network device to learn more before disabling them.
- Check to see if disabling the Virtual Ethernet Devices fixes this issue.
Method 21: Uninstall Recent Windows Update
Other times, you may lose network connectivity or experience related networking issues on Windows 10 if your computer receives a buggy update through Windows Update. In this situation, you can uninstall the update to fix the problem until Microsoft releases a new update that permanently fixes the problem.
- Press “Windows” + “I” buttons to open the settings.
- In settings, click on the “Update and Security” option and then select the “Windows Update” button from the left pane.
Open Windows Settings and Click Update & Security To Check For Updates - In the Windows Update, click on the “View Update History” option.
- In the Updates History, click on the “Uninstall Updates” option and it should take you to the uninstallation screen where all the recently installed updates will be listed.
- From the list, right-click on the update that was installed recently and prevented your driver from working properly.
- Right-click on this update and select the “Uninstall” button to remove it completely from the computer.
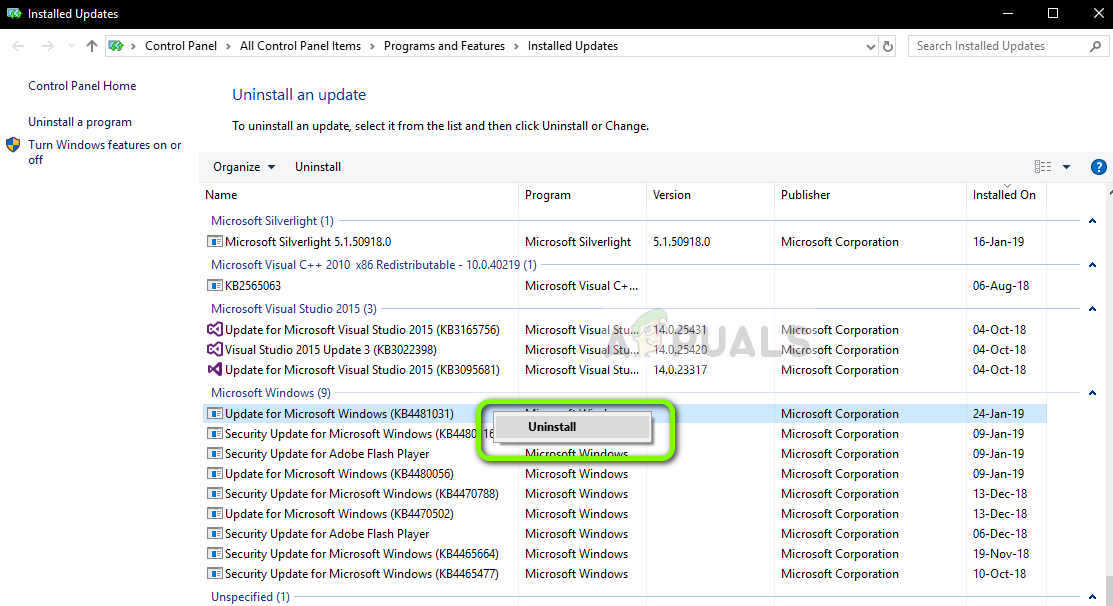
Uninstalling Microsoft Updates - Follow through with the on-screen instructions and check to see if uninstalling fixes this issue.
Once you complete the steps, Windows 10 will roll back to the previous build when there was no Wi-Fi or Ethernet adapter problem. After uninstalling the update, the system shouldn’t install the same update until the next quality update becomes available through Windows Update.
Method 22: Monitor Your Connection Details
In some cases, the connection details might not have been entered properly in the network configuration settings. Therefore, in this step, we will make sure that the adapter is set to acquire these settings automatically and that it is actually able to get the correct settings from the connection. In order to do this, follow the guide below.
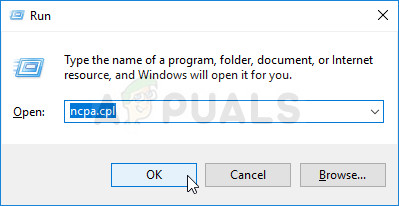
- Press “Windows” + “R” to open the Run prompt.
- Type in “ncpa.cpl” and press “Enter” to launch the network configuration panel.
Opening Networking Settings in Control Panel - Inside the Network Configuration, right-click on the “Ethernet” adapter that your computer is using.
- Select the “Properties” option from the menu to open the Ethernet properties.
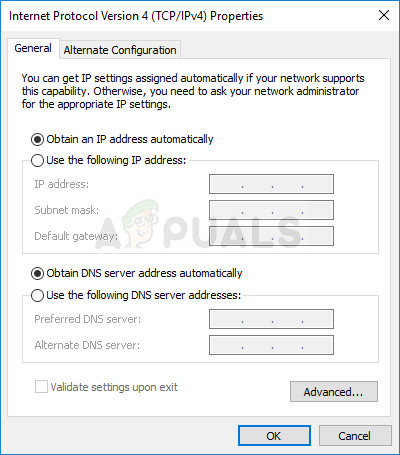
- Inside the “Ethernet Properties” window, double-click on the “Internet Protocol Version 4 (TCP/IPV4)” entry and this should open up the IPV4 configuration window.
- In this window, make sure that you have checked the “Obtain an IP Address Automatically” and the “Obtain DNS Server Automatically” option.
Obtain IP and DNS addresses automatically - Although there are scenarios where these details have to be entered manually, we have to make sure first that the computer is able to correctly obtain this information automatically.
- If the automatic setting doesn’t work, connect another computer to the connection that you are trying to connect on this computer, press “Windows” + “I” to open settings, click on “Network and Internet”, select “Status” and then click on “Properties” option to view exact connection details.
- Enter these details in the first computer and check to see if the issue persists.
Method 23: Check Compatibility
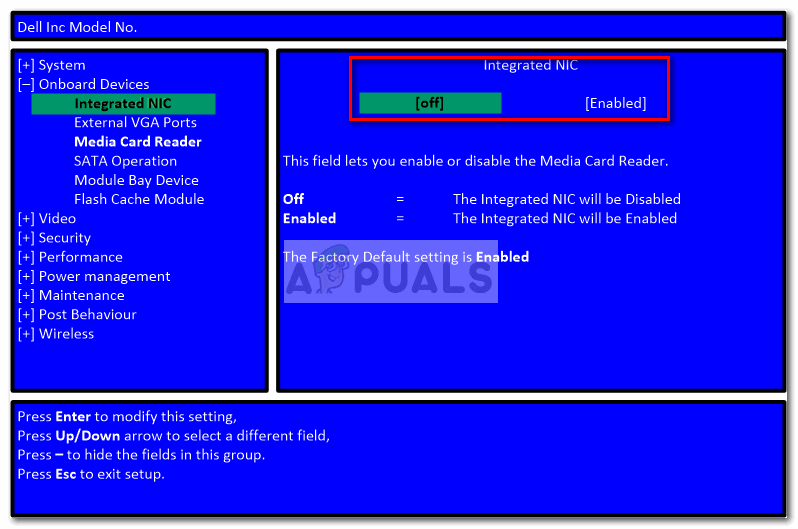
If you’ve encountered this problem on Dell machine then it might be possible that the On-board internet controller on the Dell is not compatible with Windows 10, and there isn’t an updated driver. There is, however, a cheap solution. Purchase and install a HiRO H50218 PCIe Ethernet adapter for about $15 at Amazon. Before installing the new NIC first enter the BIOS and disable the onboard controller, a Broadcom Netlink Gigabit Ethernet controller. In the BIOS look under Chipset options to disable the on-board NIC. Now install the new NIC in an available PCIe slot and reboot. At the logon screen it will appear that you don’t have an internet connection, but once you log on Windows 10 will find and install the proper driver automatically.
Method 24: Change Power Settings
In some cases, it is possible that the computer might be configured in such a way that the Power settings are able to disable the adapter at any point to prevent high power usage and this setting can prevent the adapter from being able to function altogether in some cases because the system always focuses on conserving power. Therefore, in this step, we will be disabling this feature, for that:
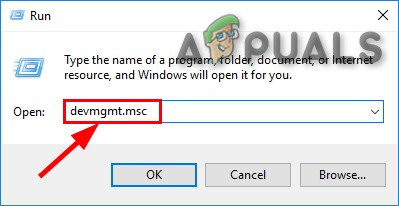
- Press “Windows” + “R” to open the Run prompt.
- Inside the Run prompt, type in “devmgmt.msc” and press “Enter” to open the device manager.
Run devmgmt.msc - In the device manager, double click on the “Network Adapters” option to expand it.
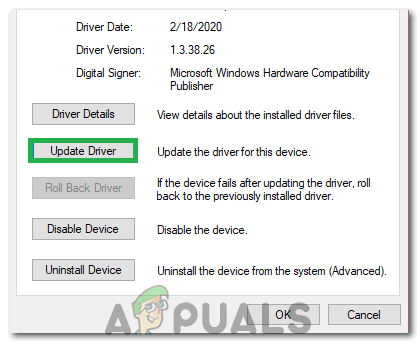
- Once expanded, right-click on your driver and then select the “Properties” option.
- In the driver properties, click on the “Power Management” option.
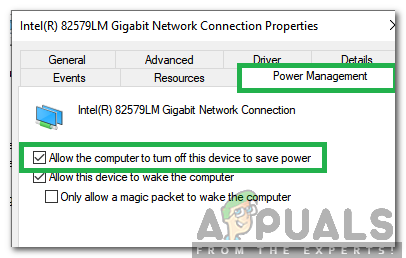
Clicking on the Power Management tab and Unchecking the option - In power management, make sure to uncheck the “Allow the computer to turn off this device to save power” button.
- Click on “Apply” and then on “OK” to save your changes and exit out of this window.
- Restart your computer and check to see if the adapter starts working again.


Where exactly on that broadcom page (Method 1, No. 1) might I download the drives files?