How to Extract Names from Cells Based on Birthdate in Excel
- Excel cells are individual data points in a spreadsheet, identifiable by column and row. They can contain data, be formatted for clarity, and use formulas for calculations and data manipulation.
- To extract names based on birthdate, identify relevant data columns, possibly split names and birthdates into separate columns, apply specific formulas to match birth years, and use Flash Fill to extend this logic across your dataset.
- Utilize Excel's filter and VLOOKUP functions for targeted data extraction. Excel outperforms Google Sheets in handling larger datasets and offers unique features like Flash Fill for pattern recognition and data manipulation.
Microsoft Excel is a powerful tool for data management, enabling efficient organization, filtering, and sorting of data. It also enables the extraction of specific information from one cell based on data from another cell and displaying it elsewhere.
For instance, you might need to extract names from cells based on birthdate. Understanding how extraction works and applying the appropriate formulas in such scenarios can significantly enhance proficiency and take your productivity to the next level.
How Do Cells Work in Excel
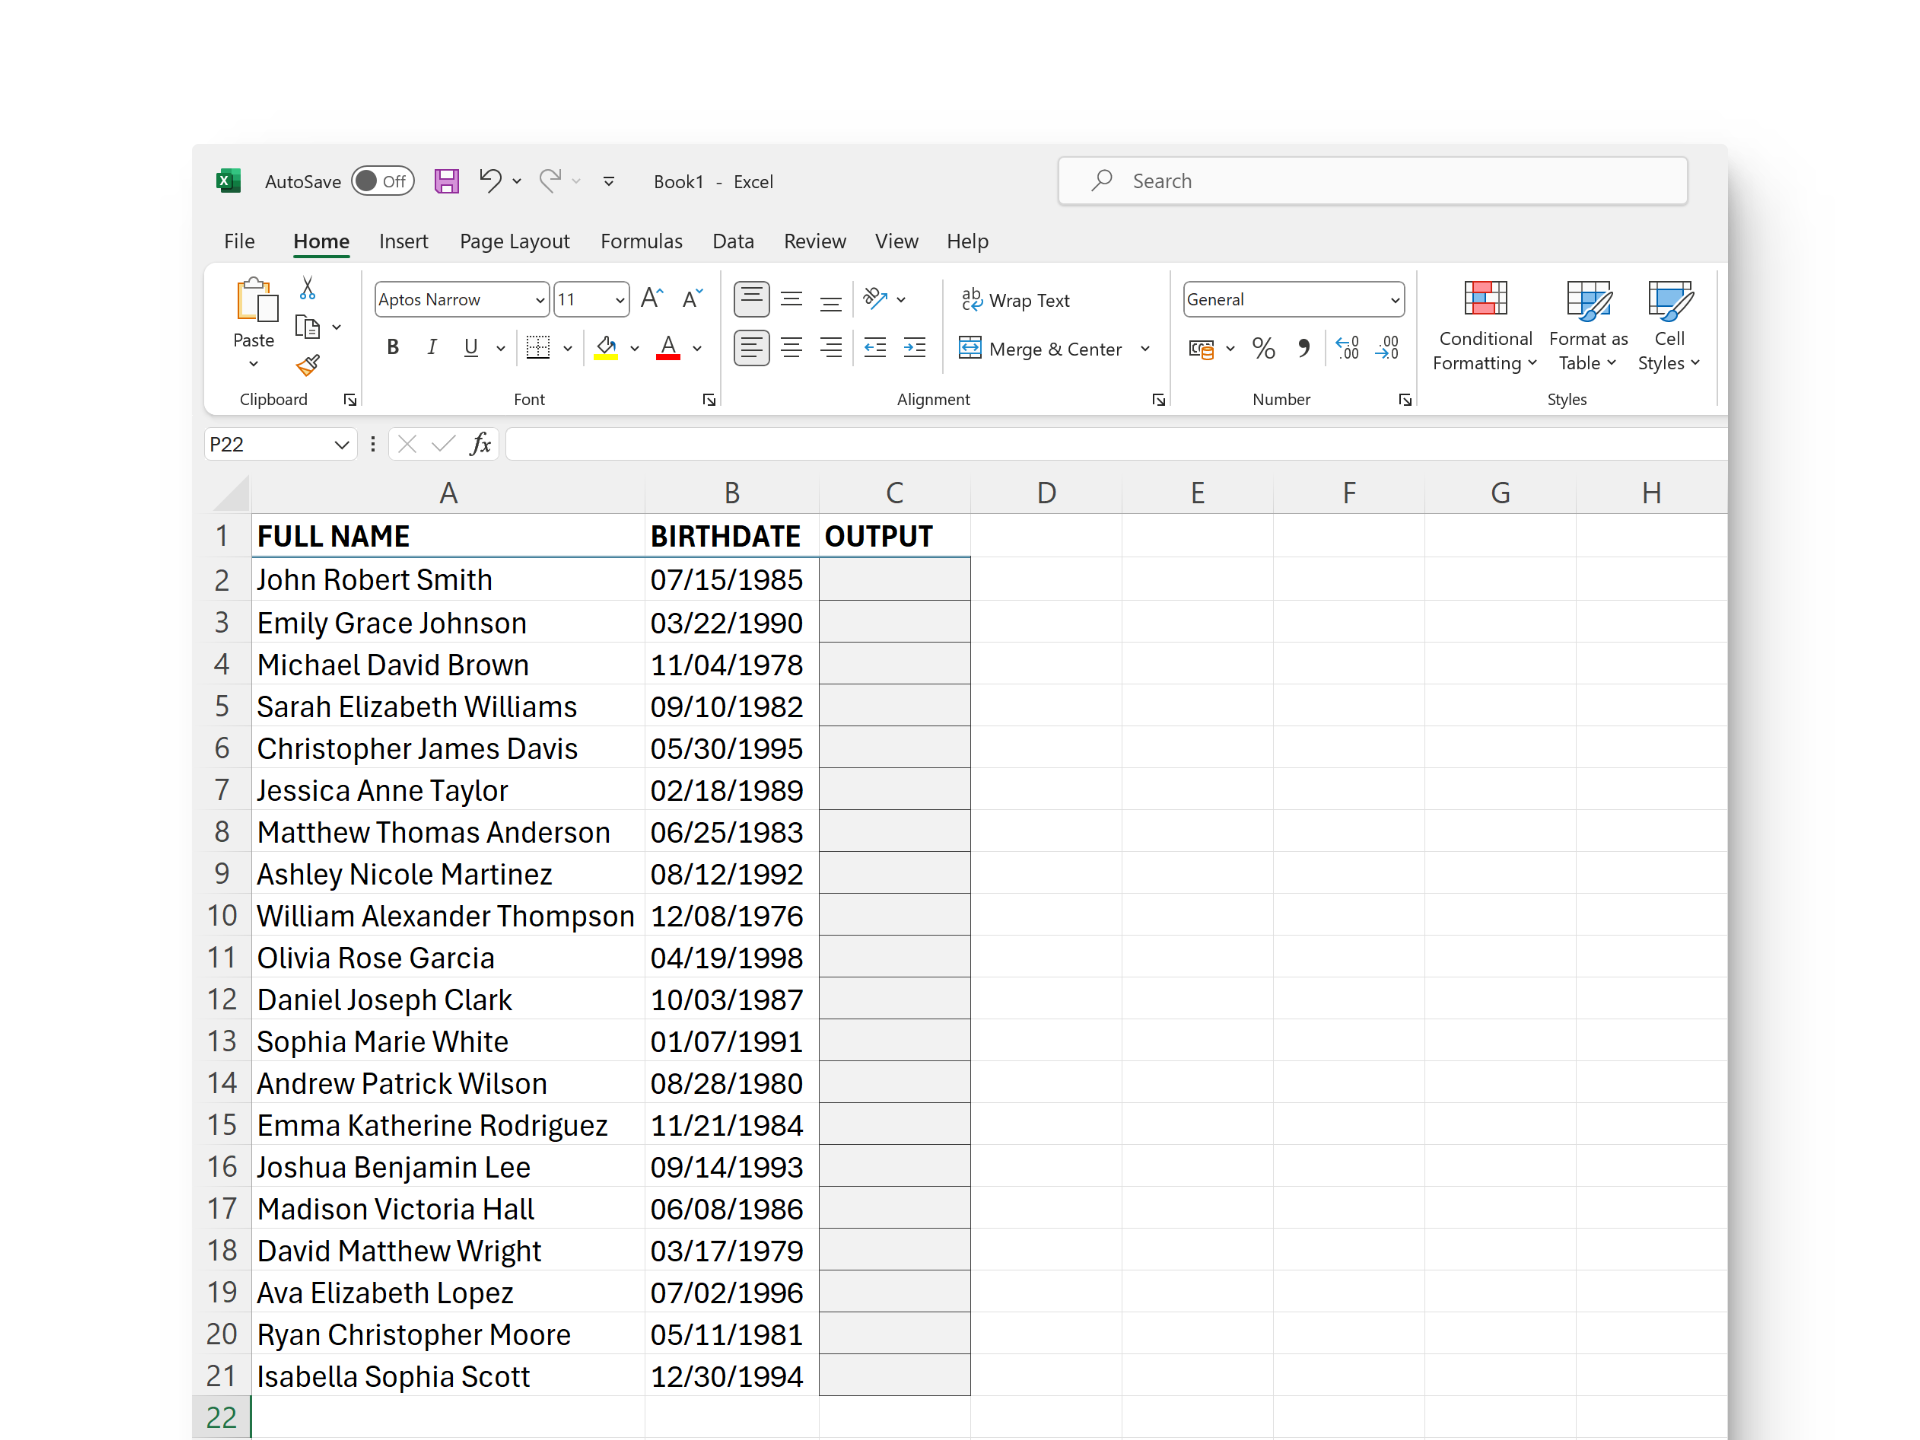
Cells in Excel are the basic units of spreadsheets, each identified by a unique combination of column letter and row number. This identification system enables precise referencing of individual cells, allowing for organization of data within the spreadsheet. Users have the flexibility to input various kinds of data in each cell and format accordingly for enhanced readability and presentation.
Moreover, cells can also interact with one another through formulas and functions, enabling users to perform calculations and logical operations used for data analysis and manipulation.
READ MORE: How to Make All Cells the Same Size in Excel [4 Easy Steps] ➜
How to Extract Cells Based on Birthdate
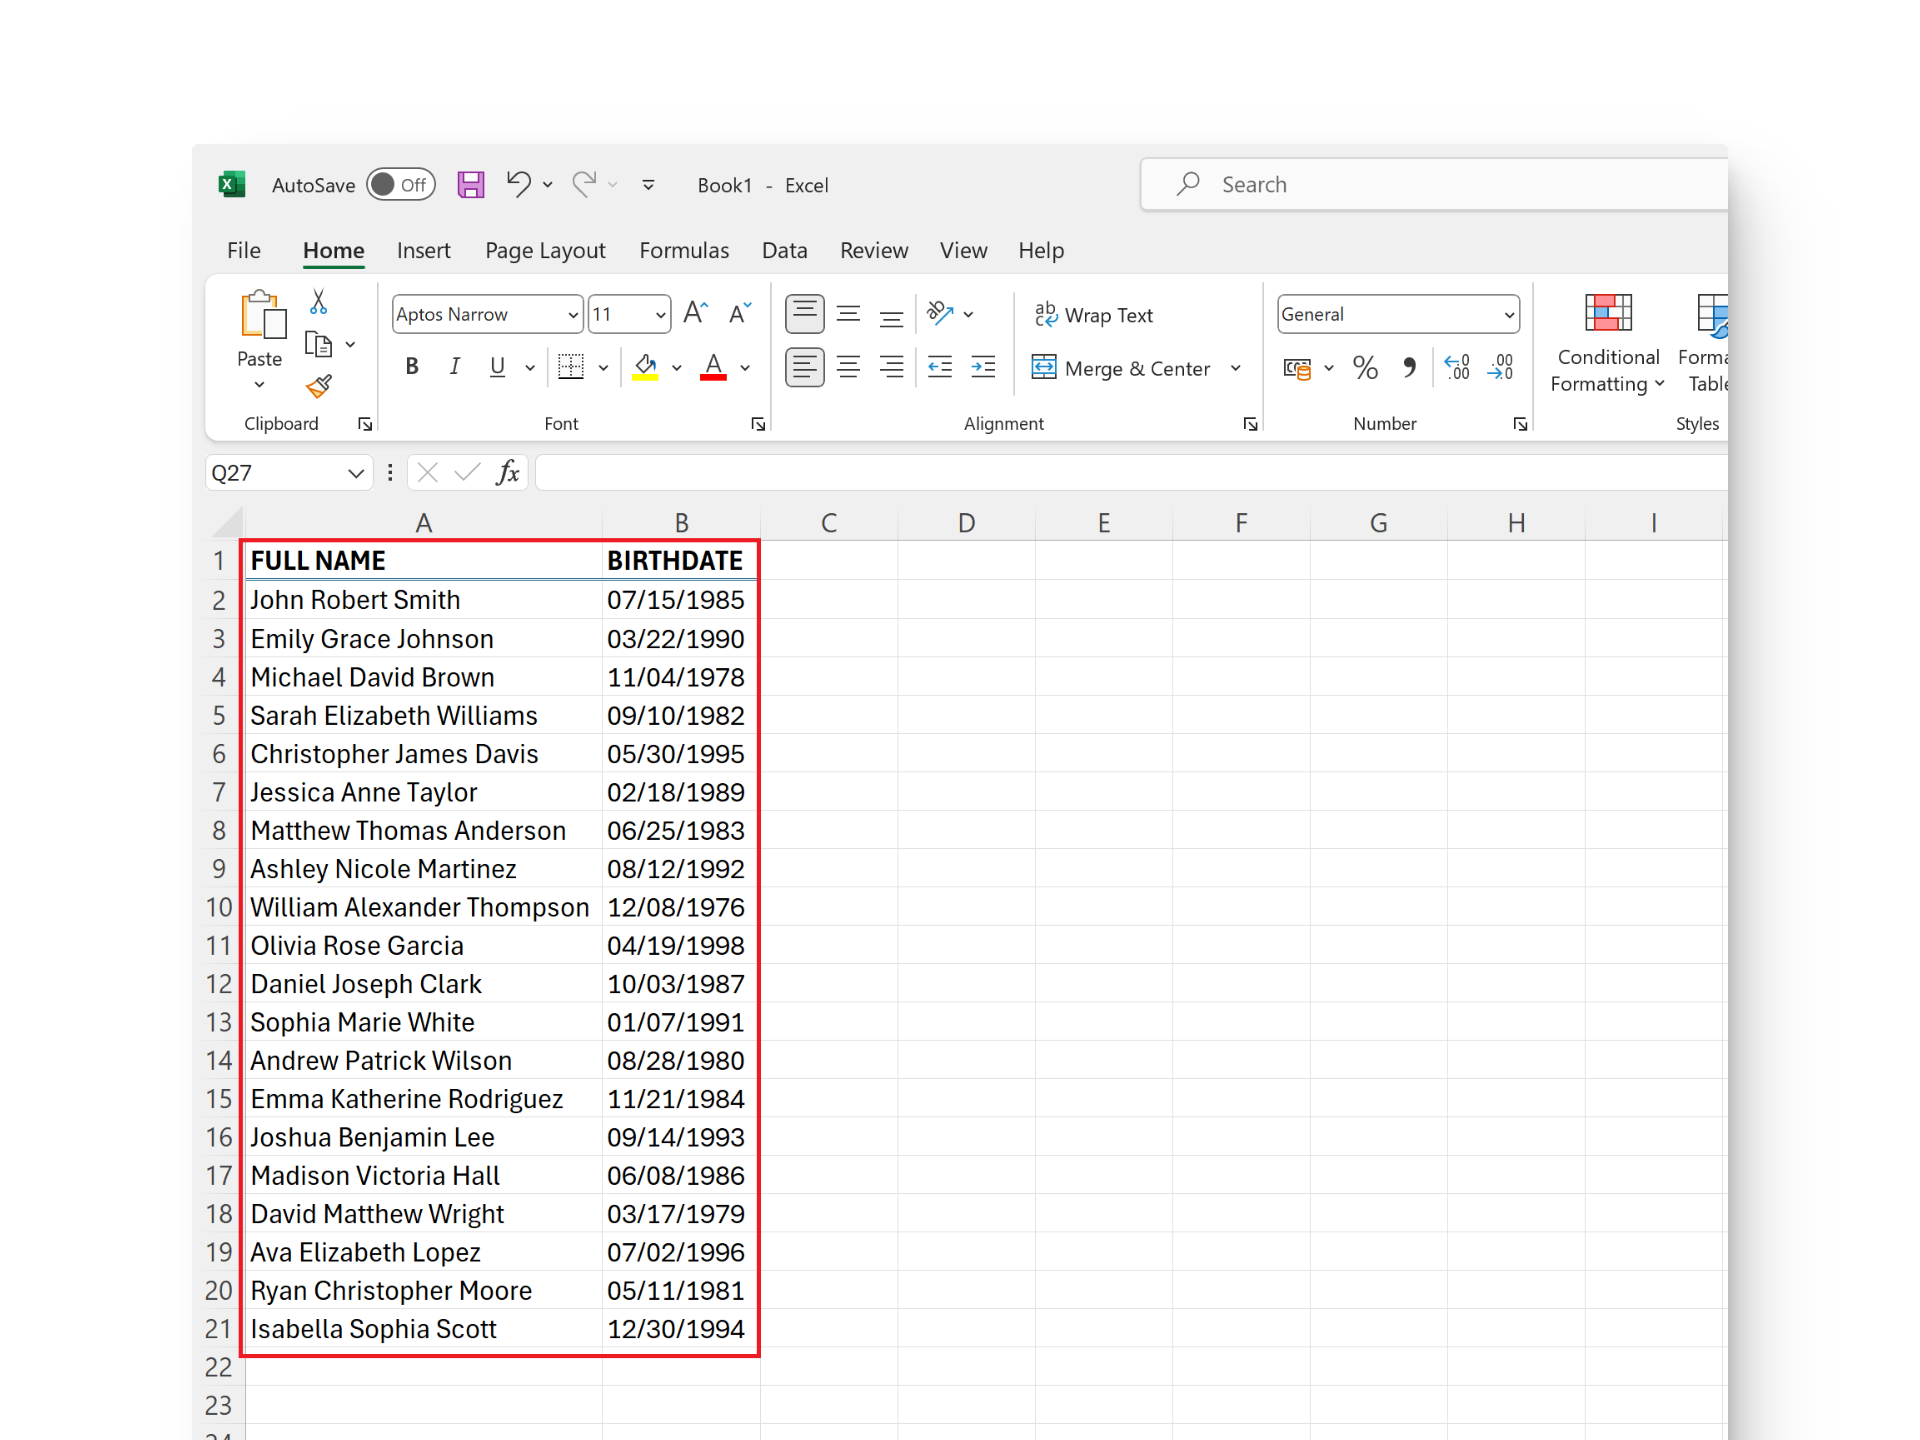
To begin extracting, it’s essential to gather relevant data and identify the columns that you’ll be working with. In this case, you’ll require access to the Names column (consider A1, A2, A3,…) and the Birthdates column (consider B1, B2, B3,…). You can follow a similar approach to extract desired data from any existing information as well.
Step 1: Identify the Data
As your first step, you need to consider whether you’d like the first, last, or full name as output. You’ll also need to decide if you’d like to extract these names based on the birth year, birth month, or the entire birthdate.
Step 2: Separate Full Names into Different Columns (If needed)
To split full names into separate columns, begin by selecting all the cells containing the names. Next, navigate to the Data tab and select Text to Columns. Alternatively, use the shortcut Alt key > A key > E key, one-by-one.
In the pop-up window, opt for Delimited and click Next.
Choose Space as the sole Delimiter and leave the Text qualifier set to (“). Proceed by clicking Next.
Finally, under Column data format, select Text for each column and click Finish to complete the process.

Step 3: Separate Birthdates into Different Columns (If needed)
Usually, birthdates are formatted as 00/00/0000. To split the days, months, and years into separate columns, start by selecting all the cells containing the birthdates. Next, go to the Data tab and choose Text to Columns. You may also use the shortcut Alt key > A key > E key, one-by-one.
In the resulting pop-up window, select Delimited and click Next.
For Delimiter, choose Other and type “/” in the box next to it. Set the Text qualifier to None and click Next.
Lastly, select Text for each column under the Column data format section, and click Finish.

Step 4: Identify the Range
Next, you’ll need to specify the range of birth years from which you want to extract names. This involves determining the starting and ending years relevant to your data. Additionally, clarify whether you intend to extract partial names or full names, and identify the corresponding columns for each extraction type.
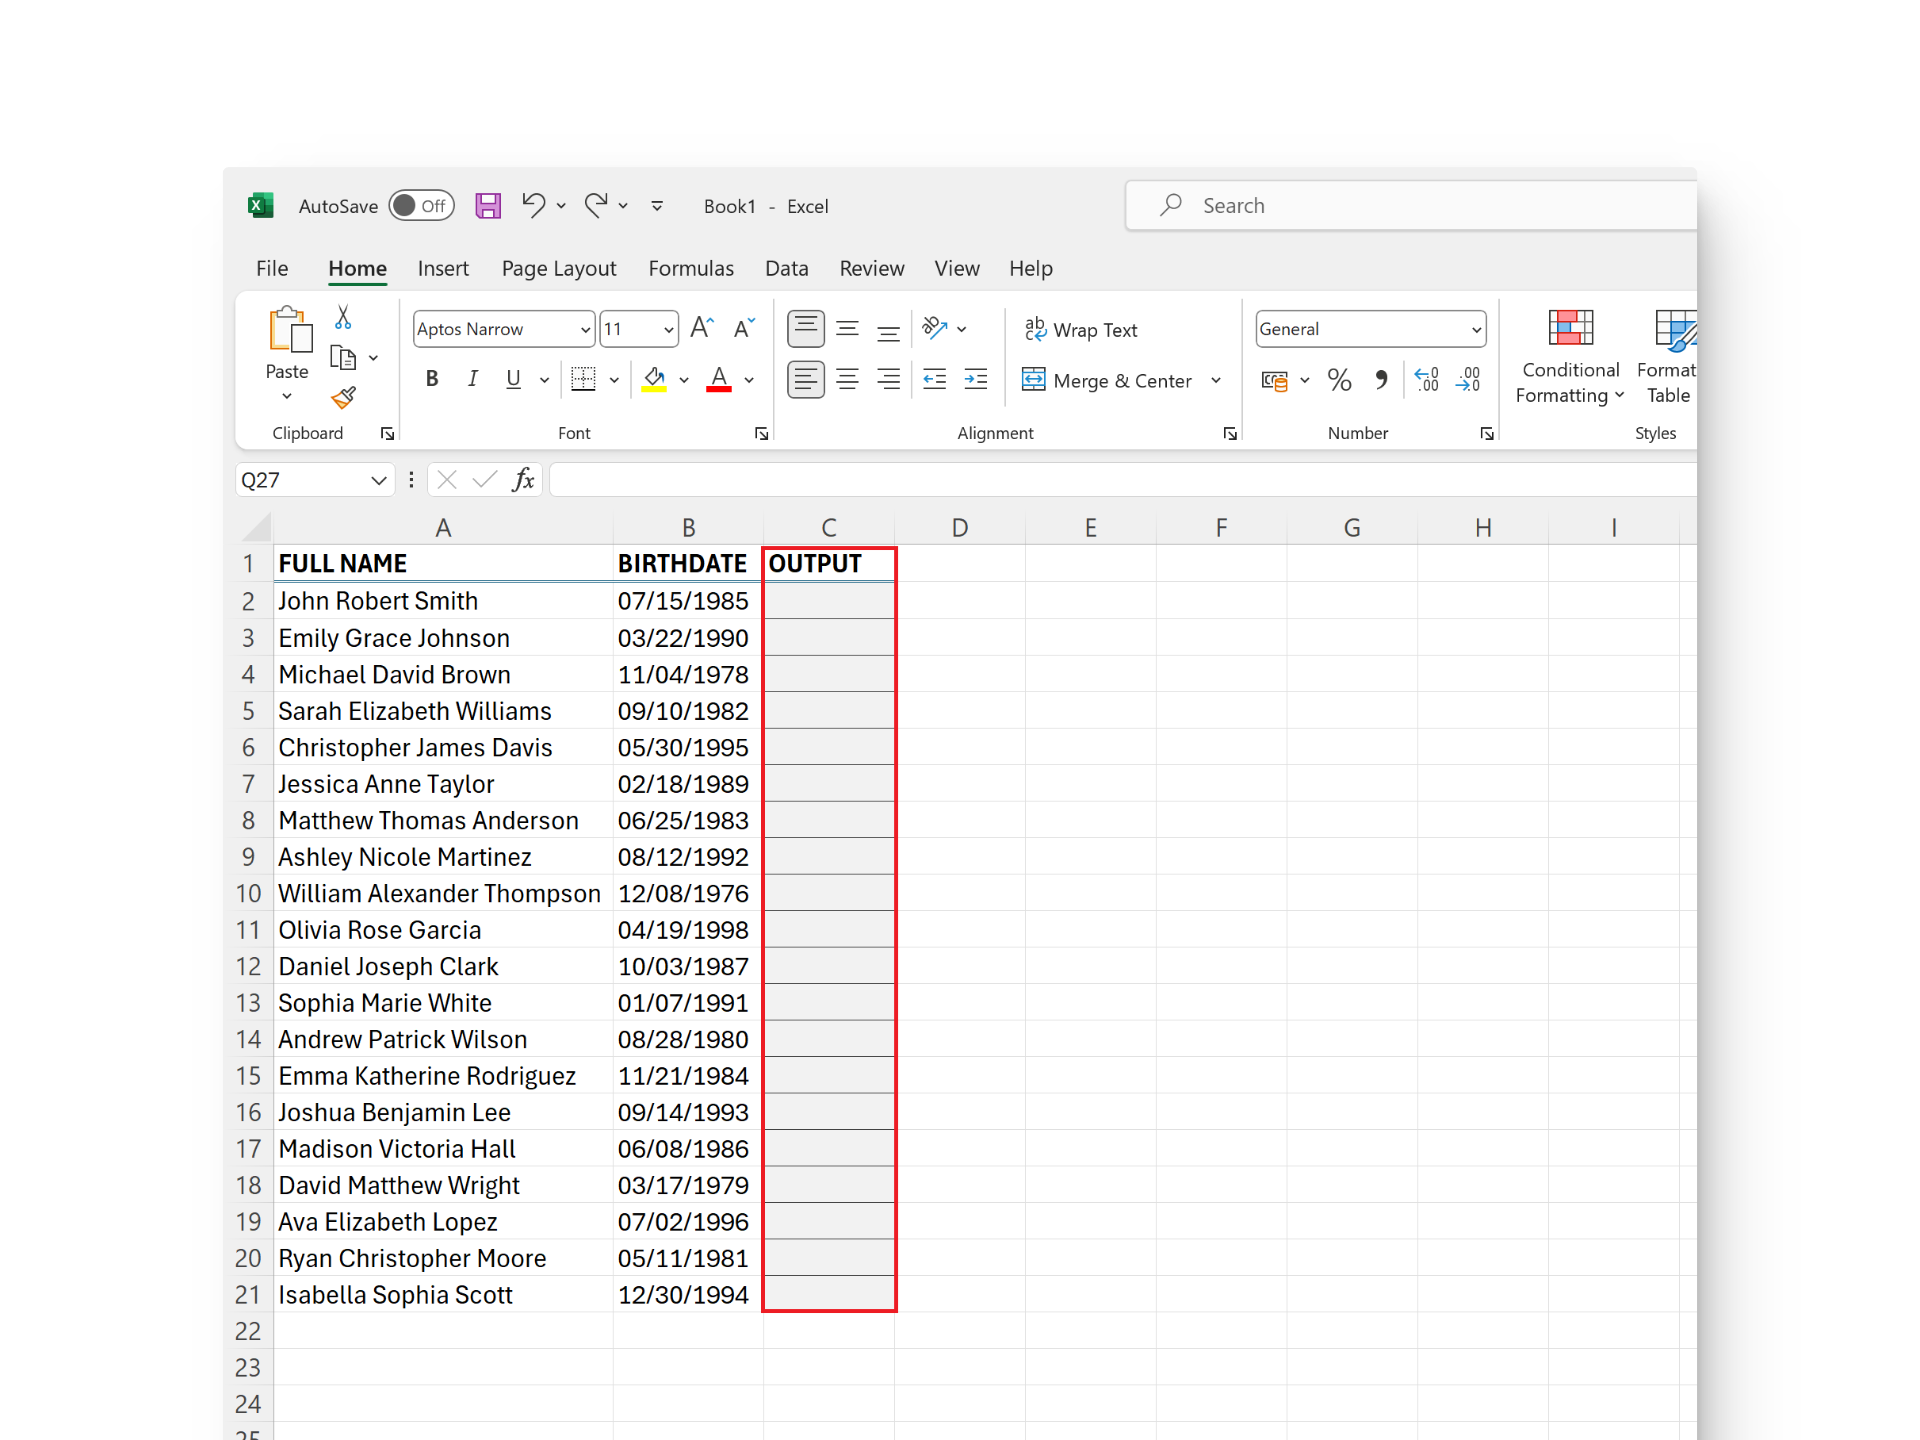
Lastly, label a new column or row as Output or with any preferred designation. This will serve as the destination for the extracted data.
Step 5: Apply the Formula
If your birthdate is split into different columns for month, day, and year, select the first cell of the Output column and enter the following formula:
=IF(AND(B1>=StartYear, B1<=EndYear), A1, "")If your birthdate is in the format 00/00/0000, select the first cell of the Output column and enter the following formula:
=IF(AND(YEAR(B1)>=StartYear, YEAR(B1)<=EndYear), A1, "")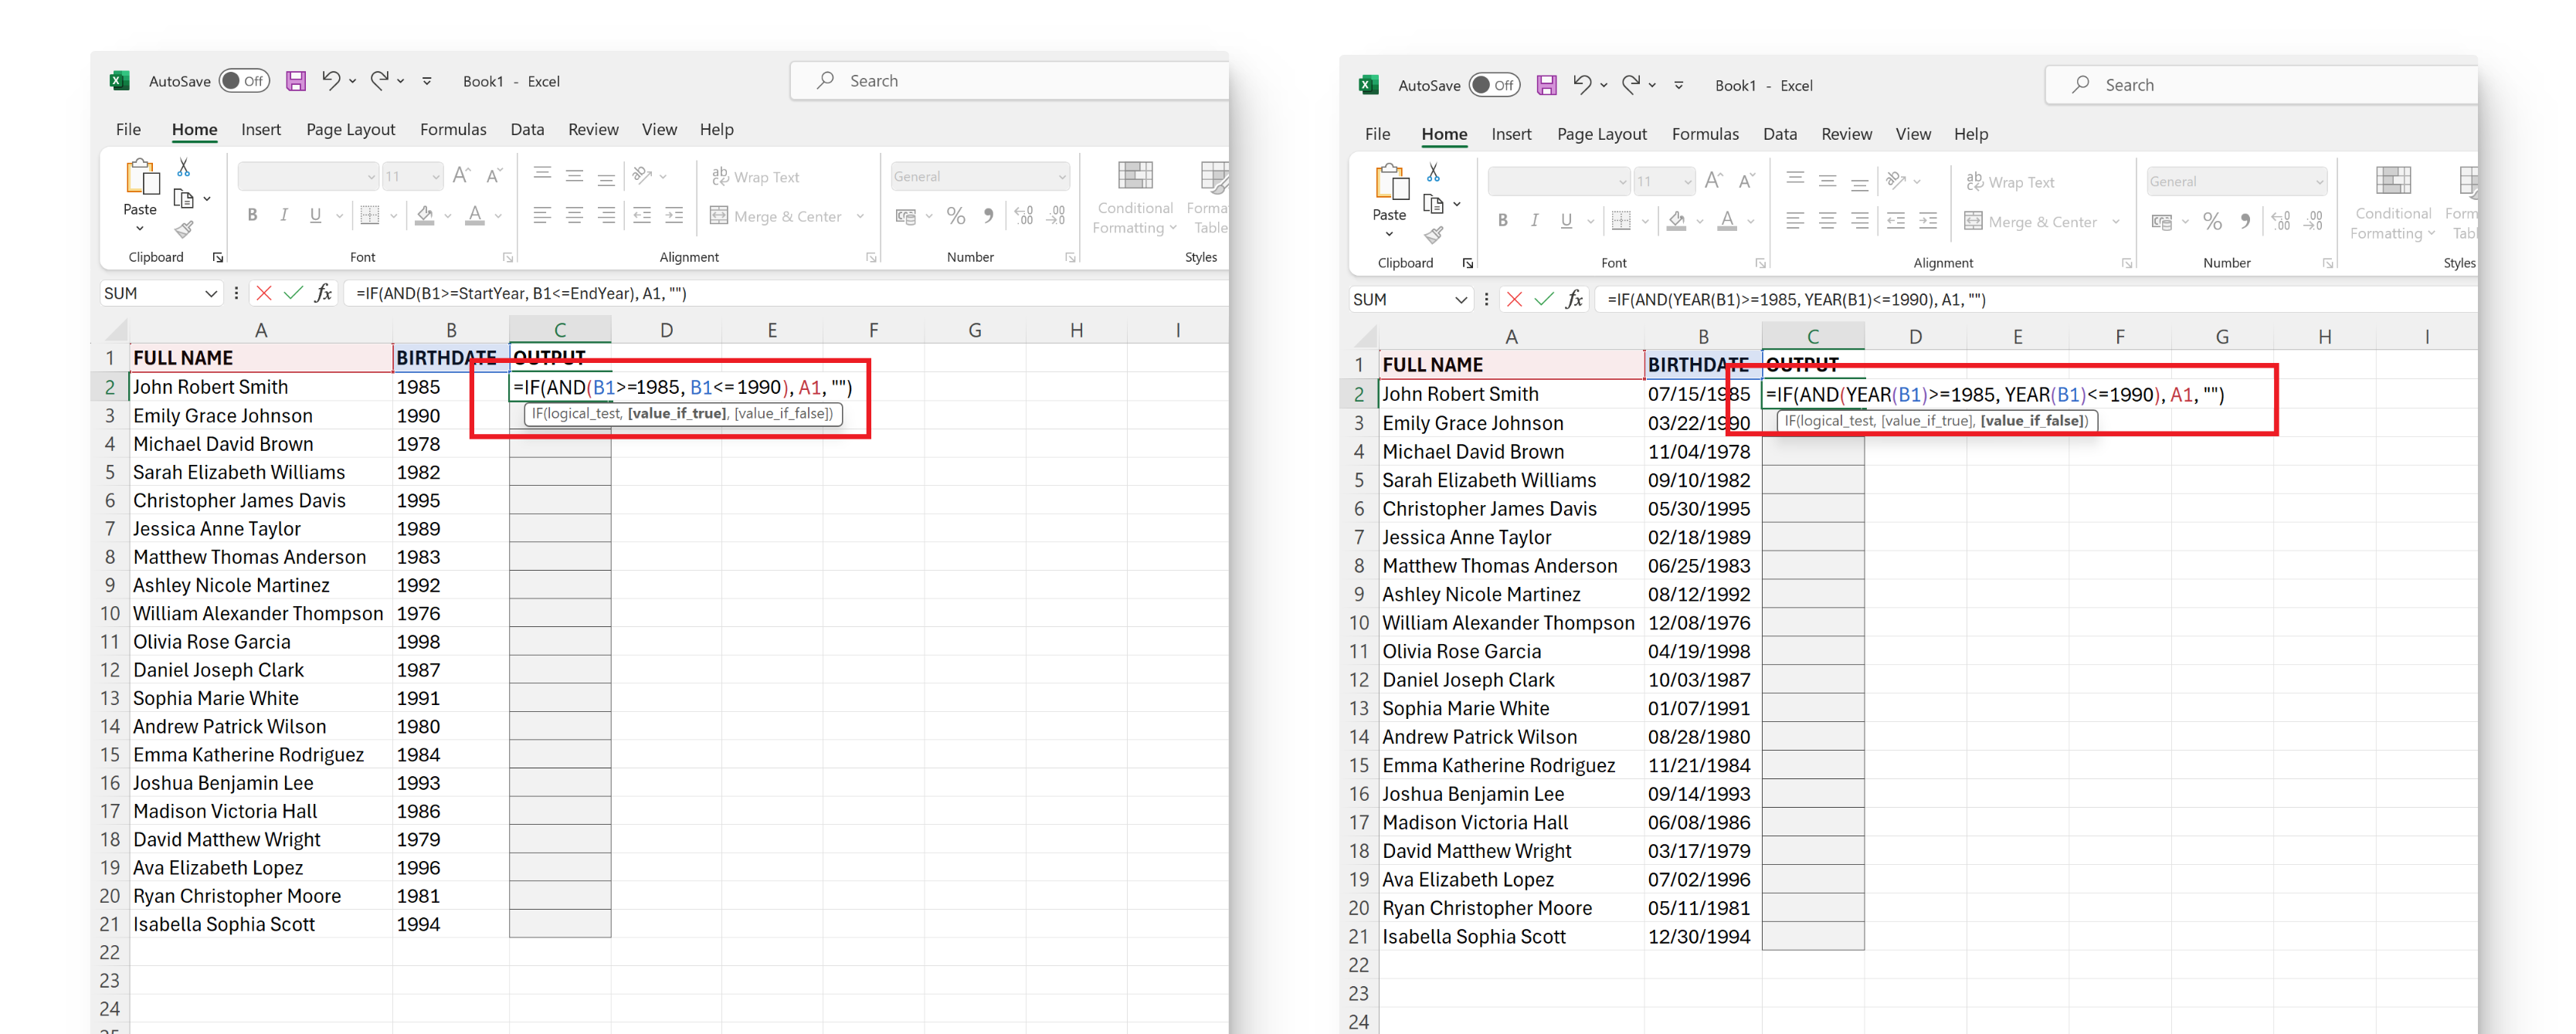
Make sure to replace the placeholders with references to cells in your sheet:
- A1: Name cell
- B1: Birth year cell
- StartYear: Start year of the range
- EndYear: End year of the range
These formulas check if the birth year in cell B1 falls within the specified range of birth years (inclusive). If it does, it copies the name from cell A1 to the current cell (C1). Otherwise, it leaves the cell blank.
Step 6: Apply Flash Fill
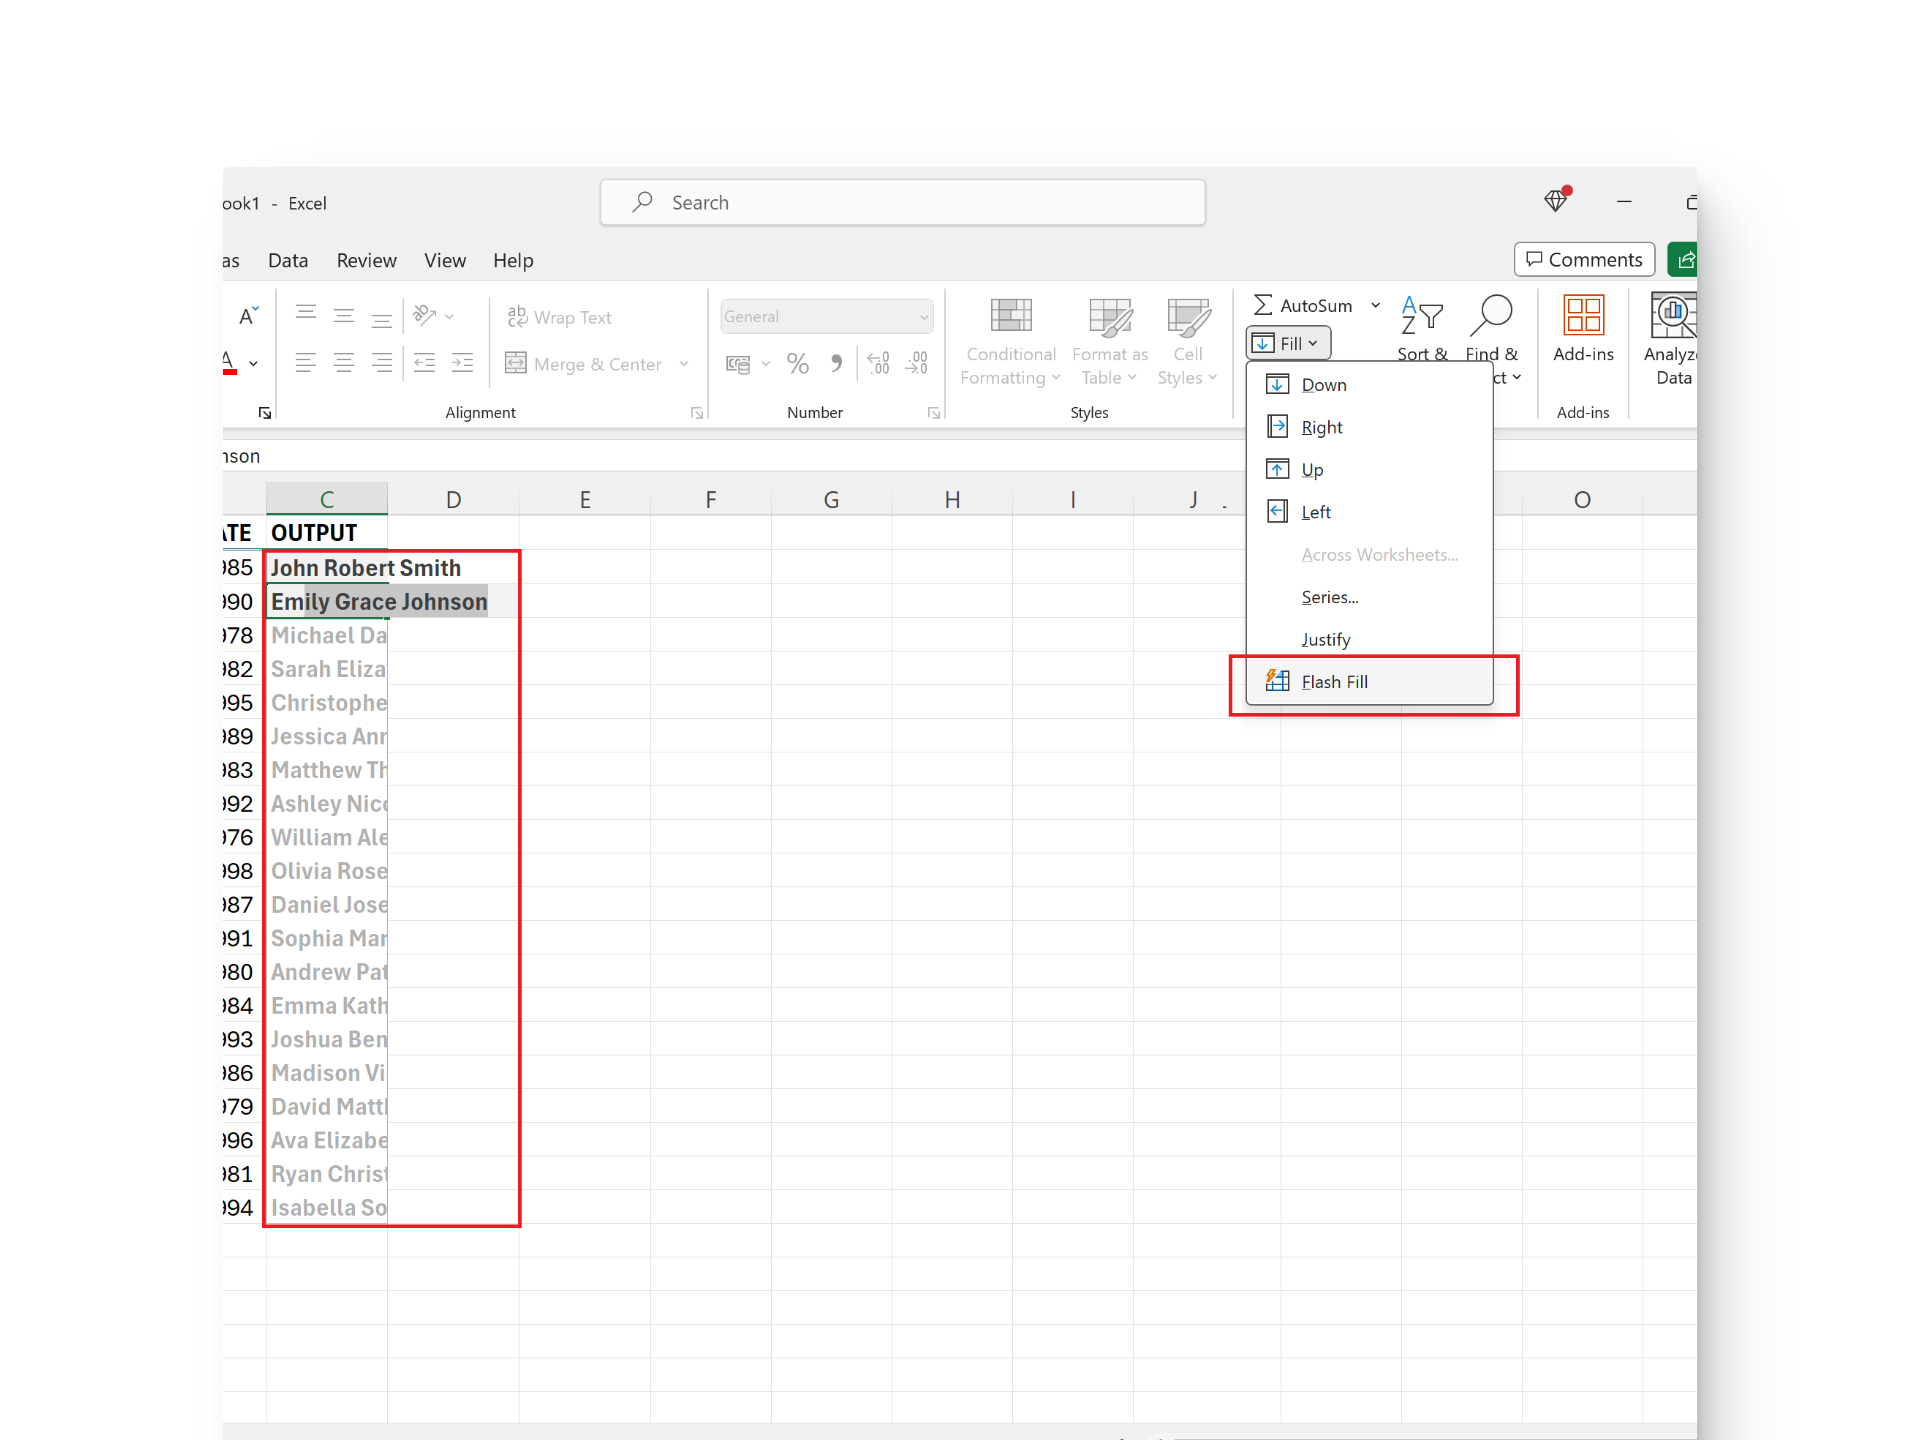
Excel’s Flash Fill feature intelligently recognizes patterns in one cell and fills in adjacent cells accordingly, eliminating the need for manual input of the same formula in each desired cell.
This feature is only available in Excel 2013 or later versions.
To use it, simply press Ctrl + E or click on the Fill option, then choose Flash Fill. Alternatively, select the cell where you’ve applied the formula, hover over the bottom-right corner where the fill handle appears, and drag it down or across the cells where you want the pattern to continue.
READ MORE: How to Shade Rows and Columns in Microsoft Excel ➜
Tips For Extracting Concise Data Set
While using formulas increases accuracy, there are other methods or tips through which you can also extract desired outcomes. However, they’re most effective when handling smaller amounts of data.
- Utilize Filters: Excel’s filter feature enables quick extraction of specific data by applying filters to columns.
To use it, select the entire dataset (including names and birthdates), click “Sort & Filter” in the Home tab, then click the drop-down arrow on the birthdates column header. Next, select “Data Filters” and choose “Custom Filter.” Set the fields to “is after or equal to” and “is before or equal to,” choose the “And” option, define the birthdate range, and click OK.
This filters the table to display only rows where the birthdates fall within the specified range. After copying the names, remove the filter to return to the original dataset. - Use VLOOKUP: If you want to extract names based on specific birth dates, the VLOOKUP function can help you retrieve it from a large data set.
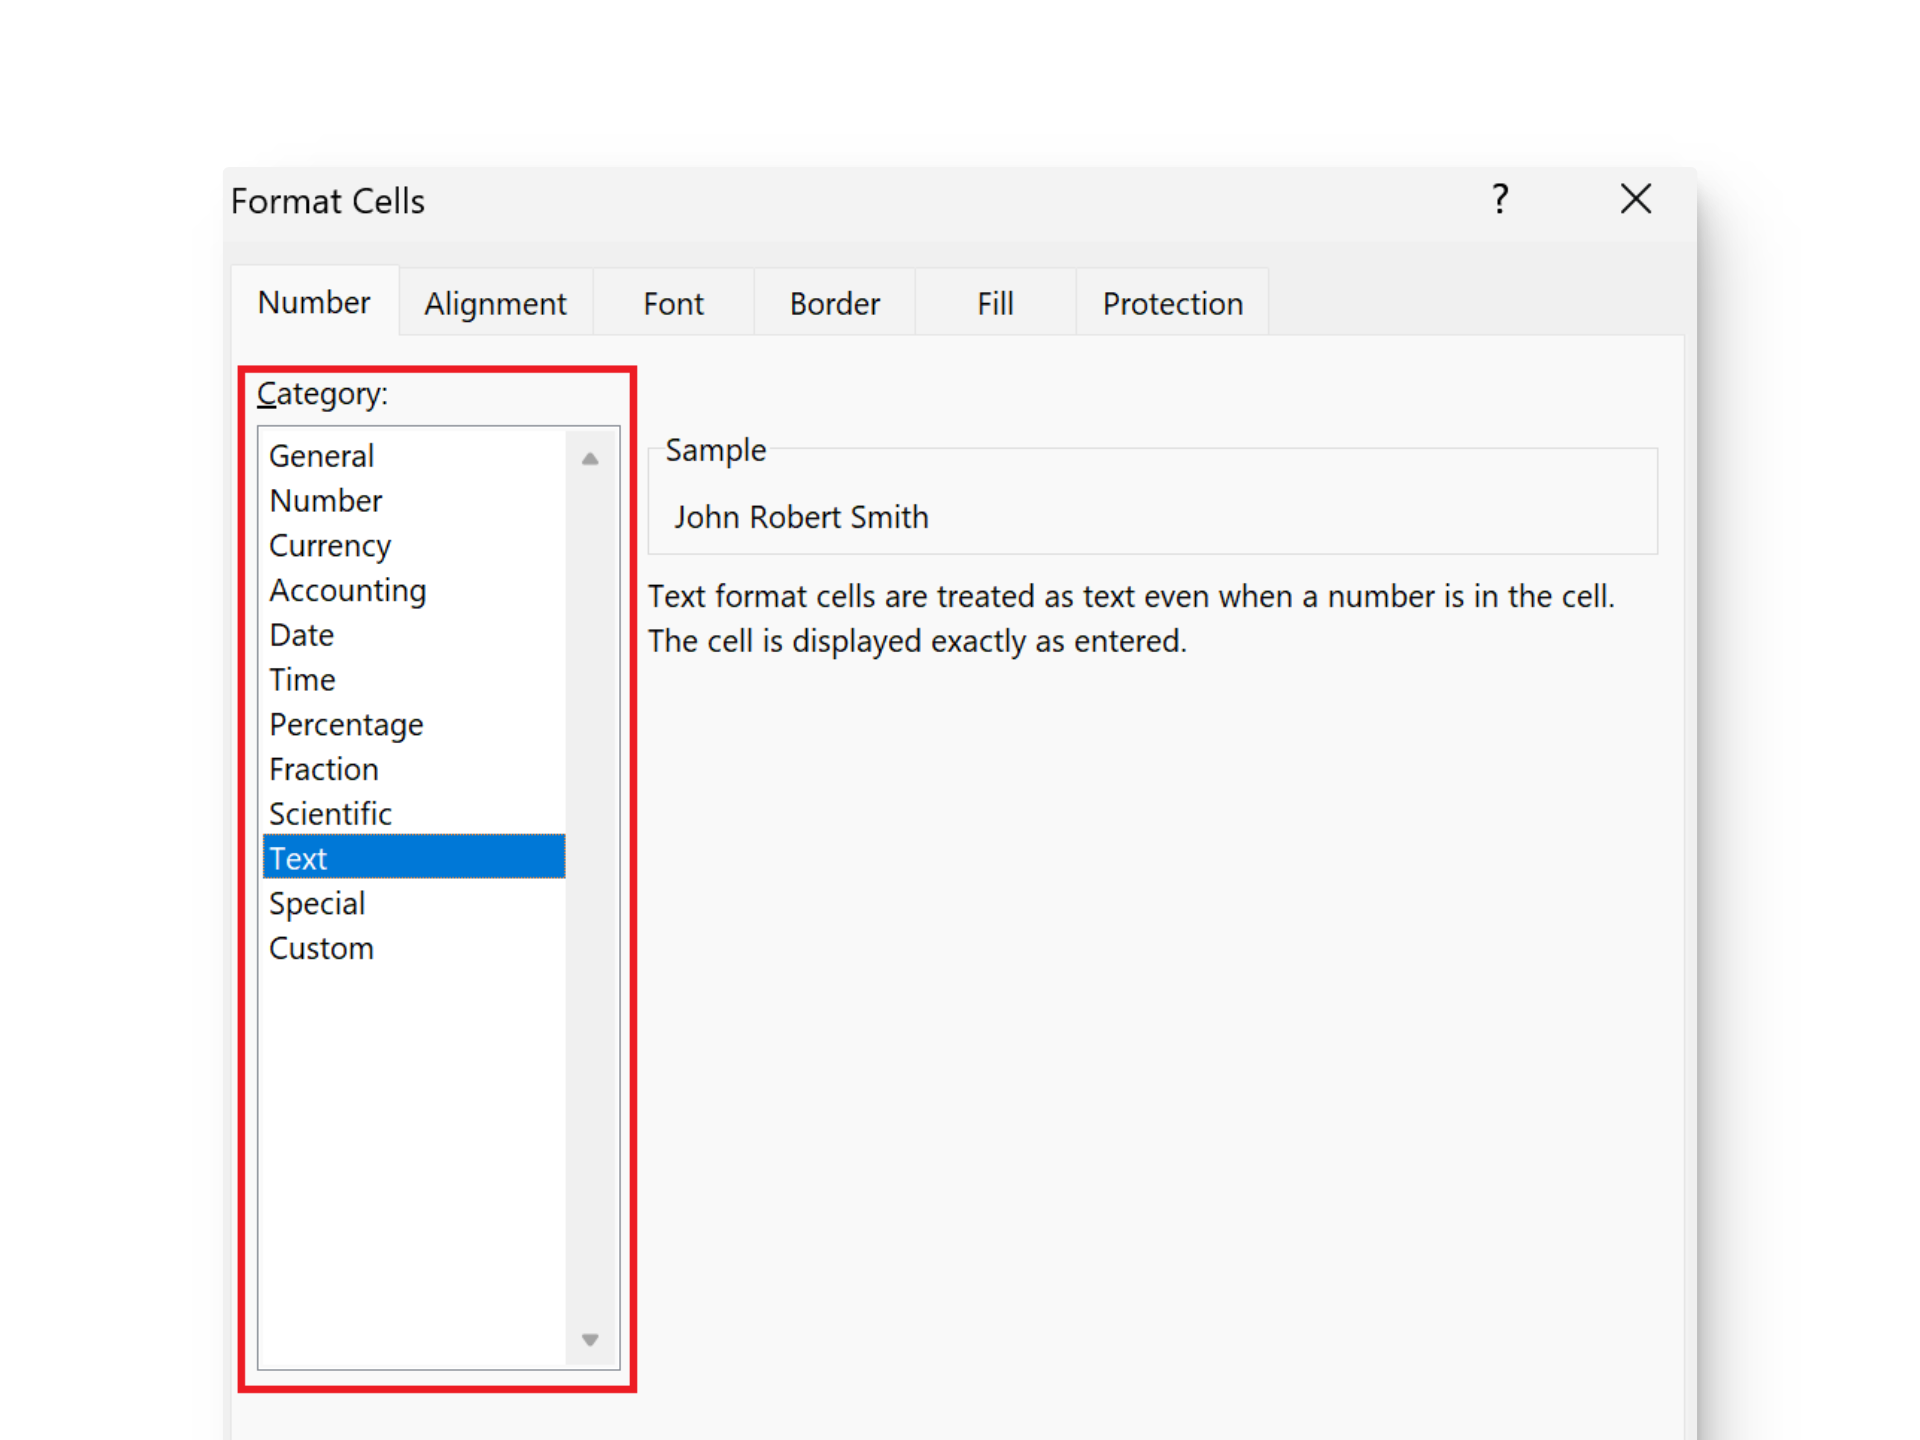
Apply the VLOOKUP formula, first select the cell with the target birthdate, then select the entire dataset. Specify the column number of the name column and set the range lookup argument to FALSE for an exact match. - Change Output Format: At times, your outcome may appear as a numbered code instead of the desired format. To correct this, right-click and choose “Format Cells”, then select the desired format, such as Date, Text, etc.
Extracting Cells: Excel vs Google Sheets
Microsoft Excel and Google Sheets offer various methods for extracting data, with similar functionalities such as IF-AND formulas and filters. However, they differ in certain aspects.
While Google Sheets leverages its cloud capabilities and collaborative features, enabling simultaneous spreadsheet sharing and collaboration, Excel boasts unique features like VLOOKUP, Flash Fill, etc. Not to mention, Google Sheets offers a significantly lower number of cells compared to Excel, making Excel the preferred option when managing large datasets.
READ MORE: How to Hide Columns in Excel – 6 Easy Ways With Pictures ➜
Conclusion
When it comes to data extraction in Excel, there are numerous methods available. However, when extracting data based on existing information, splitting strings into substrings can significantly streamline the process and make it easier to target the desired outcome accurately.
You can then choose the extraction method that best suits your needs, whether it’s using formulas, filters, or specialized functions. Don’t forget to adjust the format of the output and ensure that the cells are properly formatted to accommodate the extracted data, maintaining consistency and clarity in your spreadsheet.
Extract Names from Cells Based on Birthdate in Excel
To split full names into different columns, press Ctrl + H on your keyboard to open the Find and Replace utility. In the “Find what” field, type “* ” and leave the “Replace with” field blank. This will locate the last space in the name and replace everything before it with a blank, effectively extracting the last names only.
To find the birthdates of specific names, utilize the VLOOKUP formula with quotes around the name. For example, input =VLOOKUP(“name”, A2:E5, 1, FALSE). Replace “name” with the person you’re searching for, A2:E5 with your dataset, and 1 with the column number containing birthdates, referencing the selection.
To do so, simply select the dataset, right-click, and choose Format Cells. In the Category section, click on Date. Choose the desired format, location, and calendar, then click OK.
 Reviewed by