Fix: ‘You Must Enable System Protection on This Drive’ Error
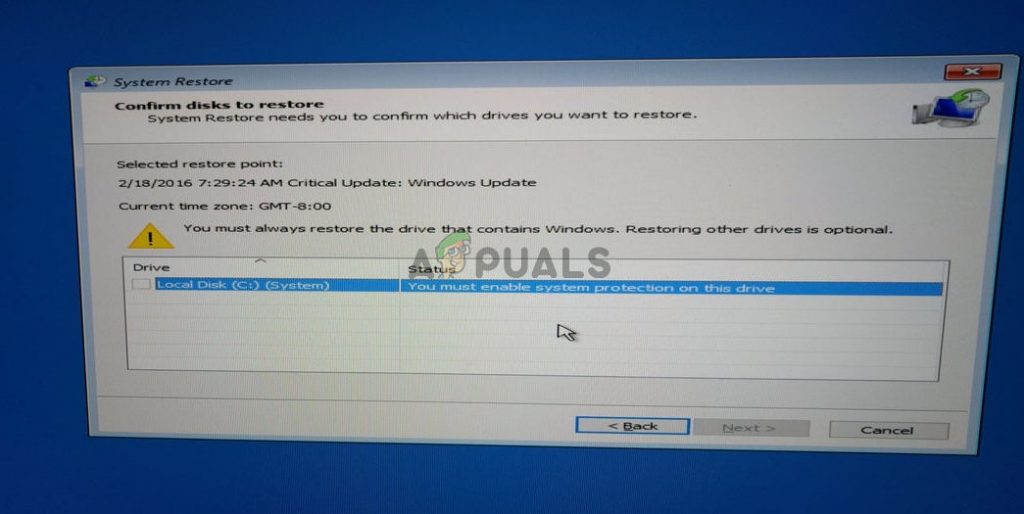
The “You must enable system protection on this drive” message appears inside System Restore and it prevents users from running this utility on the disk they chose. The message is a status message for the selected drive which users want to restore.
There are quite a few different methods users came up with to resolve this problem and we decided to include all of them in this article. Just make sure you follow the instructions carefully and the problem should be gone in no time!
What Causes the “You Must Enable System Protection on This Drive” Error on Windows?
This problem can be caused by two distinct causes. The first case scenario is that System Protection is simply not activated on your computer and you have to activate it manually. This can be more difficult if you have accessed System Restore from the Advanced Startup.
The second cause may be the fact that the System Protection service is simply not running on your computer and you need to restart it properly. Make sure you check out both causes and the methods related to them!
Solution 1: Use Command Prompt to Rename Registry File and Perform the System Restore
System Restore can also be run in a command prompt window. However, before you run it, you should rename two system files which cause the “You must enable system protection on this drive” message to appear. Since this issue mostly occurs when you are not able to access your operating system, all troubleshooting will be run from the advanced startup options.
- If you are not able to access your operating system at all, you will have to insert the installation drive you own or which you have just created and boot your computer.
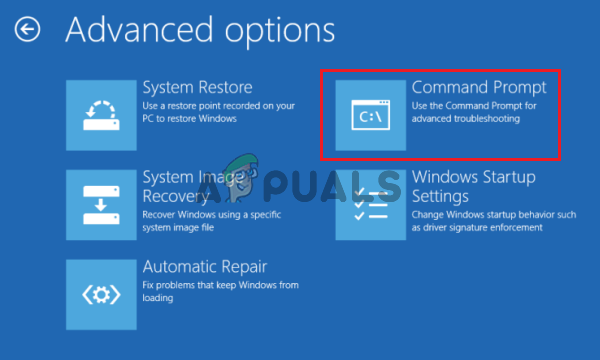
- You will see a Choose your keyboard layout window so choose the one you want to use. The Choose an option screen will appear so navigate to Troubleshoot >> Advanced options >> Command Prompt

- At the command prompt window, simply type in the command below in a new line and click the Enter key to navigate to the C >> Windows >> System32 >> config folder:
cd %systemroot%\system32\config
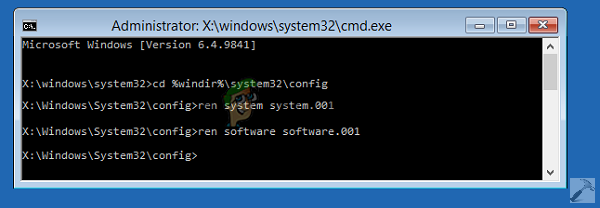
- Once you have navigated to the config folder inside System32, it’s time to rename two system files. You can do that by typing the two commands below. Make sure you tap Enter after each one!
ren SYSTEM system.001
ren SOFTWARE software.001
- Finally, it’s time to run System Restore by typing out the command below.
rstrui.exe /offline:C:\windows=active
- System Restore should now open without displaying the “You must enable system protection on this drive” this time. Follow the instructions on-screen to follow through and see if your computer starts operating normally!
Solution 2: Enable System Protection using PowerShell
There is a simple PowerShell command which can bring back the system protection feature for the drive you want to restore. After that, you can visit System Restore settings to check whether you can enable System Protection for the drive where you have installed Windows in. Follow the steps below to execute this method!
- Open the PowerShell utility by right-clicking the Start menu button and clicking the Windows PowerShell (Admin) option at the context menu.
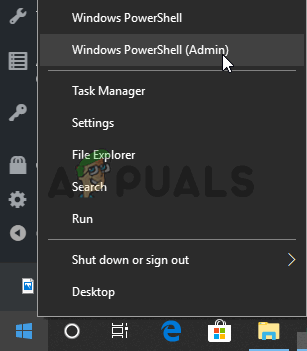
Running PowerShell from Start menu
- If you see Command Prompt instead of PowerShell at that spot, you can also search for it in the Start menu or the search bar next to it. This time, make sure you right-click on the first result and choose Run as administrator.
- In the PowerShell console, type in the commands shown below and make sure you click Enter after typing out each one.
enable-computerrestore -drive "c:\"
vssadmin resize shadowstorage /on=c: /for=c: /maxsize=5%
checkpoint-computer -description "Done"
Let these commands do their thing! It should take a couple of seconds for them to finish their process. point in time, if you opt to go back.
- To check if your System Restore is disabled or not, click the Start menu button at the taskbar and type Control Panel. Click on the first result to open it. You can also use the Windows Key + R key combination to open the run dialog box. After that, type “control.exe” in the box and click OK to run Control Panel.

- Click on System to navigate to the Control Panel’s System section.
- In the left side of the screen, you will see System protection settings. Click on it to open System Properties. Navigate to the System Protection tab and you will see the Protection Settings.
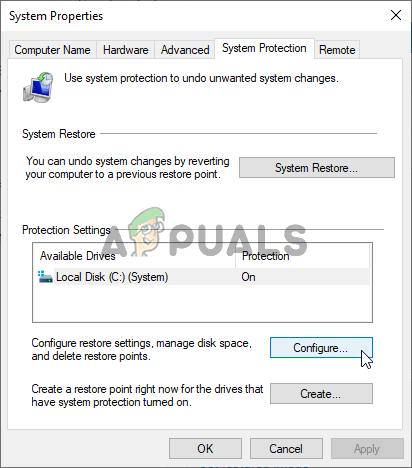
- Check to see if the Protection is switched to On under the drive you are using for your files and folders.
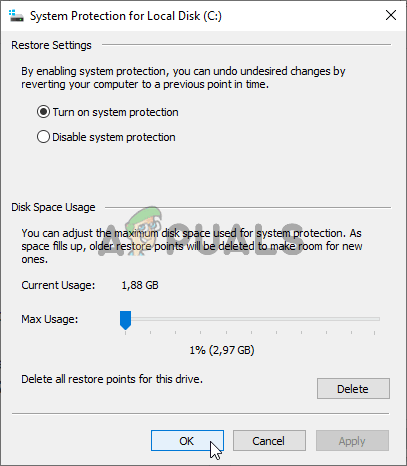
- If the option is set to off, select the drive you want to turn on System Restore for and click on the Configure
- The System Protection Settings for Windows 10 will open so check under Restore Settings for the “Turn on system protection” radio button. Make sure that this option is selected and click OK.
- Try running the System Restore now and check to see if the same error message appears.
Solution 3: Start the System Protection Service
If the System Protection Service isn’t running at all or if it’s broken, System Protection used for System Restore may not work properly and you may receive the message that it has been turned off. You should consider restarting the System Protection Service before re-running System Restore to see if the problem has been resolved. Follow the steps below!
- Open the Run utility by using the Windows Key + R key combination on your keyboard (press these keys at the same time. Type “services.msc” in the newly opened box without the quotation marks and click OK to open the Services tool.

Running Services.msc - The alternative way is to open the Control Panel by locating it in the Start menu. You can also search for it using the Start menu’s search button.
- After the Control Panel window opens, change the “View by” option at the top right part of the window to “Large Icons” and scroll down until you locate the Administrative Tools entry. Click on it and locate the Services shortcut at the bottom. Click on it to open it as well.
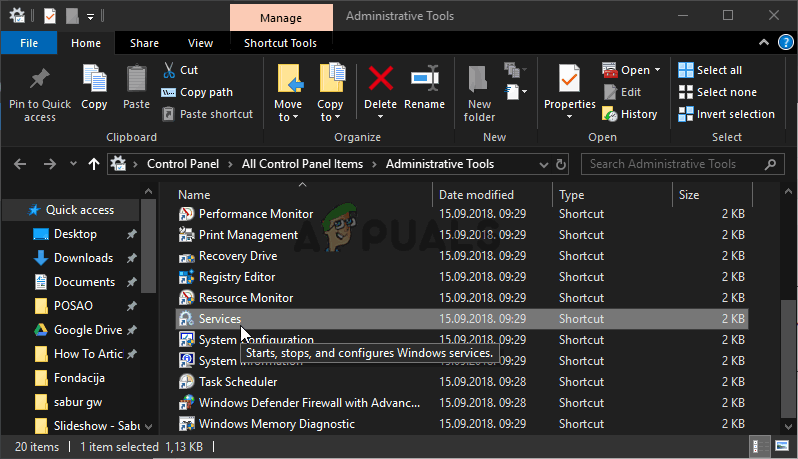
Services in Administrative Tools - Locate the System Protection Service service on the list, right-click on each one and select Properties from the context menu which appears.
- If the service is started (you can check that just next to the Service status message), you should stop it for now by clicking the Stop button in the middle of the window. If it is stopped, leave it stopped until we proceed.
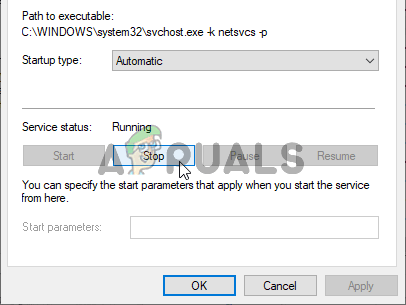
Stopping the service - Make sure that the option under the Startup type menu in the service’s properties window is set to Automatic before you proceed with other steps. Confirm any dialogue boxes which may appear when changing the startup type. Click on the Start button in the middle of the window before exiting.
You may receive the following error message when you click on Start:
Windows could not start the service on Local Computer. Error 1079: The account specified for this service differs from the account specified for other services running in the same process.
If this happens, follow the instructions below to fix it.
- Follow the steps 1-3 from the instructions above to open the service’s properties window. Navigate to the Log On tab and click on the Browse… button.
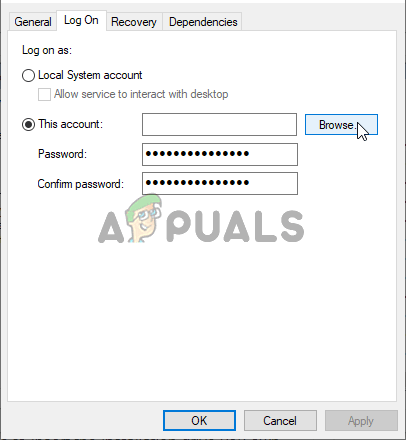
- Under the “Enter the object name to select” entry box, type in Network Service, click on Check Names and wait for the name to become available.
- Click OK when you are finished and type in the password in the Password box when you are prompted with it if you have set up a password. System Restore should now work properly!
Alternative: Use Command Prompt
- If you are not able to access your operating system at all, you will have to insert the installation drive you own or which you have just created and boot your computer.
- You will see a Choose your keyboard layout window so choose the one you want to use. The Choose an option screen will appear so navigate to Troubleshoot >> Advanced options >> Command Prompt
- At the command prompt window, simply type in the commands below in a new line and click the Enter key after each one to stop and restart the System Protection Service:
net stop vss
net start vss
- Check to see if System Restore now works properly!


God bless you for these tips, the 1st one worked for me perfectly. Thanks