How to Fix ‘Error while Partitioning Drive’ in Rufus
Some Windows users are reporting that they always end up seeing the ‘Error: Error while partitioning drive‘ error message while attempting to use Rufus to partition a drive on a Windows computer. This issue is confirmed to occur on Windows 7, Windows 8.1, and Windows 10.
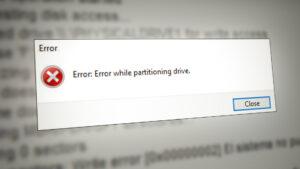
After investigating this particular issue, it turns out that there are several different underlying causes that might end up triggering this error in Rufus when you attempt to partition a drive. Here’s a list of potential culprits that might be causing this error message:
- Bad blocks on the partitioned drive – As it turns out, one of the most common situations that might spawn this error is a case of bad blocks that Rufus is unable to partition until repaired. In this case, you can fix the issue by running the Error Checking tool on the affected drive.
- Controlled Folder Access is Enabled – On Windows 10, there is one feature (Controlled Folder Access) that is known to conflict with Rufus while Enabled. Several affected users have confirmed that they were able to complete the partitioning process in Rufus after disabling ‘Controlled Folder Access’ from the Windows Defender settings screen.
- Rufus is conflicting with your Antivirus – Under certain circumstances, you can also expect Rufus to complete with your 3rd party antivirus or even with the built-in security suite. In this case, you can either disable the real-time protection while using Rufus or uninstall the problematic security suite (if you’re using a 3rd party suite).
- Outdated Rufus version – In case you’re encountering this issue on Windows 10, it’s also possible that you’re using a severely outdated build that is not fully compatible with your operating system. In this case, you can fix the issue by uninstalling your current Rufus version and installing the latest stable build available.
Now that you are intimately aware of every potential culprit that might be causing this issue, here’s a list of verified methods that should allow you to avoid the apparition of the ‘Error: Error while partitioning drive’ when partitioning a drive with Rufus:
Method 1: Checking for Bad Blocks
As it turns out, this particular error is often associated with some bad blocks that are interfering with the partitioning process. This is fairly common when attempting to use Rufus to partition external HDD, SSD, or flash drives.
If you find yourself in this scenario, you should be able to fix the problem by forcing a check of bad blocks via the Tool tab of the Properties screen.
Note: Keep in mind that this operation doesn’t have a high success rate, but it’s an ideal way to start if your storage device has a built-in fail-safe mechanism that keeps a few blocks free for these kinds of scenarios.
Several affected users have reported that the issue was resolved after they initiated an error checking attempt from the Tools screen of the affected drive. Here is some step by step instructions on how to do this:
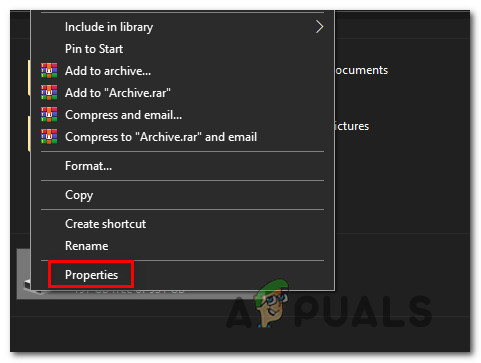
- Open File Explorer, right-click on the disk that is showing the ‘Error: Error while partitioning drive‘ error in Rufus, then choose Properties from the context menu.
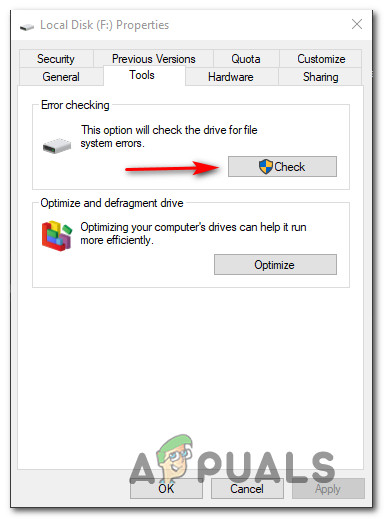
Accessing the Properties screen - Once you’re inside the Properties screen, access the Tools tab from the menu at the top, then click on the Check button under Error Checking.
Checking the Error Checking utility - When you’re prompted by the UAC (User Account Control) prompt, click Yes to grant admin access.
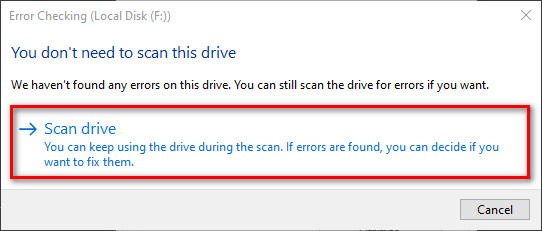
- At the next Error Checking screen, click on Scan drive and wait for the operation to complete.
Scanning the drive - After the initial scan is complete, apply the recommended fix if prompted to do so.
- Repeat the operation in Rufus and see if the issue is now resolved.
If the ‘Error: Error while partitioning drive‘ issue is still occurring, move down to the next potential fix below.
Method 2: Disabling Controlled Folder Access (Windows 10 Only)
As it turns out, some affected users that were also dealing with the ‘Error: Error while partitioning drive‘ issue has managed to fix this issue by accessing the Virus & Threat protection settings in Windows 10 Settings and disabling the Controlled Folder Access option.
As it turns out, this is a fairly new feature on Windows 10 that is known to conflict with various partitioning jobs in Rufus – Turning it off temporarily should allow you to complete the partitioning job in Rufus.
If you’re looking for specific instructions on disabling the Controlled Folder Access on Windows 10, follow the instructions below:
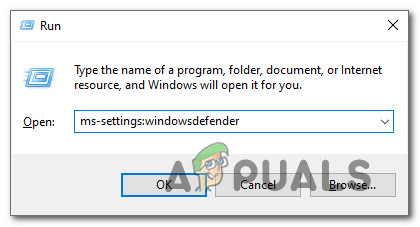
- Press Windows key + R to open up a Run dialog box. Next, type ‘ms-settings:windowsdefender‘ inside the text box and press Enter to open up the Windows Security tab of the Settings app in Windows 10.
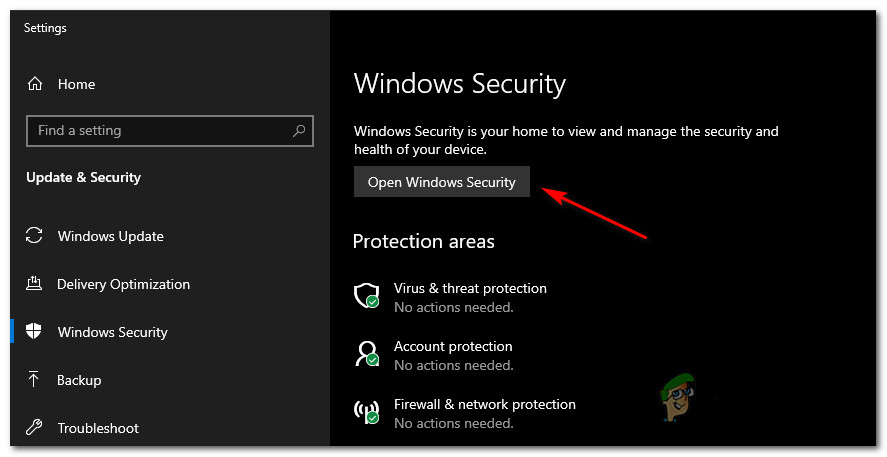
Accessing the Windows Defender tab - Once you’re inside the Windows Security tab, move over to the right-hand section of the screen and click on Open Windows Security.
Opening the Windows Security tab - Inside the Windows Security screen, click on Virus and threat protection from the vertical menu on the left, then click on Manage ransomware protection (under Ransomware protection).
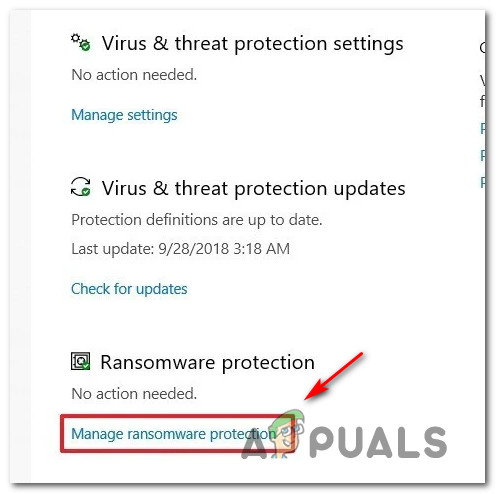
Accessing the Ransomware protection menu - Once you’re inside the Ransomware protection menu, set the toggle associate with Controlled folder access to OFF before saving the changes.
- Restart your computer and wait for the next startup to complete before attempting to partition your drive with Rufus once again to see if the issue is now fixed.
In case the same ‘Error: Error while partitioning drive‘ issue is still occurring, move down to the next potential fixes below.
Method 3: Disable / Uninstalling Conflicting Antivirus
As it turns out you can also expect to see this particular issue occurring due to some kind of antivirus interference that is causing the operation in Rufus to abort unexpectedly.
According to some affected users, this issue can occur with both 3rd party AV suites and with the built-in Windows Defender – Windows FIrewall tandem.
If you’re using a 3rd party AV suite, you should disable the real-time security protection before launching Rufus – In the vast majority of cases, you can do this by right-clicking on the tray-bar icon of the AV and looking for an option that disables the real-time protection.
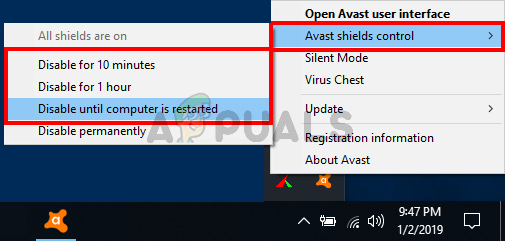
Note: On the other hand, if you’re using the built-in virus protection suite, follow these instructions to disable the real-time protection of Windows Security Essentials.
If you’re using a 3rd party suite and disabling the real-time protection is not enough, follow the instructions below to uninstall it from your computer:
- Start by press Windows key + R to open up a Run dialog box. Inside the text box, type ‘appwiz.cpl’ and hit Enter inside the text box to open up the Programs and Files menu.
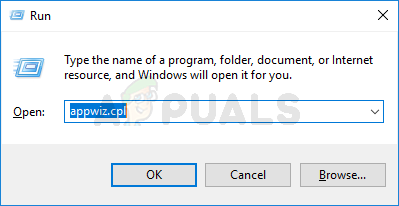
Opening the Programs and Features menu - Inside the Programs and Files menu, move down through the list of installed applications and locate the antivirus tool that you want to uninstall.
- Once you manage to spot it, right-click on it and choose Uninstall from the context menu that just appeared to complete the uninstallation.
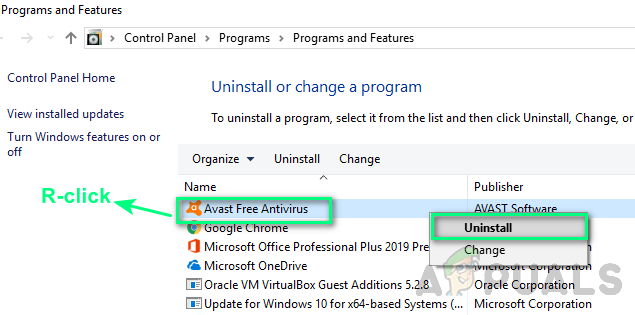
Uninstalling the antivirus - Follow the remaining uninstallation prompts to complete the operation before restarting your computer and see if the problem is fixed once the next computer startup is finished.
In case this scenario is not applicable or you already followed the instructions above to no success, move down to the next method below.
Method 4: Update to the Latest Rufus Version
As it turns out, you can also expect to see this particular error code if you are using an older Rufus version that is not fully compatible with Windows 10. Several affected users that were also dealing with this issue have reported that the issue was finally resolved after they uninstalled the current Rufus version and installed the latest stable build prior to repeating the partitioning process.
If this scenario looks like it could be applicable and you’re not using the latest version of Rufus, follow the instructions below to update to the latest available Rufus version:
- Press Windows key + R to open up a Run dialog box. When prompted by the text box, type ‘appwiz.cpl’ and press Enter to open up the Programs and Features menu.
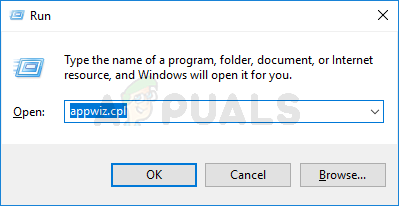
Opening the Programs and Features menu Note: When you’re prompted by the UAC (User Account Control) prompt, click Yes to grant admin access.
- Once you’re inside the Programs and Features menu, scroll down through the list of installed programs and locate the listing associated with Rufus. Once you see it, right-click on it and choose Uninstall from the context menu that just appeared.
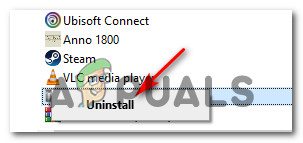
Uninstalling the outdated Rufus version from your computer - Inside the uninstallation screen, follow the on-screen prompts to complete the uninstallation, then reboot your computer and wait for the next startup to complete.
- After your computer boots back up, open your default browser and navigate to the official page of Rufus. Once inside, scroll down to the Download section and click on the latest standalone release of Rufus.
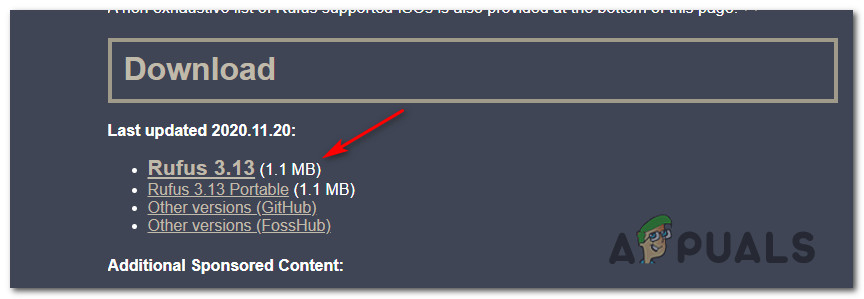
Downloading the latest version of Rufus - After the download is complete, double-click on the Rufus executable, click Yes at the UAC (User Account Control) prompt, then follow the on-screen prompts to complete the installation of the latest version of the software.
- Repeat the partitioning attempt on the new version of Rufus and see if the issue is now fixed.


