How to Fix VideoCaptureFileCreationFailed Camera App Error?
 Reviewed by Muhammad Zubyan
If you are encountering this error, it means the Camera app cannot save the recorded videos or pictures to the specified directory. This can happen when the Camera Roll folder gets corrupted or the Camera app does not have read and write permission to save the recorded videos and pictures.
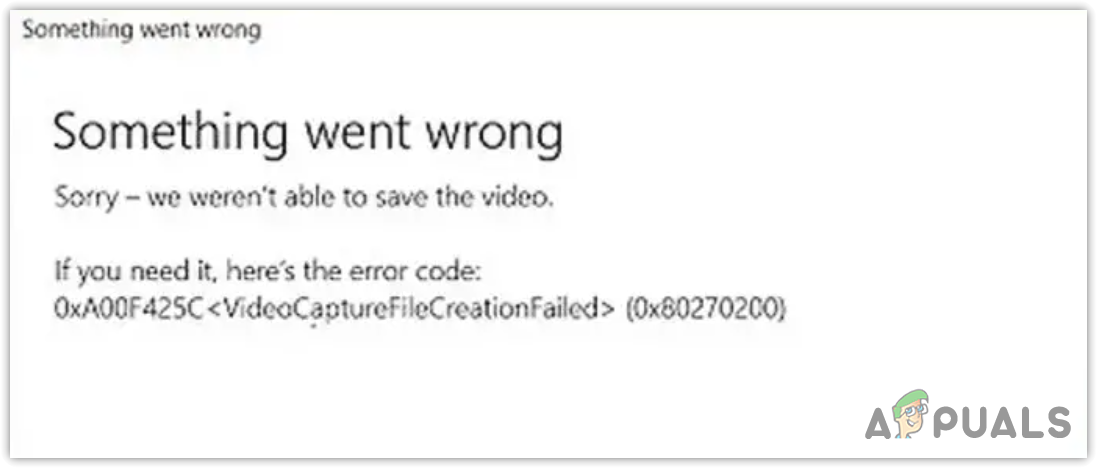
There are different variants of this error that appear with the following error codes and messages.
Error codes 0xa00f424f, 0xa00f4294, 0xa00f4253
Messages “Photo capture start timeout”; “Sorry we weren’t able to save the photo.
Now let’s talk about the solutions to this error, but before that, make sure to restart your computer, which works in most cases if the error is occurring due to a bug or the service that is not running in the background.
1. Recreate the Camera Roll folder
Since this error occurs due to not having the read and write permission, we can try recreating a new Camera Roll folder, which should fix this error as the new folder will have all the permissions that the Camera app requires to save the media data.
To do so, follow the steps:
- Open the File Explorer and navigate to the videos folder.
- Delete all the content from the capture folder.
- Once done, go to the Pictures folder and delete the Camera Roll folder.
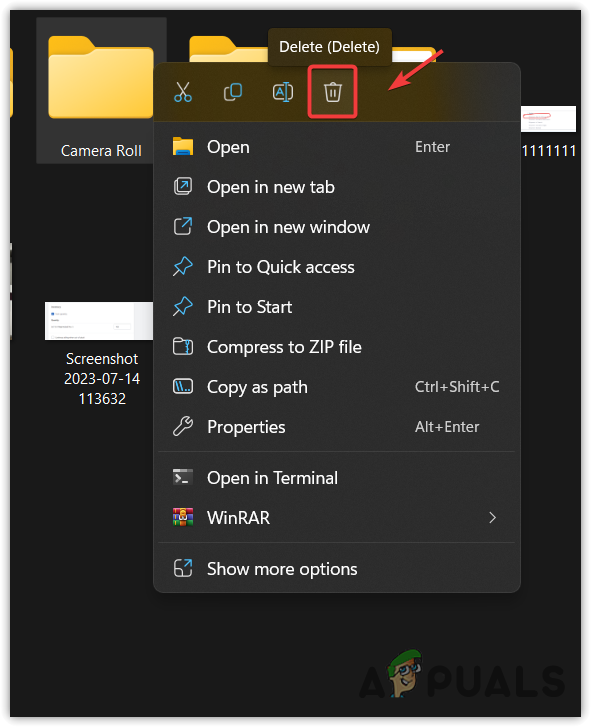
- Then right-click the empty space, hover New, and select the Folder option to create a new folder.
- Then, name it Camera Roll.
- Once done, open the Camera App and try capturing videos and pictures to see if it is saving the data into the new Camera Roll folder.
2. Run the Camera troubleshooter
You can also try running the Camera troubleshooter if you haven’t tried this yet. The camera troubleshooter automatically resolves problems, preventing the user from capturing videos and pictures. This method can be helpful if there is a service responsible for saving the captured data has stopped working in the background.
To use the Camera troubleshooter, follow the steps:
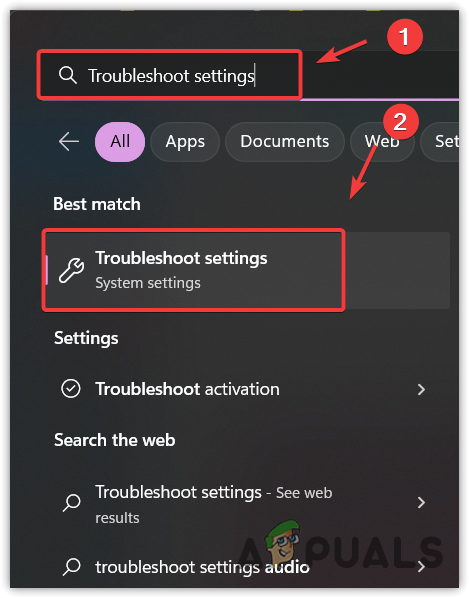
- Use the Windows key to open Start Menu.
- Here search Troubleshoot Settings and hit Enter to open the settings.
- Click Other troubleshooter to view more troubleshooters.
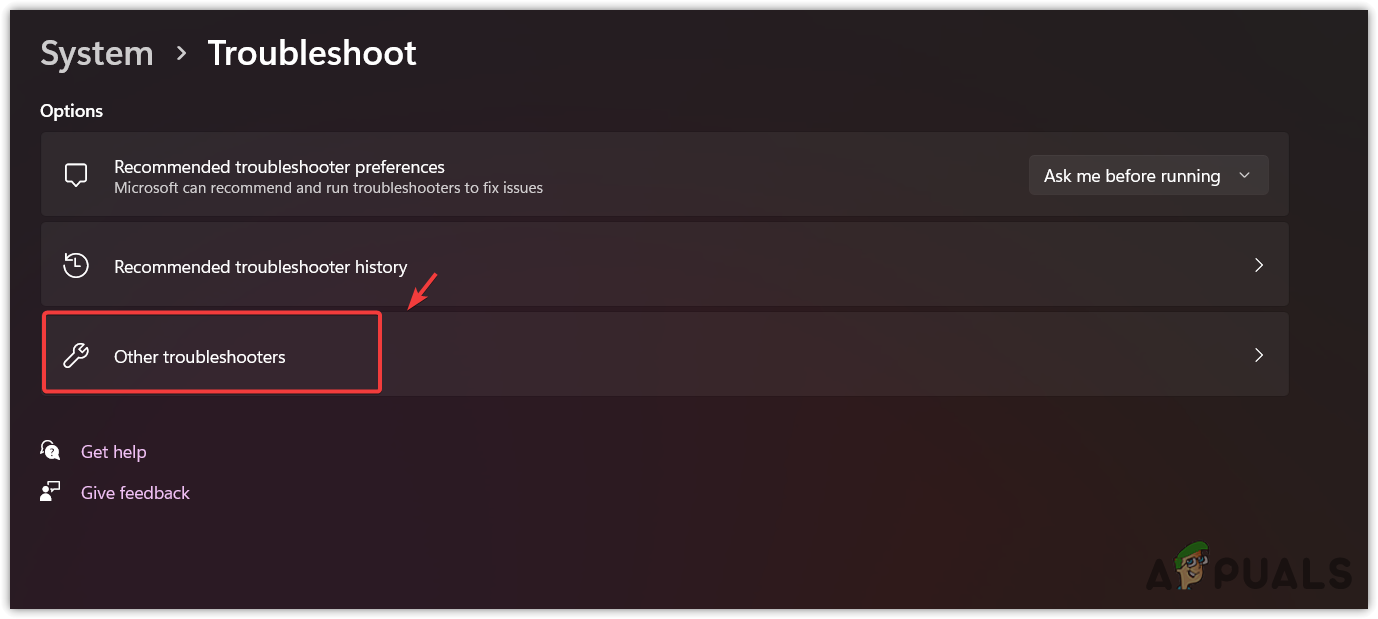
- Here run the Camera app troubleshooter.
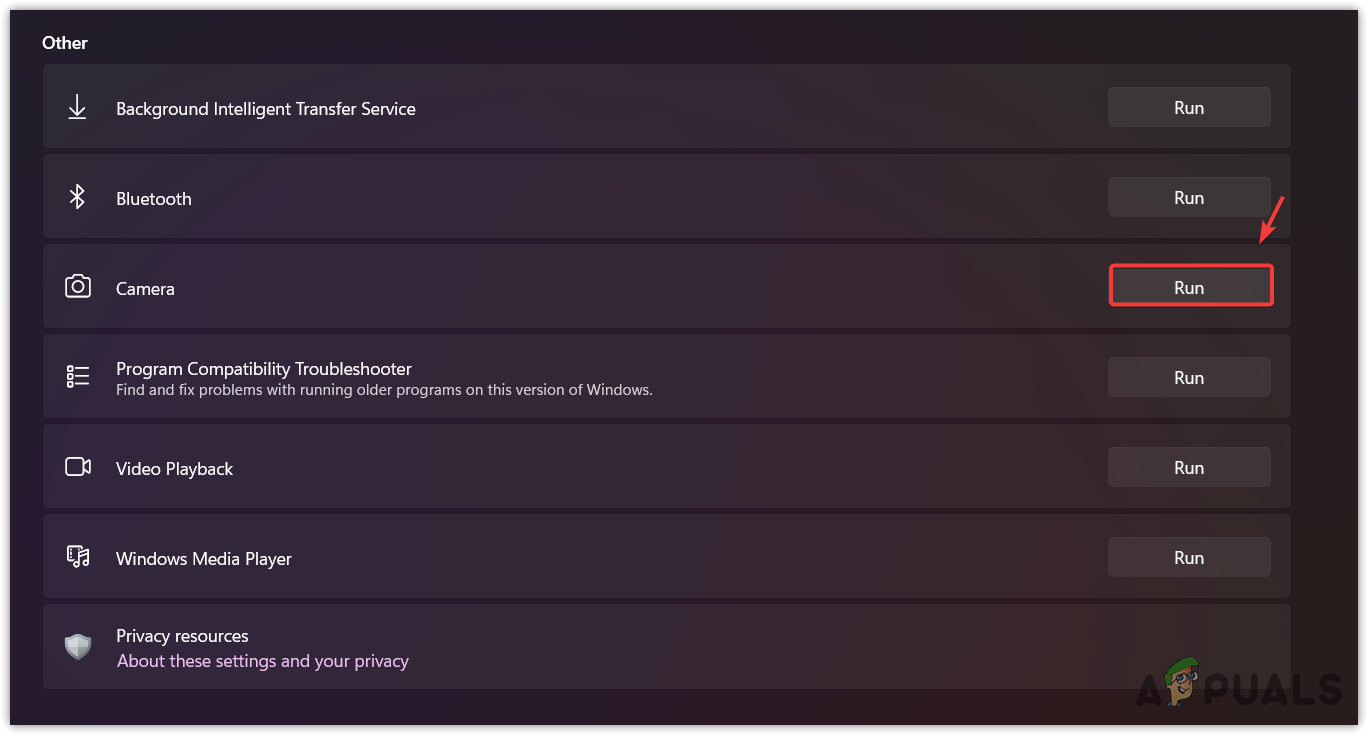
- Simply follow the on-screen instructions to fix this problem.
- Once done, open the Camera app and see if the error still persists.
3. Share the Camera Roll folder with Yourself
Sharing the folder with yourself means you are giving permission to your own account to access the data captured by your built-in Camera app. This method has actually worked for the users, so in this step, we will share the folder with our own account to see if this works or not. To do so, follow the steps:
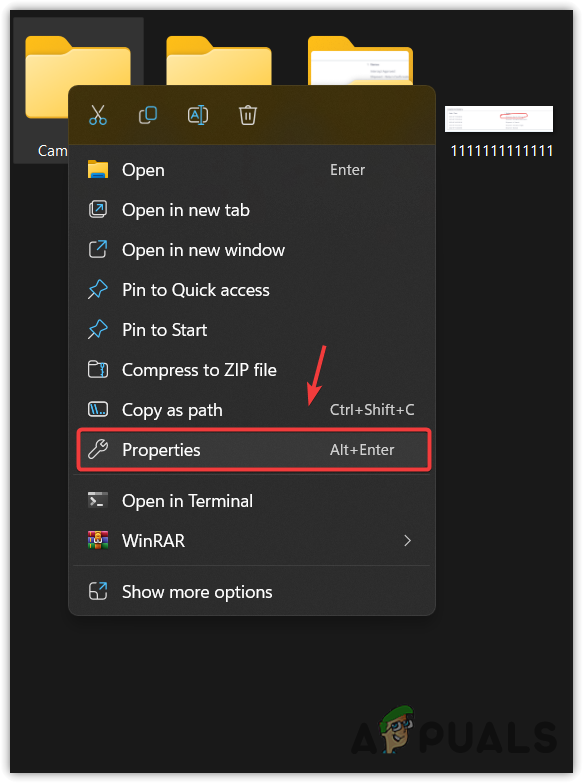
- Launch the File Explorer by using the combination of Win + E on the keyboard.
- Go to the Pictures folder, right-click on the Camera Roll folder, and select Properties.
- Go to Share from the top and click Share.
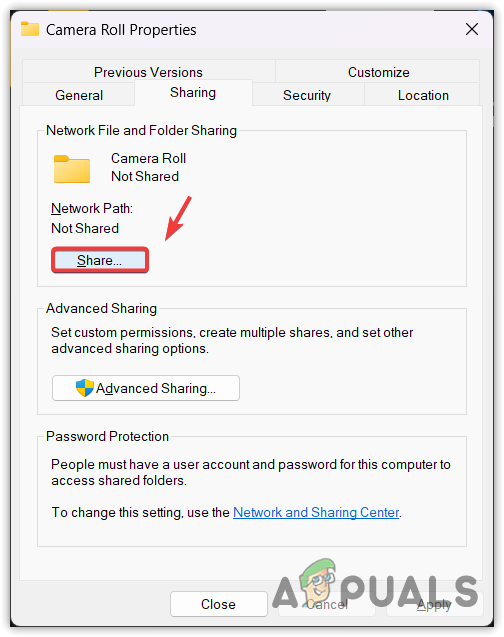
- Select your own account and click Share.
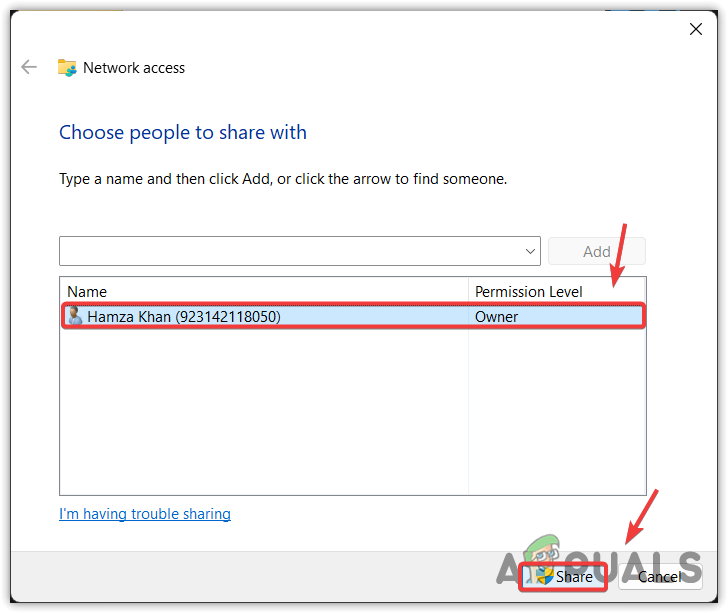
- Once the folder is shared, check if the error is resolved.
4. Specify the new Location to save the media data
Now if recreating and sharing the Camera Roll folder did not work for you, we recommend specifying the new location for saving videos and pictures in order to get rid of this error message. Follow the steps to change the location:
- Click the Start Menu and type Storage Settings.
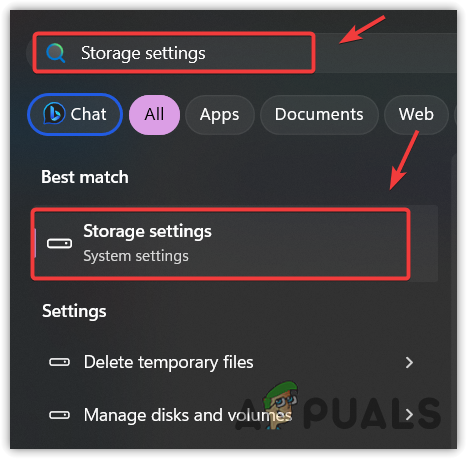
- Click Advanced Storage Settings listed under Storage Management.
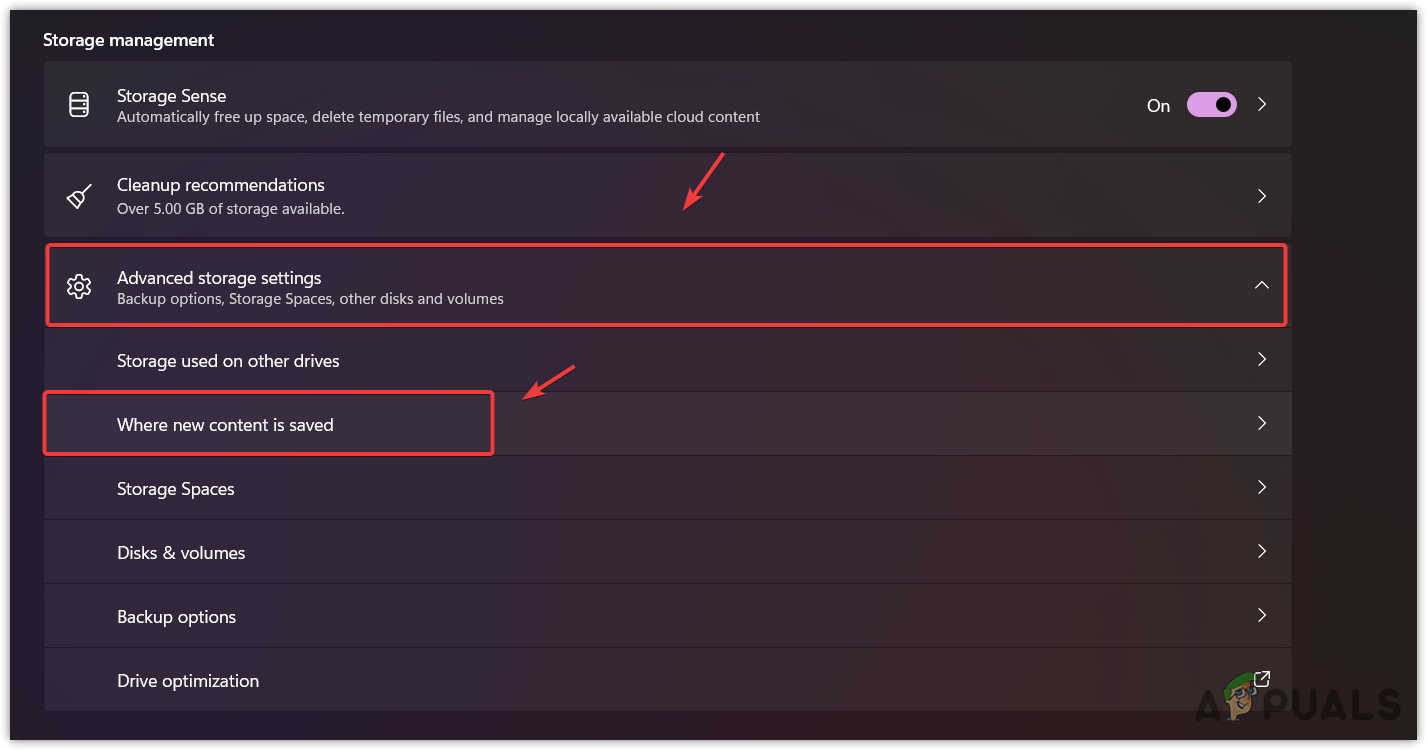
- Now click Where new content is saved from the list of options.
- Here change the Local Disk to any other disk of New photos and videos will save to.

- Once done, open the Camera app and verify if the error is fixed.
4. Reset or Repair the Camera App
If the error still persists, you can try repairing or resetting the Camera app. Resetting or repairing the Camera app will clear the cache files and restore the corruption from the application files. You can first repair the Camera app, then if it does not work, proceed to reset the Camera app. Follow the instructions:
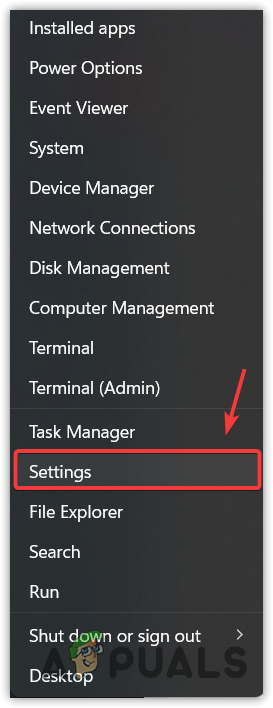
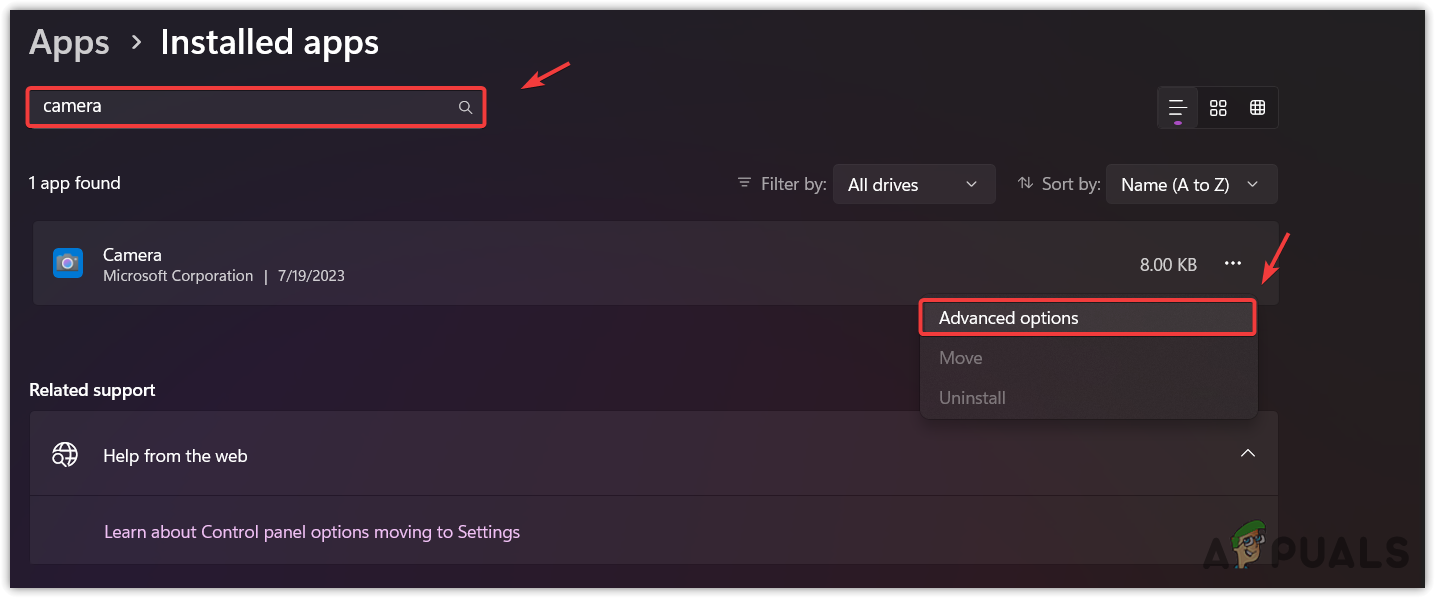
- Open the Settings app by right-clicking the Start Menu.
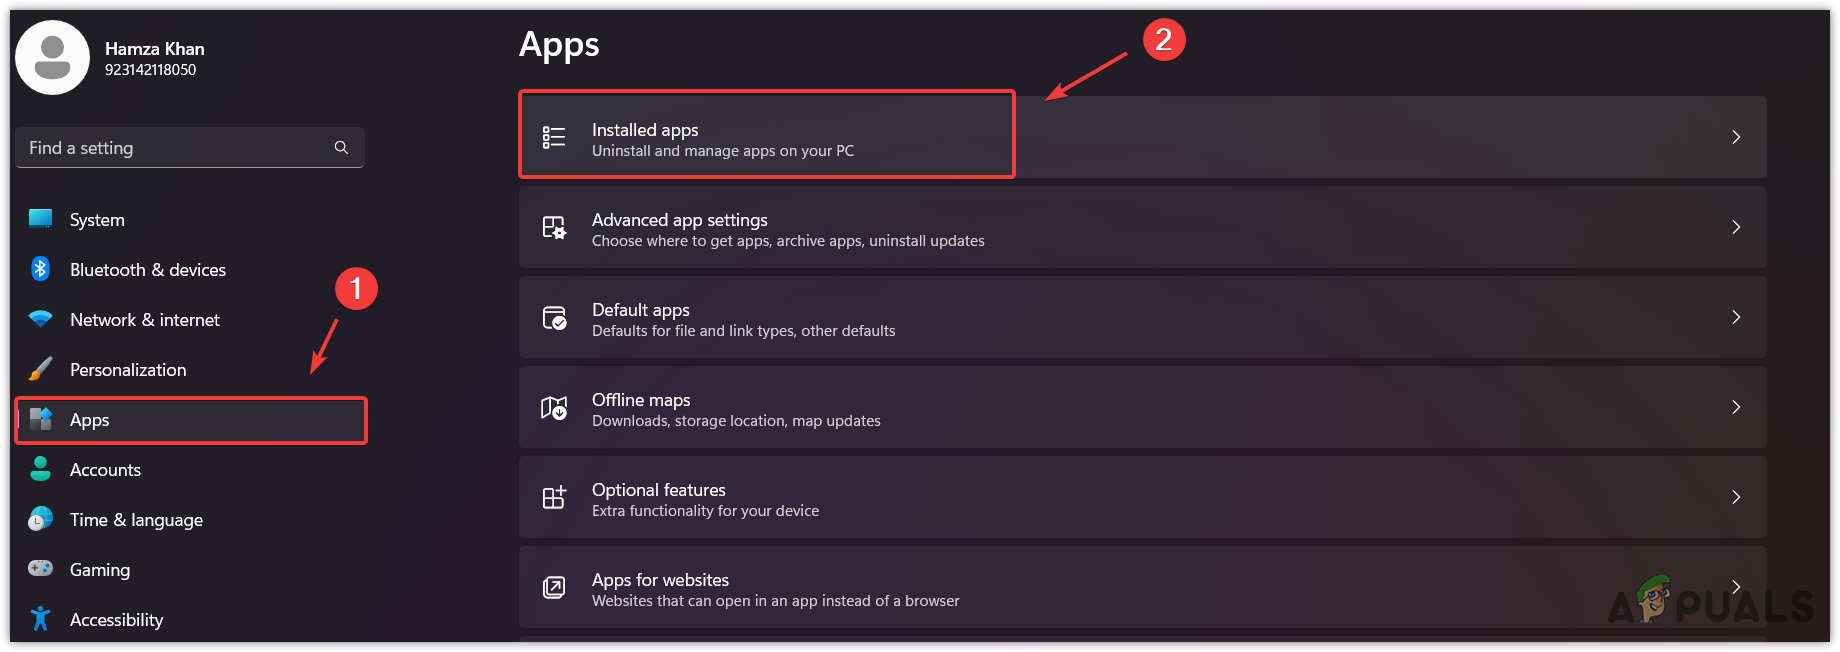
- Head across to the Apps > Installed Apps.
- Search for the Camera app and click the three dots.
- Go to Advanced Options.
- Scroll down to the Reset option.
- Click the Repair option and wait for it to be properly repaired.
- Once done, verify if the error persists. If it is, then come back to the settings app and reset the Camera app.
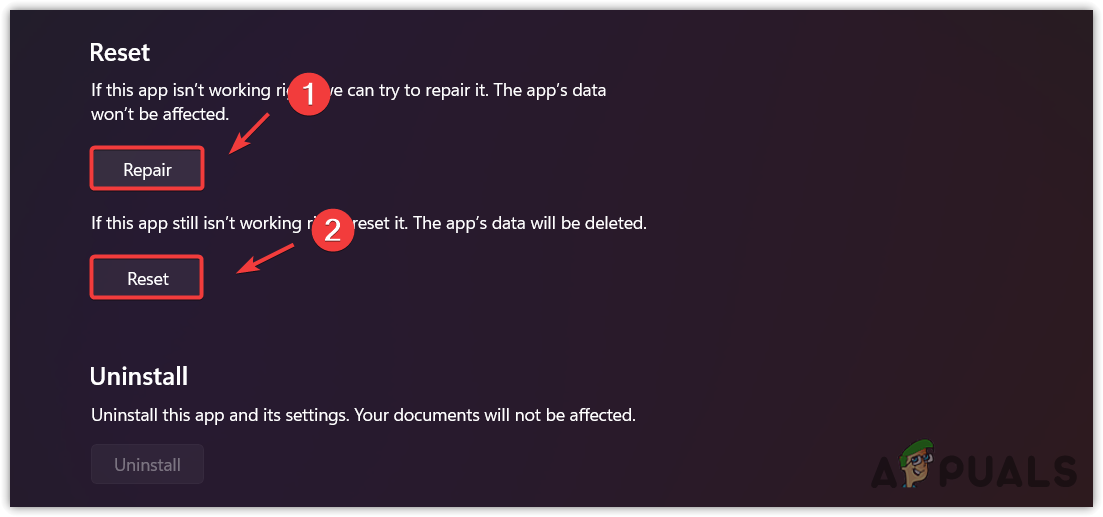
- Once done, check again if the error is fixed or not.
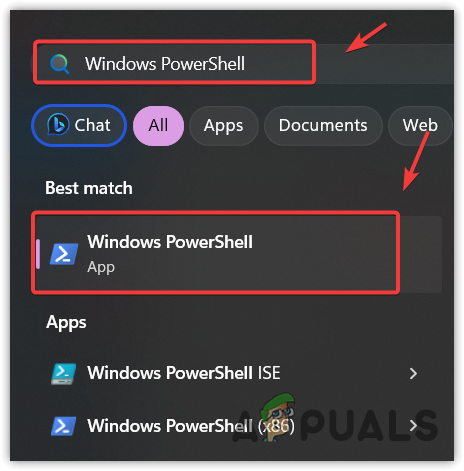
5. Reinstall the Camera app
You may encounter the same error message even after trying all the solutions listed above. If that’s the case, you should reinstall the Camera app using Windows PowerShell. Follow the steps to do so.
- Click the Windows Search icon and type Windows PowerShell.
- Right-click the Windows PowerShell and select Run as administrator.
- Enter the following command to uninstall the Camera app.
Get-AppxPackage *windowscamera* | Remove-AppxPackage
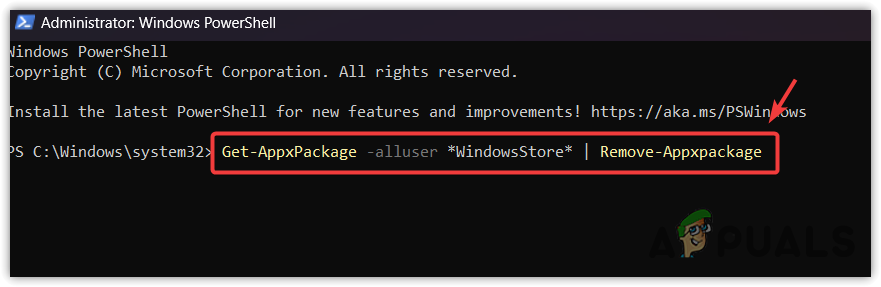
- Once the camera app is uninstalled, go to the Microsoft Store and simply install the Camera app.
- Once done, this should fix your error.
In case the error persists, you should contact a Microsoft support agent to get your issue resolved. Also, try reinstalling the Camera driver if you think it is causing the error. You can visit our article on How to reinstall the driver to reinstall the Camera driver properly.
Reviewed by Muhammad Zubyan


