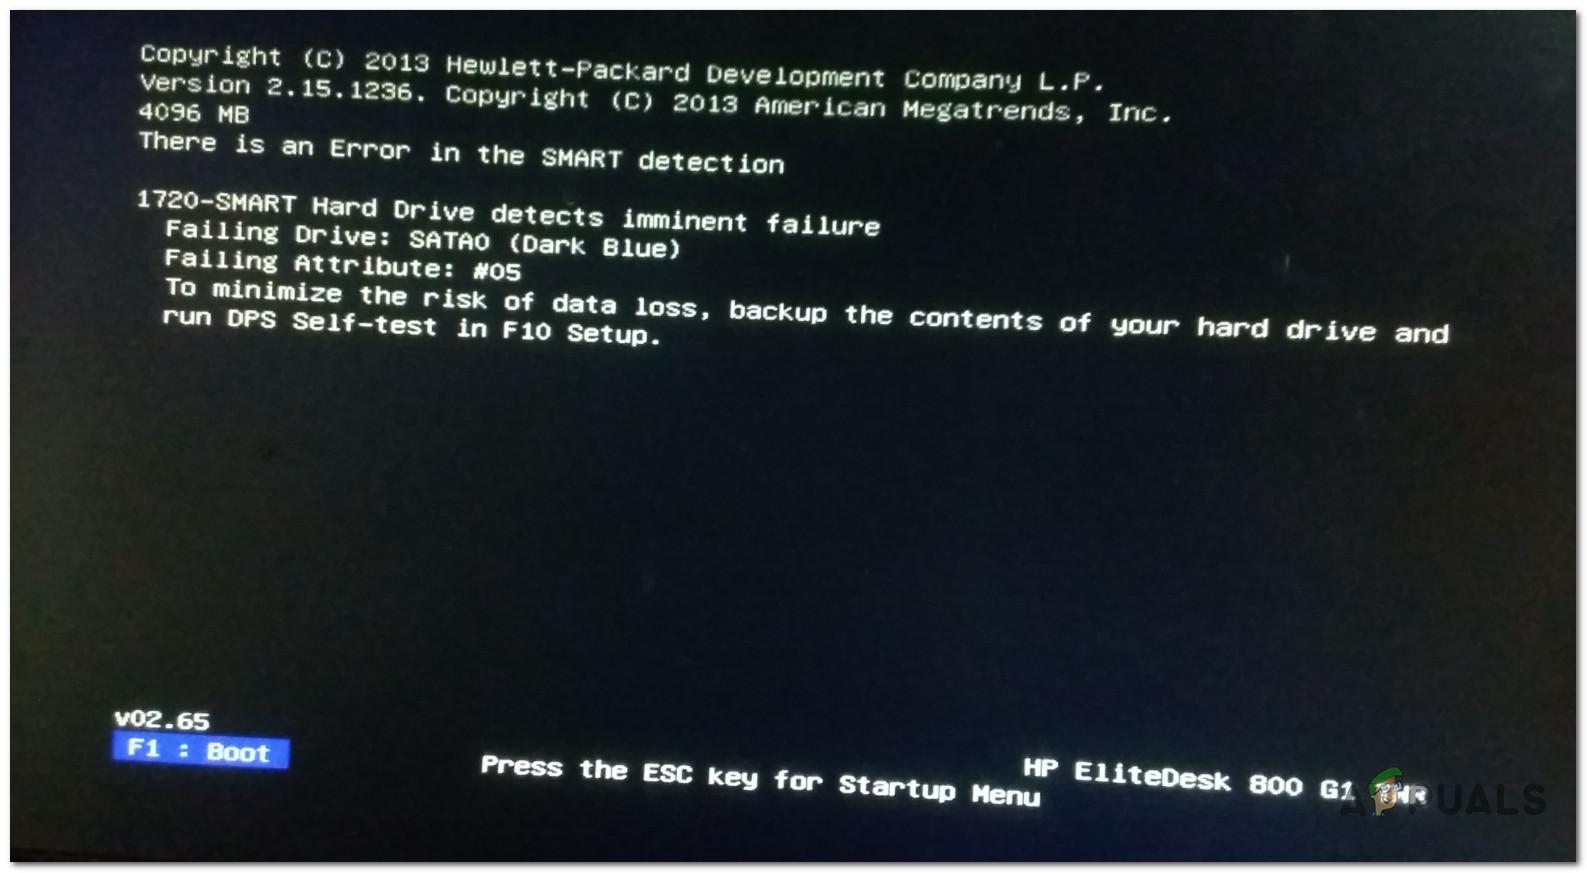
[Fix] Error ‘1720-SMART Hard Drive Detects Imminent Failure’
Several Windows users are encountering the 1720-SMART Hard Drive Detects Imminent Failure error at every boot up, leaving them unable to boot consistently (or at all, in some cases). This issue is confirmed to occur on Windows 7, Windows 8.1, and Windows 10.

As it turns out, there are several different underlying causes that will cause this error code. After investigating this issue, we’ve put together a list of potential culprits that you should carefully look at:
- Inconsistent temporary data – Keep in mind that it’s not uncommon to see this error due to a false positive brought about by badly cached data that’s being perpetuated by the CMOS battery or memory chip (depending on the case). Several affected users dealing with the same problem have reported that the error message went away on it;’s own after they have temporarily removed the CMOS battery or memory chip, allowing the data to be cleared.
- Failing drive – Once you confirm that badly cached data it’s not to blame for this issue, the only possible culprit at this point is a failing drive. You can double-check to see if this is true with a 3rd party utility like Speccy, but ultimately it all comes down to backing up your data from the failing drive and going for a replacement.
Now that you are aware of every potential culprit that might be responsible for this issue, here’s a collection of different methods that users encountering the same 1720-SMART Hard Drive Detects Imminent Failure error have successfully used to resolve the issue:
Method 1: Clearing the CMOS battery/memory Chip
Keep in mind that in some cases, the SMART monitoring system can actually display a false positive because of cached data that’s being maintained by the CMOS battery/memory chip. This is very likely if you have already tried to swap the supposedly failing drive and you’re still seeing the same 1720-SMART Hard Drive Detects Imminent Failure error.
If this scenario is applicable, the first thing you should do is clear the CMOS battery or memory chip, depending on which type of cache technology your PC uses. On desktops, it’s likely that this task is accomplished by a CMOS (Complementary Metal-Oxide Semiconductor) battery. On newer models and laptops/ ultrabooks, in particular, this is replaced with a memory chip.
Several affected users dealing with the same issue have managed to fix the issue by clearing the CMOS battery or memory chip, thus clearing the temporary data that’s causing the false positive.
To make matters easier for you, we’ve put together a step-by-step guide that will show you through this process:
- Start by turning your computer off and unplugging it from a power source.
- Next, remove the side cover (or the back cover if you’re using a laptop) and equip yourself with a static wrist band if you have one. This will ground you to the frame of the computer and eliminates the risk of you causing damage to your PC components due to static electrical energy.
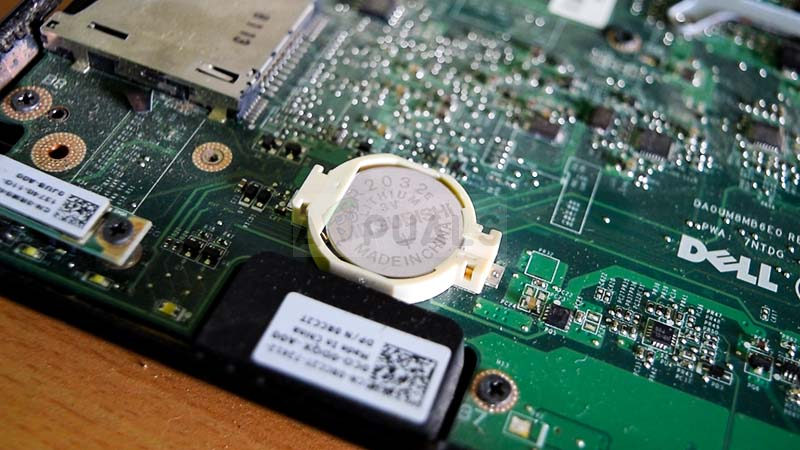
- Once the back case is opened and you have an overview of your motherboard, look for the CMOS battery or memory-chip (depending on the case). When you see it, use your fingernail or a non-conductive screwdriver to carefully remove it from its slot.

Removing the CMOS battery - After you remove the battery, wait for a full minute or more before putting it back into place.
- Put the back cover on, plug in the power, and allow it to boot normally.
If you still end up seeing the 1720-SMART Hard Drive Detects Imminent Failure error even after clearing the CMOS battery or memory chip, move down to the next method below.
Method 2: Using SPECCY to pinpoint the Failing Drive (if applicable)
If the method above didn’t work for you, you should start considering the fact that you might be dealing with a failing HDD or SSD that is about to malfunction. However, SMART monitoring is known to trigger some false positives, so ideally, you should take the time to investigate whether your drive is indeed failing with a 3rd party tool.
In case you’re in the market for a tool capable of doing this, we recommend Speccy – It’s free, easy to install, and it will give you an overview of about 30+ SMART points that you need to be aware of. If the measurements are off the normal range, you can safely conclude that the disk-drive is failing.
Note: Keep in mind that you can only go for this method as long as your computer is able to boot up or you have a spare PC that you can connect to the supposedly failing drive as a secondary partition.
If you haven’t done this already, follow the instructions below to install Speccy on a working PC and using it to determine if you’re dealing with a failing drive:
- On a computer where you have previously connected the supposedly failing drive as secondary (slave), access a browser software and visit the download page of Speccy.
- Once you’re inside, click on the Download button associated with the Free version – You don’t need the Professional version to check out SMART parameters, so there’s no need to buy it.

Downloading the Free version of Speccy - Once the spsetup.exe file is successfully downloaded, double-click on it and click Yes at the User Account Control prompt.
- Inside the installation prompt, follow the on-screen instructions to complete the installation, then restart your computer if prompted to do so.
- After the installation is complete, run Speccy and wait until the initial scan is complete.
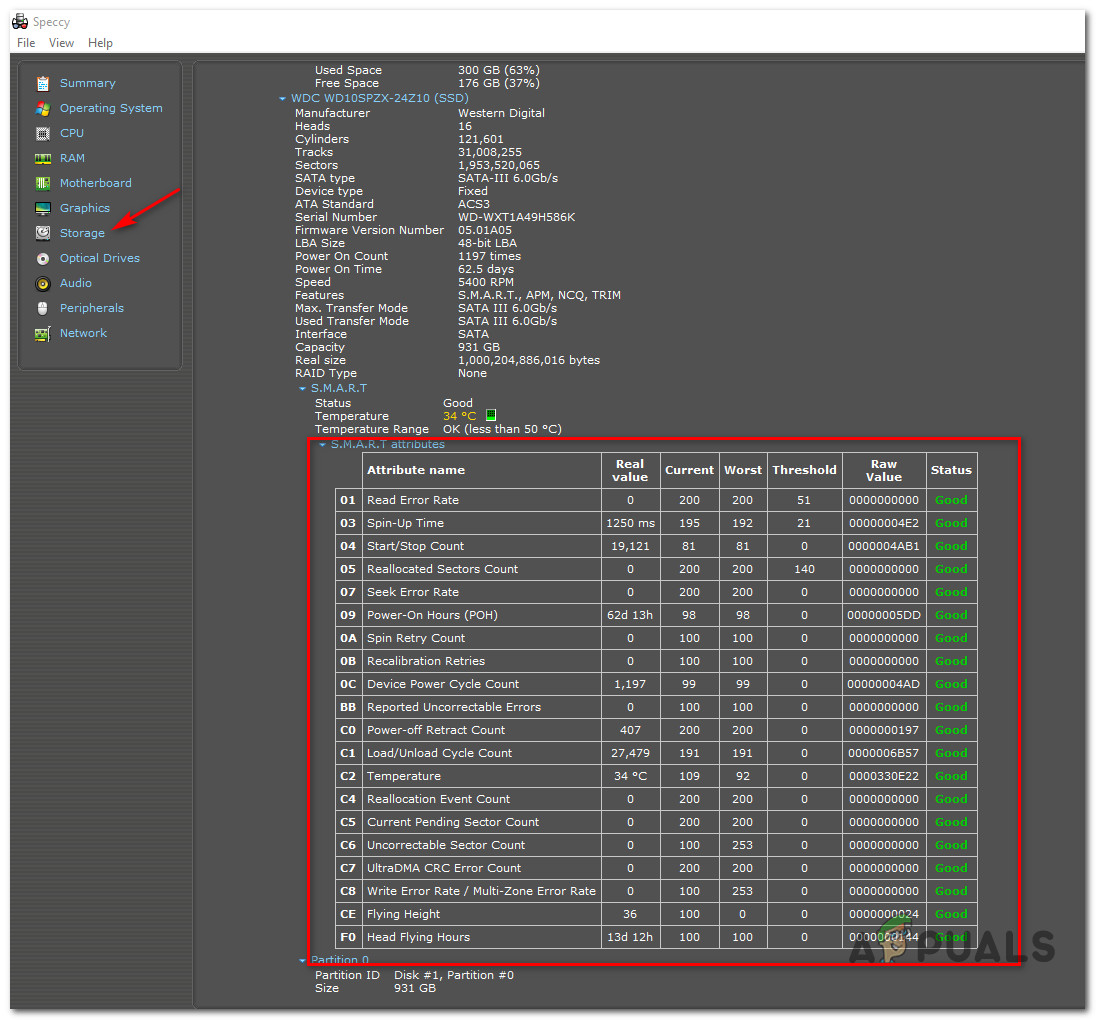
- Once the scan is finished, click on the Storage from the menu on the left.
- Next, with the Storage menu selected, move to the section on the right and scroll down to the Smart Attributes section. Once inside, check the Status of every attribute name and see whether the status deviates from the default one (Good). If any value deviates from the maximum threshold, you can conclude that you’re dealing with a failing drive, in which case, you need to go for a replacement after backing up your data.

Checking the health of your HDD / SSD with Speccy
If the investigation you’ve just performed points towards a failing drive, move down to the next method below.
Method 3: Clone & Replace Faulty Disk-Drive
If none of the potential fixes featured above have worked in your case and you did the investigations to ensure that the drive in question is failing, the only thing you can do right now is to get a replacement for your faulty disk drive and try to recover as many files as possible.
If you are still able to boot from the drive (from time to time), try to do it and use an external HDD or a cloud service to back-up all your important files.
However, if your disk is partially damaged and it can no longer boot, the only option to save the majority of your data is to use some kind of disk-cloning software. There’s a lot of different tools that will allow you to do this, and with the majority of them, the free plans are enough to help you do this. If you’re considering this option, here’s a list with some viable drive cloning software.
Note: Keep in mind that even if the software will be unable to copy some of the files located in bad sectors, you will still get to salvage the majority of your files. Typically, if you’re only dealing with a few bad sectors on your failing drive, the new ‘target’ disk-drive will likely contain over 99% of healthy files salvaged from the faulty drive.


