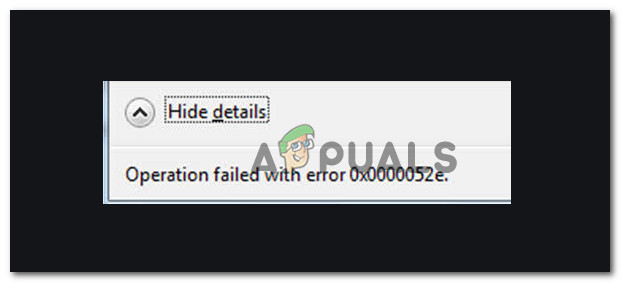
How to Fix ‘Error 0x0000052E’ on Windows 10
Some Windows 7, Windows 8.1 and Windows 10 users are reporting that they always end up seeing the 0x0000052E error code (Windows cannot connect to the printer) when trying to connect a new printer on their PC.
After investigating this particular issue, it turns out that there are several different underlying causes that might be triggering this error code. Here’s a list of potential culprits that might be responsible for this issue:
- Common Printer protocol glitch – If you’re encountering this issue on a Windows 10 computer, chances are you’re dealing with a common glitch that can be resolved simply by running the built-in Printer Troubleshooter and applying the recommended fix.
- Corrupted Dymo driver installation – A lot of users that were only encountering this issue when attempting to connect Dymo devices have managed to fix the issue by uninstalling the entire driver + support software infrastructure before clean installing it again.
- System File Corruption – As it turns out, it’s also possible to experience these types of issues due to some kind of system file corruption that’s affecting Windows files responsible for handling printing dependencies. In this case, you can hope to fix the issue with a procedure like clean installing or repair install.
Now that you know every potential underlying cause for this error, here’s a list of verified methods that other affected users have successfully used to fix this error code:
Method 1: Running the Printer Troubleshooter (Windows 10)
If you’re looking to fix the issue the easiest way possible, the first thing you should do is run the built-in Printer Troubleshooter and apply the recommended fix. This is not guaranteed to work, but a lot of affected users have reported that this utility managed to fix the 0x0000052E error in their case.
This troubleshooter essentially contains a collection of automated fixes that can be deployed with a single click if the culprit of this issue is identified.
When you run the Printer Troubleshooter, this tool will automatically analyze the current situation and determine if any of the pre-determined repair strategies are applicable to your current situation. If a viable fix is identified, you will be presented with a choice to apply this fix.
If you haven’t tried running the Printer Troubleshooter yet, follow the instructions below to do so:
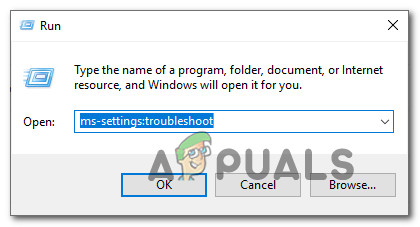
- Open up a Run dialog box by pressing Windows key + R. Next, type ‘ms-settings:troubleshoot’ and press Enter to open up the Troubleshoot tab of the Settings app.
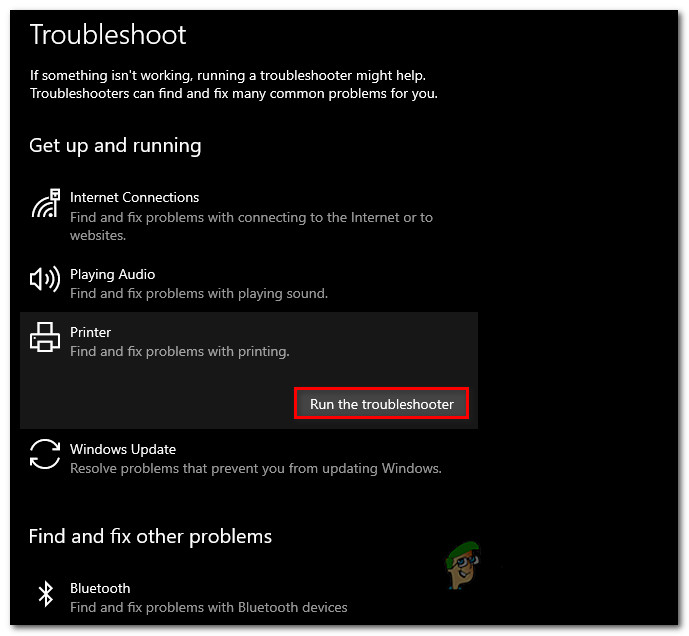
Accessing the activation troubleshooter - Once you’re inside the Troubleshooting tab, scroll down to the Get up and running tab, then click on Printer from the list of available options. Next, click on Run the troubleshooter from the context menu that just appeared.
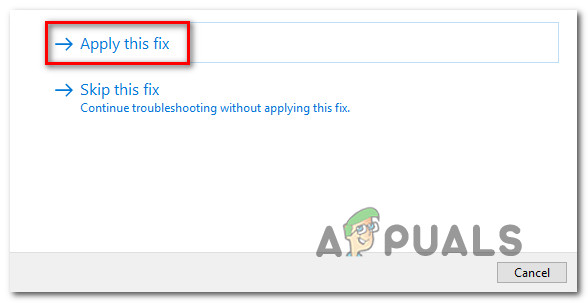
Running the printer troubleshooter - If a viable fix is identified, click on Apply this fix if a repair strategy is recommended.
Applying the recommended fix - Once the operation is complete, restart your computer and attempt to connect your printer once again once the next startup is complete.
If the same problem is still persisting even after applying the fix or the utility wasn’t able to find a viable fix for your issue, move down to the next potential fix below.
Method 2: Reinstalling the Dymo Connect Dymo software (if applicable)
If you’re encountering this issue while attempting to connect a Dymo device to your windows computer, keep in mind that you’re not the only one. We’ve managed to discover a lot of user reports facing the same 0x0000052e when attempting to connect their Dymo device to multiple computers.
After investigating this issue, it turns out that this issue is occurring due to an issue with the supporting driver software that comes with the vast majority of Dymo devices.
Since this is caused by corrupted installation files, the only way to fix this problem is to uninstall the current Dymo drivers and remove and remove any traces from them before reinstalling the latest driver equivalent from scratch.
If this scenario is applicable and you’re looking for step by step instructions on how to do this, follow the instructions below:
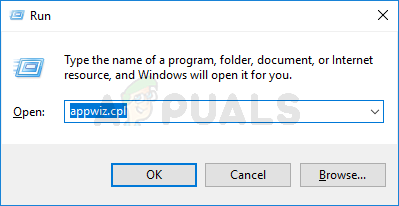
- Press Windows key + R to open up a Run dialog box. Next, type ‘appwiz.cpl’ inside the text box and hit Enter to open up the Programs and Features menu.
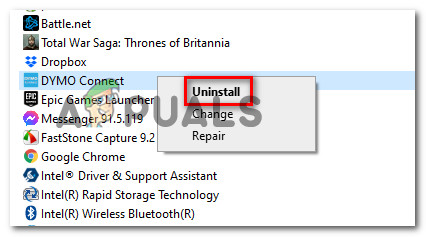
Accessing the Programs and Features menu - Once you’re inside the Programs and Features menu, scroll down through the list of applications and locate the DCD installation.
- When you manage to locate it, right-click on it and choose Uninstall from the context menu that just appeared.
Uninstalling the Dymo software +, driver - Next, follow the on-screen prompts to complete the uninstallation, then restart your computer and wait for the next startup to complete.
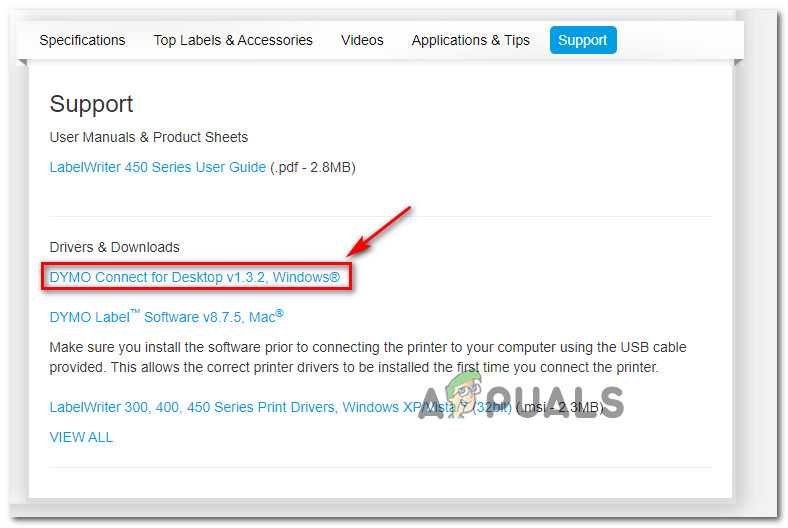
- Once your computer boots back up, visit the official driver download page of Dymo and click on the Support tab.
- Inside the Support tab, click on the latest version of Dymo Connect for Desktop (under Drivers & Downloads) to begin the download of the latest driver version.
Downloading the latest version of Dymo connect - Once the download is complete, double-click on the executable, provide admin access at the User Account Control prompt, then follow the on-screen prompts to install the requirements necessary for the Dymo suite to work.

Installing the Dymo requirements - Once every requirement is installed, complete the installation of the newer driver version before restarting your computer once again.
- After the newer version of the Dymo driver is installed, attempt to connect your printer once again and see if the same problem is still occurring.
If this method didn’t work in your case or this method was not applicable to your particular scenario, move down to the next potential fix below.
Method 3: Refreshing your Windows Components
If none of the methods above have worked in your particular scenario and you’re certain that you’re not dealing with a hardware issue, you can probably conclude that you’re dealing with some type of underlying system file corruption that is affecting your OS’s ability to install and manage printer protocols.
In this case, the best thing you can do is refresh every Windows component that might be causing this problem with a procedure like clean installing or repair installing:
- Repair installing – If you are currently storing important information on your Windows drive, you should go for a repair install procedure since it will allow you to keep all your personal data. A repair install procedure will allow you to keep your personal media, apps, games, and even some user preferences associated with your current OS installation. The main drawback is that you will need to insert or plug in a compatible installation media in order to trigger a repair install procedure.
- Clean installing – If you don’t care about losing personal data on your OS drive, the quickest and painless procedure is to go for a clean install. This operation will erase any personal data on the OS drive, but you will be able to trigger this procedure directly from the GUI menu of Windows without having to plug in a compatible installation media.


