How to Fix “ERR_CONNECTION_REFUSED” in Chrome Browser?
The error code ERR_CONNECTION_REFUSED occurs when the connection to the web server from your Chrome browser is refused. This can happen for several reasons, including interference from the Windows Defender Firewall or a third-party security program, your computer’s network settings, and more.

In some instances, Google synchronization can also lead to the generation of the error code in question. This occurs when there is an inconsistency in the Google account synchronization you are using on the web browser. In this article, we will guide you through several methods to eliminate the error code in question.
1. Restart the router.
The first thing you should start with when trying to troubleshoot the ERR_CONNECTION_REFUSED error code is restarting your router. This can often resolve any Internet connection issues that you are facing on your network.
Routers have a local cache that stores specific information from your Internet Service Provider (ISP). In some instances, this cache can become damaged, which may cause certain underlying issues with your internet connection.
In such a scenario, to resolve the issue, you will have to clean the cache. This can be done by restarting your router. When you do so, the router will establish a new link to the ISP servers, resulting in a fresh connection for you to the servers.
You can restart your router by either pressing the dedicated Restart button found on the back of the router or simply unplugging the power supply. If the problem persists after restarting your router, move on to the next method below.
2. Clear the browser cache.
Your web browser stores information about the websites you visit locally to make the process faster when you visit the website again. If you encounter an issue on a specific website, it is possible that the error code is due to the browser’s cache.
This can occur when the browser cache is either obsolete or damaged, leading to connection refusal. In such a scenario, you can resolve the issue by clearing your browser cache. Doing so will force the browser to create a new copy of the website’s data when you visit it.
Follow the instructions below to clear your browser cache:
- First, click on the three-dot menu in the top-right corner.
- From the drop-down menu, navigate to More tools > Clear browsing data.
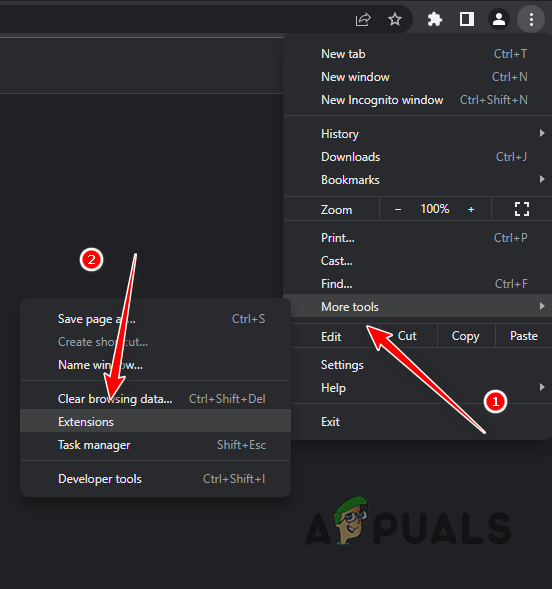
Navigating to Clear Browsing Data - In the Clear Browsing Data dialog box, check all of the checkboxes.
- Choose All time as the Time range.
- Finally, click on the Clear data button.
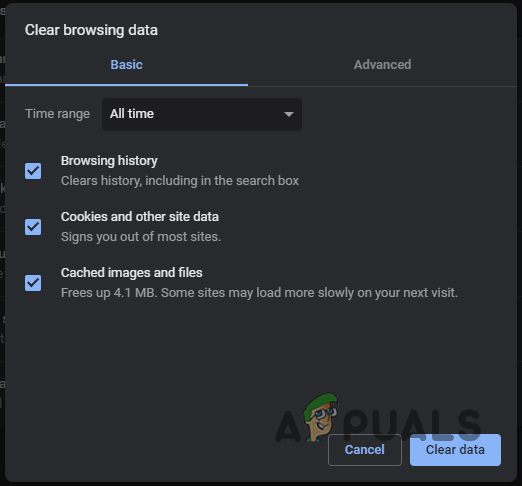
Clearing Chrome Browser Cache - Once you do that, visit the problematic site to see if the problem persists.
3. Disable the Chrome browser extensions.
In some scenarios, the ERR_CONNECTION_REFUSED error code may occur due to third-party extensions installed on your Chrome browser. This can happen when add-ons interfere with the connection your browser is attempting to establish with the web server.
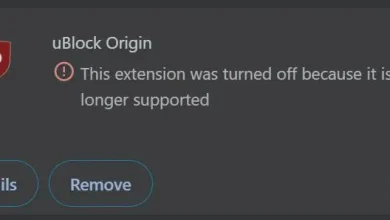
In such a scenario, you can mitigate the issue by disabling the third-party extensions on your Chrome browser. If you have multiple extensions added to your browser, you can quickly check if the add-ons are causing the problem by visiting the website in Incognito mode.
Web browsers do not allow third-party add-ons in private mode by default, so you can visit the problematic site in a private window to see if the error occurs. If the problem goes away, navigate to the Extensions page on your browser and start disabling the add-ons to find the culprit.
4. Turn off Google Sync.
Another potential cause of the issue in question could be Google sync on your account. An inconsistency with Google synchronization might result in the ERR_CONNECTION_REFUSED error code.
If you are using a Google account on your Chrome browser and have turned on browser synchronization, you will need to turn it off to see if that resolves the issue for you. To do this, follow the instructions below:
- First, click on the three-dots menu in the top-right corner.
- Then, from the drop-down menu, choose the Settings option.
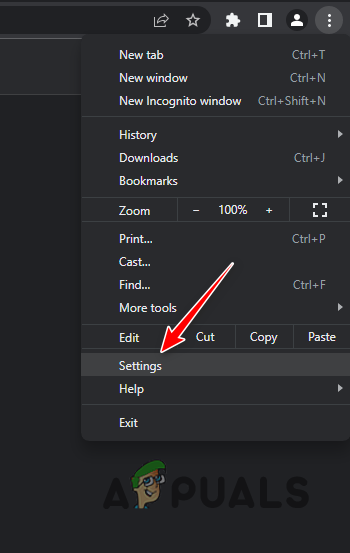
Navigating to Chrome Settings - There, navigate to the Sync and Google services option.

Navigating to Sync and Google Services - Finally, click on the “Turn Off” option next to your account name to stop the synchronization.
- Restart your browser and see if that resolves the issue.
5. Disable third-party antivirus.
Using a third-party security program is quite common, as they offer extended features and protect your system from any suspicious activity. Modern antivirus programs come with a safe browsing feature that manages your internet connection to prevent you from visiting harmful websites.
However, in some scenarios, these programs can trigger a false positive, which leads to the ERR_CONNECTION_REFUSED error code. This is typical behavior of modern antivirus programs, thanks to their advanced security mechanisms.
If you are using a third-party security program, we recommend turning it off temporarily to see if that resolves the issue. Once the antivirus program is off, try visiting the problematic website in your browser. If the problem persists after disabling your security program, proceed to the next method below.
6. Disable the Windows Defender Firewall.
Windows Defender Firewall is a vital component of the operating system, as it manages the inbound and outbound internet connections. In some scenarios, you may experience connectivity issues with your browser because the firewall is blocking the inbound or outbound connection.
To check if your firewall is blocking the connection, you can temporarily disable the Windows Defender Firewall on your computer to see if that resolves the issue. If the problem goes away after disabling the firewall, you can whitelist the browser in your firewall settings to prevent the Windows Defender Firewall from blocking any connections from the browser.
Follow the instructions below to complete this task:
- First, open the Control Panel by searching for it in the Start Menu.
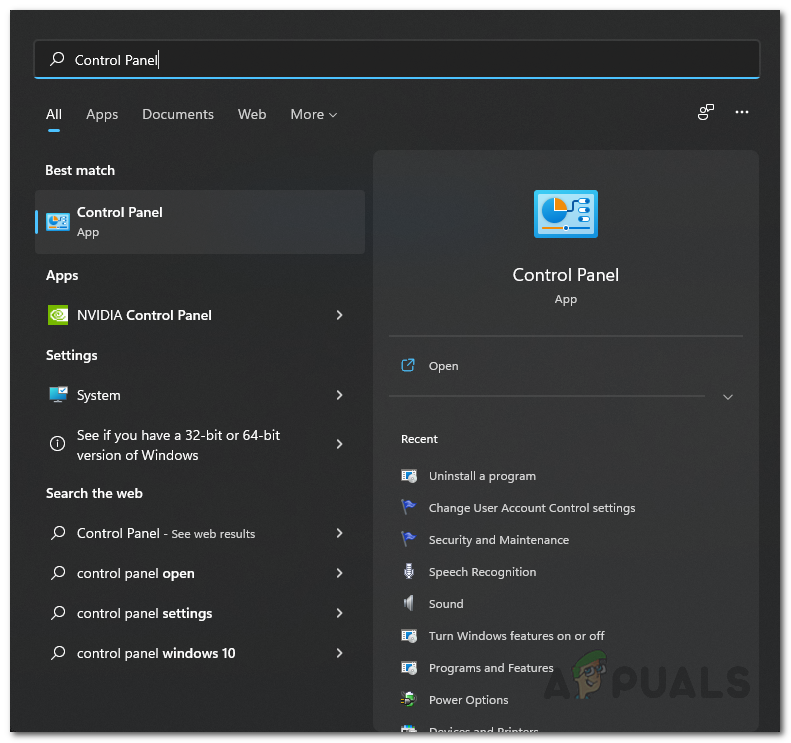
Opening Control Panel - In the Control Panel window, navigate to System and Security > Windows Defender Firewall.
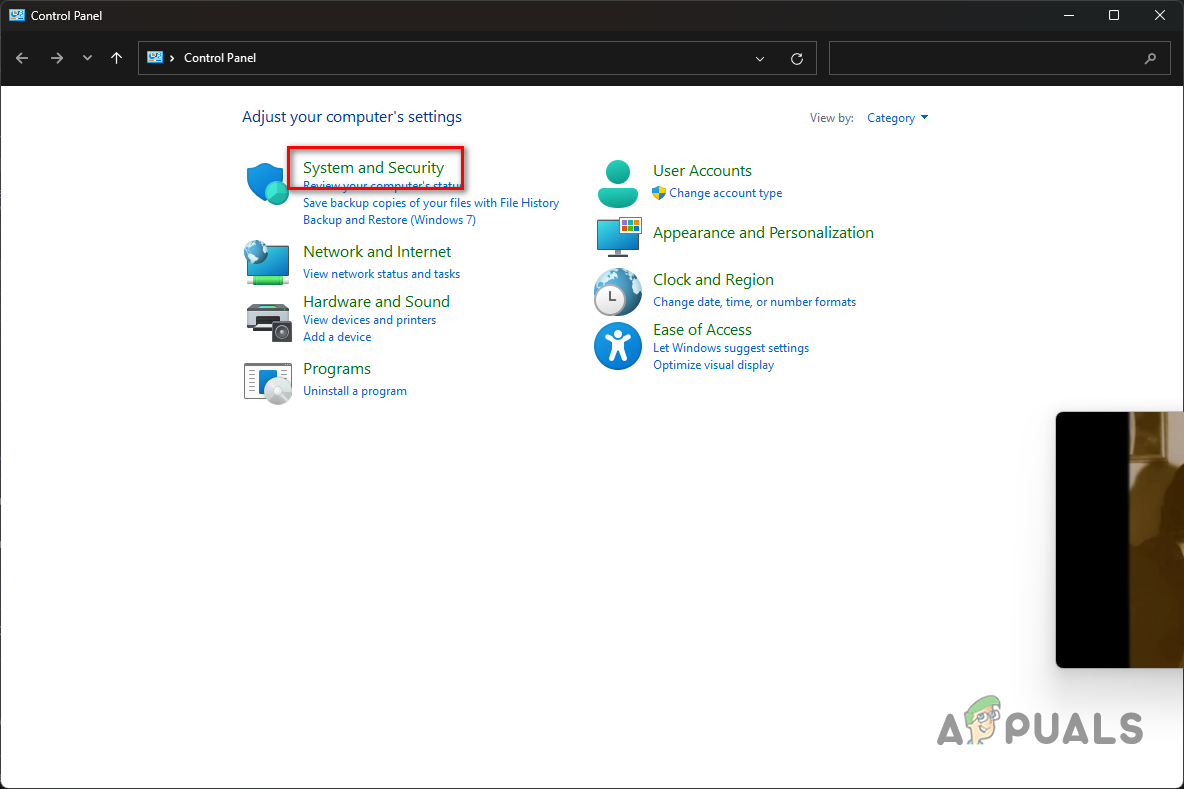
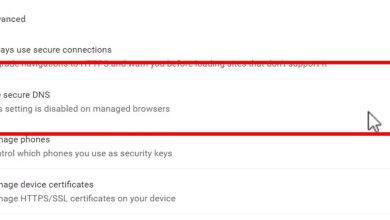
Navigating to System and Security - Then, click on the “Turn Windows Defender Firewall on or off” option on the left-hand side.
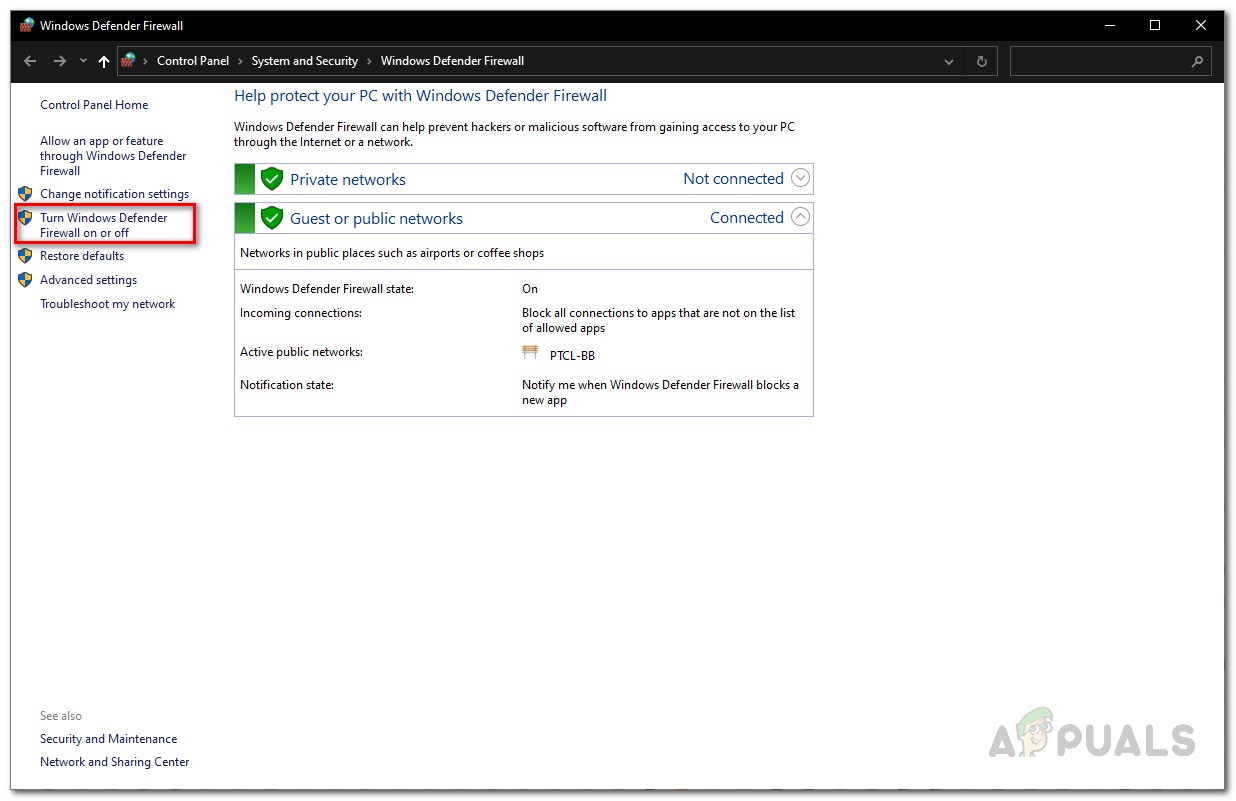
Navigating to Turn off the Firewall Page - Finally, choose the Turn off Windows Defender Firewall option for both Private and Public network settings. Click OK.
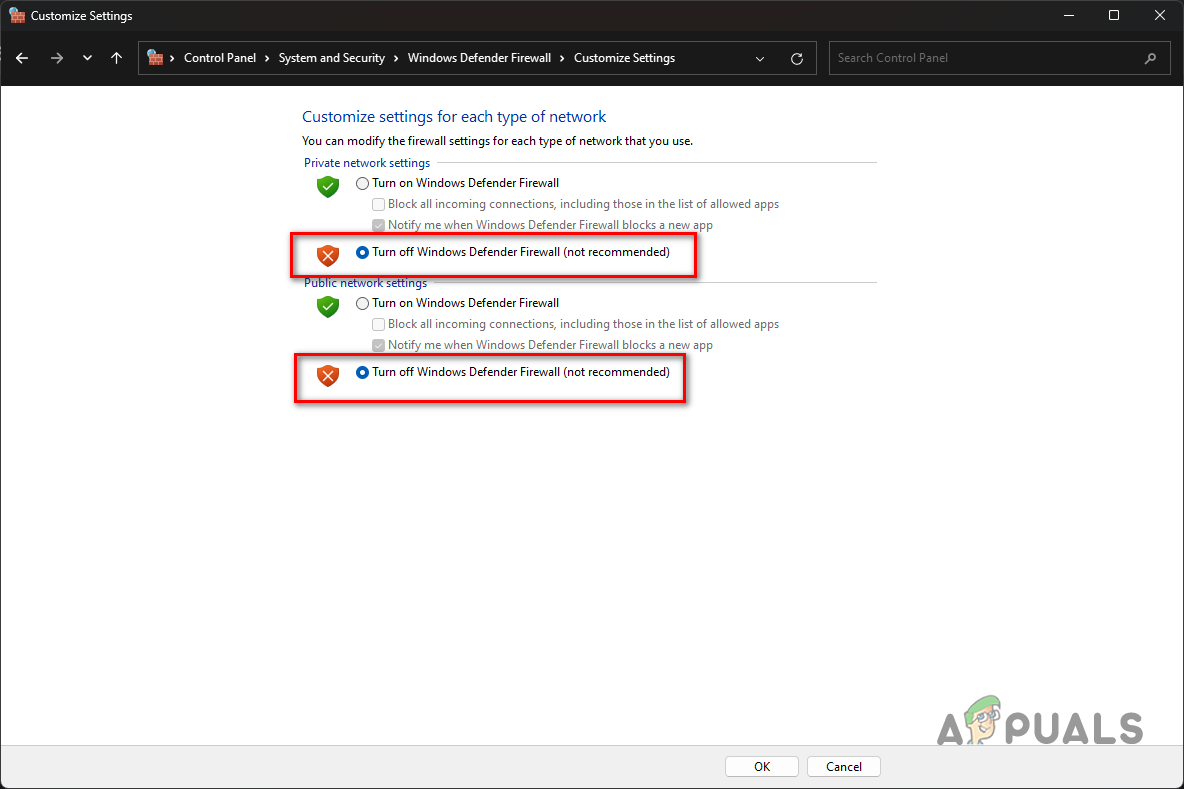
Disabling Windows Defender Firewall - Restart your browser and see if the problem persists.
- If the problem goes away, you will have to whitelist the browser on your firewall.
- To do this, navigate to the Windows Defender Firewall and click on the Allow an app or feature through Windows Defender Firewall option.
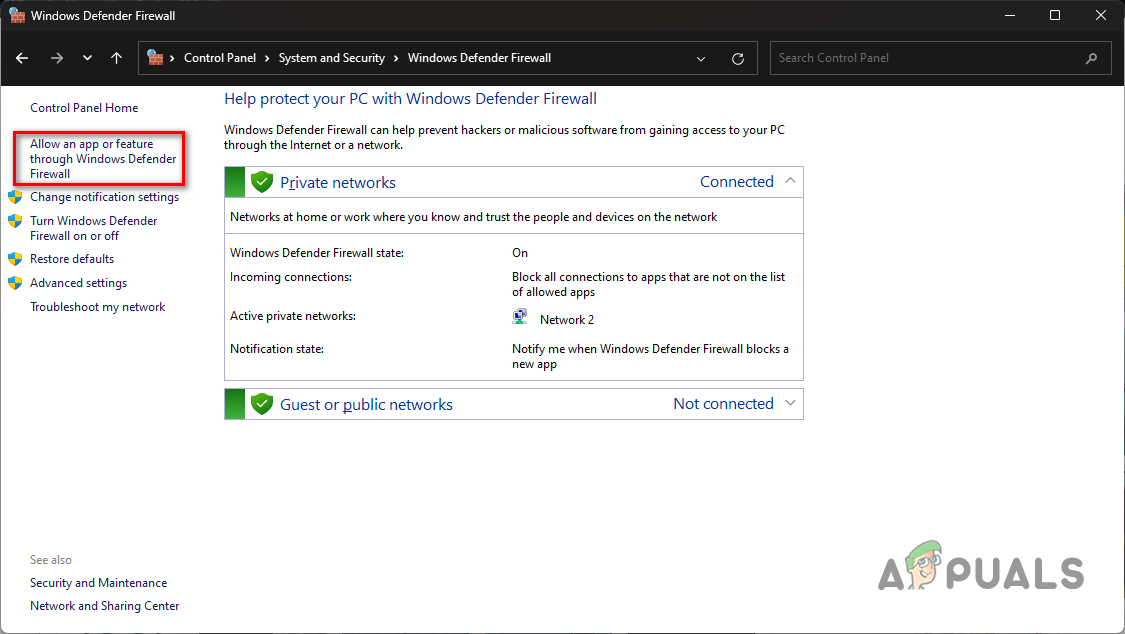
Navigating to the Allowed Apps List - There, click on the Change settings button at the top.
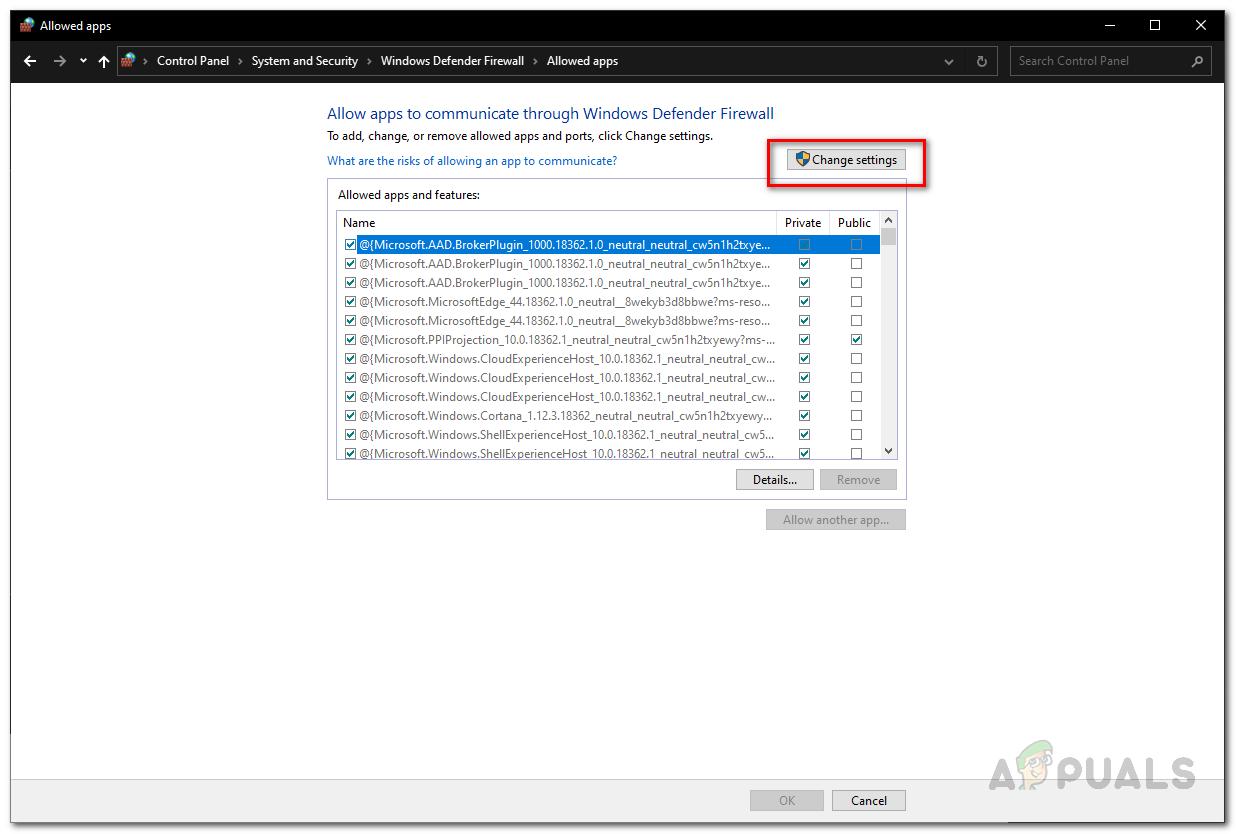
Changing Firewall Settings - After that, click on the Allow another app option.
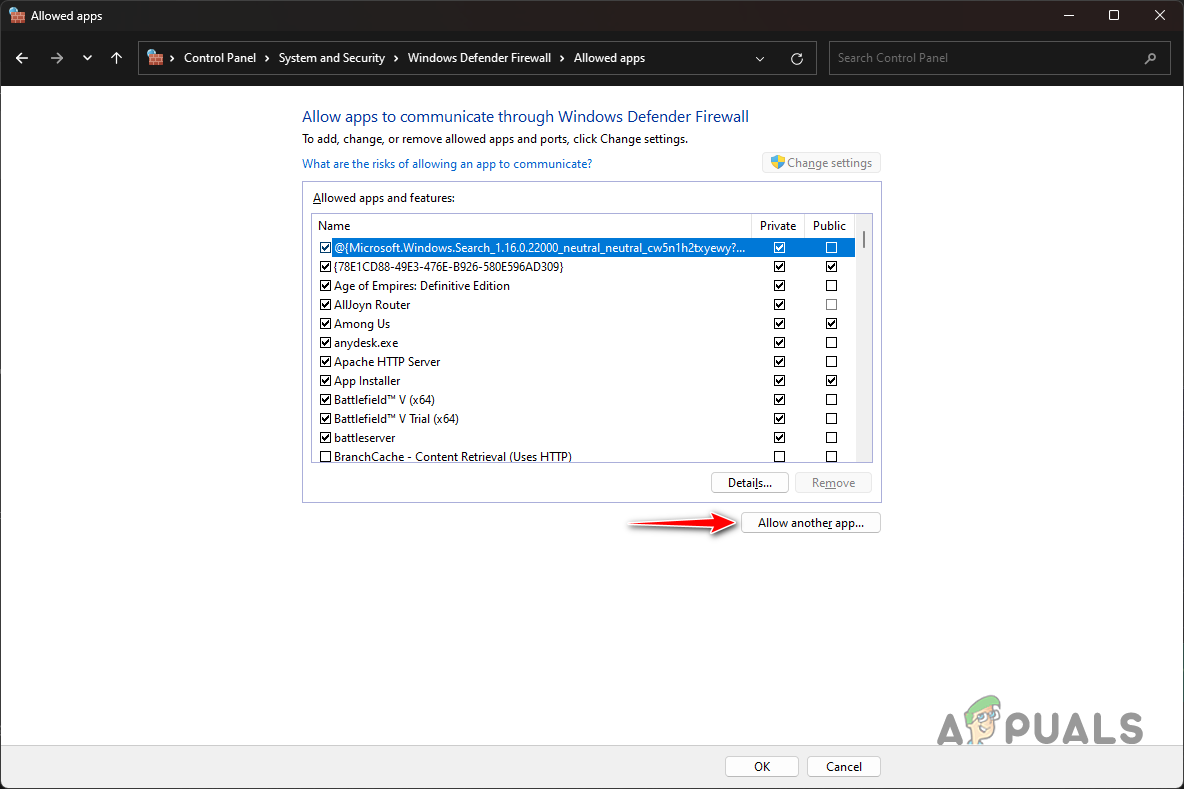
Allowing New App through Firewall - Click on the Browse button and navigate to the installation directory of your browser. Choose the browser executable file and click OK.
- Then, click on the Network types option and tick both the Public and Private checkboxes.
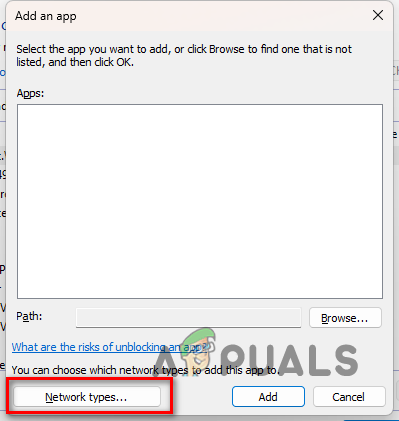
Navigating to Network Types - Finally, click the Add button and hit OK.
- Make sure to enable your firewall at this point.
7. Flush the DNS cache.
The local Domain Name System cache on your computer can also trigger the ERR_CONNECTION_REFUSED error code in your browser. A DNS server is used to resolve all of the domain names that you attempt to access on your web browser.
Your computer stores the addresses of the websites you have visited locally so that you can access them quickly during subsequent connections. However, in some cases, the cache can become damaged, which can cause connectivity issues in your browser.
In such a scenario, you will have to flush the DNS cache. To do this, follow the instructions below:
- First, open the Start Menu and search for the Command Prompt. Click on the Run as administrator option.
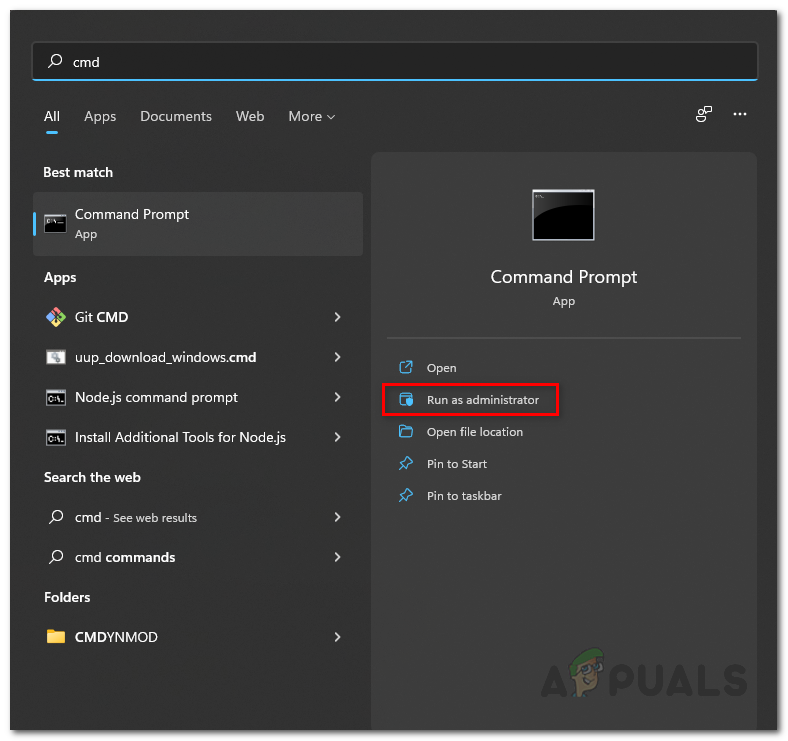
Opening the Command Prompt as Admin - In the command prompt window, type in “ipconfig /flushdns” and hit the Enter key.
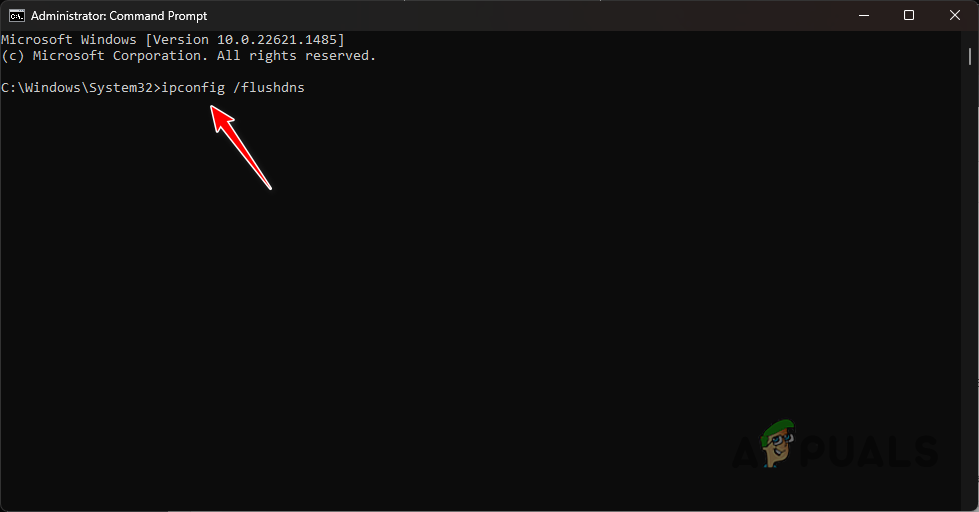
Flushing DNS - After that, enter “ipconfig /registerdns” and hit Enter.
- Once you do that, restart your PC. See if that resolves the problem.
8. Change the DNS server.
A DNS server is used to find the IP addresses of the web addresses you wish to visit. These IP addresses are important for establishing a connection with the web servers on the internet. In some scenarios, the DNS server you are using may experience issues that prevent it from performing name resolution.
In such a scenario, you will need to change your computer’s DNS server to resolve the issue. By default, your computer uses the DNS server provided by your internet service provider. You can switch to using a public DNS server from Google or Cloudflare.
Follow the instructions below to accomplish this:
- First, open the Start Menu and search for Network Connections. Open it up.
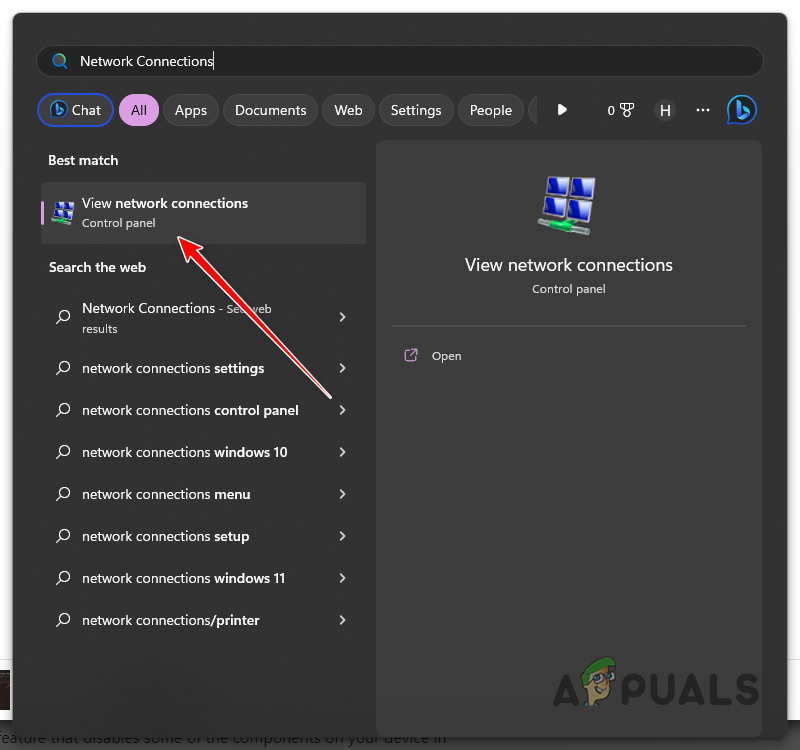
Opening Network Connections Window - In the Network Connections window, right-click on your network adapter and select Properties from the drop-down menu.
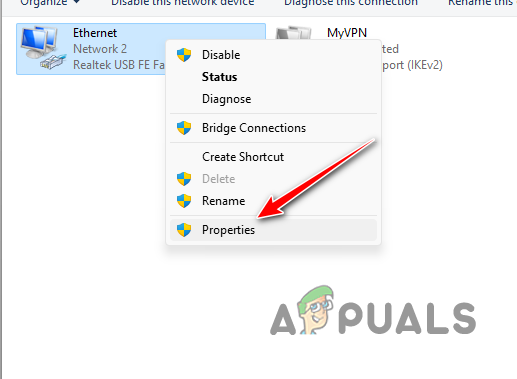
Navigating to Network Adapter Properties - Then, scroll down and double-click on Internet Protocol Version 4 (TCP/IPv4).
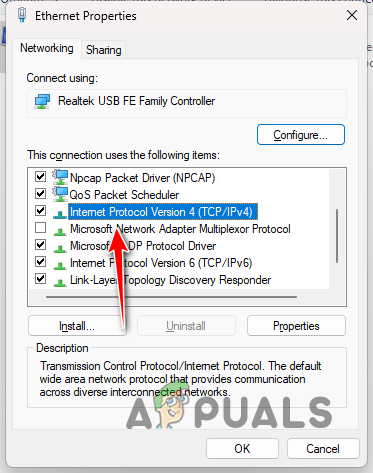
Navigating to IPv4 Properties - After that, choose the Use the following DNS server addresses option.
- If you want to use Google’s DNS server, enter the addresses 8.8.8.8 and 8.8.4.4 respectively. In the case of Cloudflare, enter 1.1.1.1 and 1.0.0.1 respectively.

Changing DNS Server - Finally, click OK and restart your browser.
- See if that fixes the issue.
9. Reset the network settings.
Finally, if none of the above methods have fixed the problem for you, the error code is likely caused by misconfiguration or inconsistency in your network settings. In such a scenario, you will need to reset your network settings to resolve the issue.
Resetting the network settings on your computer will reinstall all of the network adapters and remove any VPN clients that you might have installed. In addition, all passwords of any connected Wi-Fi networks will also be forgotten.
Follow the instructions below to reset network settings:
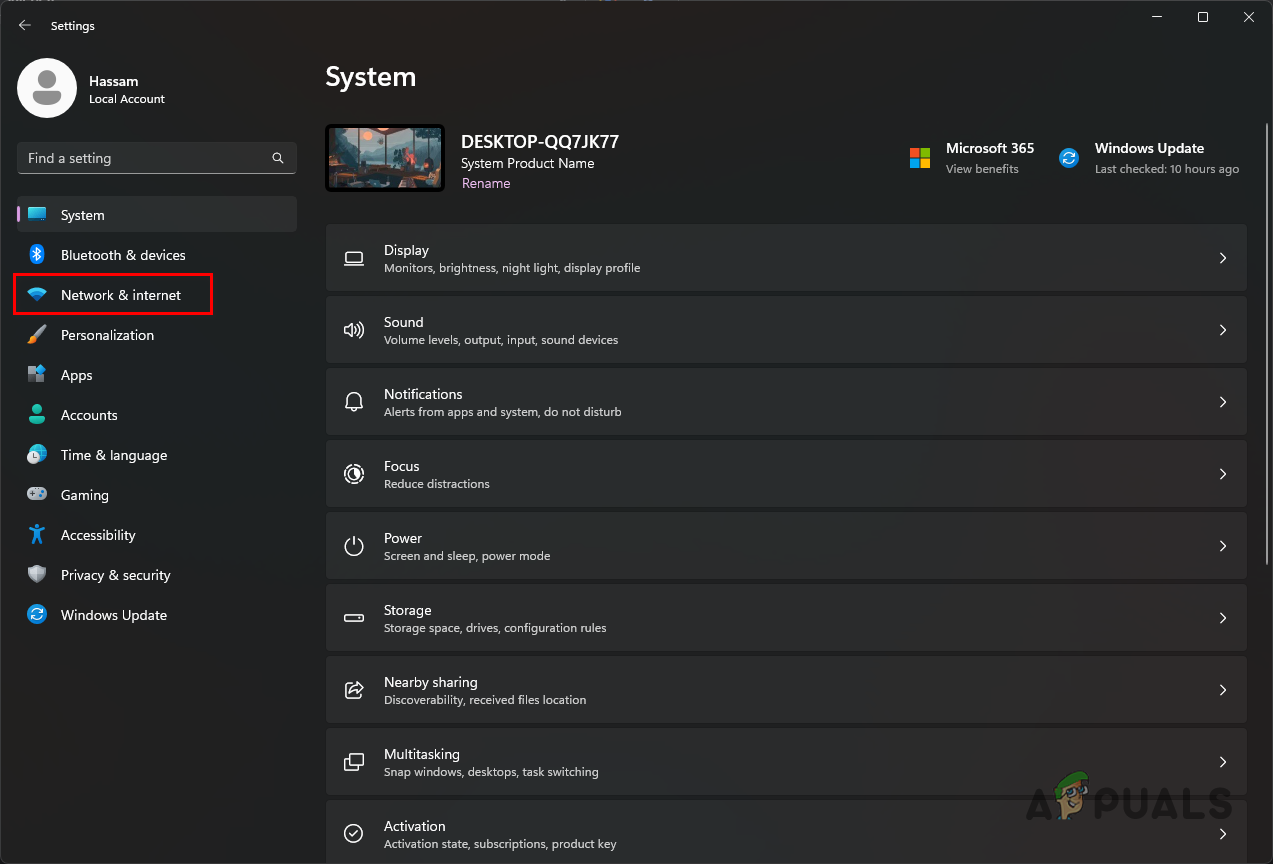
- First, open the Settings window by pressing the Windows key + I on your keyboard.
- In the Settings window, navigate to Network and internet > Advanced Network Settings.
Navigating to Network Settings - On the Advanced Network Settings page, click on the Network reset option.
- Finally, click on the Reset now button to reset your network settings.
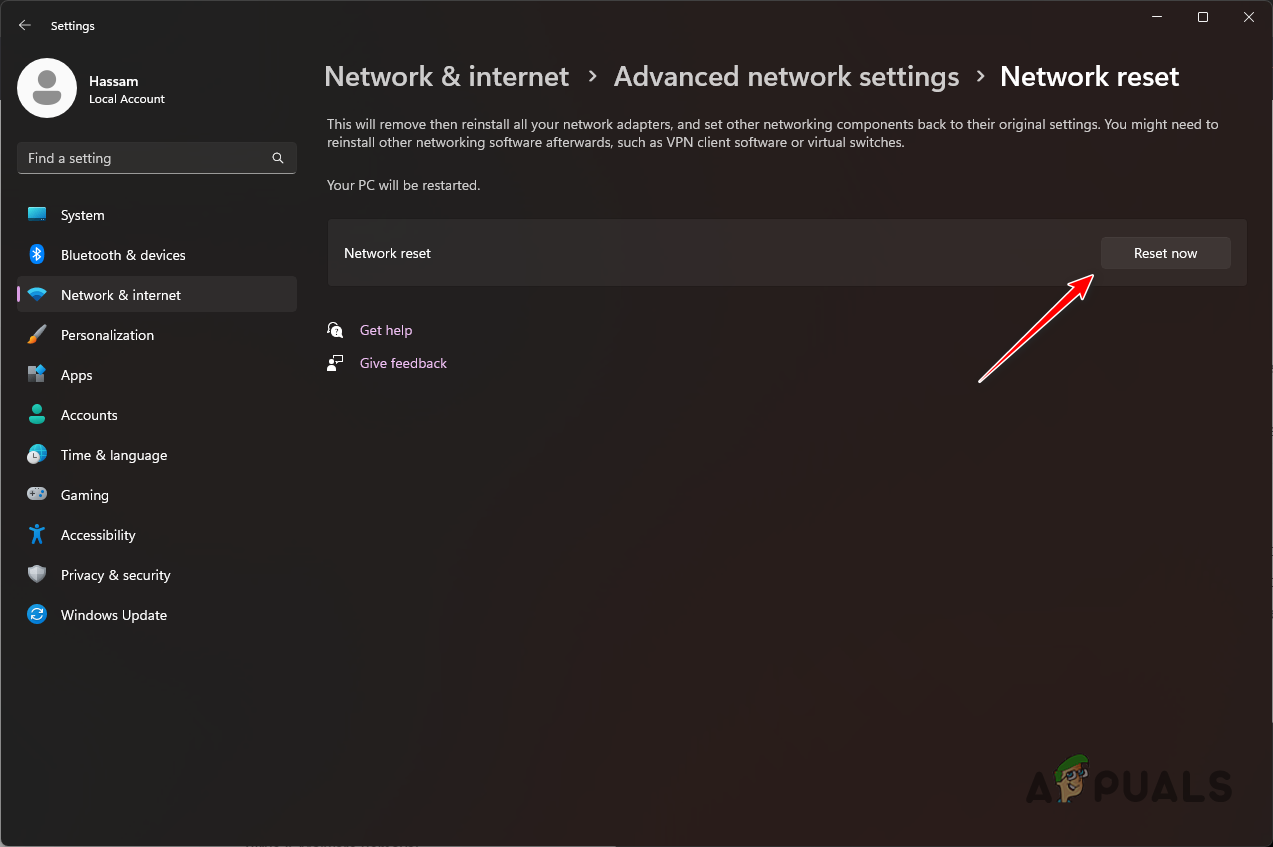
Resetting Network Settings - After your PC boots up, check if the error code still appears.