How to Enable Dual Sim on Single Sim Moto Z
The Motorola Moto Z was shipped in single SIM and dual SIM versions. Ironically, both versions use a dual-SIM support tray. There is zero physical difference between the single-SIM and dual-SIM version of the Moto Z! In the single-SIM version of the Moto Z, the second SIM slot is locked via the phone’s internal software. In a nutshell, Motorola shipped a phone that is perfectly capable of dual-SIM support, yet charged consumers extra to have both SIM slots unlocked.
The purpose of this guide is to unlock the second SIM tray, therefore bypassing the software lock.
Warning: The following steps were performed on a Moto Z running LineageOS 14.1 which is based on Android 7.x. LineageOS is a highly developed custom ROM that was forked from CyanogenMod.
Before following this guide, read through completely to the end. No matter which method you follow, there is a specific final task you must do, which is at the end of this guide.
Installing LineageOS on your Moto Z:
- Download LineageOS 14.1 here
- Reboot to your recovery (Volume Down + Power)
- Format your /system, /data, and /cache.
- Flash the LineageOS .zip file.
- [Optional] Install a Google Apps package of your choice, such as Open GApps.
Unlocking the Dual Sim Support
There are several methods which I will detail below.
Option 1 – TWRP Terminal
- Boot into TWRP and open a Terminal
- Type the following command into the TWRP Terminal:
setprop persist.radio.multisim.config dsds
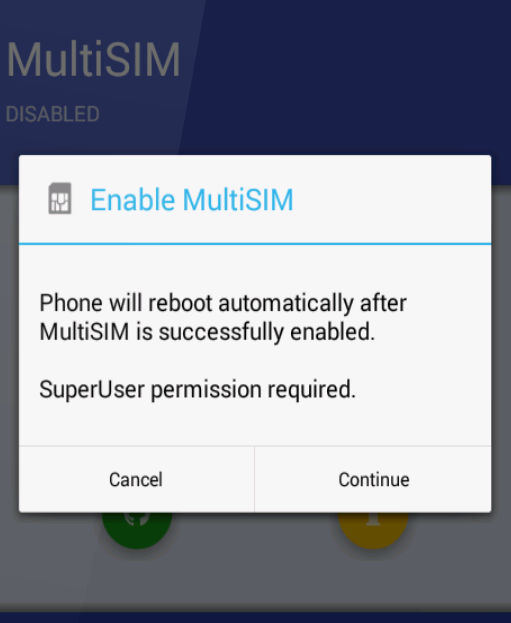
Option 2 – MultiSIM Toggle app (Root Required)
- Download the MultiSIM Toggle .apk from here and install it on your phone.
- Open the app and grant it SuperUser permission.

- Your device will automatically reboot if the operation is successful.
Option 3 – Via Command Line Interface
- Activate developer mode on your Moto Z (Settings > About > tap Build Number 7 times)
- Go into Developer Options and enable the terminal app
- Launch the terminal app and grant it root access
- Type the following commands into the terminal:
su
mount -o rw,remount /system
cd /system
cp build.prop build.prop.orig
echo ro.hw.dualsim=true >>build.prop
mount -o ro,remount /system - Reboot your device.
Option 4 – Root File Explorer method
You need a root file explorer app on your device – ES File Explorer, FX, Root Browser, etc.
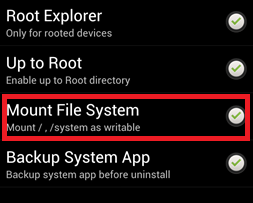
- In your explorer app, make sure that /system is mounted as writable (steps may vary depending on app).

- Navigate to /system and make a backup copy of your build.prop file.
- Open build.prop with a text editor and find this line:
hw.dualsim=false - Change the false to true
- Reboot your device
After Following Any of the Above Steps:
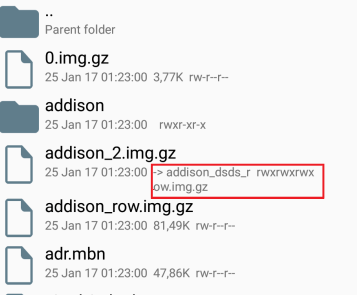
- Open your root explorer app and navigate to the “fsg” folder.
- Depending on your regional firmware, you will see a bunch of img.gz files. You are looking for either griffin_2.img.gz and griffin_row.img.gz, or Addison_ROW and Addison_2.img.gz

- Make a backup of those files, and then delete the originals.
- Now find files with a similar name but with the addition of “dsds”, example: img.gz
- Rename the dsds files to the original files you deleted earlier (example: rename Addison_dsds_2.img.gz to Addison_2.img.gz, and Addison_dsds_row.img.gz to Addison_row.img.gz)
- Connect your Moto Z to your PC via USB, and reboot to your bootloader (Volume Up + Power)
- Open an ADB terminal and type the following commands:
fastboot erase modemst1
fastboot erase modemst2
fastboot erase cache
fastboot reboot
**Known Issues**
- Dialer may have limited functionality, such as not being able to save contacts to SIM 2
- SIM 2 may display IMEI 0
- Your SIM 1 IMEI may be lost if you follow these steps incorrectly
If you need to revert to original settings, you can flash the fsg.mbn file found in your original firmware.