How to Enable or Disable Auto HDR on Games on Windows 11
Fortunately for all PC gamers, Windows 11 comes with a built-in Auto HDR. This feature was first introduced in Microsoft’s 9th generation of gaming consoles, the Xbox Series X and S before finding its way to Windows as a preview feature.
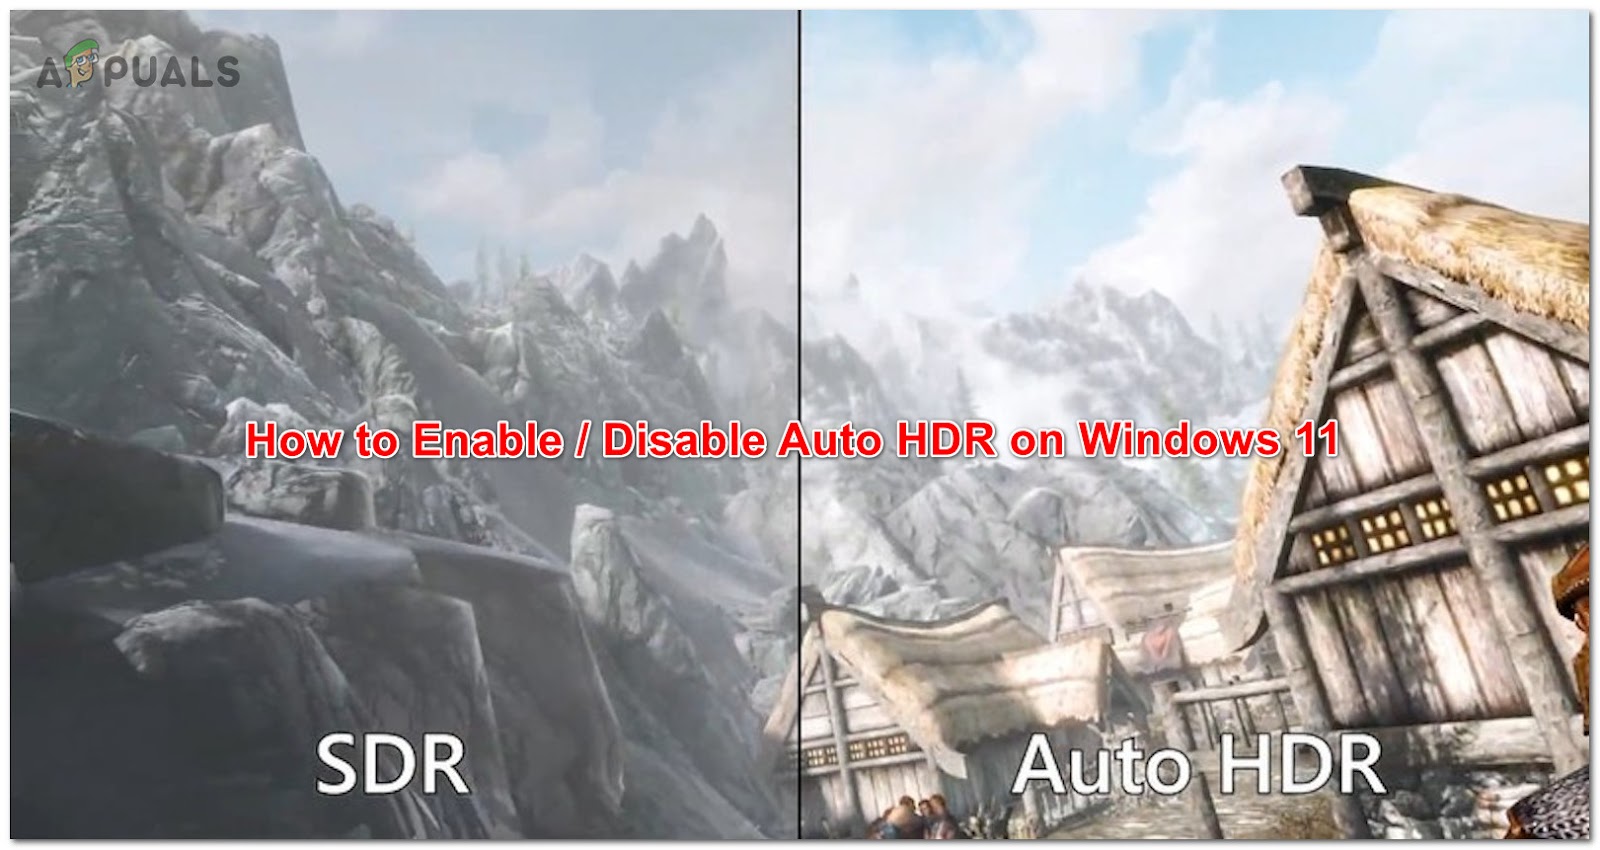
What is HDR?
HDR or High Dynamic Range is a feature that automatically updates the lightning and color of your screen, which is very useful for gaming, improving and making the graphics more realistic.
Enable HDR and you will immediately notice better brightness and better color capabilities (as long as your display supports it).
HDR, as opposed to SDR (Standard Dynamic Range), is capable of showing a way wider range of colors and more details in between whites and blacks. SDR is only capable of showing details in a bright part of the scene or in a dark one, but not in both extremes at the same time.
Auto HDR vs HDR
The vast majority of games studios already develop their games with HDR in mind, but Microsoft’s Auto HDR takes DirectX 11 and DirectX1 12 games that we’re NOT designed for HDR and automatically expands the color and brightness range to HDR.
Auto HDR is not a technology rivaling HDR, but rather a seamless platform that will give you the same kind of HDR experience (more or less) on games that we’re not originally designed for this technology.
While Auto HDR won’t match the visuals you get when you play a game that was natively developed for HDR, it’s still a vast improvement from SDR.
How to Enable Auto HDR on Windows 11
Now that you understand what is Auto HDR and what it can do for your gaming endeavors on your Windows 11 computer, let’s go over a couple of methods that will allow you to enable or disable this feature:
- Enable or Disable Auto HDR for Games via the Xbox Game Bar
- Enable or Disable Auto HDR for Games via the Settings menu
Both methods below will allow you to achieve the same thing, so feel free to follow the one that you feel most comfortable with :
Enable or Disable Auto HDR on Windows 11 (via Xbox Game Bar)
- Press Window key + G to open up the Xbox Game bar on your Windows 11 computer.
Note: Keep in mind that if this is the first time you open up this app, you will be required to do some initial configuration. - From the Game bar that just appeared, click on the gear icon (settings icon) from the right-hand side of the bar.
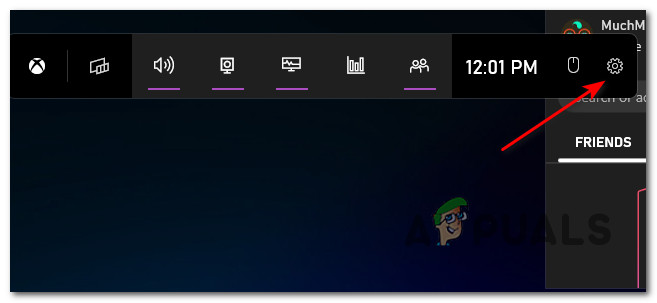
Opening up the Game bar - Next, click on Gaming Features from the vertical menu on the left, then go over to the right menu and check or uncheck the box associated with Use Auto HDR with supported games depending if you want to Enable or Disable Auto HDR.
Enable or Disable Auto HDR on Windows 11 (via the Settings menu)
- Press the Windows Start key on your keyboard to bring up the Start menu.
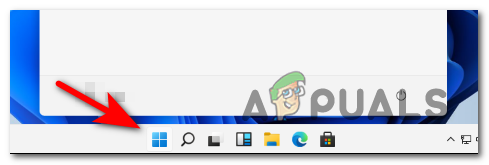
Press the Start key on your PC - Once you’re inside the Start menu, click on Settings from the list of available options.
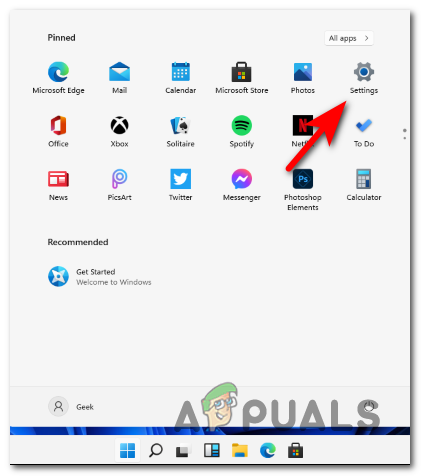
Settings menu Windows 11 - Once you’re inside the Settings screen, click on System from the side menu on the left.
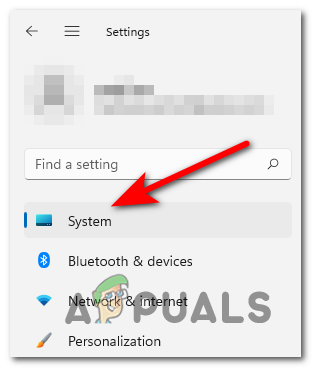
Open up the System menu - From the System menu, click on Display from the menu on the right.
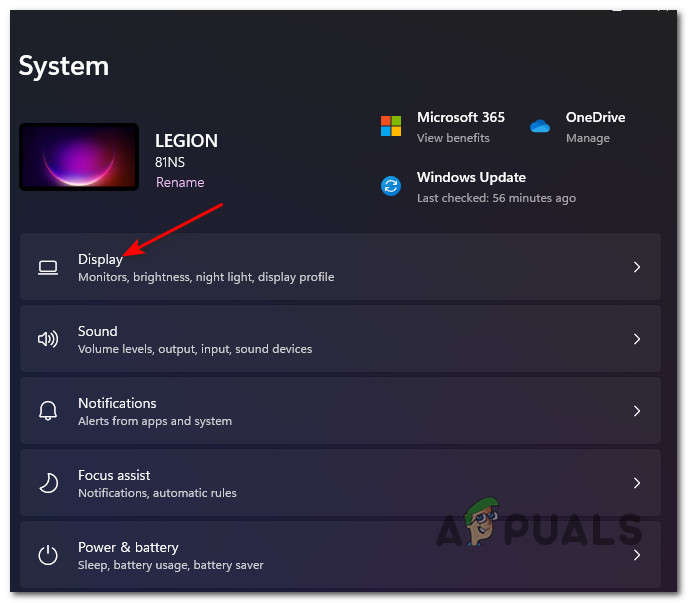
Open up the Display tab from Windows 11 Settings - Once you’re inside the Display menu, locate the option named HDR and click on it.
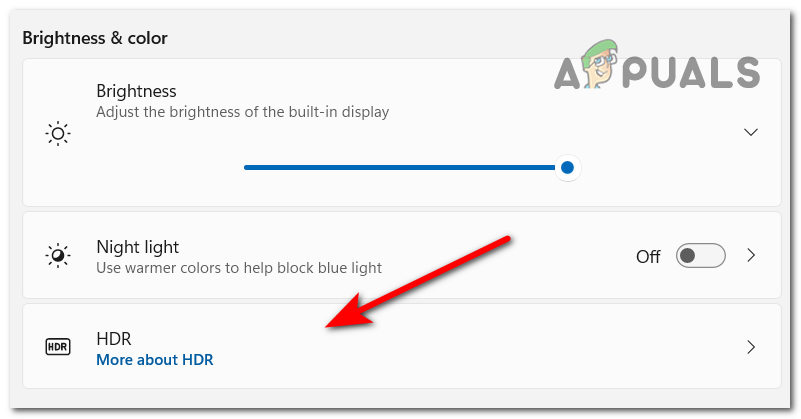
Opening up the HDR menu on Windows 11 - Next, locate the Auto HDR toggle and flick it ON or OFF depending if you want to disable or enable this option.
- After the modifications are done, you can safely close the Settings menu as the changes are enforced immediately.
Should I enable HDR on Windows 11?
Let’s imagine that you’re playing a game in which there’s a porch with a bright light at the entrance.
With SDR, you will only see the details of the bright colors, while the details in regards to the shadow are lost.
But with HDR, you get the full light spectrum, plus an increased range of color and luminance which makes up for a much more realistic and immersive experience.
Note: Unless you have a display that supports dynamic range, you will not get the full HDR experience.


