How to Fix Elden Ring Connection Error on PC and Consoles?
If you regularly get disconnected while playing Elden Ring on PC or consoles, you are not the only one. Despite receiving overwhelmingly positive reviews, the game has a lot of technical issues that take away from an otherwise unforgettable experience.
As of now, a lot of players on both PC and consoles are reporting that they can’t play online for more than a few minutes due to being disconnected from the game.

If you’re facing the same kind of issue, you should know that we’ve discovered a series of potential fixes that should alleviate the connection problem with Elden Ring.
But before we get to that, let’s go over the most common causes (besides a server problem) that might contribute to the constant disconnects that you’re facing with Elden Ring.
Here’s a list of potential culprits that might cause this network issue with Elden Ring:
- Missing Windows infrastructure updates – As it turns out, one of the reasons that might contribute to your connection instability while playing Elder Ring is a missing Windows Update network infrastructure update. This should be installed, especially if you’re running on Windows 11 since it makes IPv6 connections much more stable. If you still have pending Windows updates, installed every missing Windows Update to fix the problem.
- Corrupted Temporary files – Another scenario that might cause these types of issues with the game are corrupted network files currently stored in your temp or prefetch folders. According to some affected users, clearing these folders might resolve your connection issues with Elder Ring.
- UPnP is disabled – If you’re using a relatively newer router model, you need to access the router settings and ensure that UPnP (Universal Plug and Play) is enabled. Without this option disabled, the ports required by Elden Ring won’t be updated automatically so the connection with the game server can’t be maintained.
- Required Ports are not forwarded – If you’re using an older router that doesn’t support UPnP, you will have to forward the used Elden Ring ports manually (depending on which platform you’re using to play the game). This is only applicable for routers older than 3-4 years.
- System file corruption – If you’re experiencing this issue on a Windows 10 or Windows 11 PC and you’re facing similar issues with other games, it’s also possible that this particular issue is rooted in some kind of system file corruption. Make sure that’s not the case by repair installing or clean installing your current Windows installation.
Now that we went over all the potential reasons why you can expect to see this problem (besides a server issue that’s entirely beyond your control), let’s go over every potential fix below until you find a method that alleviates the problem for you.
Install Pending Windows Updates (PC Only)
If there are still pending updates on your Windows 10 or Windows 11 PC that are waiting to be installed, you should start your troubleshooting efforts by making sure that you have the latest network infrastructure Windows update installed.
Microsoft already released a fix aimed at making IPv6 connections more stable on Windows 10 and Windows 11 – installing this fix can make a big difference when it comes to the stability of your game when playing Elden Ring in online mode.
Note: This method is confirmed to be effective on both Windows 10 and Windows 11.
With this in mind, follow the instructions below to install every pending update in order to ensure that the network infrastructure update for IPv6 is installed on your Windows installation.
- Start by pressing Windows key + R to open up the Run dialog box.
- Next, inside the text box, type ‘ms-settings:windowsupdate’ and press Enter to open up the Windows Update page of the Settings menu.
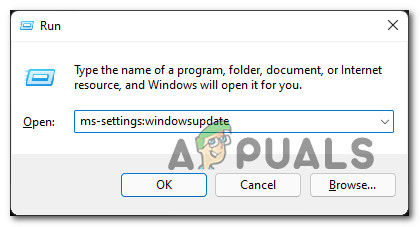
Accessing the Windows update component Note: This command will work on both Windows 10 and Windows 11.
- Inside the Windows Update screen, move over to the right-hand side menu and click on Download Now if new updates are available.

Installing pending updates Note: If no updates are pending to be installed from the get-go, click on the Check for updates to trigger a scan.
- If new pending updates are identified, click on Install, then wait patiently until every pending update is installed.
- Reboot your PC and wait until the next startup is complete.
- After your Windows 10 or Windows 11 computer boots back up, launch Elden Ring once again and see if the problem is now fixed.
If the problem is still not fixed or you already had the latest pending Windows updates installed for your OS version, move down to the next method below.
Clear Temporary Files (PC Only)
As it turns out, this type of issue can also be indirectly caused by some network-related temp files that your operating system has accumulated over time.
if this scenario is applicable, you should be able to fix the problem by accessing the Storage usage menu of your Windows installation and clearing the Temporary Files.
This method has been confirmed to be effective by a lot of affected users.
Follow the instructions below to access the Properties screen of our OS installation and delete the temporary files:
- Start by opening File Explorer by pressing Windows key + E.
- Next, right-click on your Windows Partition (from File Explorer), then click on Properties from the context menu that just appeared.
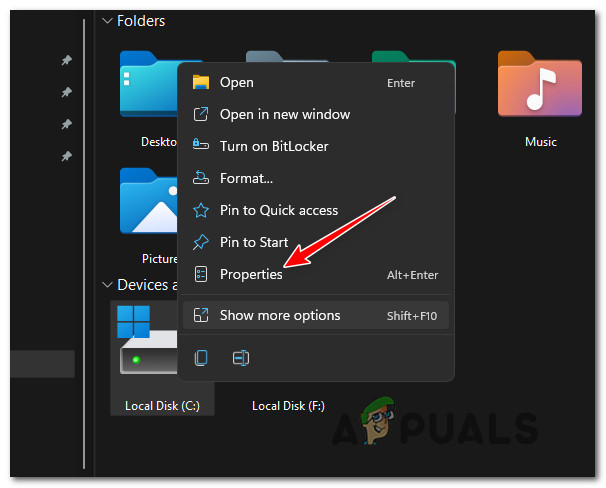
Accessing the Properties screen of the Windows partition - From the insides of the Properties screen, click on the General tab at the top, then click on Details.
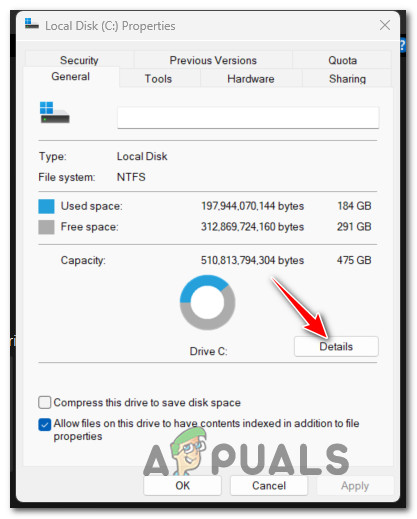
Accessing the Details screen - From the next screen, click on Temporary Files from the menu on the right.
- From the Temporary files sub-menu, click on Remove Files while leaving the default sections.
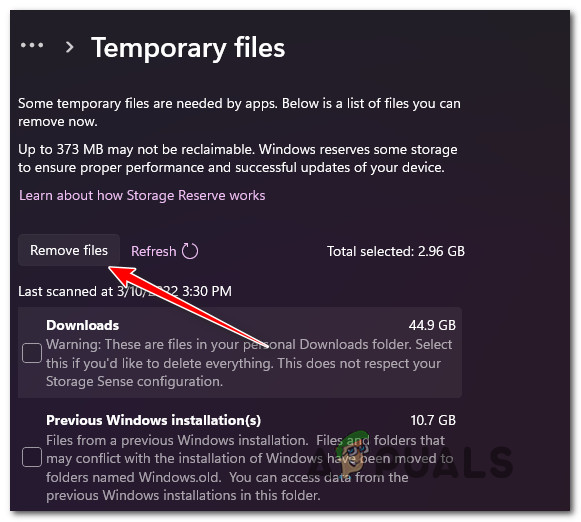
Removing the files - Once the operation is complete, reboot your PC and launch Elder Ring to see if the problem is now fixed.
In case the same type of issue is still ongoing, move down to the next method below.
Enabling UPnP (to facilitate an Opened NAT)
Most network connectivity issues related to Elden Ring not related to a server problem can one way or another be traced to the Network Address Translation (NAT).
Note: the NAT is metric that will determine how easy it is for you to connect with other players. The status of your NAT can also affect the ability to join and invite friends on Elden Ring as well as interact with other network features.
There are multiple ways to ensure that the NAT is opened on your PC or console. But for the sake of keeping things simple, we are going to focus on a universal fix that will ensure that your NAT is open (regardless of your platform or ISP) – enabling Universal Plug and Play (UPnP).
When you enable UPnP, you’re essentially allowing your router to forward the ports of all applications and games that are utilizing the network. This will save you from having to create them manually.
Since UPnP is enabled at the router level, the steps below can be followed regardless of the platform that you’re encountering the issue on:
Note: If you’re trying to play Elden Ring cooperatively, both you and the friends that you’re trying to play with need to ensure that UPnP is enabled (if supported).
- Start by making sure your computer/console is connected to your router.
- Next, open your Internet web browser, type 192.168.0.1 or 192.168.1.1 and press Enter to open the settings page of your router/modem.
Note: In case the generic router addresses don’t work, search online for specific steps on how to access your router settings. - After you get to the login page, insert your credentials to move forward.
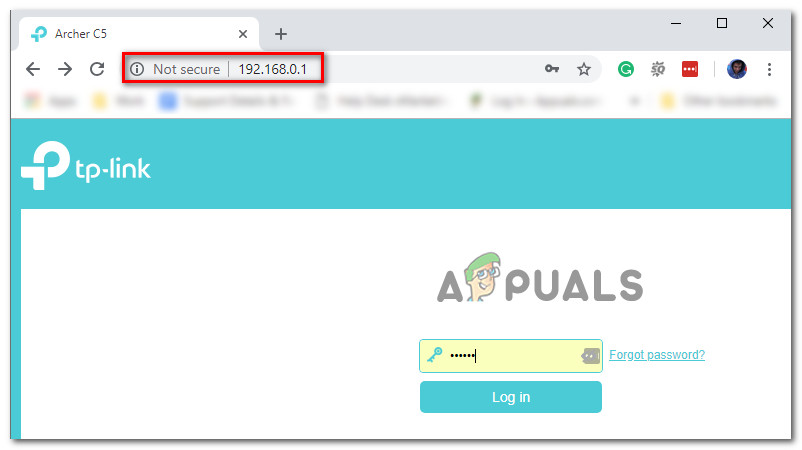
Accessing your router settings Note: With most manufacturers, the default username is “admin” and the default password is either “admin” or “1234”. If the default credentials are different in your case, search for specific steps according to your router model.
- Once you’re finally inside your router settings, look for the Advanced settings.
- Next, go to the NAT Forwarding tab and look for a UPnP submenu. once you find it, make sure that it’s enabled.
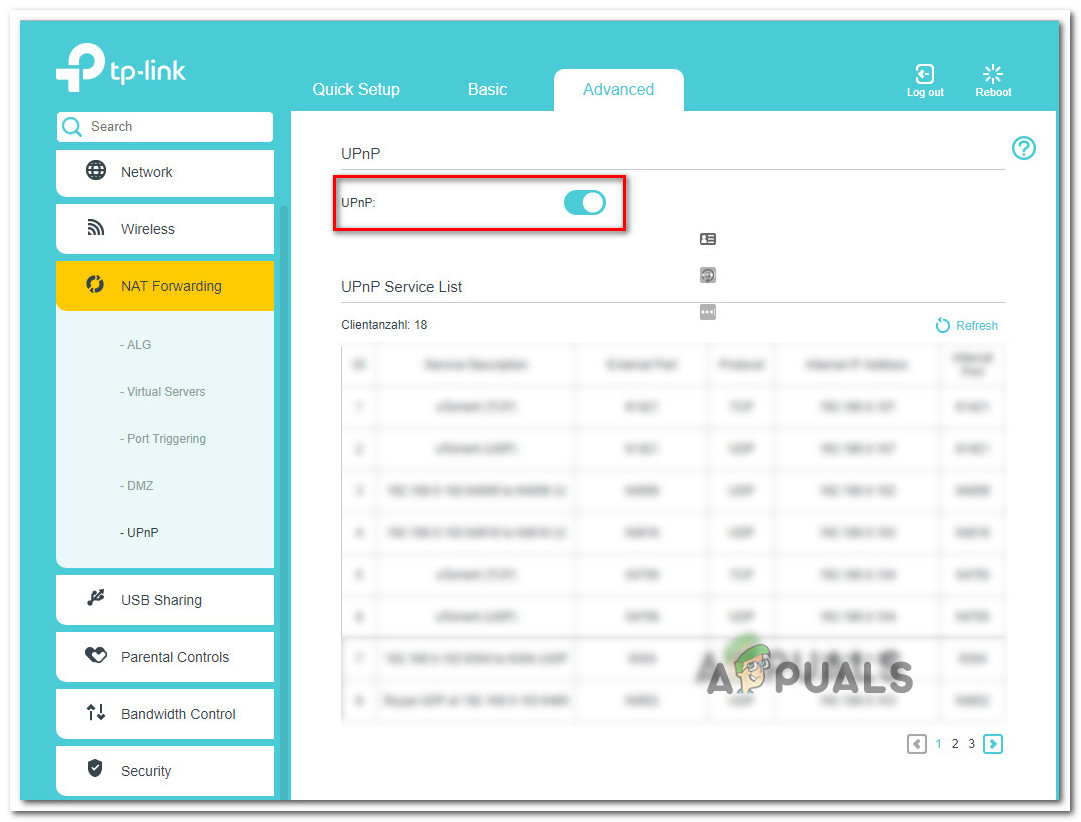
Enabling the UPnP feature on your router Note: The instructions in this guide are performed on the UI of a TP-Link router – the screens you will see will look different depending on your router/modem manufacturer. However, you should be able to enable the UPnP feature from the NAT Forwarding menu.
- Once you’ve enabled UPnP, restart both your router and the console/PC to force open the necessary ports.
- After your PC boots back up, launch Elder Ring once again and see if the problem is now fixed.
If the same problem is still occurring or UPnP is not supported by your router, move over to the next method below.
Forwarding Elden Ring ports manually
Depending on your router model, UPnP (Universal Plug and Play) might not be supported so your router won’t be capable of auto-forward the ports used during the online mode of Elden Ring.
If this scenario is applicable and your router doesn’t support UPnP, the only solution is to forward the ports that Elden Ring uses manually.
This method is a bit more tedious, but in the end, you’ll end up accomplishing the same thing (opening NAT) but the steps will be done manually.
Note: Keep in mind that the ports that need to be forwarded will be different depending on the platform that you’re playing the game on.
Here’s what you need to do:
- Start by opening your browser and inserting your router/modem IP address. Try the two addresses since most manufacturers used it as the default:
192.168.0.1
192.168.1.1
Note: In case the default IP addresses don’t work, press Windows key + R, type “cmd” and press Enter. Inside the Command Prompt window, type “ipconfig” and hit Enter to get an overview of your network connection. Finally, scroll down to Default Gateway. That’s the address of your router/modem.
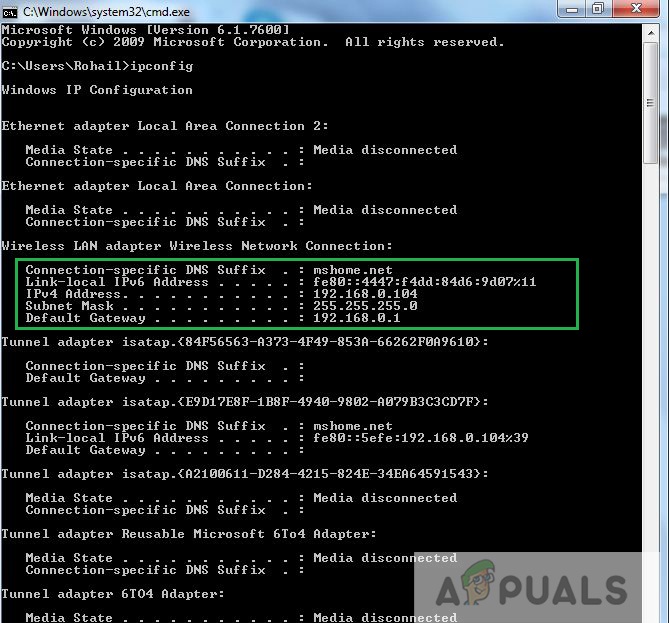
Finding your IP address - Once you finally manage to reach the login page of your router, use the default values to log in:
Username: admin
Password: admin or 1234
Note: These are applicable with most router/modem manufacturers. If these won’t work for you, search online for the default login credentials of your networking device.
- Inside your router/modem settings, go to the advanced menu and look for an option called NAT Forwarding or Forwarding.
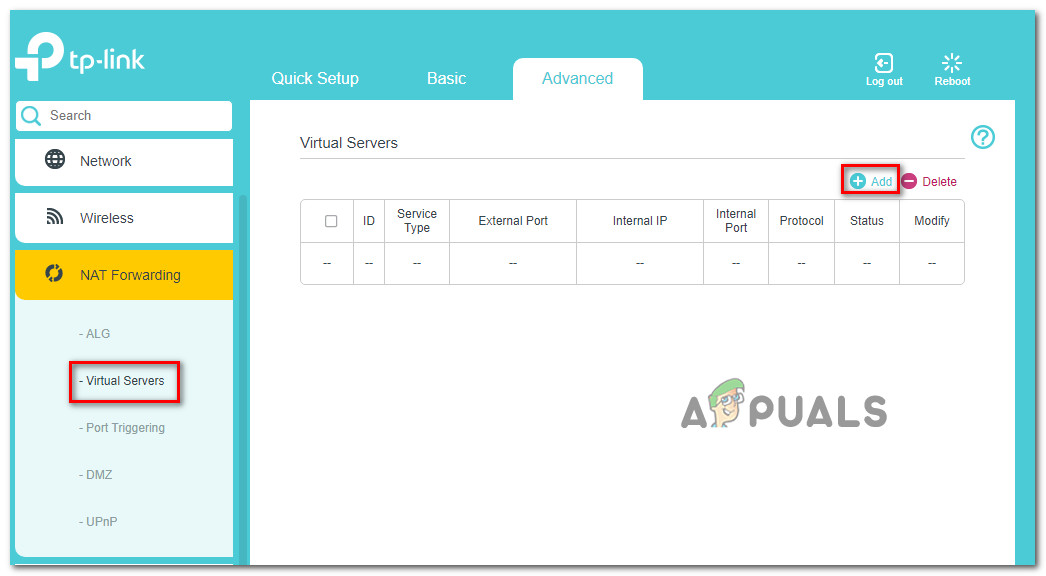
Forwarding the ports manually - Next, you need to open the ports required by Elder ring, depending on which platform you’re using:
Elden Ring - Steam
TCP: 27015, 27036
UDP: 27015, 27031-27036

Elden Ring - Playstation 4
TCP: 3478-3480
UDP: 3074, 3478-3479

Elden Ring - Xbox One
TCP: 3074
UDP: 88, 500, 3074, 3544, 4500

Elden Ring - Playstation 5
TCP: 3478-3480
UDP: 3074, 3478-3479

Elden Ring - Xbox Series X
TCP: 3074
UDP: 88, 500, 3074, 3544, 4500
- Once the required ports have been opened, restart both your router and your console or PC.
- After your system boots back up, launch Elden Ring once again and see if the problem is now fixed.
If you’re still experiencing this issue despite the fact that you ensured that the required ports are forwarded, move down to the next method below.
Clean install / Repair install
If you tried every potential fix above and you’re still encountering network issues while playing Elder Ring, there’s a very big chance that the problem is occurring due to some kind of system file corruption.
In case you’re dealing with some kind of system file corruption that is affecting a dependency by the game, the next logical step is to reset every Windows component with a procedure like a clean install or install repair (in-place repair).
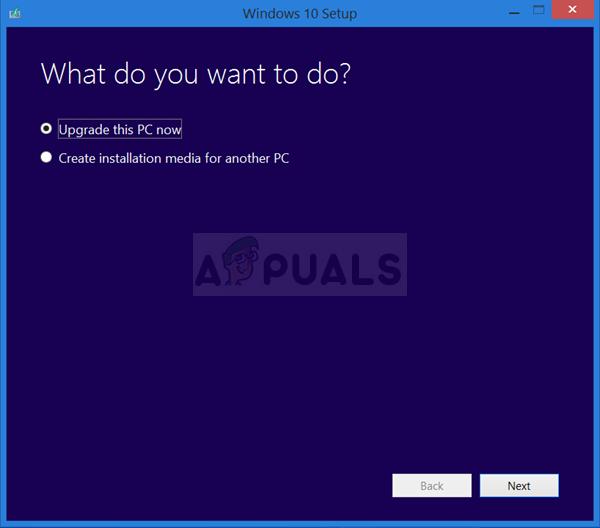
The easy route is to go for a clean install. If you go this route, expect to lose all your personal data present on your OS driver.
Note: Going with this procedure will NOT require you to use compatible installation media.
On the other hand, if you want to go for a focused approach that will leave your personal files stored on your OS drive untouched, you’ll need compatible installation media to initiate a repair install (in-place repair procedure).
Note: The main advantage of this method is that you’ll be able to refresh every potentially corrupted component without losing data from your apps, games, documents, and personal media that is currently stored on your OS drive.


