Fix: DXGI_ERROR_DEVICE_HUNG in The Last of Us Part II Remastered
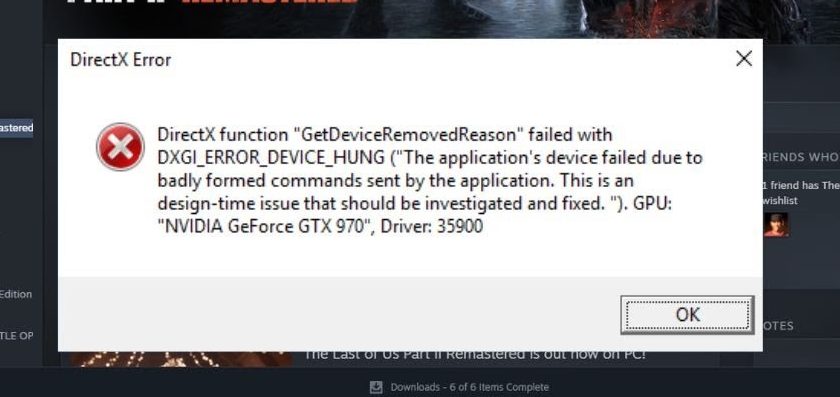
The error “DXGI_ERROR_DEVICE_HUNG” in The Last of Us Part II Remastered typically indicates a system-level graphics failure. This occurs when the GPU becomes unresponsive due to an overloaded graphics pipeline, unstable drivers, or hardware-related instability. Common causes include excessive GPU or CPU workload, corrupted drivers, or misconfigured performance settings.
Additionally, advanced rendering features like Frame Generation and third-party upscaling technologies (e.g., DLSS mods or reshade injectors) have been known to trigger crashes under specific conditions.
Now that we’ve identified the likely causes, let’s move on to the most effective solutions to resolve this error.
Before You Begin:
- Make sure Windows is up to date (Settings > Windows Update).
- Close all background applications (Overlays, MSI Afterburner, Discord, OBS).
- Ensure the game is installed on an SSD.
- Confirm your GPU temperatures stay below 85°C under load (use HWiNFO or MSI Afterburner).
Also, undo any GPU or VRAM overclocking and disable undervolting if applied. Overclocked or undervolted GPUs may pass benchmarks but still crash in specific games like The Last of Us Part II Remastered, especially during shader compilation or heavy scene transitions. Restoring default clock and voltage settings ensures maximum stability during gameplay.
1. Disable NVIDIA Reflex
NVIDIA Reflex is designed to reduce system latency by minimizing the delay between input and on-screen response. While it benefits competitive gameplay, in some cases, Reflex may interfere with frame delivery if your GPU is under heavy load or your drivers are unstable. This can cause crashes or stutters during gameplay.
Disabling this feature can reduce the processing pressure on the GPU, allowing frames to render more consistently and improving overall system stability. This can resolve the “DXGI_ERROR_DEVICE_HUNG” error in some setups.
- Start the game and access the Settings/Options menu.
- Go to the Display settings tab and locate:
- NVIDIA Reflex Low Latency
- Change the setting to:
- Set NVIDIA Reflex Low Latency to Off (instead of “On” or “On + Boost“).
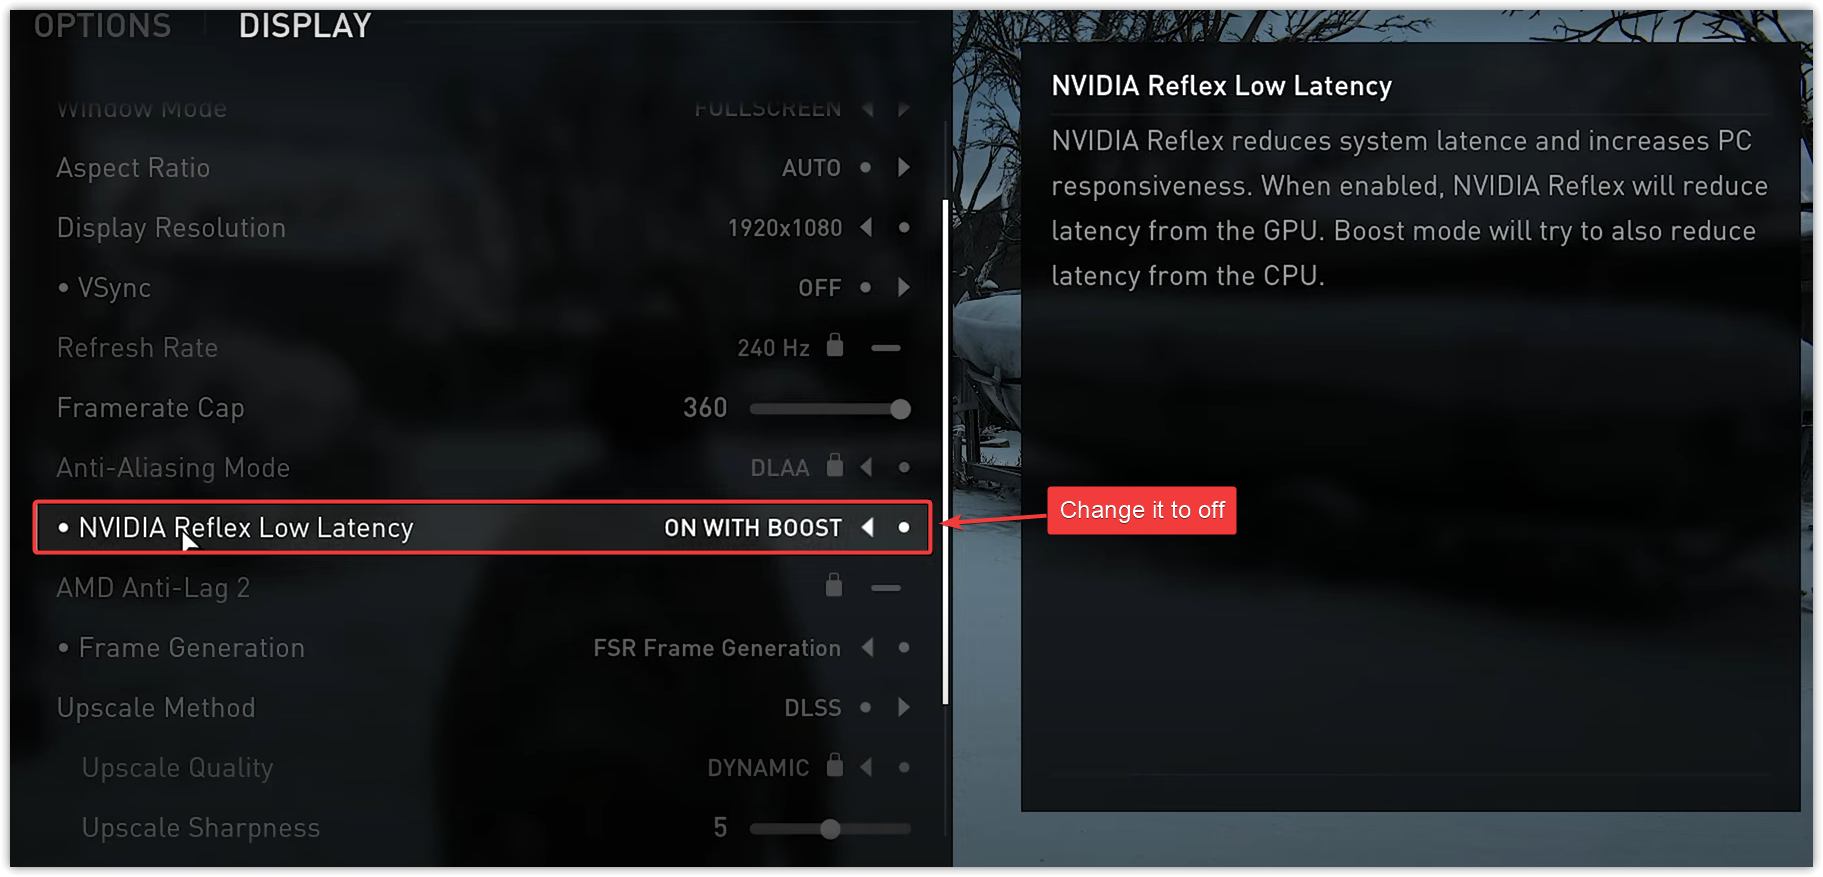
- Select Apply Changes or Save, then fully restart the game for settings to take effect.
2. Increase Virtual Memory
Virtual memory is a reserved portion of your hard drive or SSD that Windows uses as an extension of your physical RAM. If your system exceeds commit limits or runs out of available page file space during gameplay, it can lead to instability and trigger errors like “DXGI_ERROR_DEVICE_HUNG”—especially in demanding titles.
By increasing virtual memory, you give Windows more flexibility to handle memory spikes, ensuring that the game has a fallback when physical RAM is fully utilized. This can help reduce the chances of crashes caused by memory-related limitations.
- Press Windows + S, type “Advanced system settings”, and press Enter.

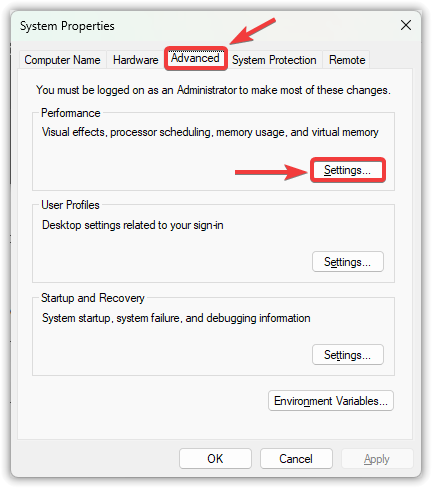
- In the System Properties window:
- Select the Advanced tab
- Click Settings under Performance
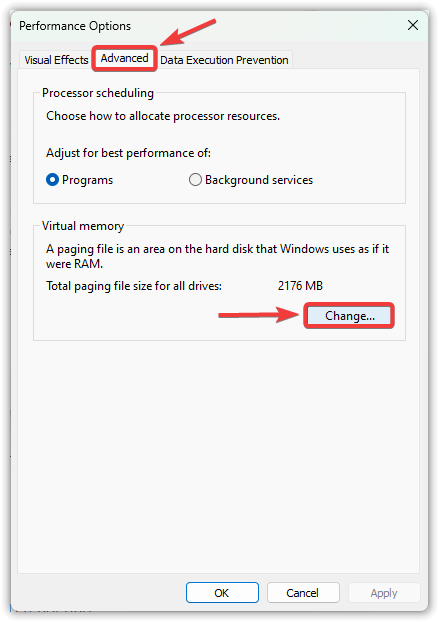
- In Performance Options:
- Go to the Advanced tab
- Click Change under Virtual Memory
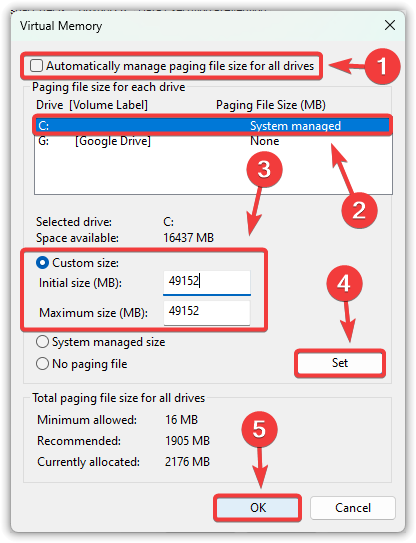
- Uncheck “Automatically manage paging file size for all drives”.
- Select your system drive (C:) and choose Custom size.
- If you want to use custom settings, enter these values (adjusted for your system RAM):
Initial size: 1.5 × your RAM in MB (e.g., 16GB → 24576 MB)
Maximum size: 3 × your RAM in MB (e.g., 16GB → 49152 MB)
Note: 1 GB = 1024 MB. If unsure, leave this setting on “System managed size.”Not sure how much RAM you have? Press Windows + R, type dxdiag, and check under the System tab.
- Click Set, then OK to confirm.
Important: After entering both values, click Set or your changes will not apply.
- Restart your PC for changes to take effect, then test your application.
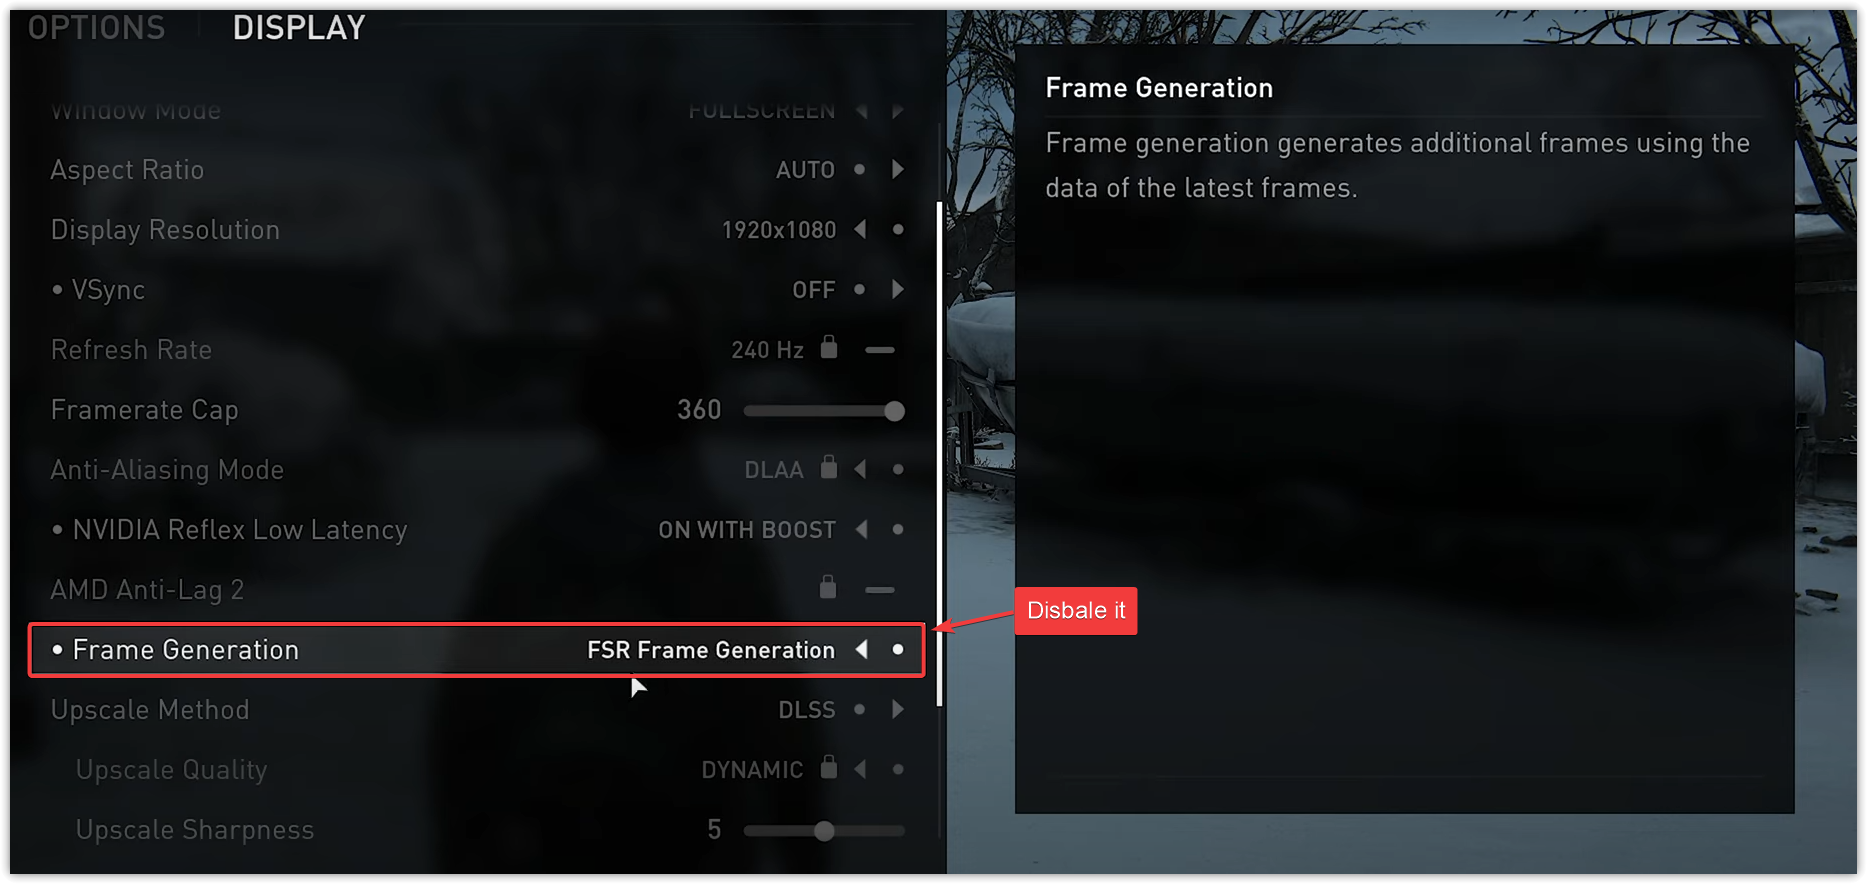
3. Disable Frame Generation and Upscaling Features
Frame Generation, and upscaling serve different purposes, but each adds GPU-side processing that can destabilize frame timing on unstable systems. Frame Generation inserts AI-generated frames, while upscaling reconstructs lower-resolution frames to improve image quality. Disabling these features reduces scheduling complexity and helps prevent DXGI_ERROR_DEVICE_HUNG crashes.
- Locate and disable the Frame Generation option (may appear as “DLSS Frame Gen” or “FSR 3 Frame Gen,” depending on your GPU).
- Find the Upscale Method setting (DLSS/FSR/XeSS) and set it to Off or Native Resolution.
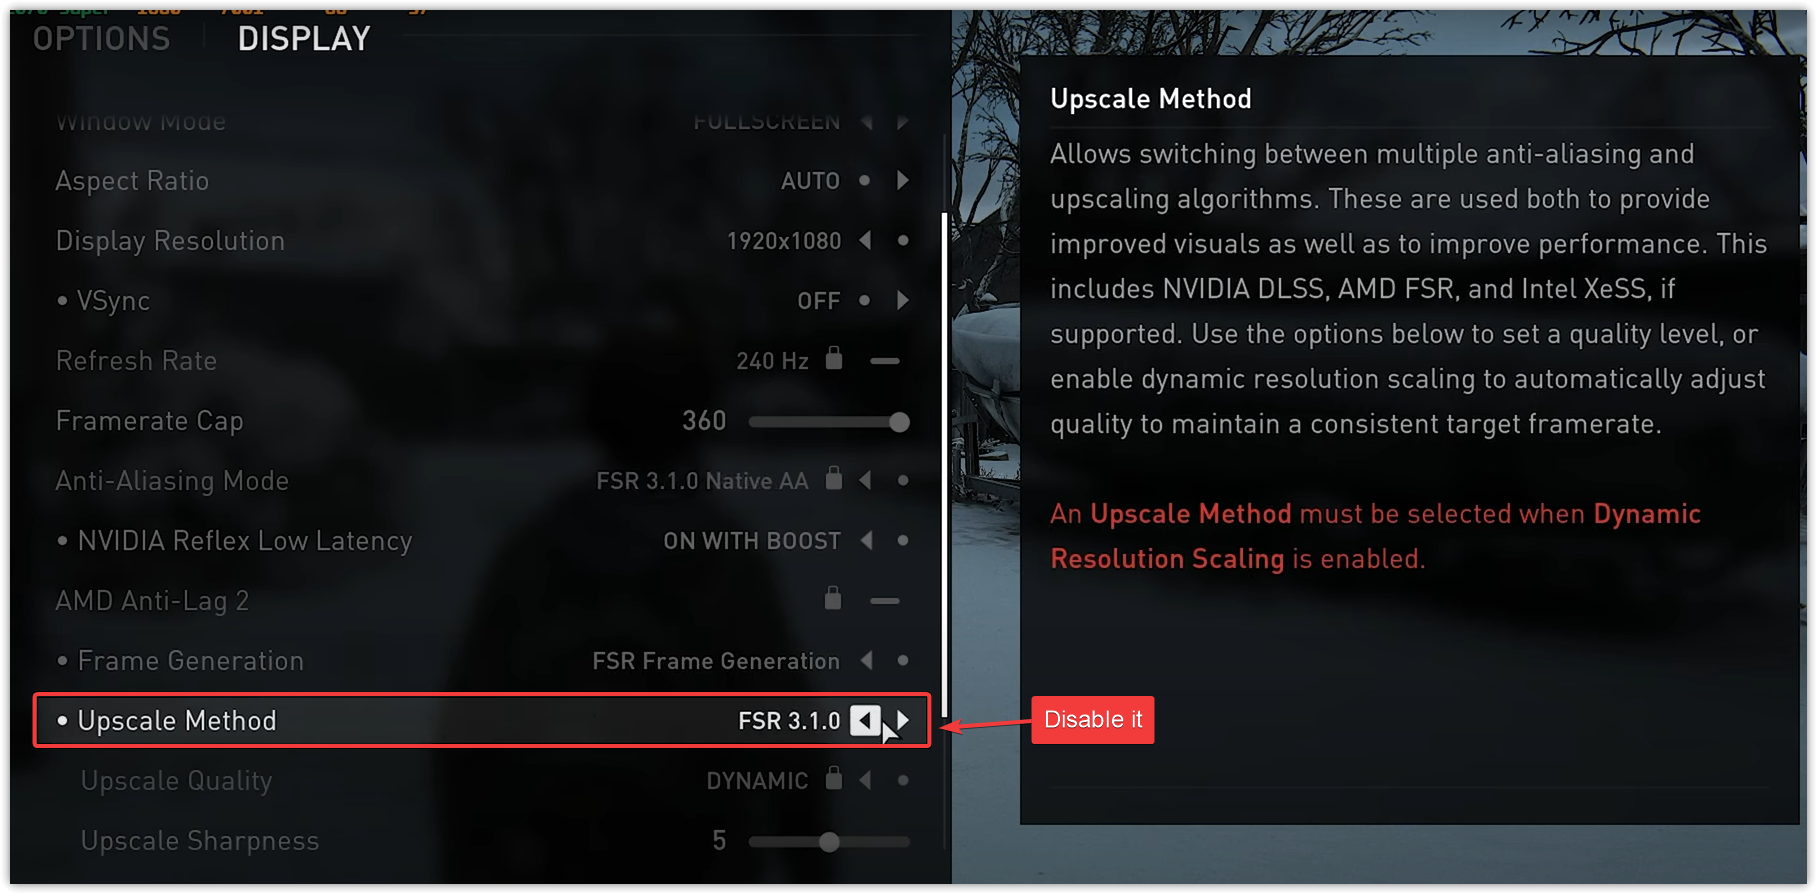
- Select Apply Changes or Confirm, then fully exit and relaunch the game to ensure changes take effect—not just return to the main menu.
If the issue persists, try lowering Ray Tracing and Shader Quality, as both can spike GPU usage and increase crash risk in demanding scenes.
4. Clean Install of Graphics Drivers
Outdated, unstable, or improperly installed drivers are one of the most common causes of crashes and errors like “DXGI_ERROR_DEVICE_HUNG”. Performing a clean install removes all existing driver components, including those that may be conflicting or unstable, and replaces them with a fresh, stable version.
While you can uninstall drivers using Device Manager, it isn’t optimal because Device Manager only removes parts of the driver, often leaving behind files or registry entries that can still cause conflicts.
For a complete removal, it’s recommended to use DDU (Display Driver Uninstaller)—a specialized tool that wipes out all traces of your current GPU driver, allowing you to perform a truly clean install.
- Download Display Driver Uninstaller (DDU) from the official source: wagnardsoft.com.
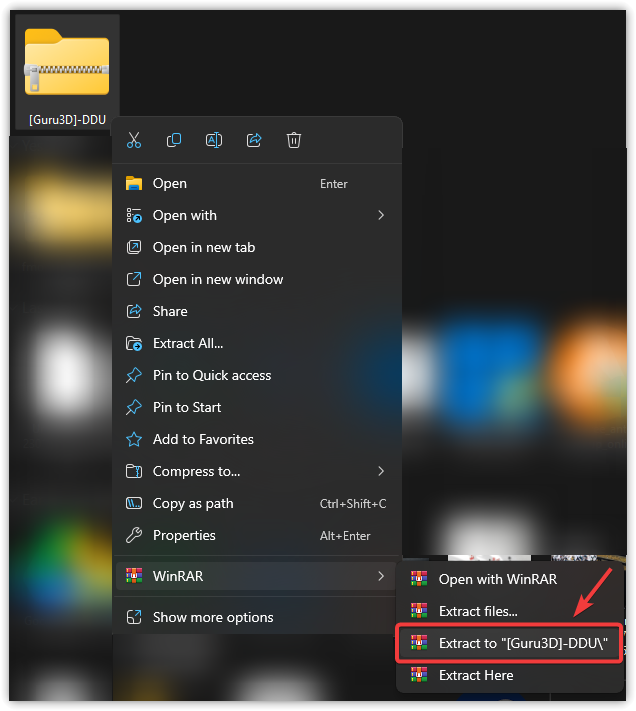
- Extract the downloaded ZIP file and run DDU.exe as administrator.
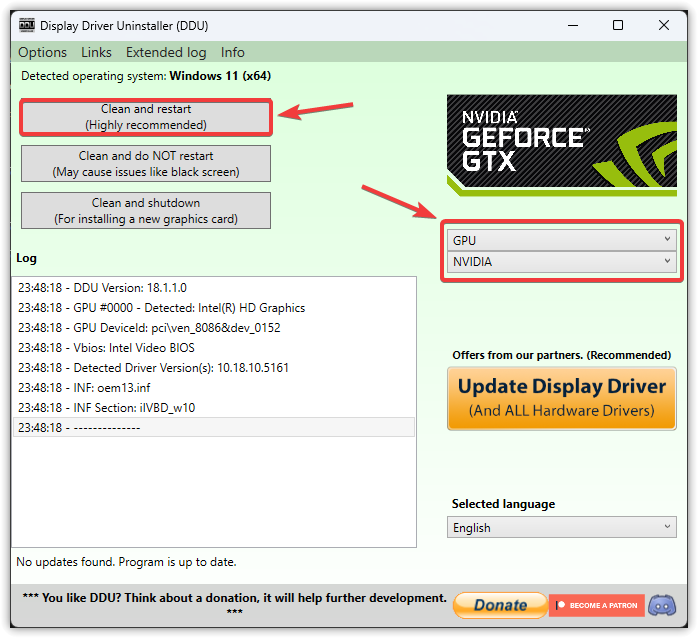
- In DDU, select your GPU manufacturer from the dropdown:
- NVIDIA
- AMD
- Intel
- Click Clean and restart to fully remove current drivers (PC will reboot automatically).
After your PC restarts, make sure to disconnect from the internet temporarily before installing fresh drivers. This prevents Windows Update from installing outdated drivers automatically.
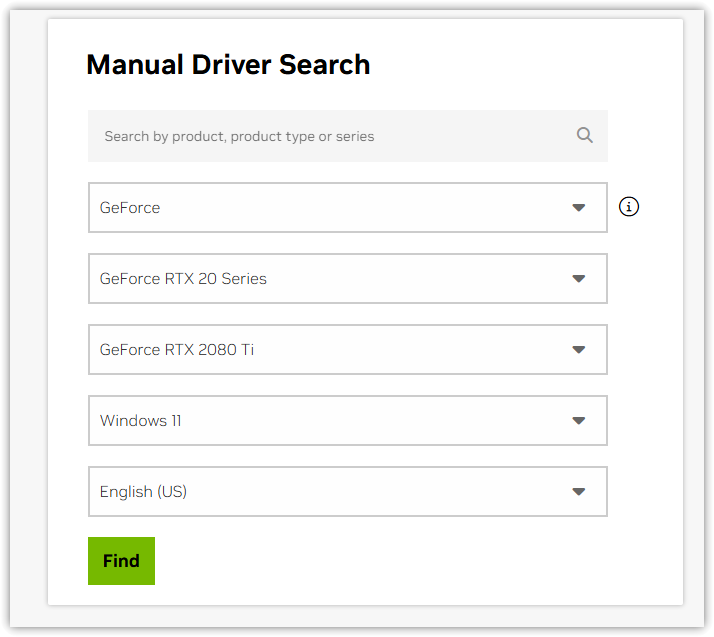
- After restarting, download fresh drivers from:
Tip: If you’re on a laptop with switchable graphics (Optimus or AMD Switchable Graphics), download the driver package from your laptop manufacturer’s site, not the GPU vendor.
- Install the downloaded drivers using express/standard settings, then restart your PC.
5. Disable Intel Turbo Boost (Advanced Users Only)
Intel Turbo Boost temporarily increases CPU clock speeds to enhance performance. On systems with poor cooling—especially laptops—this can lead to power or thermal fluctuations that may trigger GPU instability.
While not a direct cause of DXGI_ERROR_DEVICE_HUNG, disabling Turbo Boost has reduced crash frequency for some users. It helps maintain stable system behavior during heavy GPU workloads.
Also, high CPU usage from background apps (e.g., browsers, recording tools, antivirus) can indirectly cause driver timeouts. Close these before launching the game.
Note: Disabling Turbo Boost may significantly reduce CPU performance in some workloads, but it will retain stability.
- Restart your computer and immediately begin pressing the BIOS key (repeatedly) as it boots.
- The correct BIOS key varies by manufacturer and model:
- F2 – Dell, Acer, some ASUS and Lenovo systems
- F12 – Boot menu on many Lenovo and HP models
- Del / Esc – Common for MSI, Gigabyte, and some ASUS motherboardsTip: Your system’s splash screen will show the correct key, or consult your motherboard/laptop manual.
- Navigate to the Advanced, Tweaker, or Overclocking tab (depending on your BIOS) and locate the CPU Configuration or Performance section.
⚠️ If you’re unfamiliar with BIOS settings, take photos of every tab before making changes. Only modify Turbo Boost settings—do not adjust others unless necessary.

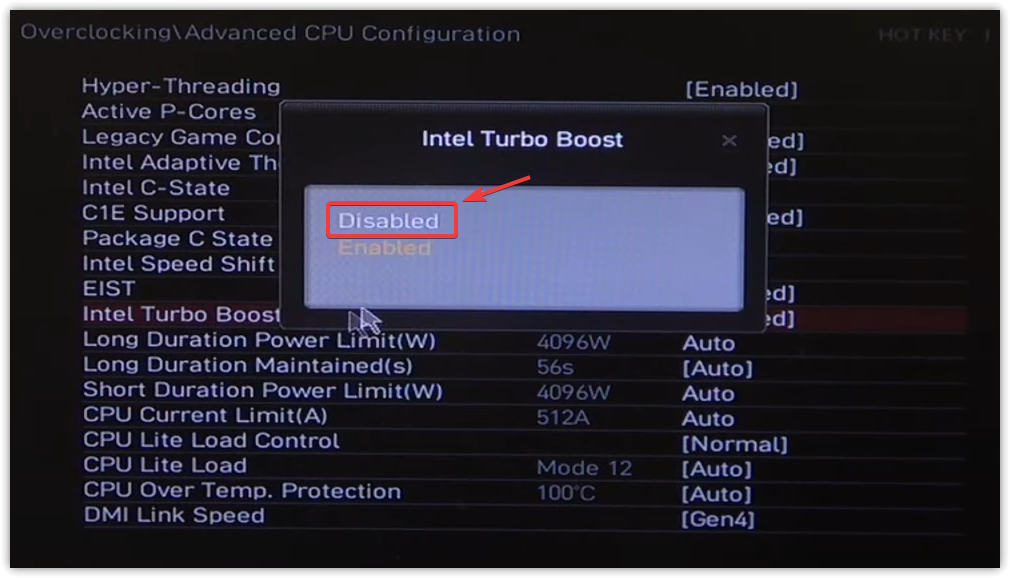
- Locate Intel Turbo Boost Technology and set it to Disabled.
If this setting is missing, your BIOS may label it as “Intel Adaptive Boost” or “Enhanced Turbo,” or it may not be available at all depending on your CPU.
- Press F10 to save changes and exit (or follow on-screen save prompts).
6. Increase TDR Delay (Advanced Users Only)
The “DXGI_ERROR_DEVICE_HUNG” error is caused by a GPU timeout—when Windows thinks your graphics card has stopped responding and forcefully resets it.
By default, this timeout period is set to just 2 seconds. Increasing this value gives the GPU more time to recover during intensive workloads before Windows intervenes, which can prevent unnecessary crashes.
- Press Windows + R, type regedit, and press Enter.
- Navigate to this path:
HKEY_LOCAL_MACHINE\SYSTEM\CurrentControlSet\Control\GraphicsDrivers
- Right-click on the right side, choose New > DWORD (32-bit) Value, and name it:
TdrDelay
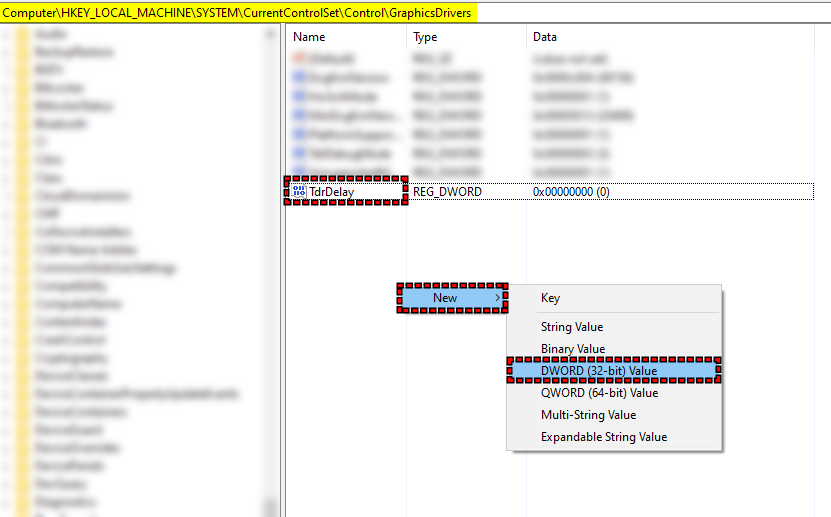
- Double-click TdrDelay, set the base to Decimal, and enter:
10

- Click OK, close the Registry Editor, and restart your PC to apply the changes.
This tweak tells Windows to wait 10 seconds (instead of the default 2) before declaring that the GPU has hung. It doesn’t fix driver-level issues but can prevent premature resets during heavy GPU usage.