How to Use Do Not Disturb on iPhone [All iOS Versions]
 Reviewed by Huzaifa Haroon
Our iPhones keep us constantly updated with phone calls, text messages, social media alerts, and many other notifications. Even when we mute our phones, the screen still lights up with new alerts, making it difficult to disconnect from the online world.

To help with this, Apple has created the iPhone’s “Do Not Disturb” feature. This feature turns off all sound notifications and keeps the screen off.
In this guide, we’ll explain what Do Not Disturb on the iPhone is, how to turn it on and customize it, and how to turn it off when you no longer need it. This will help you manage your notifications more effectively and enjoy quiet time.
Do Not Disturb on the iPhone is a handy tool that helps you avoid interruptions by silencing calls, alerts, and notifications. This feature is great when you need to concentrate, relax, or do something without your phone interrupting you.
When you turn on Do Not Disturb, your phone won’t make any noise for calls and notifications, and you’ll see a crescent icon at the top to show it’s active. But you can set it up so important calls, like from your favorite contacts or repeated calls, can still get through.
You can also set Do Not Disturb to turn on automatically at certain times, maybe when you’re usually asleep. This way, you can keep your phone from bothering you but stay connected if something important arises. It’s a great way to manage how you use your phone and find peace when needed.
↪ Do Not Disturb is now in Focus
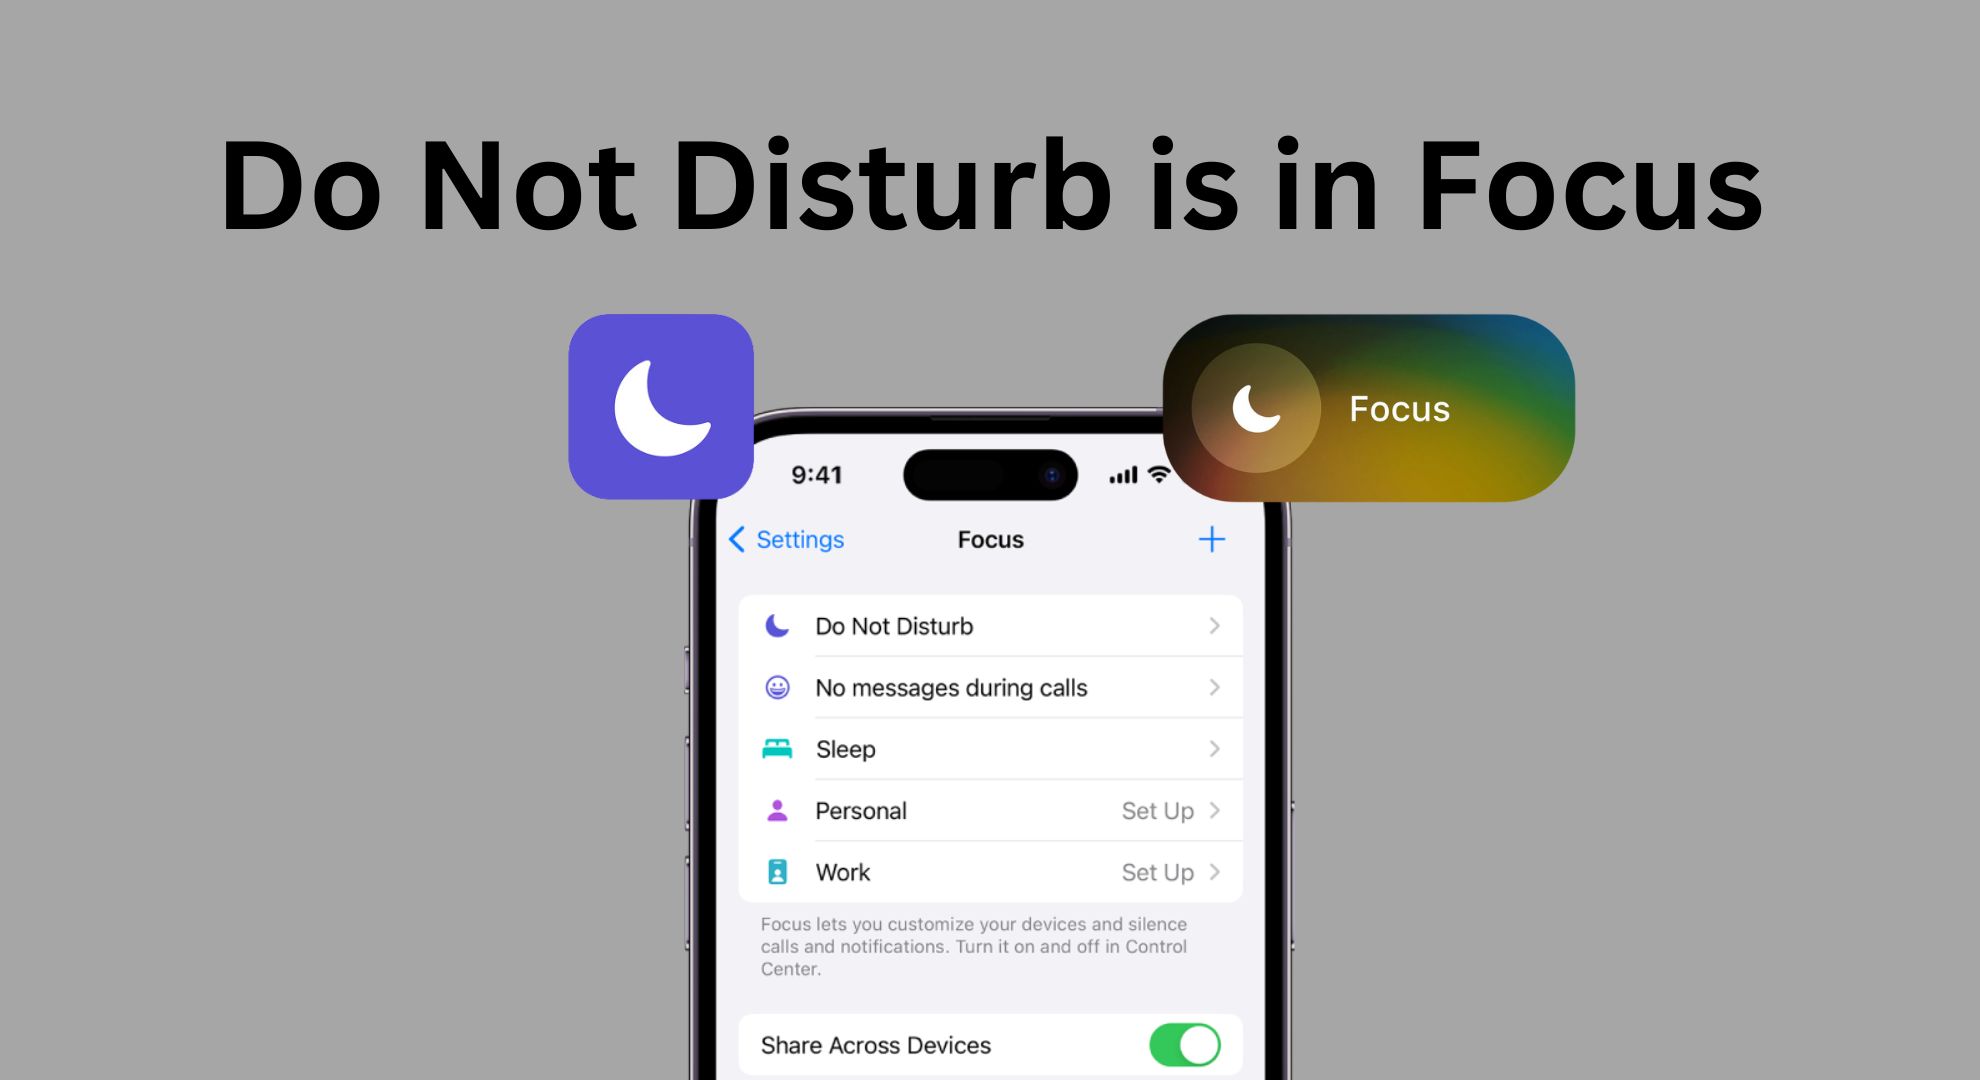
Before iOS 15, the Do Not Disturb feature was a standalone setting. With iOS 15, Apple expanded the concept by introducing Focus, a more customizable feature that includes Do Not Disturb as one of its options.
Focus allows users to set different types of focus modes, such as Personal, Work, Sleep, etc., each with its own set of notification and app allowances, providing more control over what users see and hear from their iPhones during different activities or times of day.
How to Turn on Do Not Disturb mode on an iPhone
Whether using a newer or older model, turning on and customizing this mode is straightforward. Here, we’ll guide you through the simple steps to activate Do Not Disturb mode on different iPhone models and how to customize it to fit your needs and lifestyle.
↪ iOS 15 and later
If you are using an iPhone with iOS 15 or later, you will have to follow slightly different steps due to the introduction of Focus settings, which we discussed above.
- Access the Control Center by swiping downward from the upper-right corner of the Home or Lock screen. For the iPhone with Touch ID, access the Control Center by touching the bottom of any screen and then dragging upward.
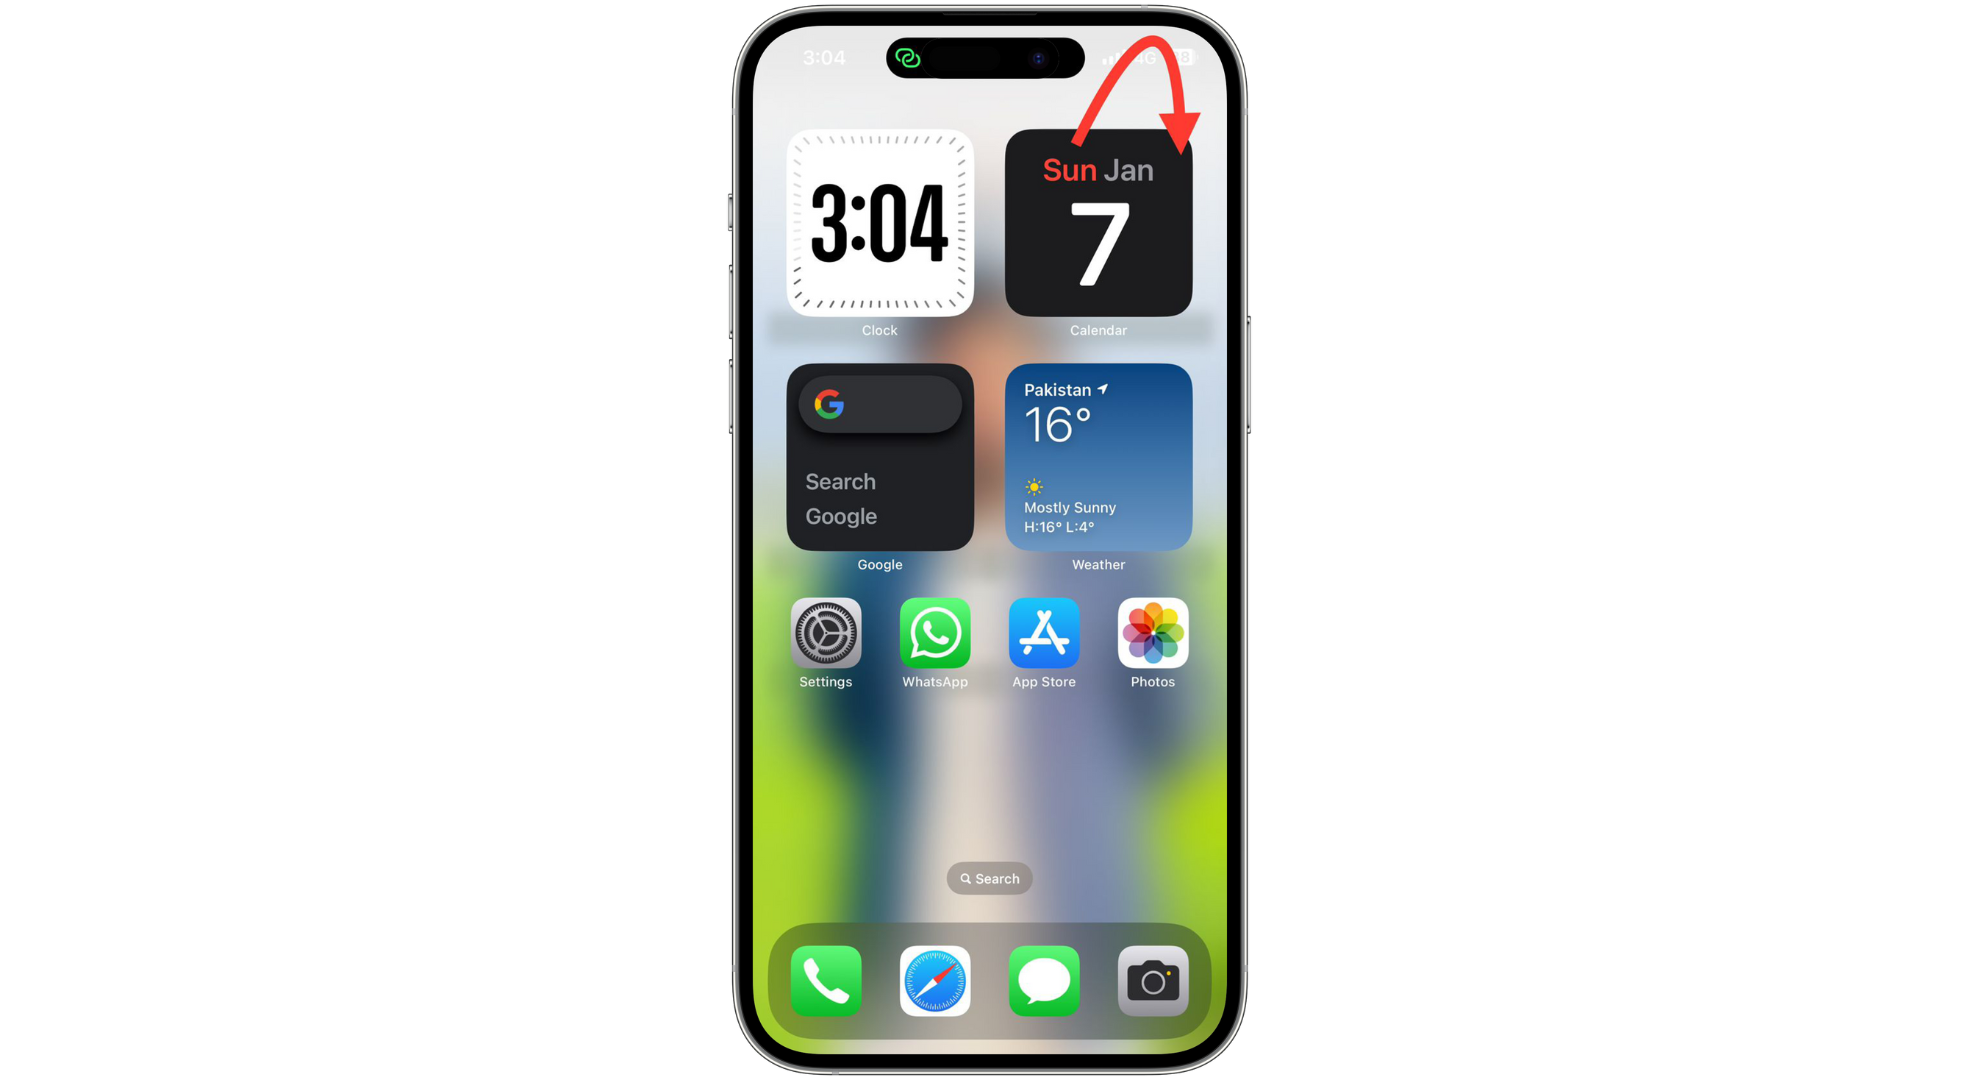
Access the Control Center - Find and tap the “Focus” button. It looks like a crescent icon in a circle enclosed in a rectangle.
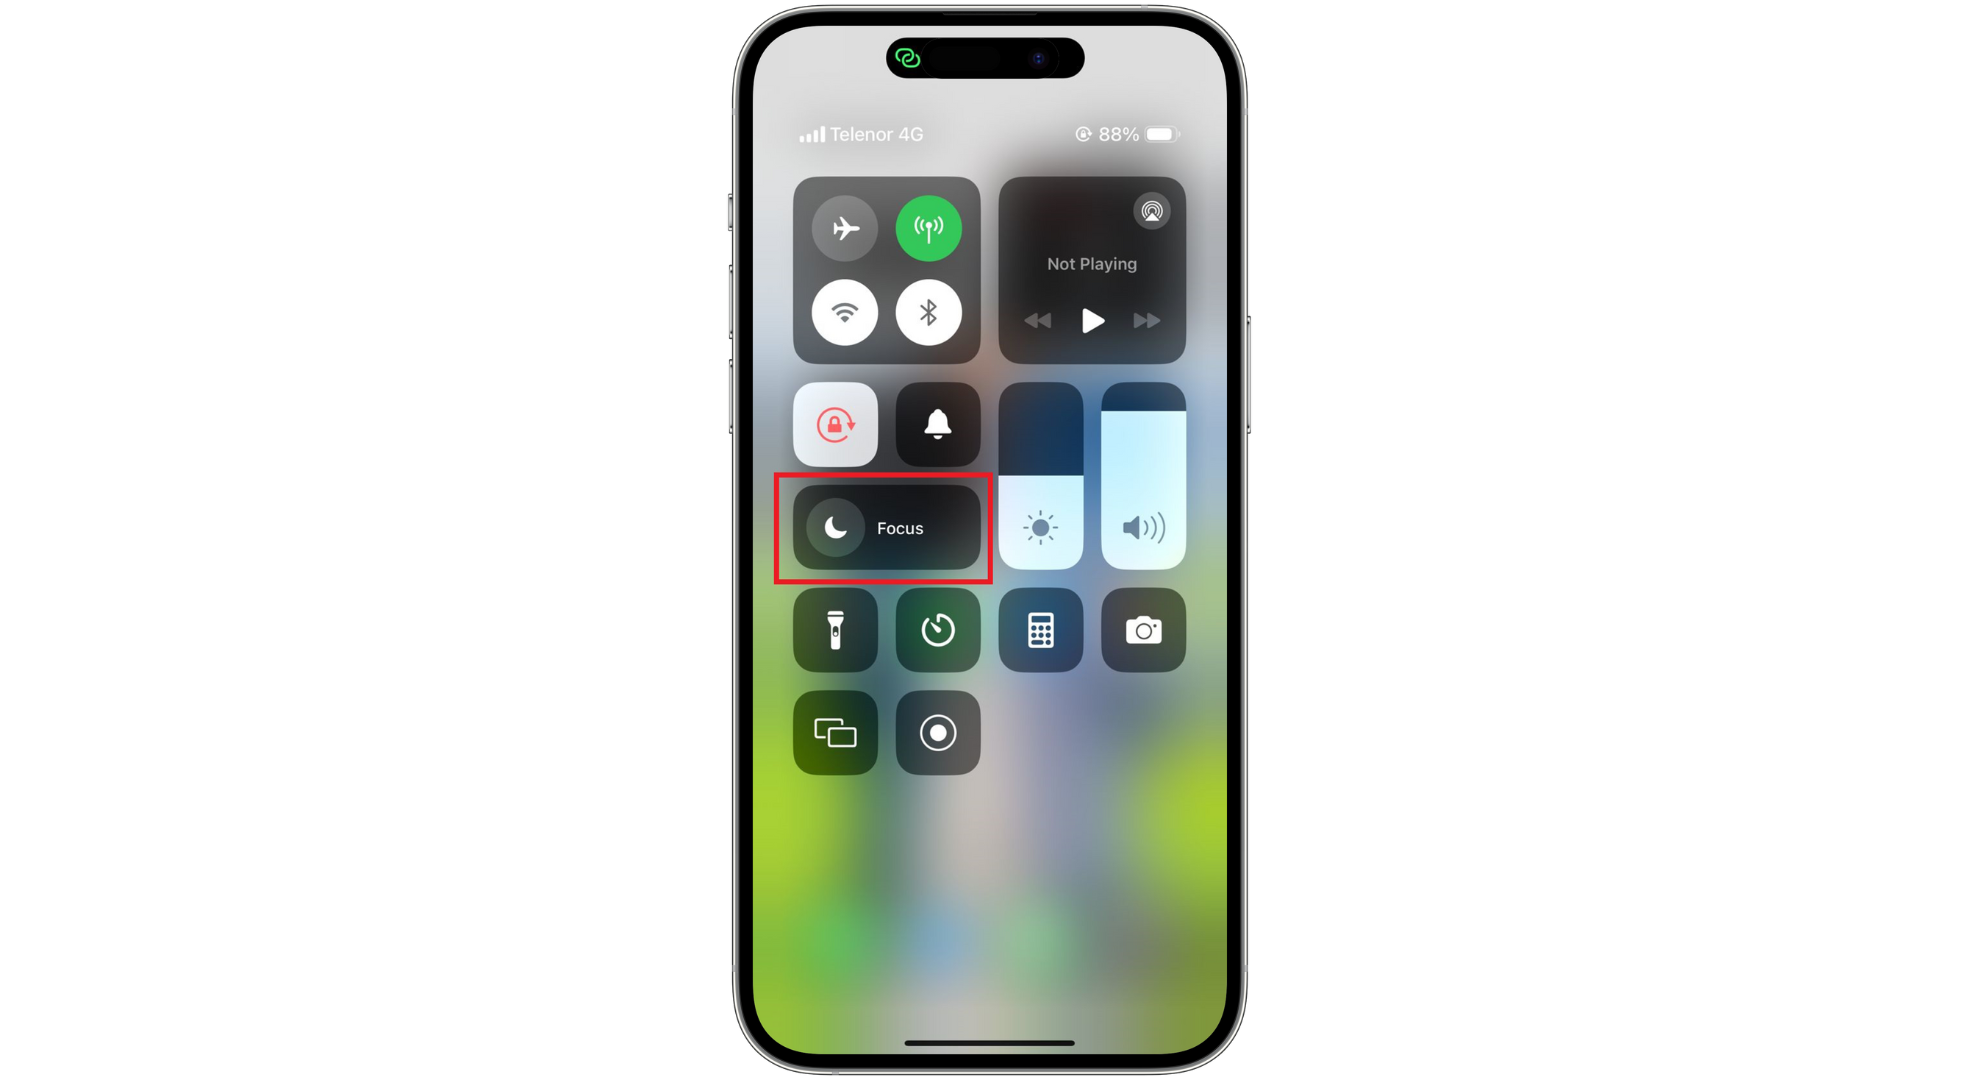
Tap the Focus - Tap “Do Not Disturb” to turn it on. When it’s on, the icon will be highlighted.
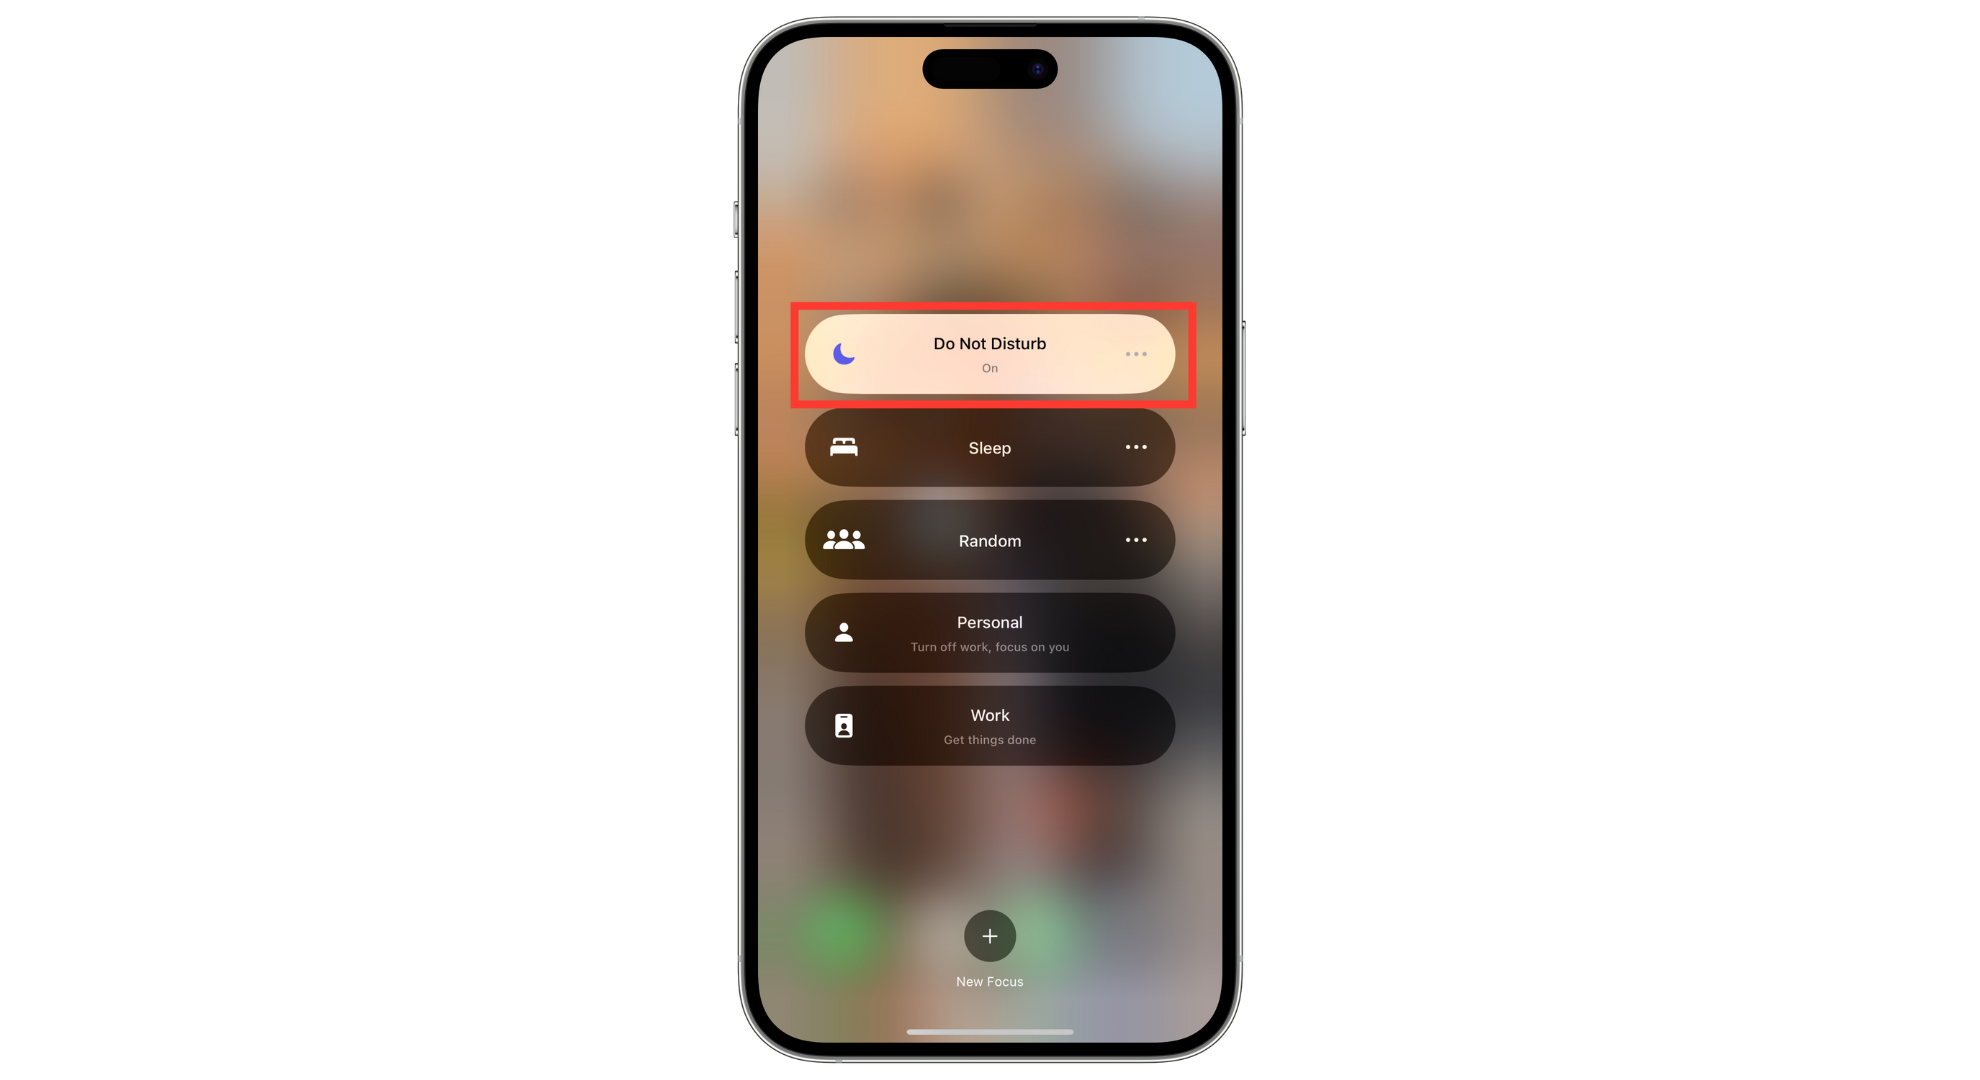
Tap Do Not Disturb
↪ iOS 14.8 or older
On iPhones with iOS 14.8 or older, using Do Not Disturb is simple, with options in both the Control Center and Settings.
1. From Control Center
- Access the control center by swiping down from the top right. If you have an iPhone with Touch ID, you can access Control Center by touching and dragging up from the bottom of your screen.
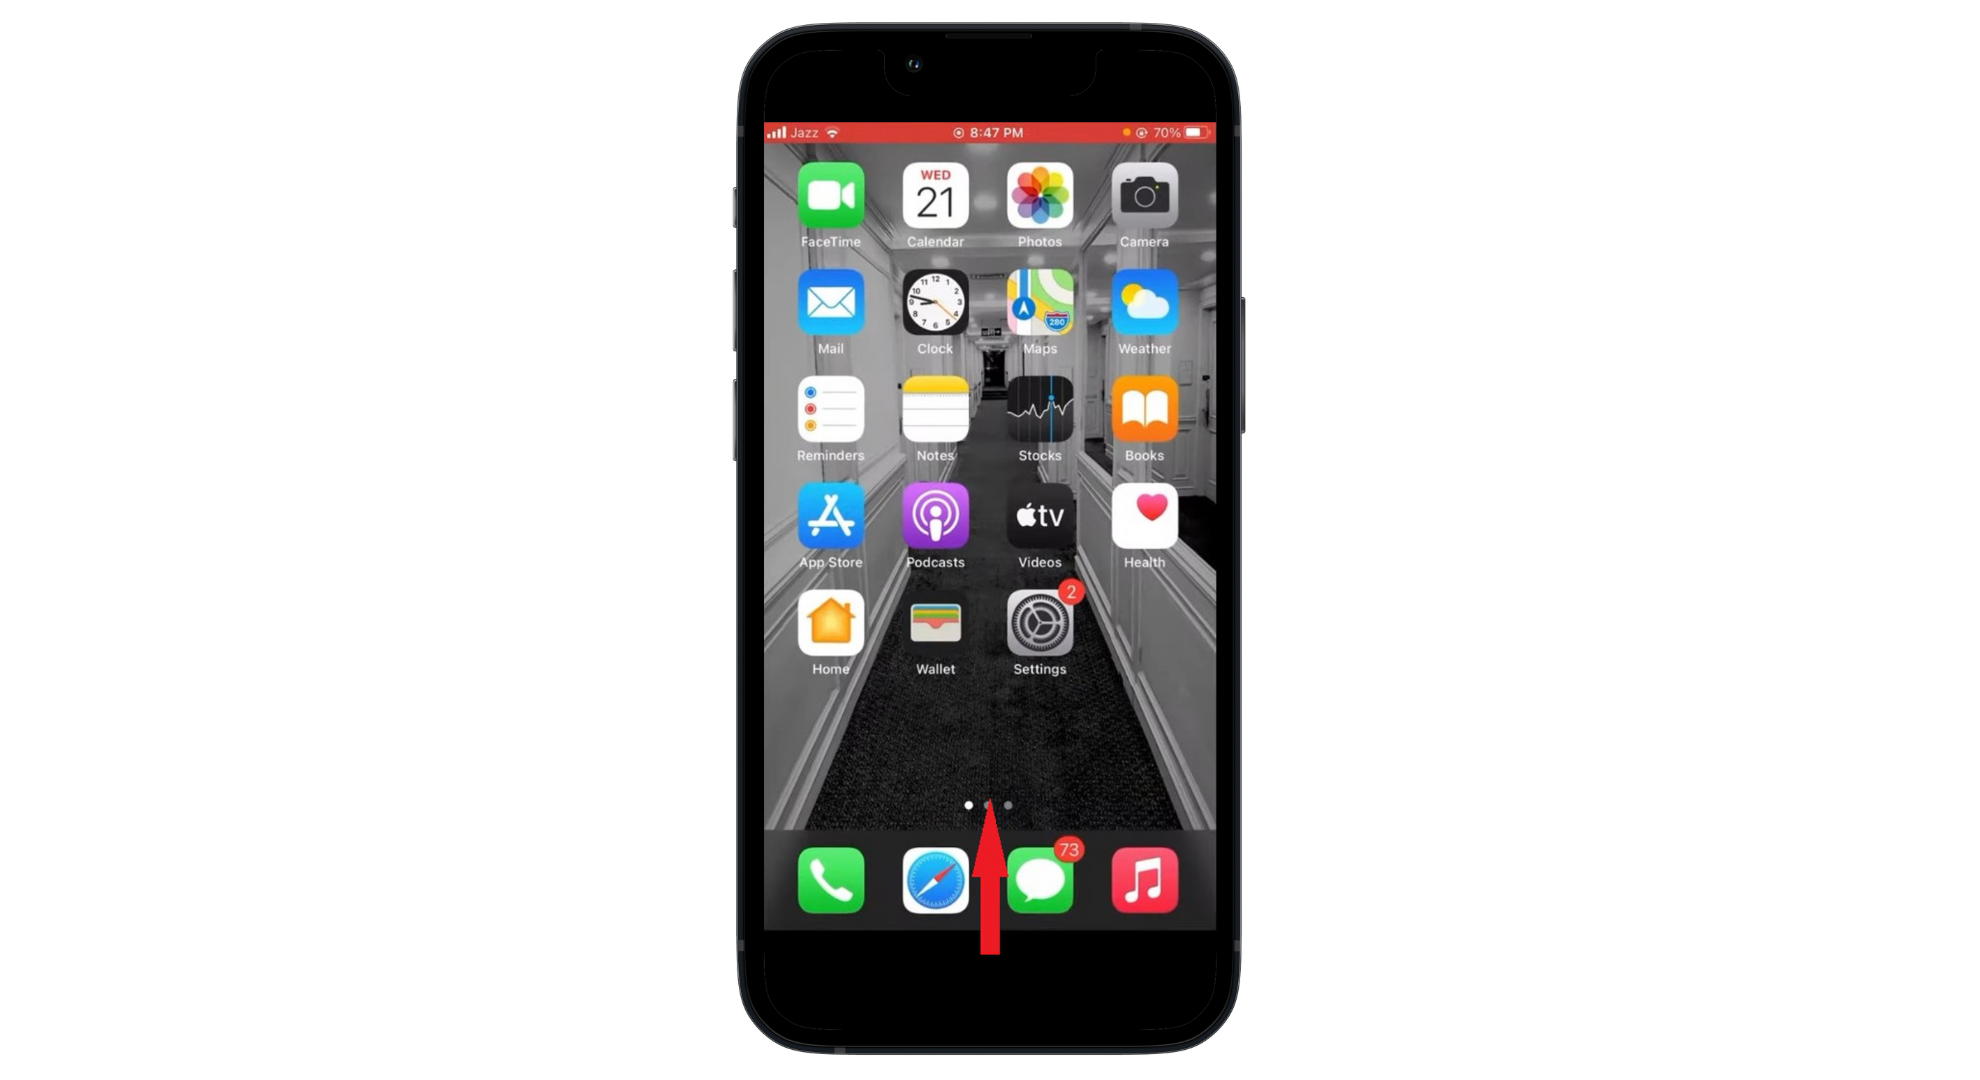
Access Control Center - You will see an option with the crescent icon. Tap on it to enable Do Not Disturb mode.
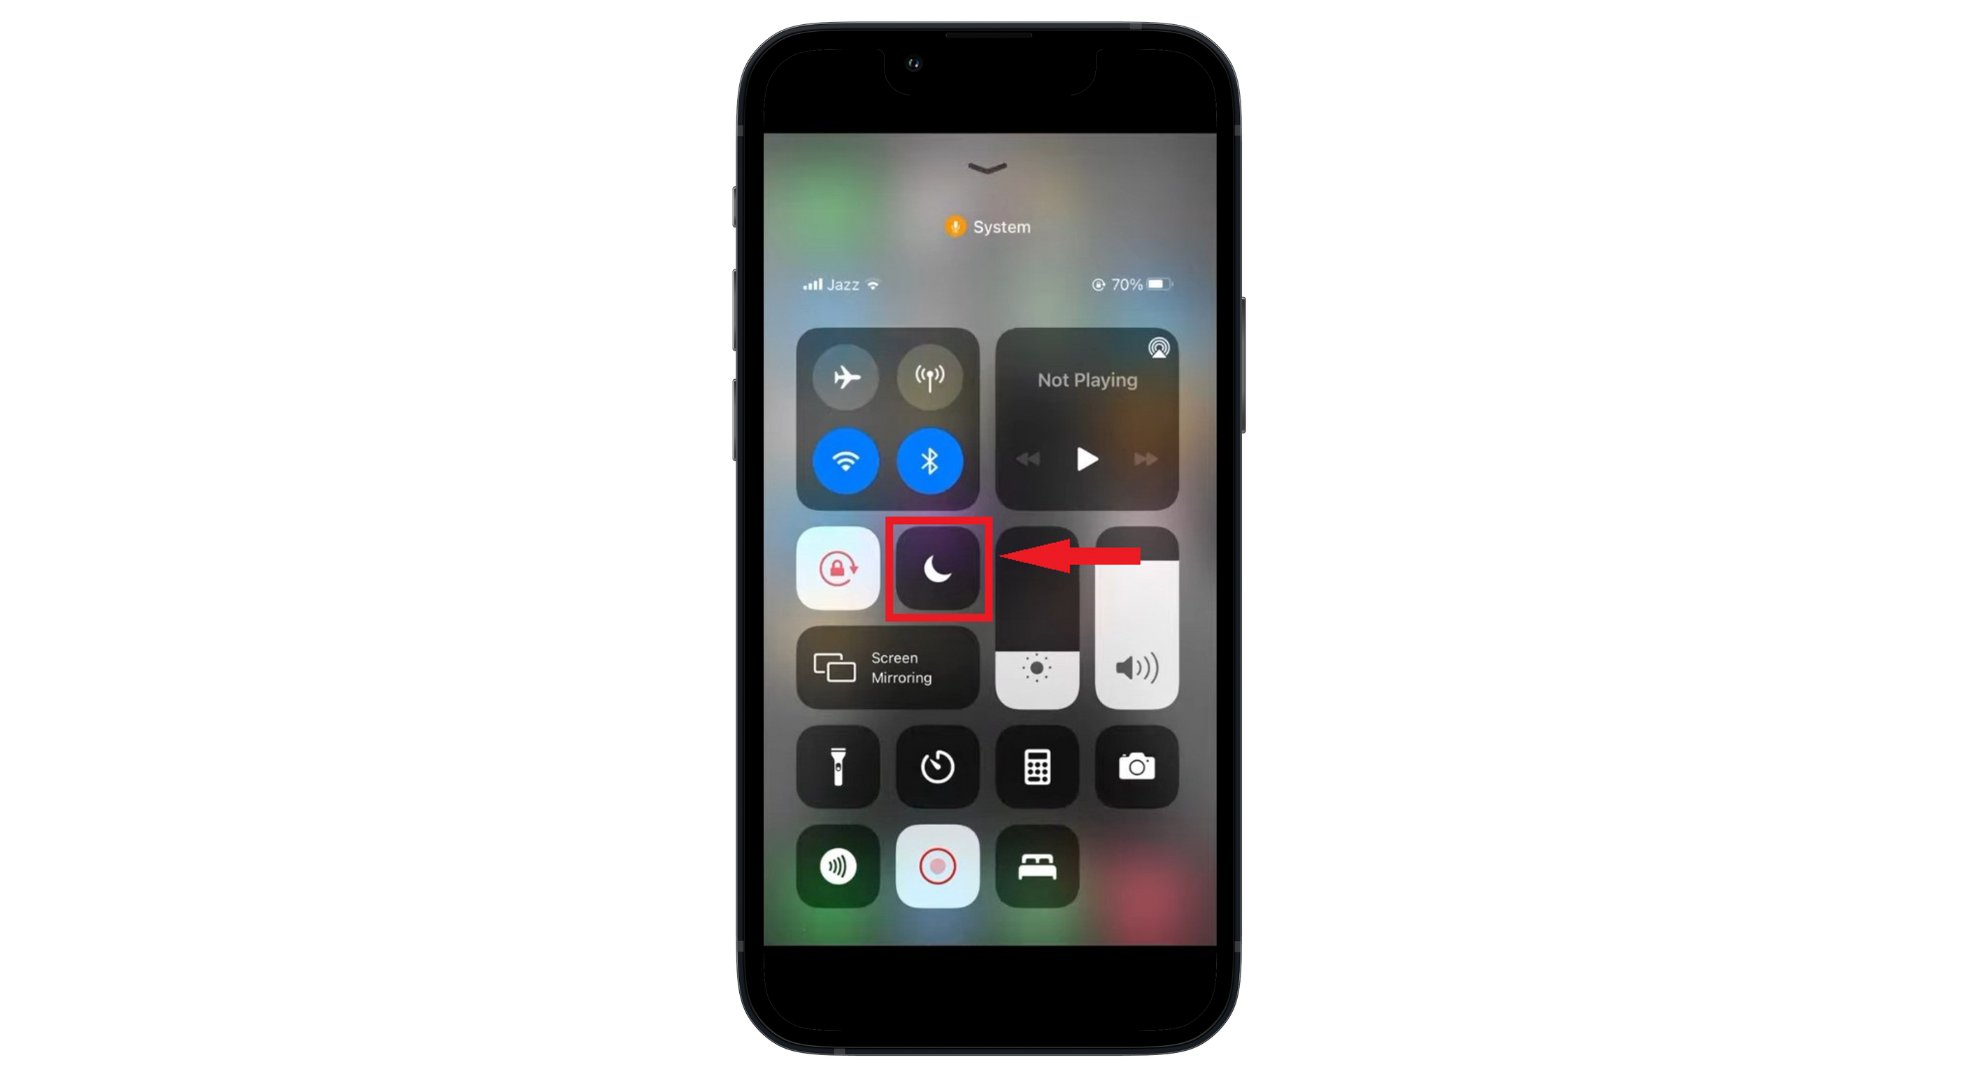
Tap on the Do Not Disturb icon
2. From iPhone’s Settings
- Open the iPhone’s Settings app and tap on Do Not Disturb.
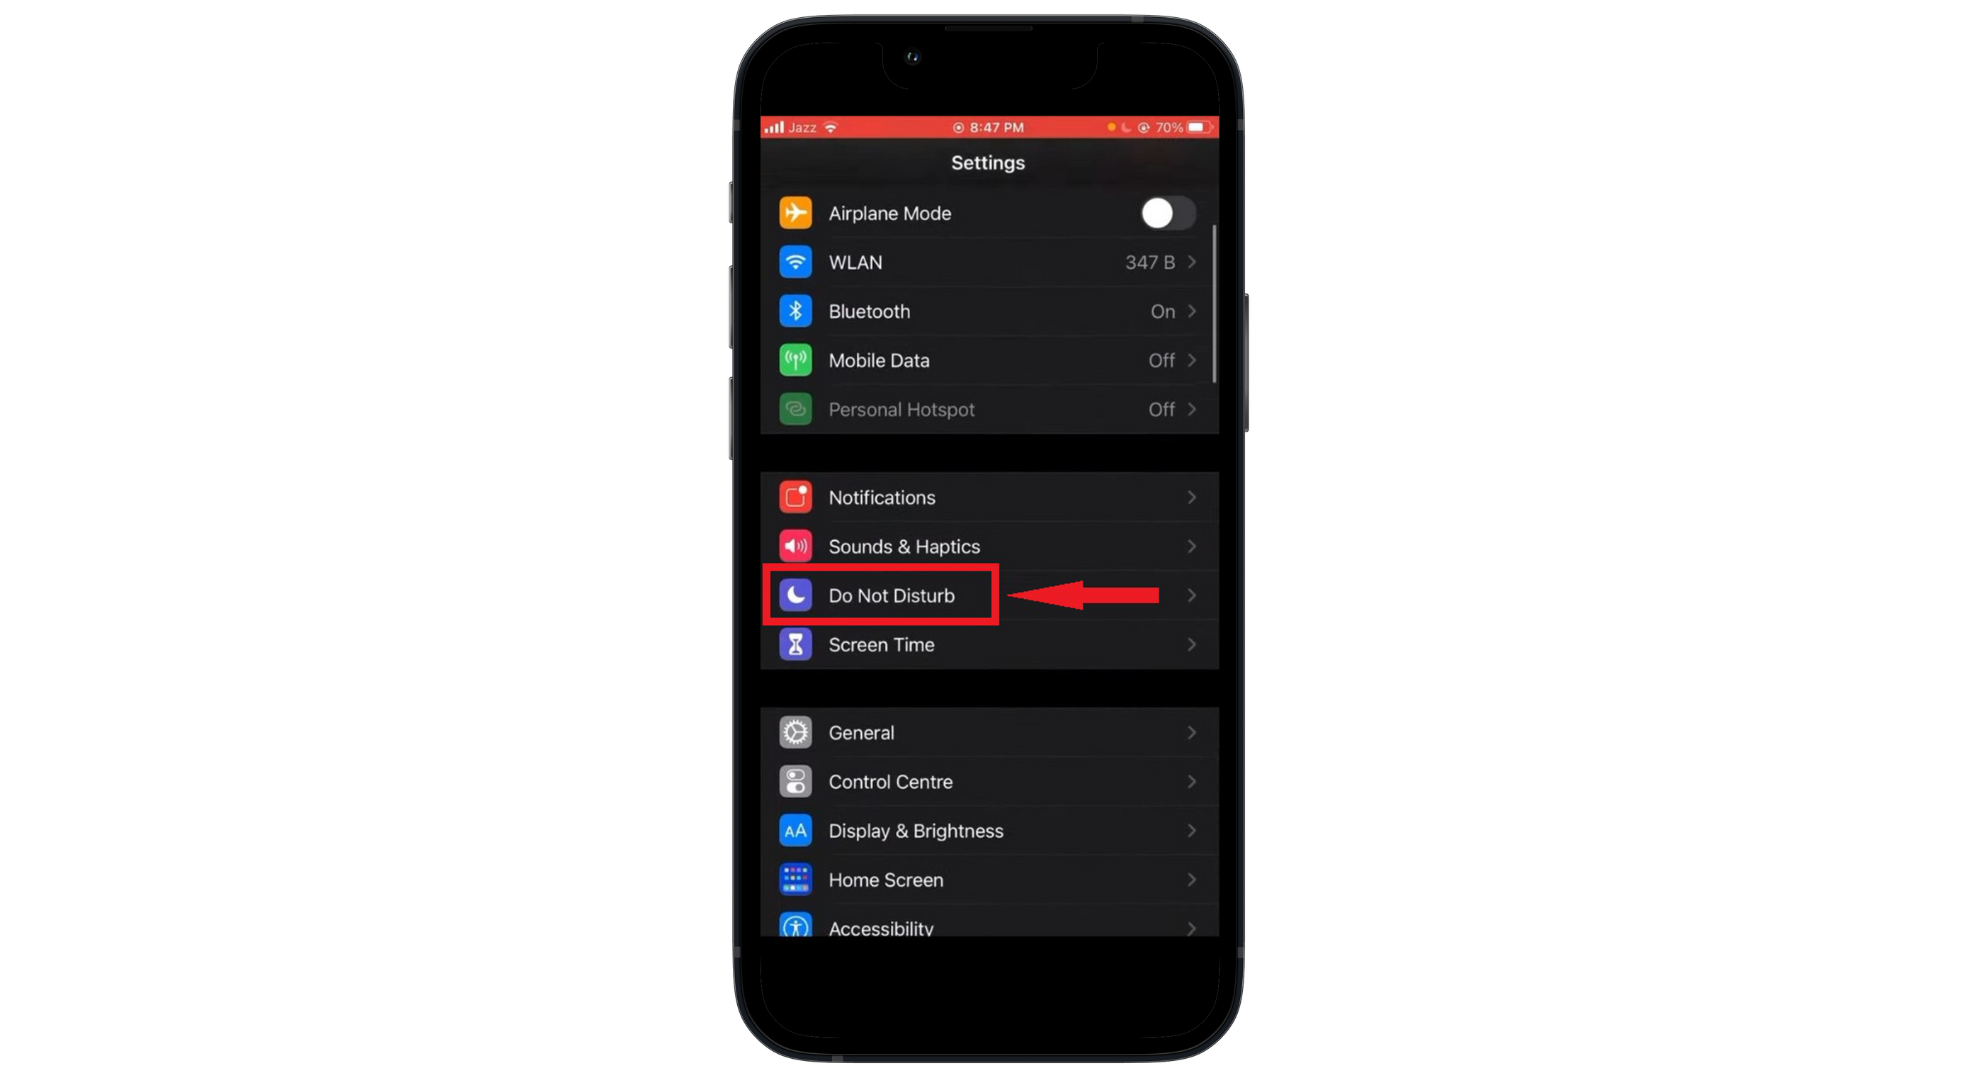
Tap on Do Not Disturb - Tap the Do Not Disturb toggle to turn it on or off.
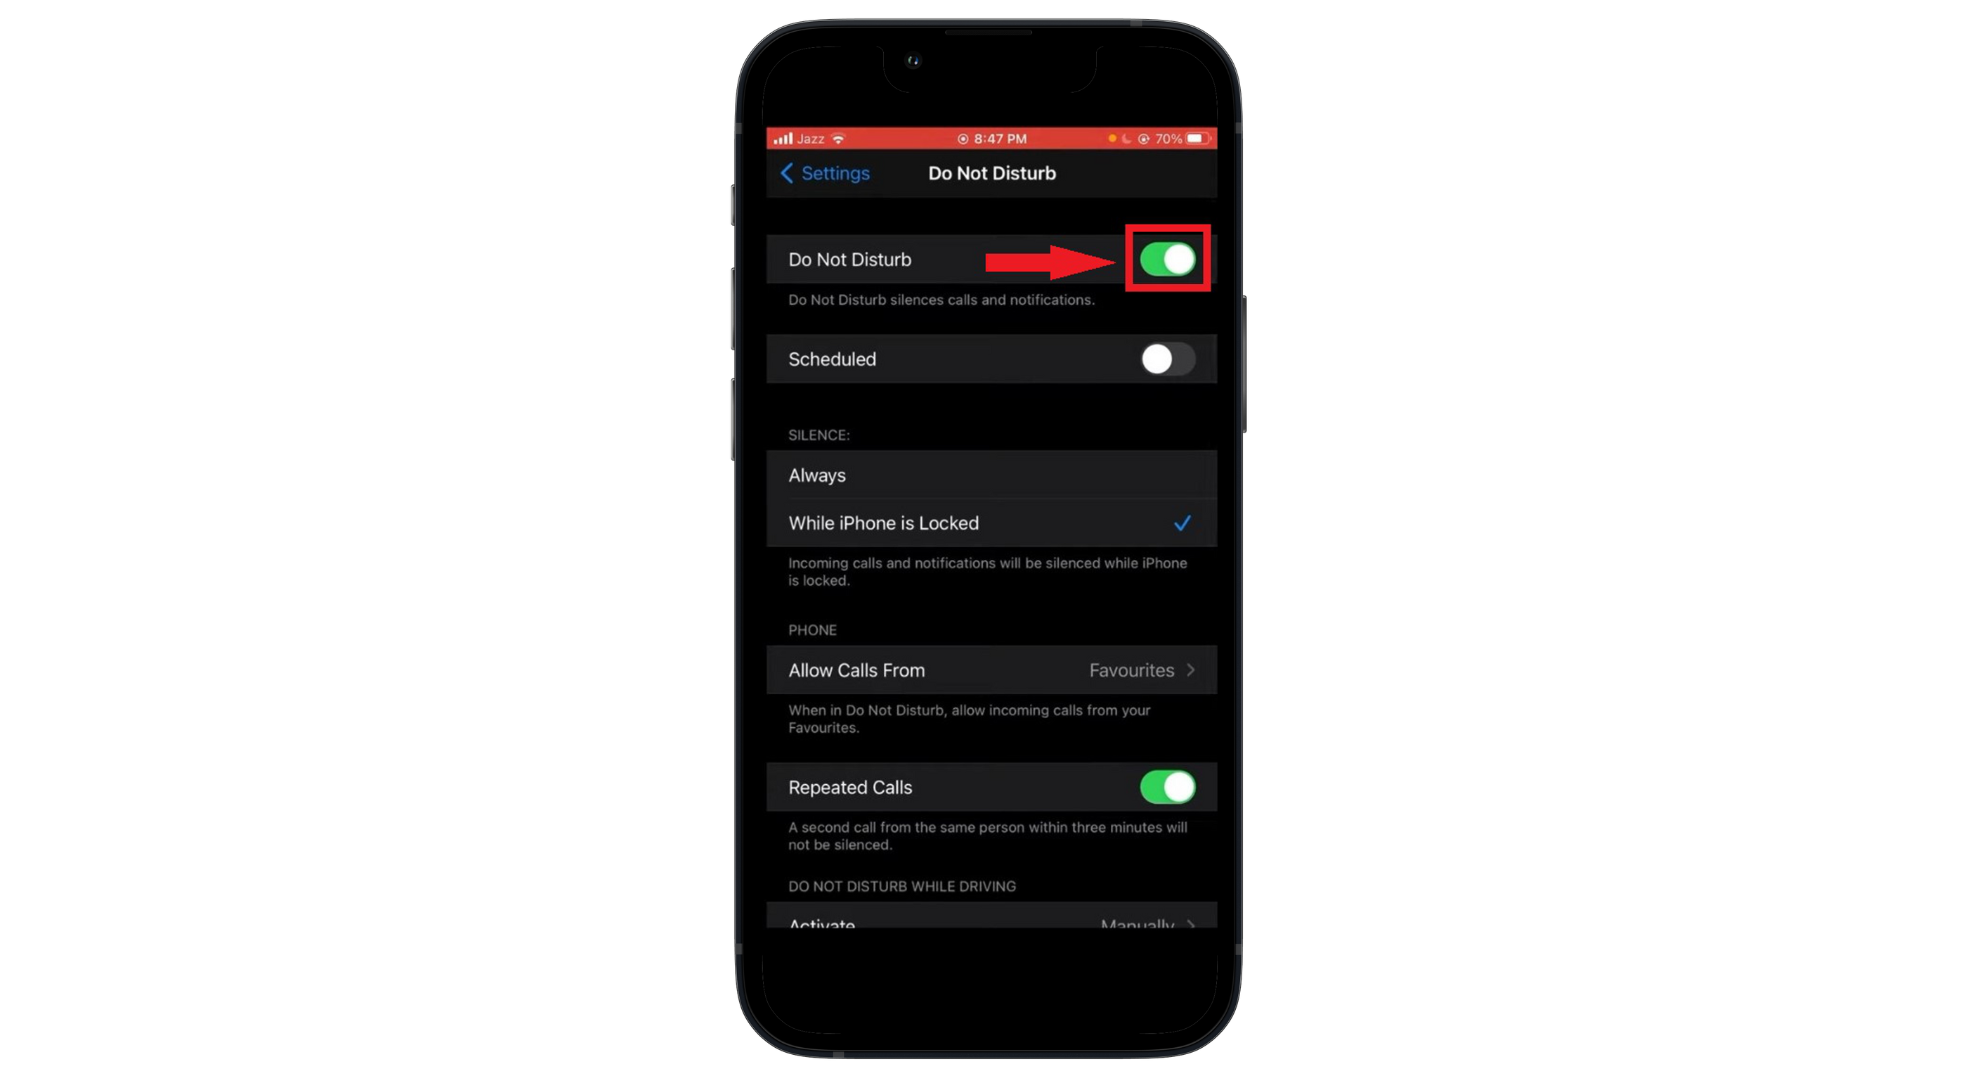
Tap the toggle to turn it on
How to Set Do Not Disturb Mode to turn on Automatically?
You can switch your iPhone’s Do Not Disturb mode on and off by itself instead of doing it manually. This is great for a routine, like when you go to sleep and wake up. You can schedule it so that Do Not Disturb starts at bedtime and stops when you get up.
Similarly, you can do this for specific locations like worship places or gaming or reading apps. When you enter that place (location) or open the specific app, the Do Not Disturb mode will be turned on automatically. Also, when you leave that place or close the app, it will be turned off. Let’s show you how to set this up:
- Open your iPhone’s Settings app and tap on “Focus.“
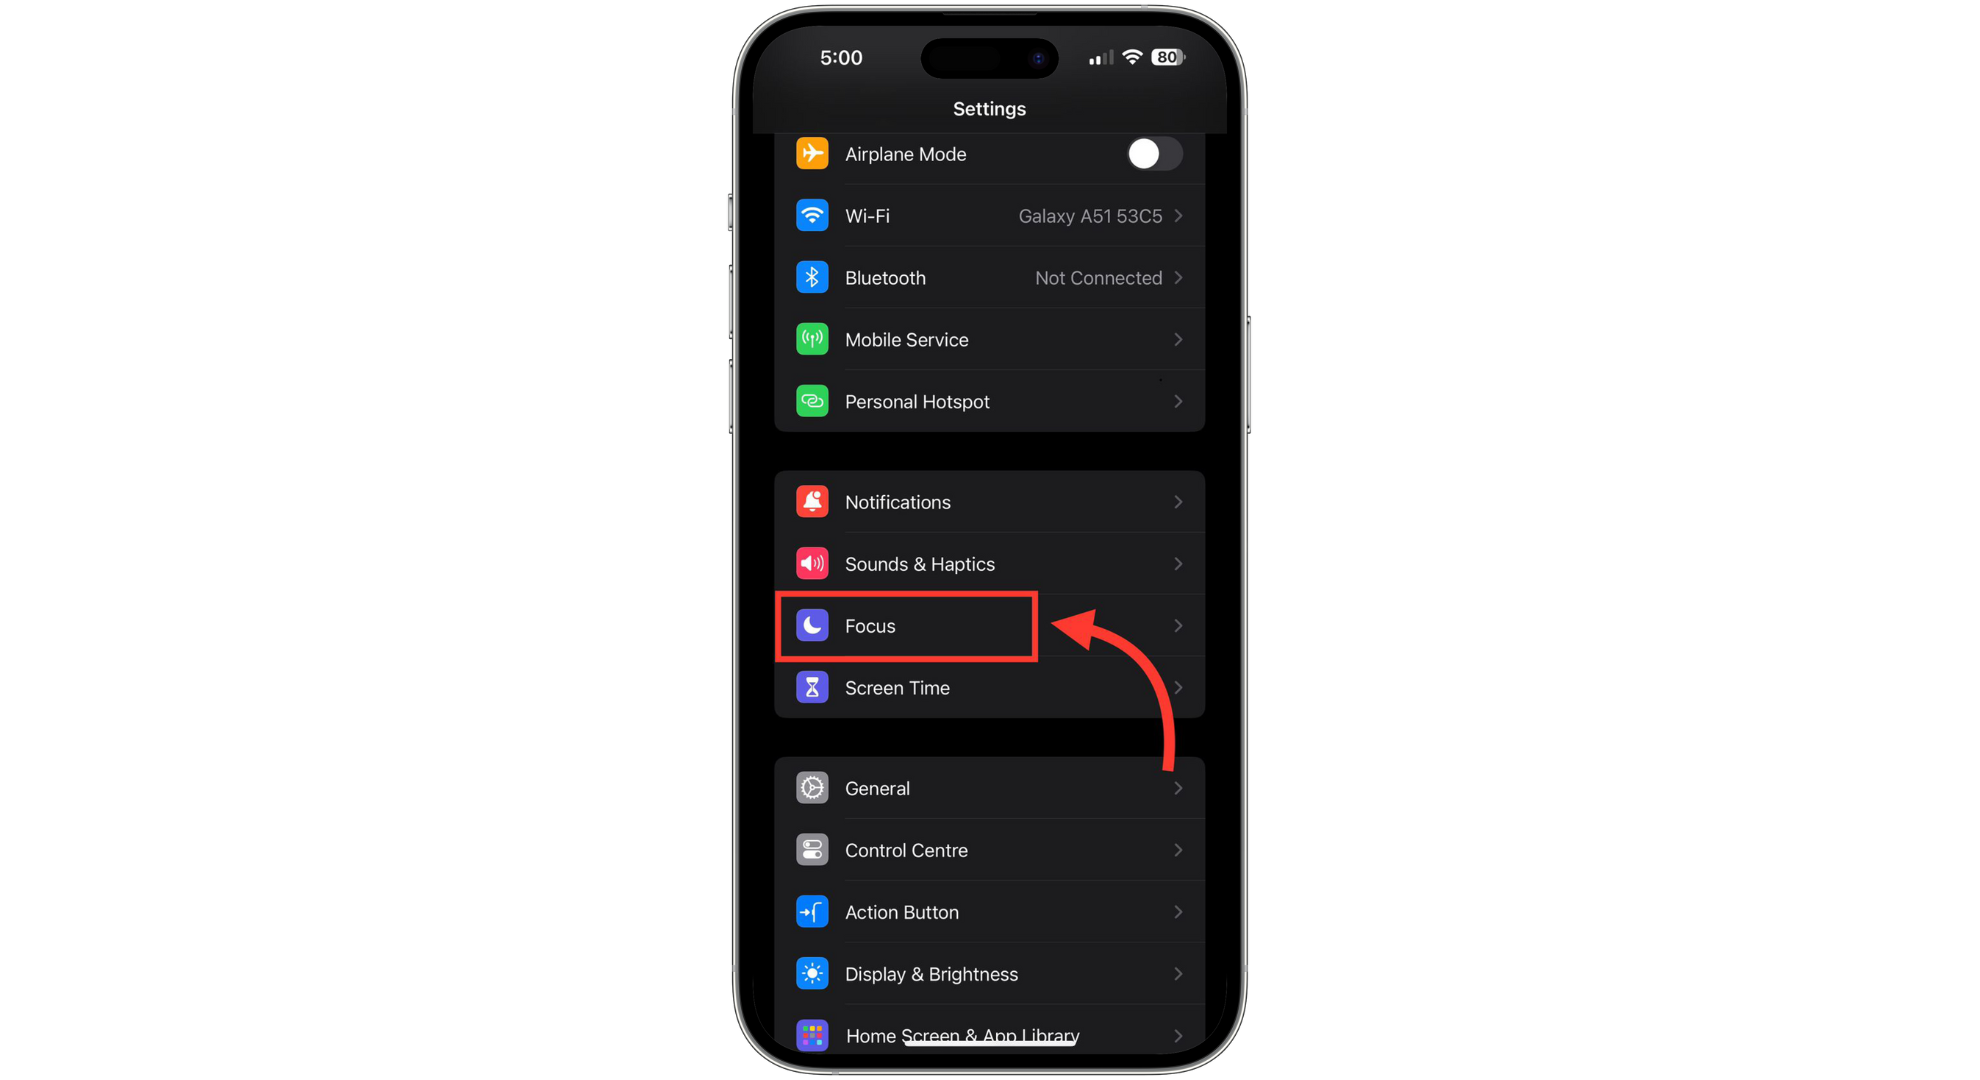
Tap on Focus - In the Focus menu, select “Do Not Disturb.”
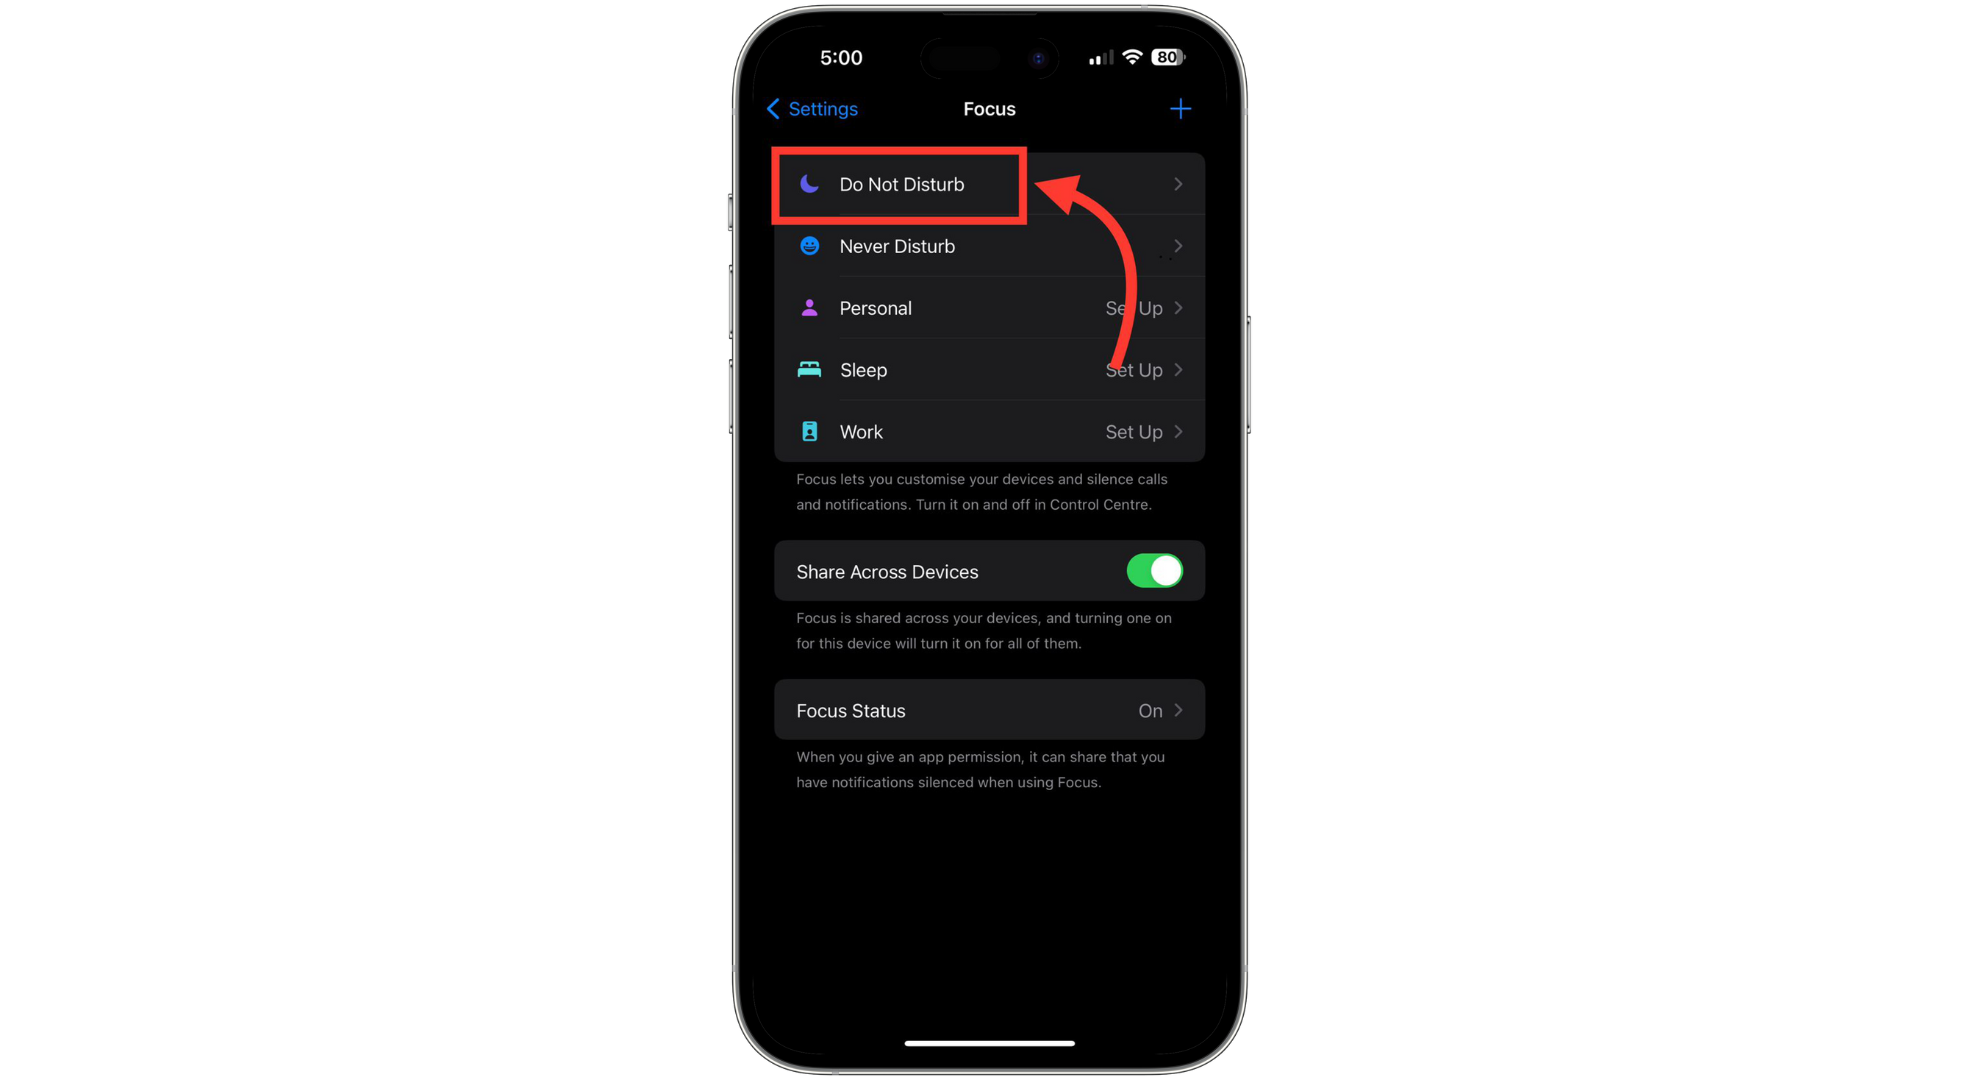
Select Do Not Disturb - Scroll to the “Set A Schedule” option and tap on “Add Schedule.”
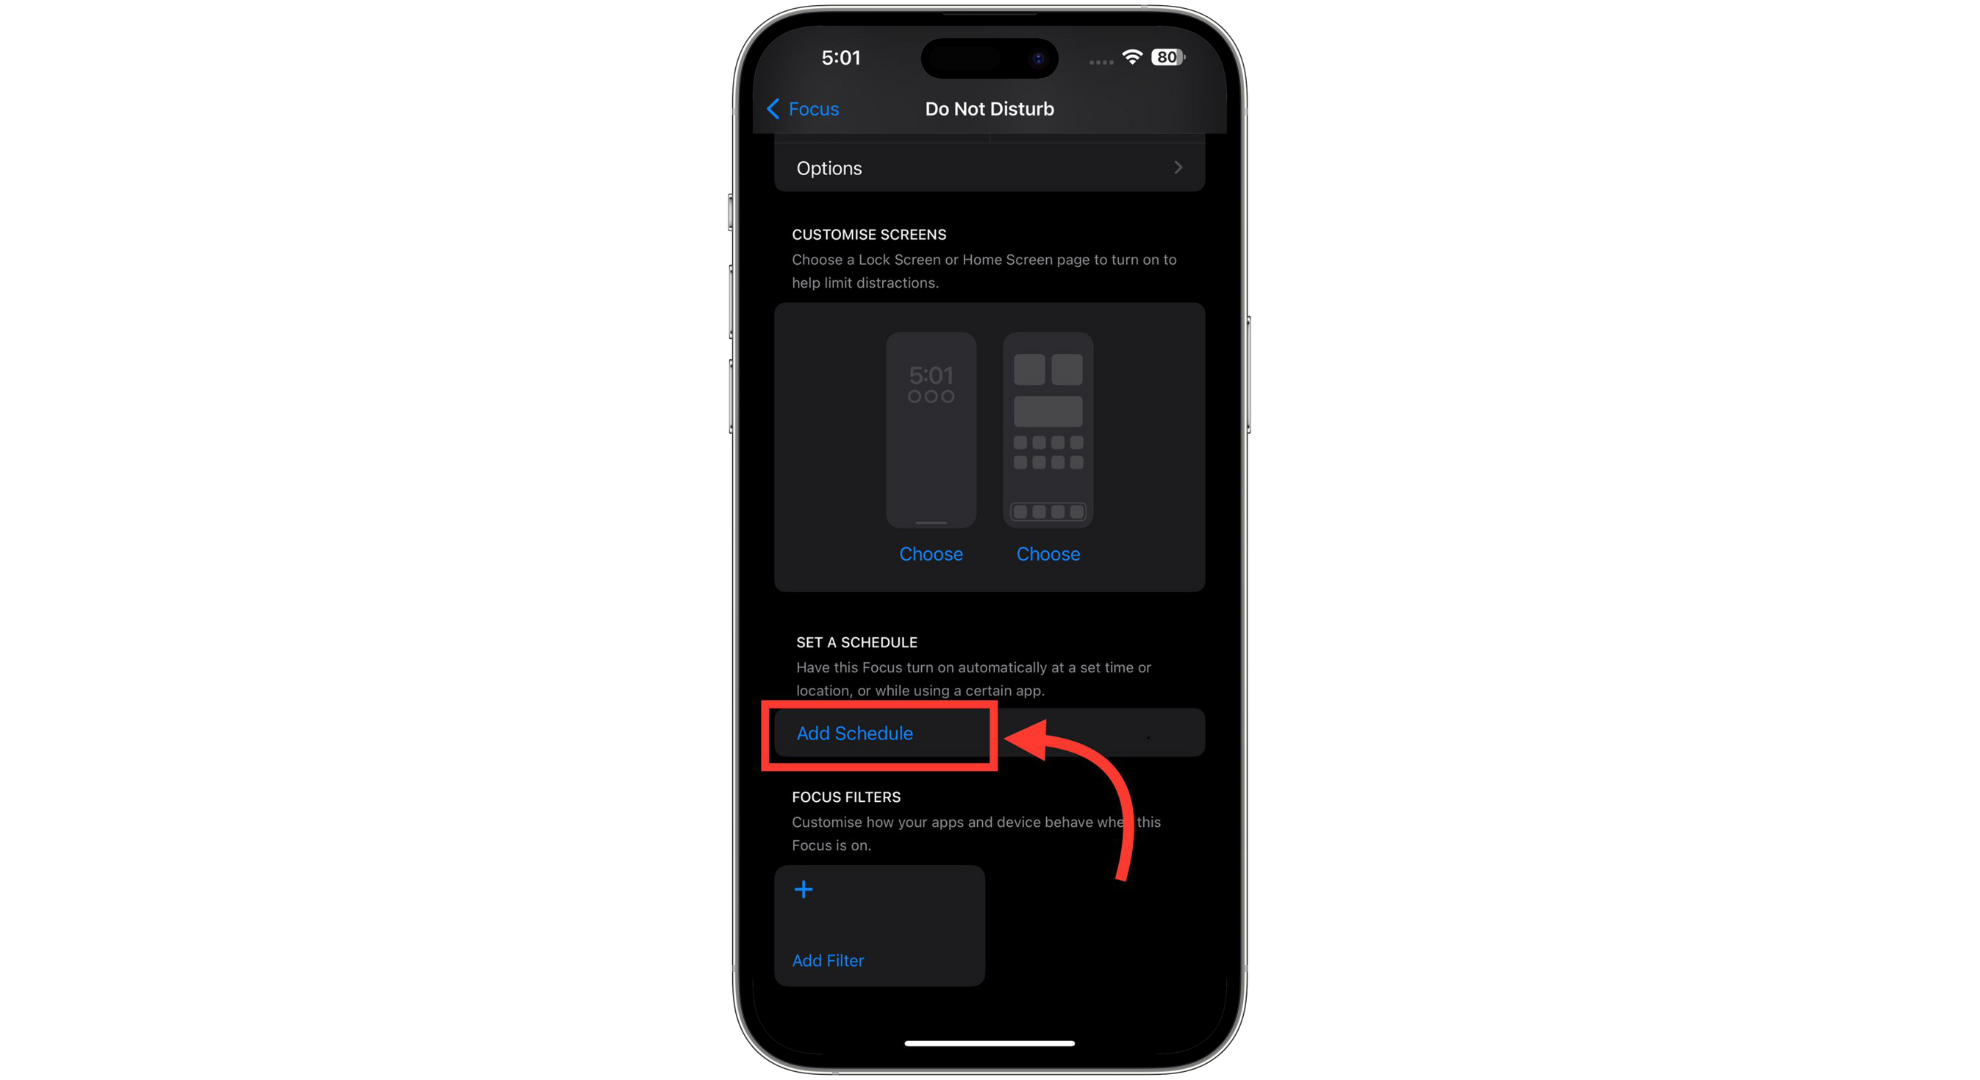
Tap on Add Schedule - You’ll see different choices like Time, Location, and App.
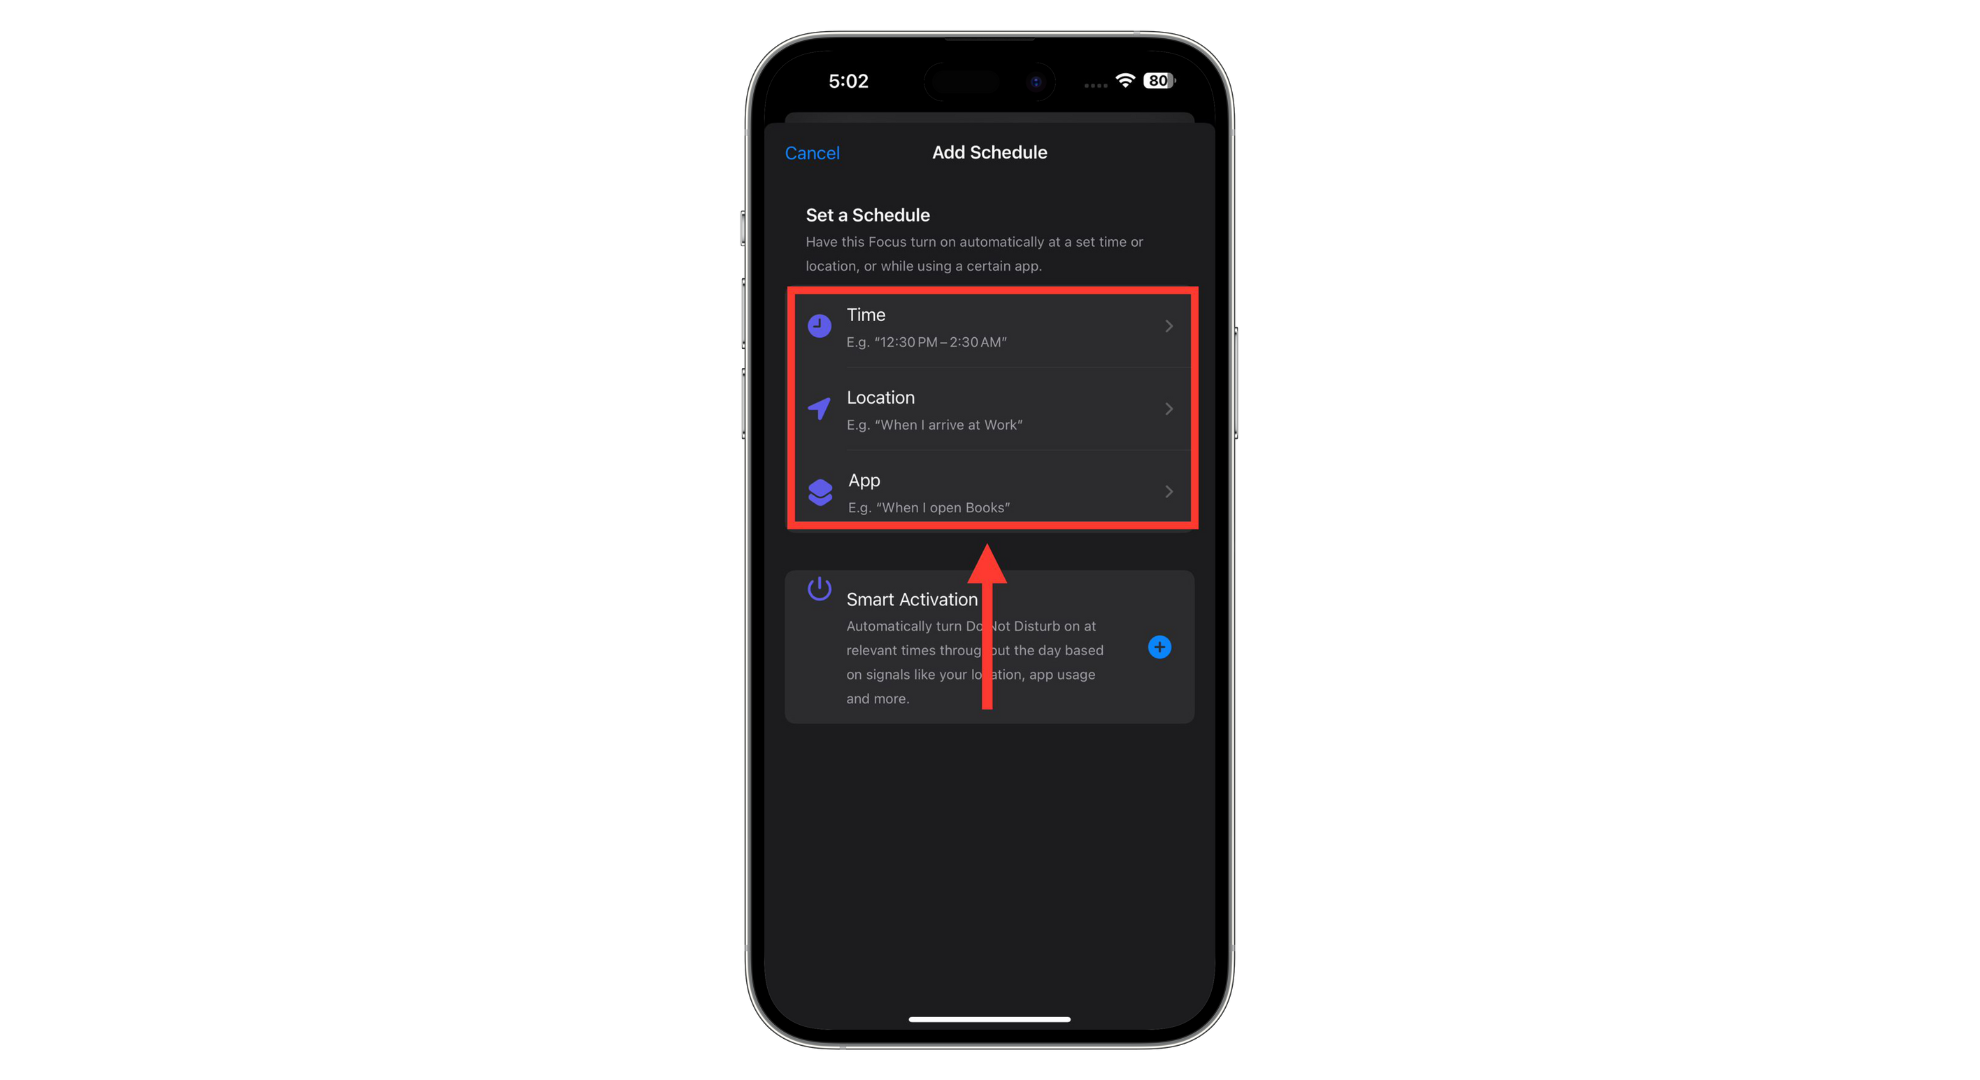
Options like Time, Location, and App appear - Choose the “Time” option to schedule when Do Not Disturb should start and end. You can set the time duration using the “From” and “To” options, along with the days on which you want this schedule to work.
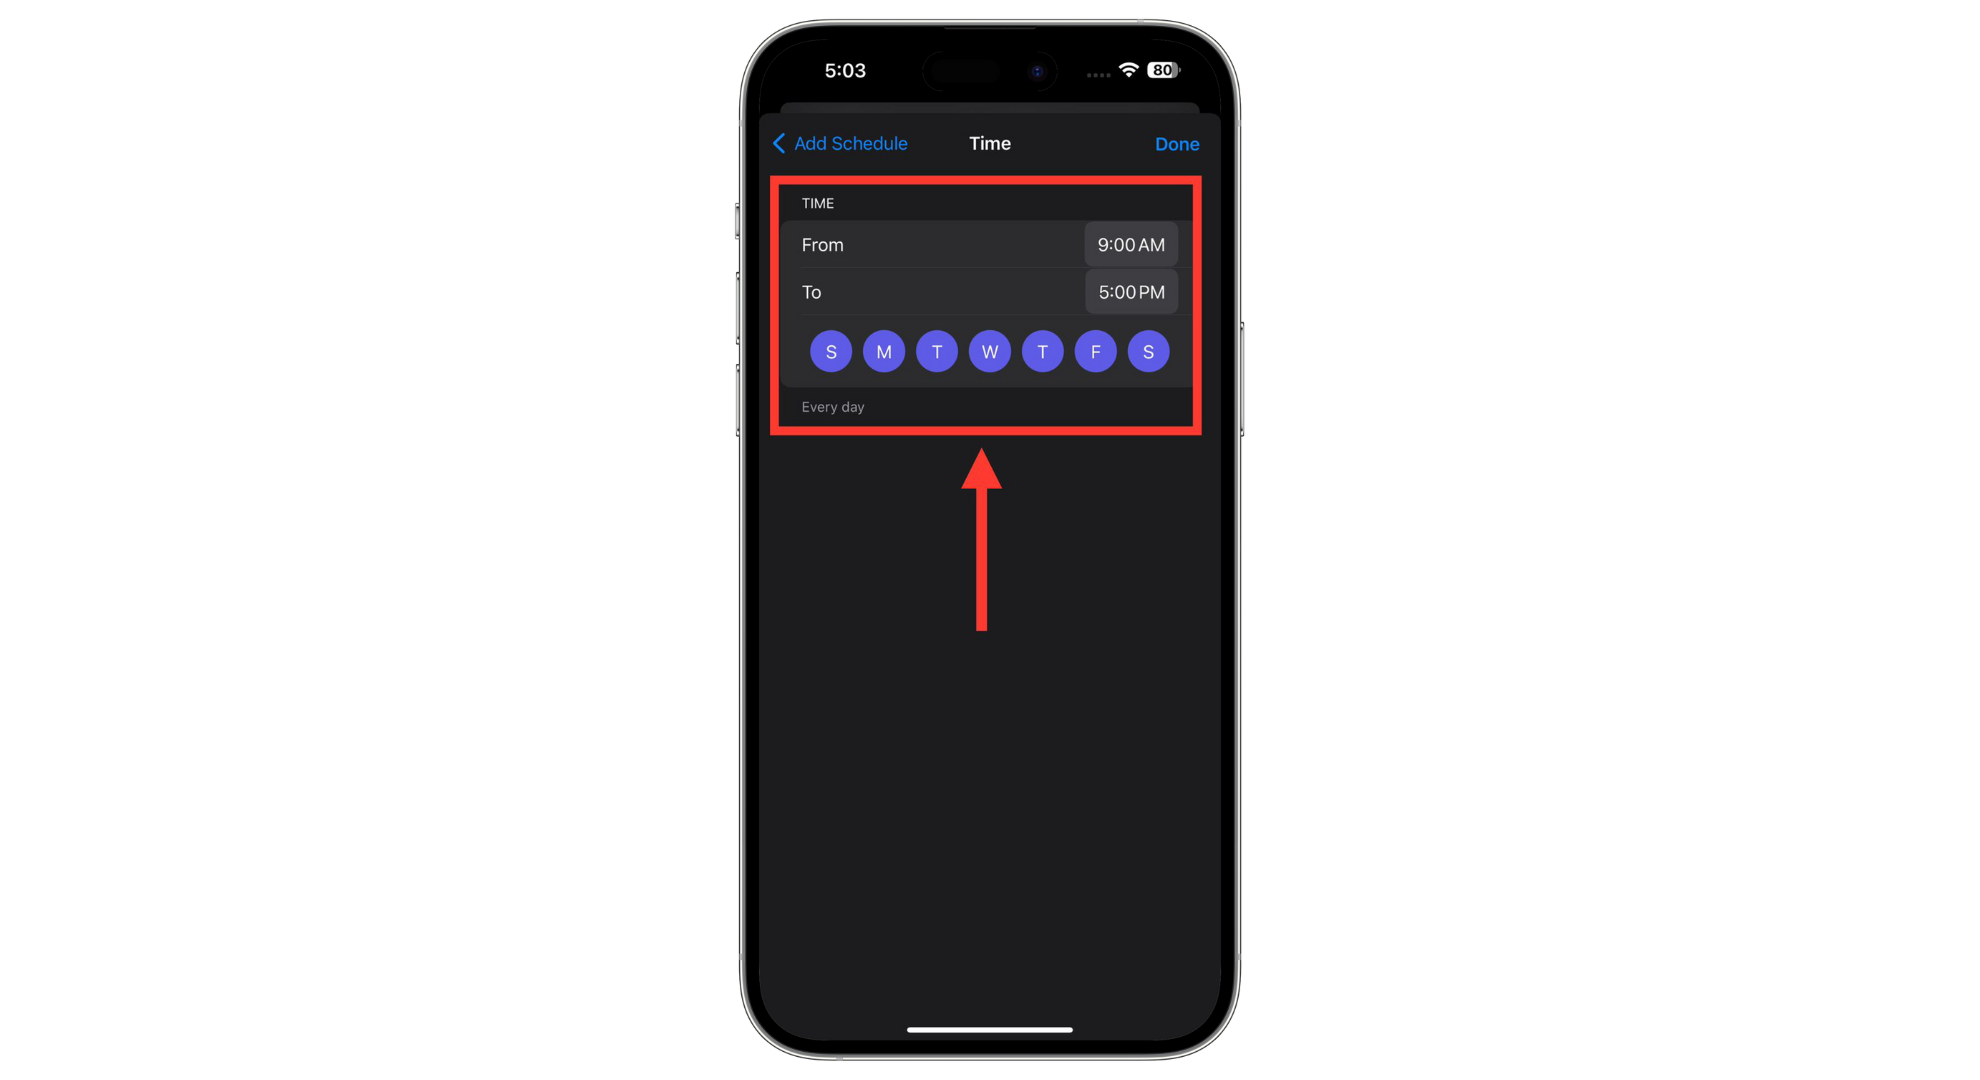
Set the time duration - If you want Do Not Disturb to turn on automatically at a specific place, select “Location.” Then, select a location by entering an “Address” in the search bar.
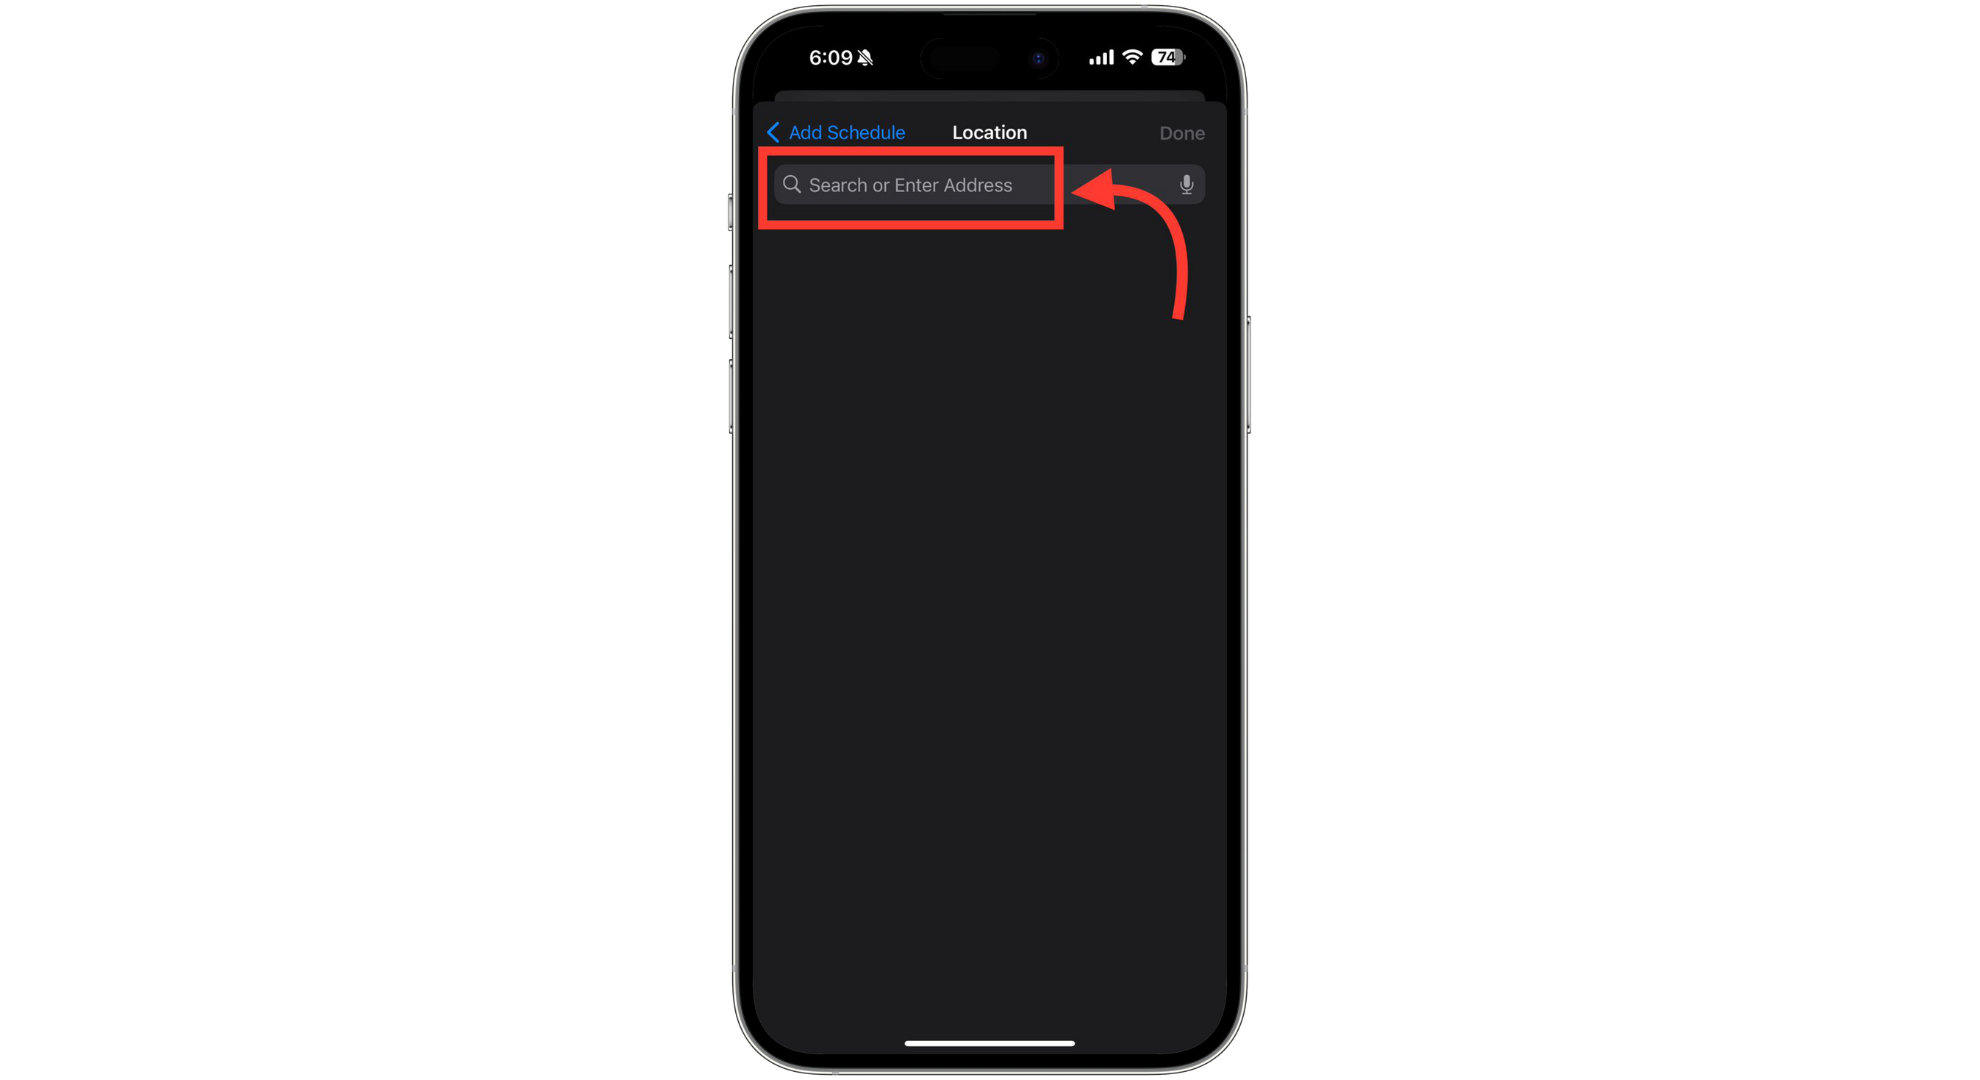
Select a location by entering an Address - You can also automatically turn the Do Not Mode on when you open a specific app. For this, tap on “App” and select one from your iPhone’s list of installed apps.
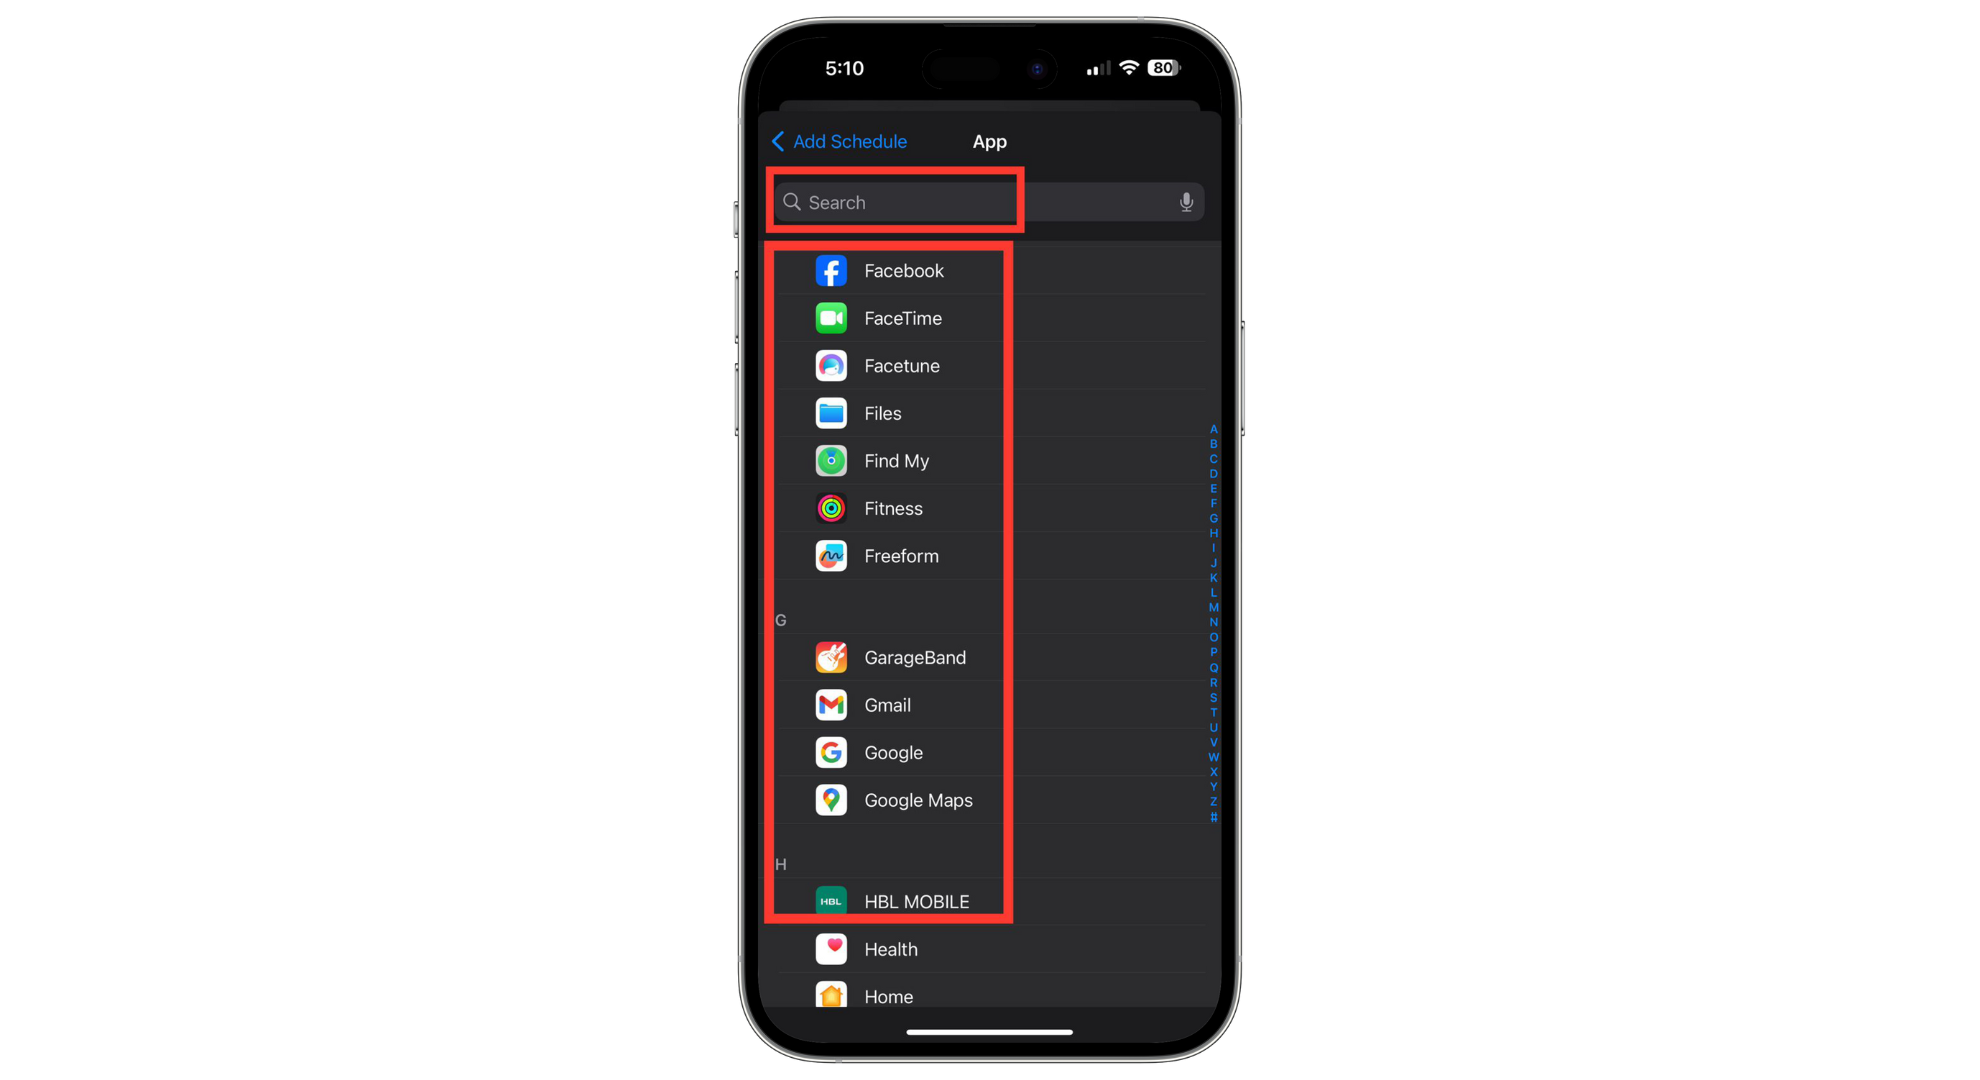
Tap on App
Now, whenever the conditions you set here are met, the Do Not Disturb mode will automatically be enabled on your iPhone.
Customize Do Not Disturb mode
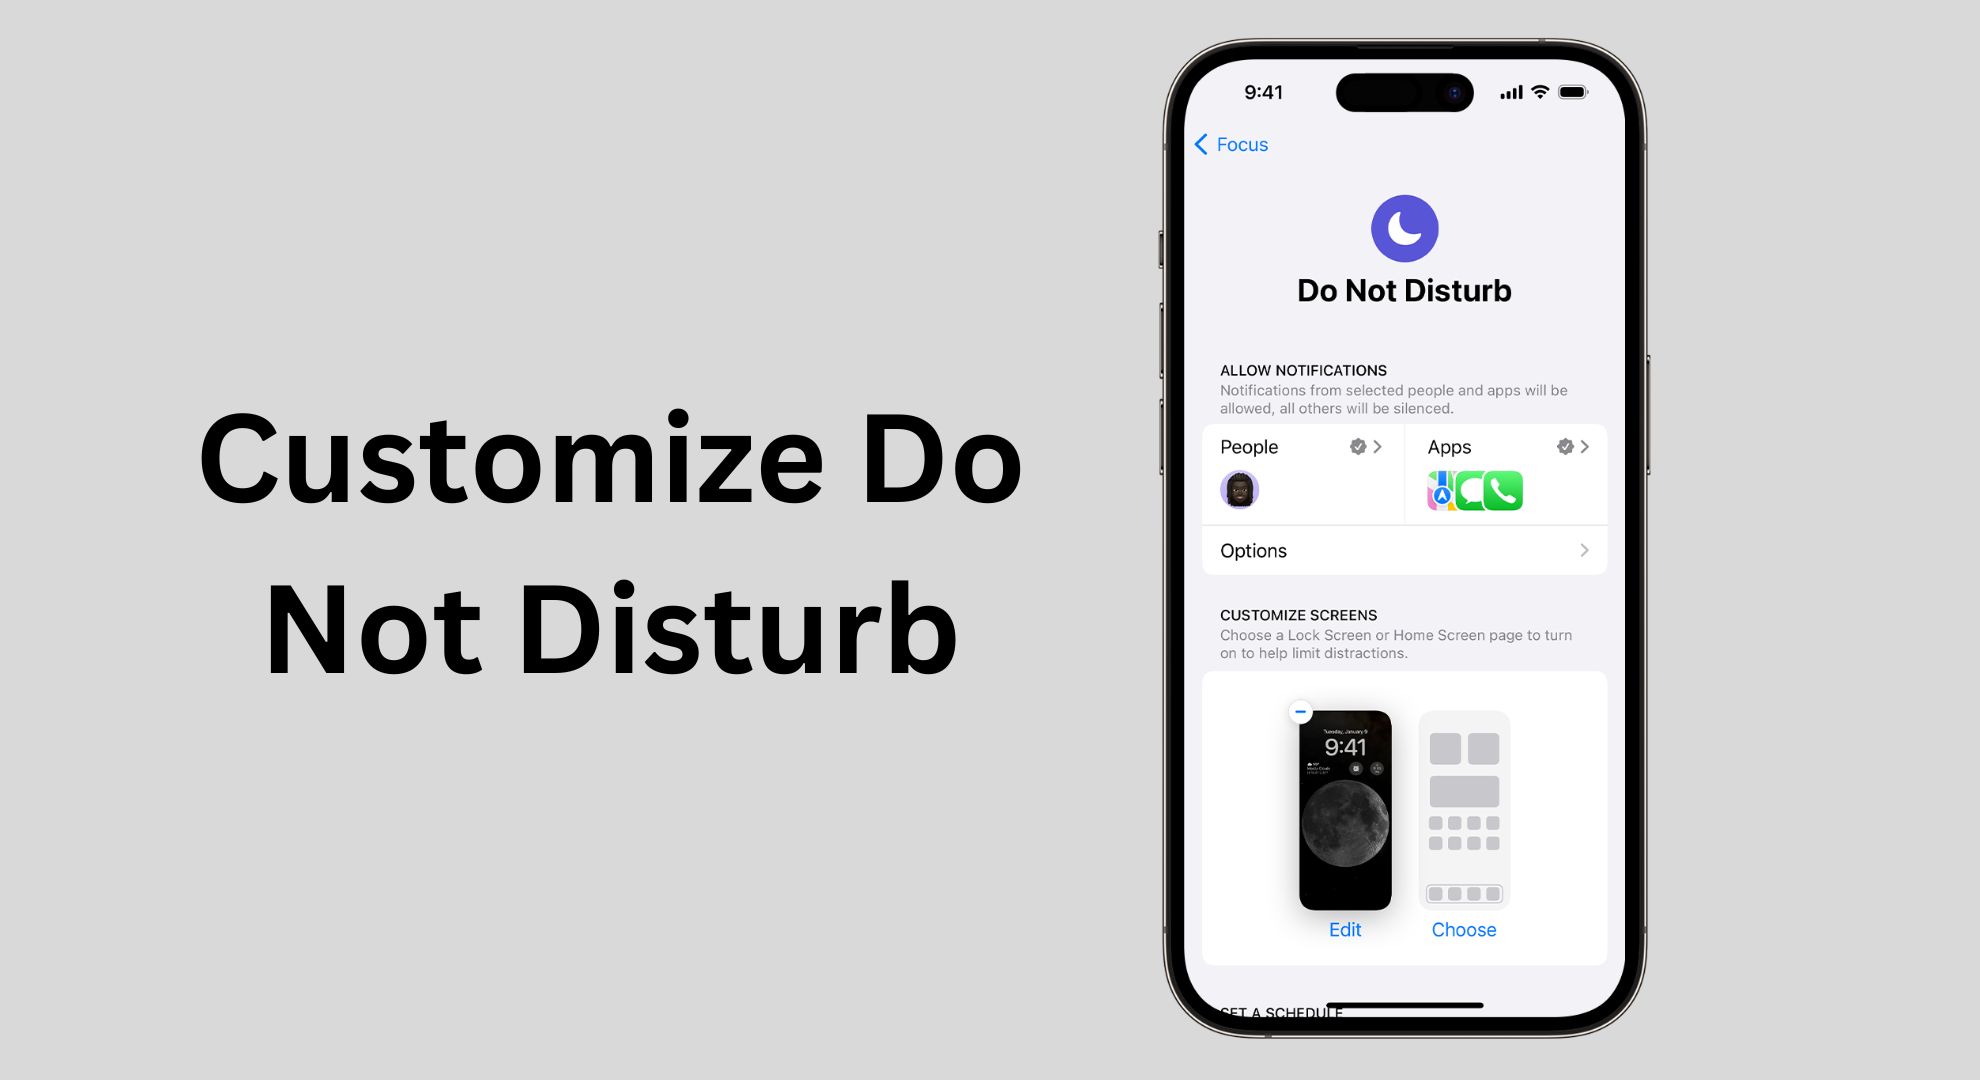
Customizing your iPhone’s Do Not Disturb mode offers several options, thanks to the latest features in Focus mode. This allows you to modify exactly how and when you want to minimize disruptions.
From setting specific schedules to choosing which calls or notifications can break through the silence, the customization features ensure that Do Not Disturb works in a way that perfectly aligns with your lifestyle and needs.
Whether for uninterrupted work hours, peaceful sleep, or moments of quietness, these settings provide the flexibility to create a personal digital environment that suits your preferences. Let’s go over the step-by-step guides for customizing Notifications from People, App Notifications, and Focus Filters in the Do Not Disturb mode on your iPhone.
1. Customize People Notifications in Do Not Disturb mode in Focus settings
Here’s how you can customize notifications in your Do Not Disturb mode in Focus on your iPhone:
- Access the “Do Not Disturb” focus mode by going to Settings -> Focus -> Do Not Disturb on your iPhone. Then tap on the “People” tab.
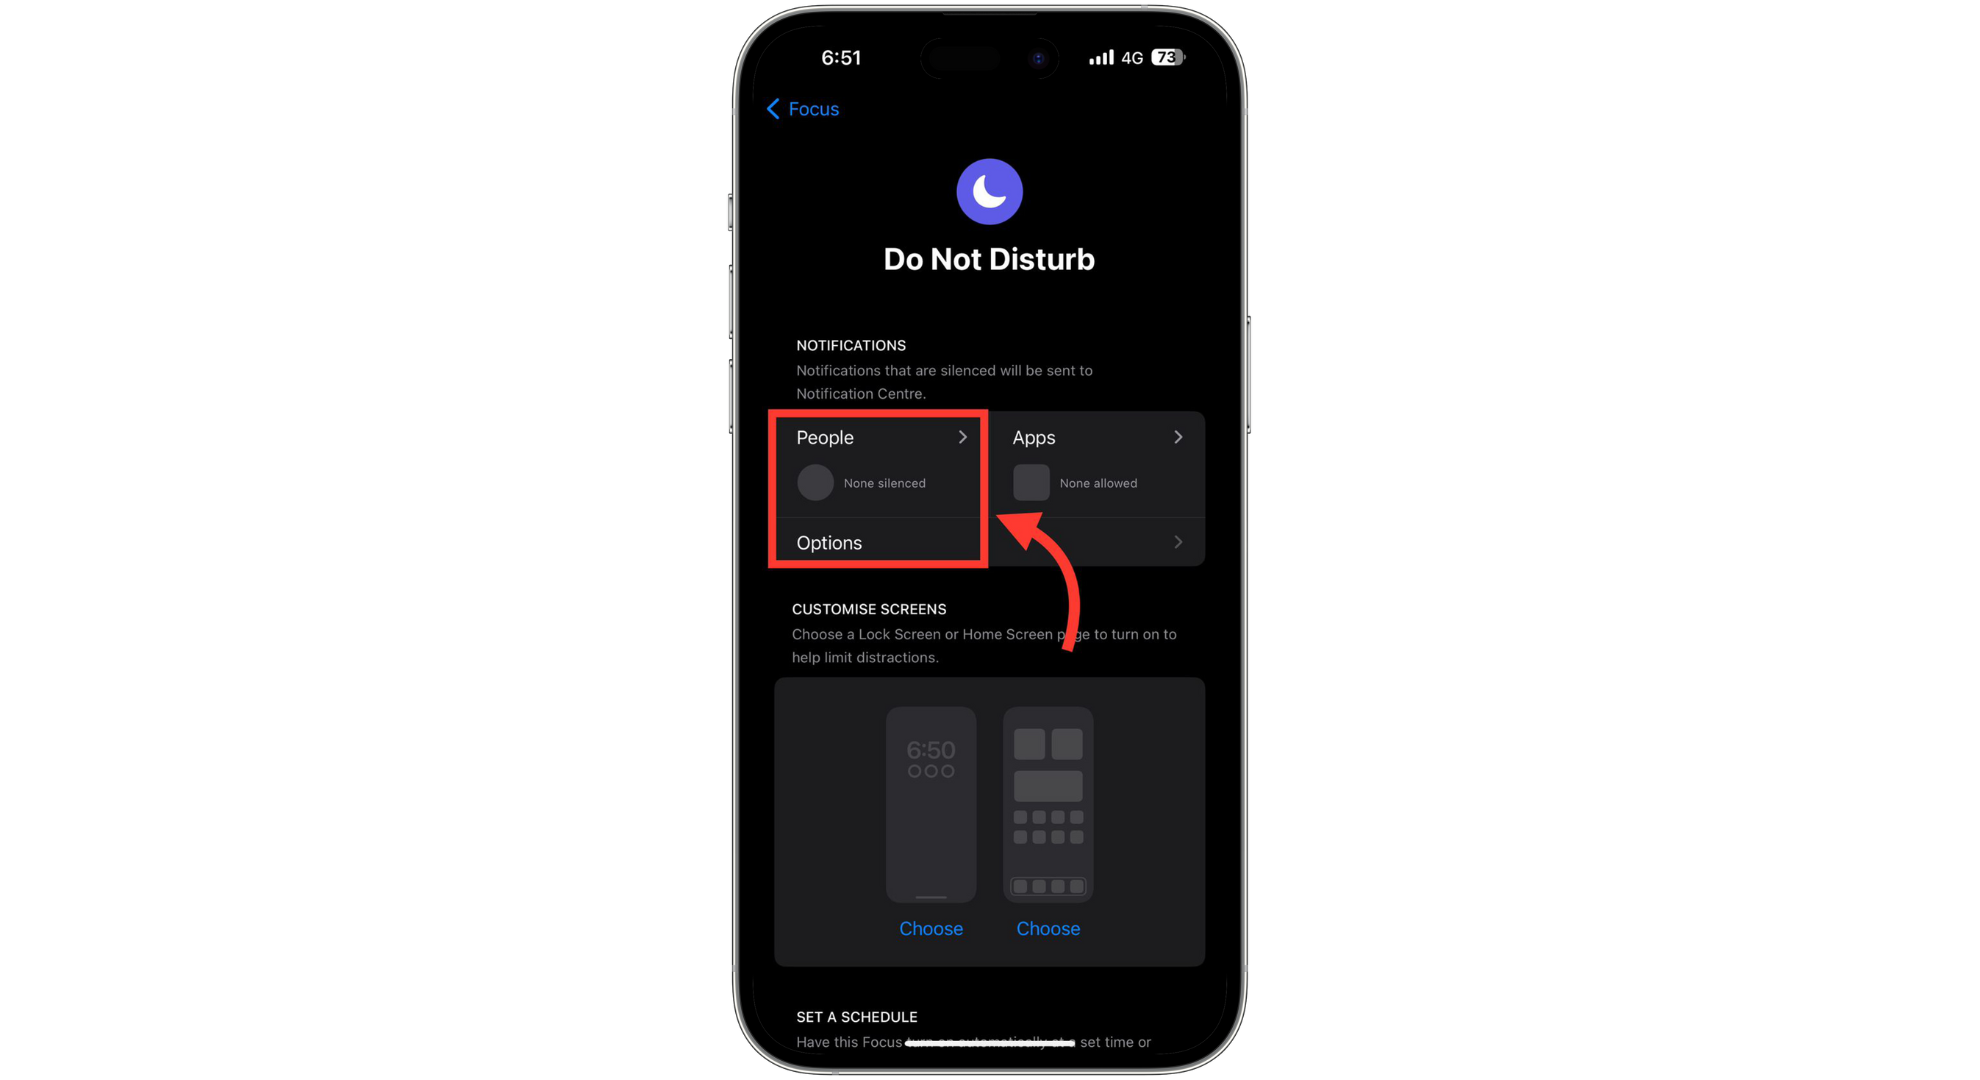
Tap on the People tab - You’ll find two options: “Silence Notifications From” and “Allow Notifications From.”
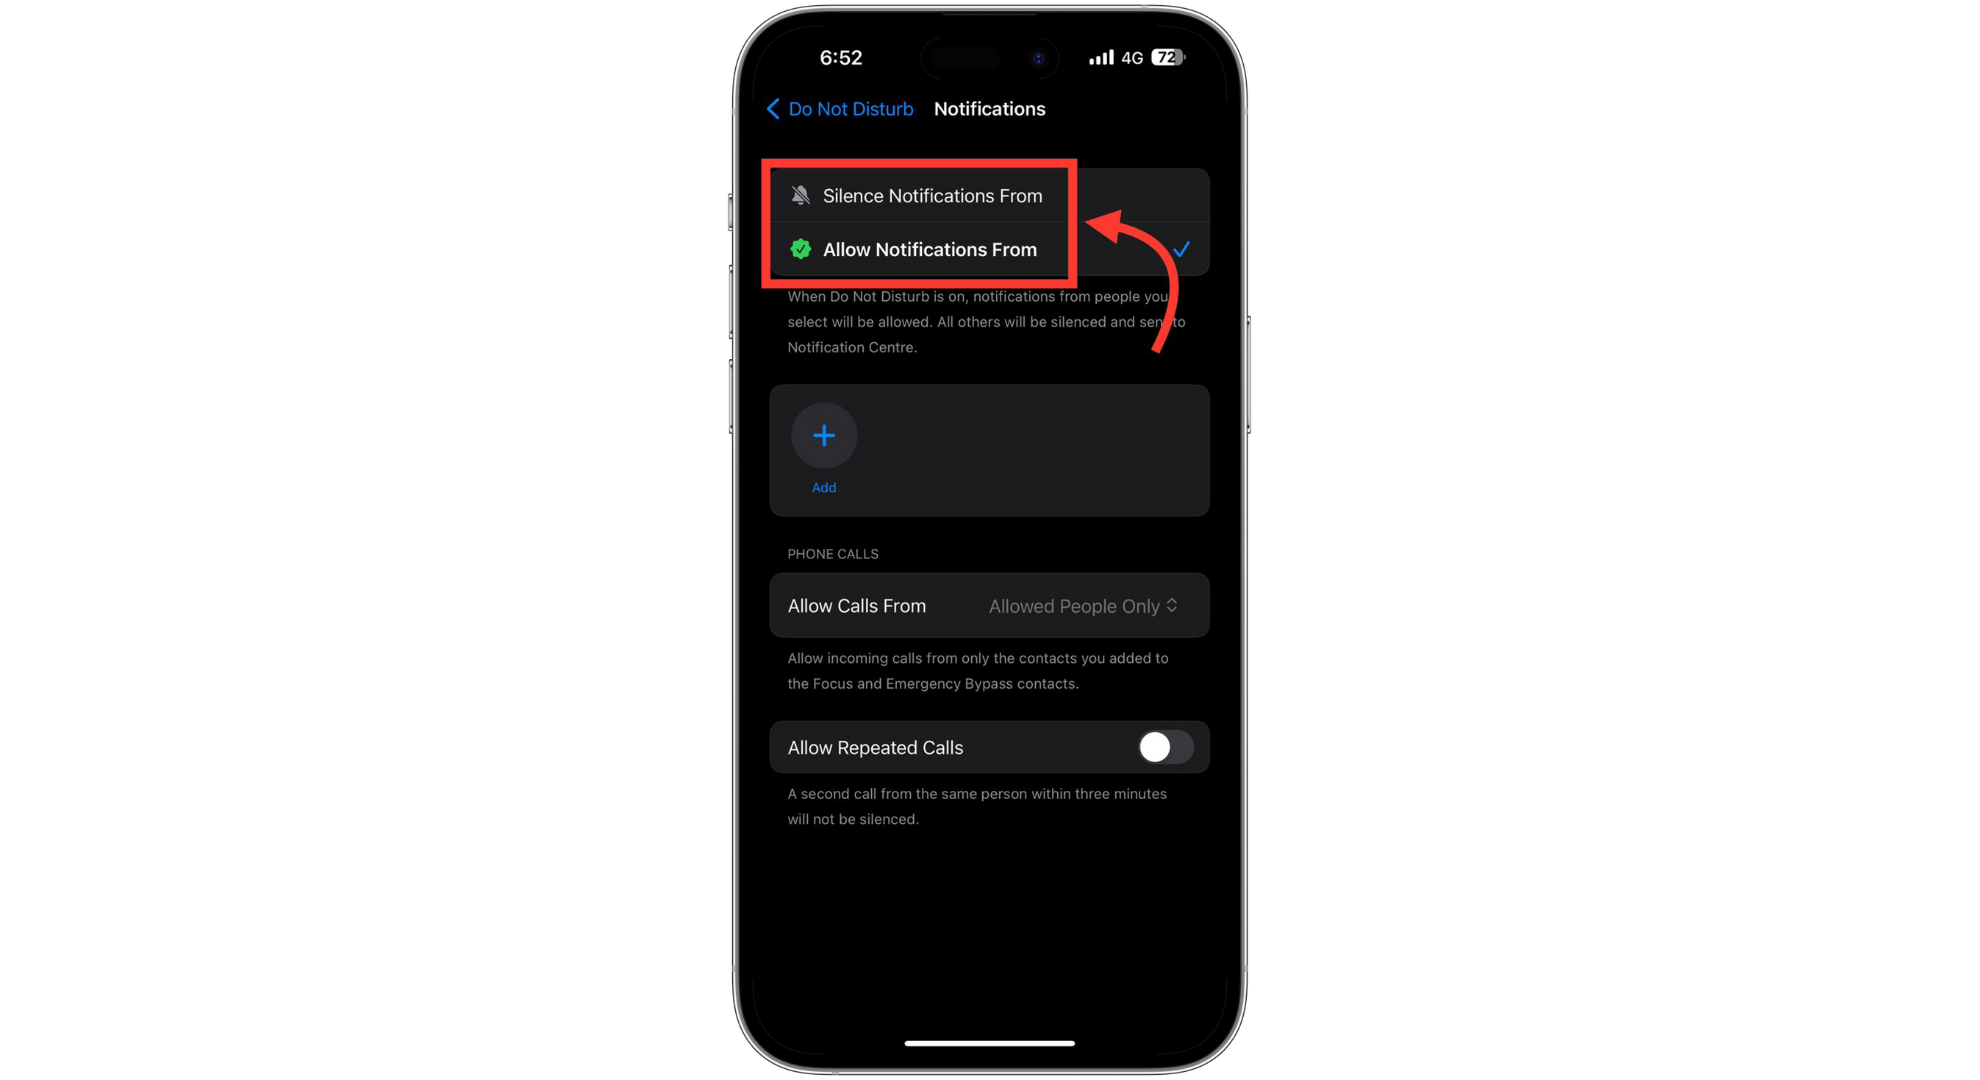
You’ll find two options - Select “Silence Notifications From” to mute notifications from specific contacts. Toggle on “Allow Calls from Silenced People” to receive calls from these contacts.
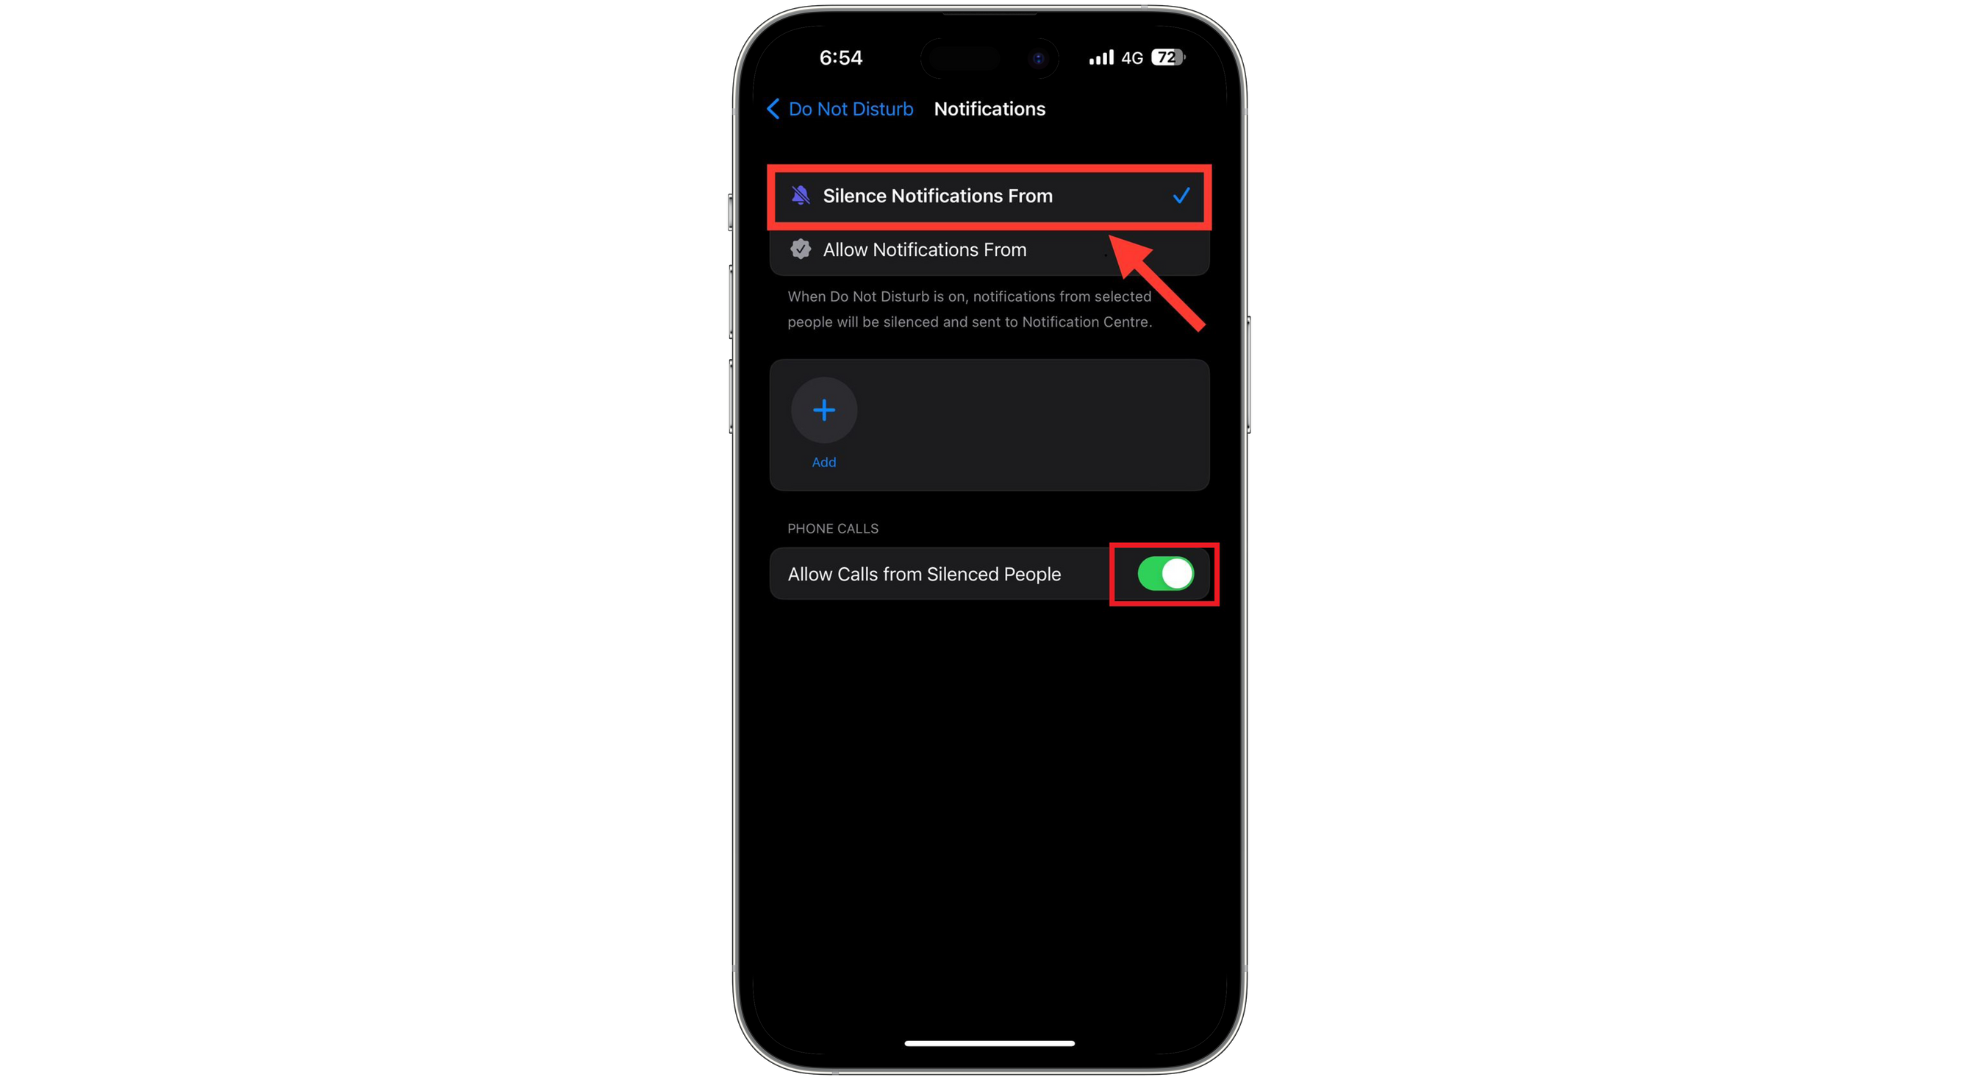
Toggle on Allow Calls from Silenced People - Tap the “+” icon to add contacts to your silenced list for when Do Not Disturb mode is active.
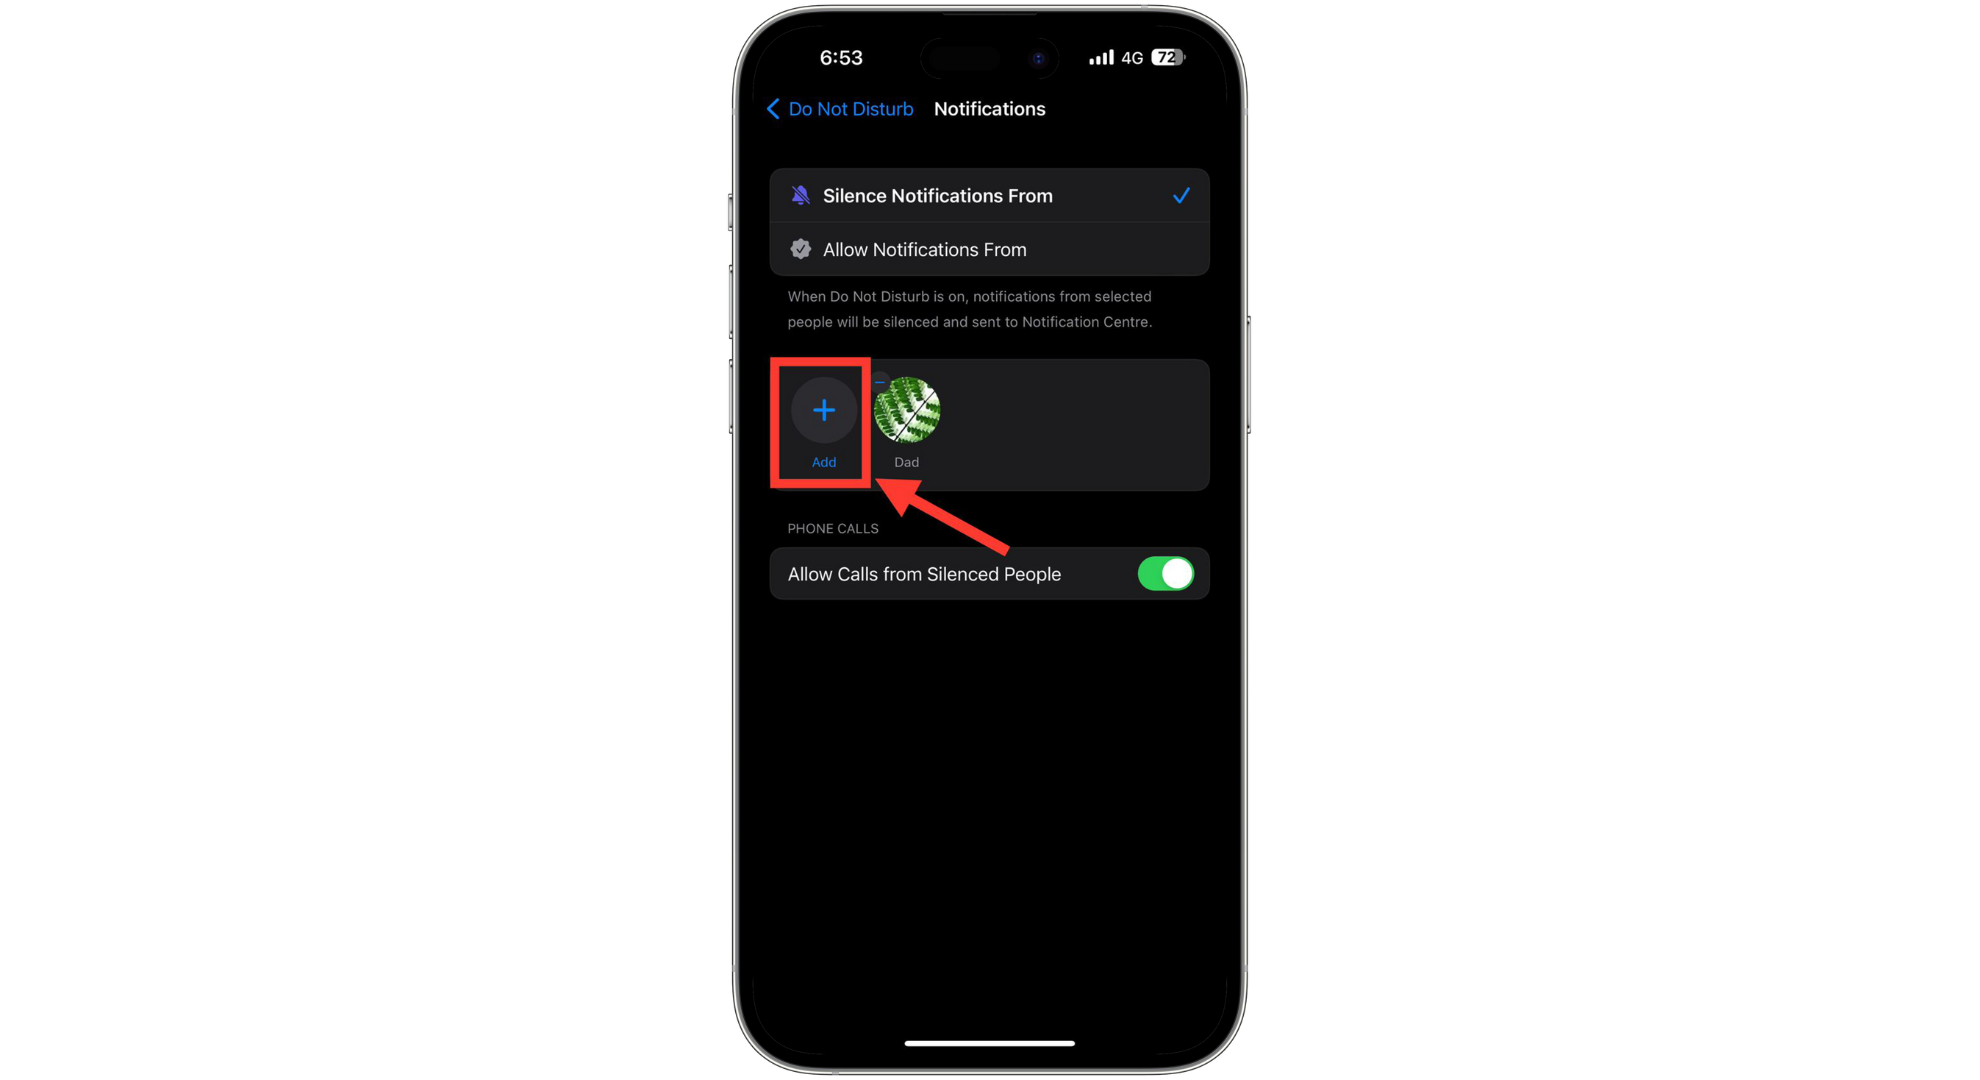
Tap the + icon - Alternatively, use “Allow Notifications From” to receive notifications from selected contacts during Do Not Disturb.
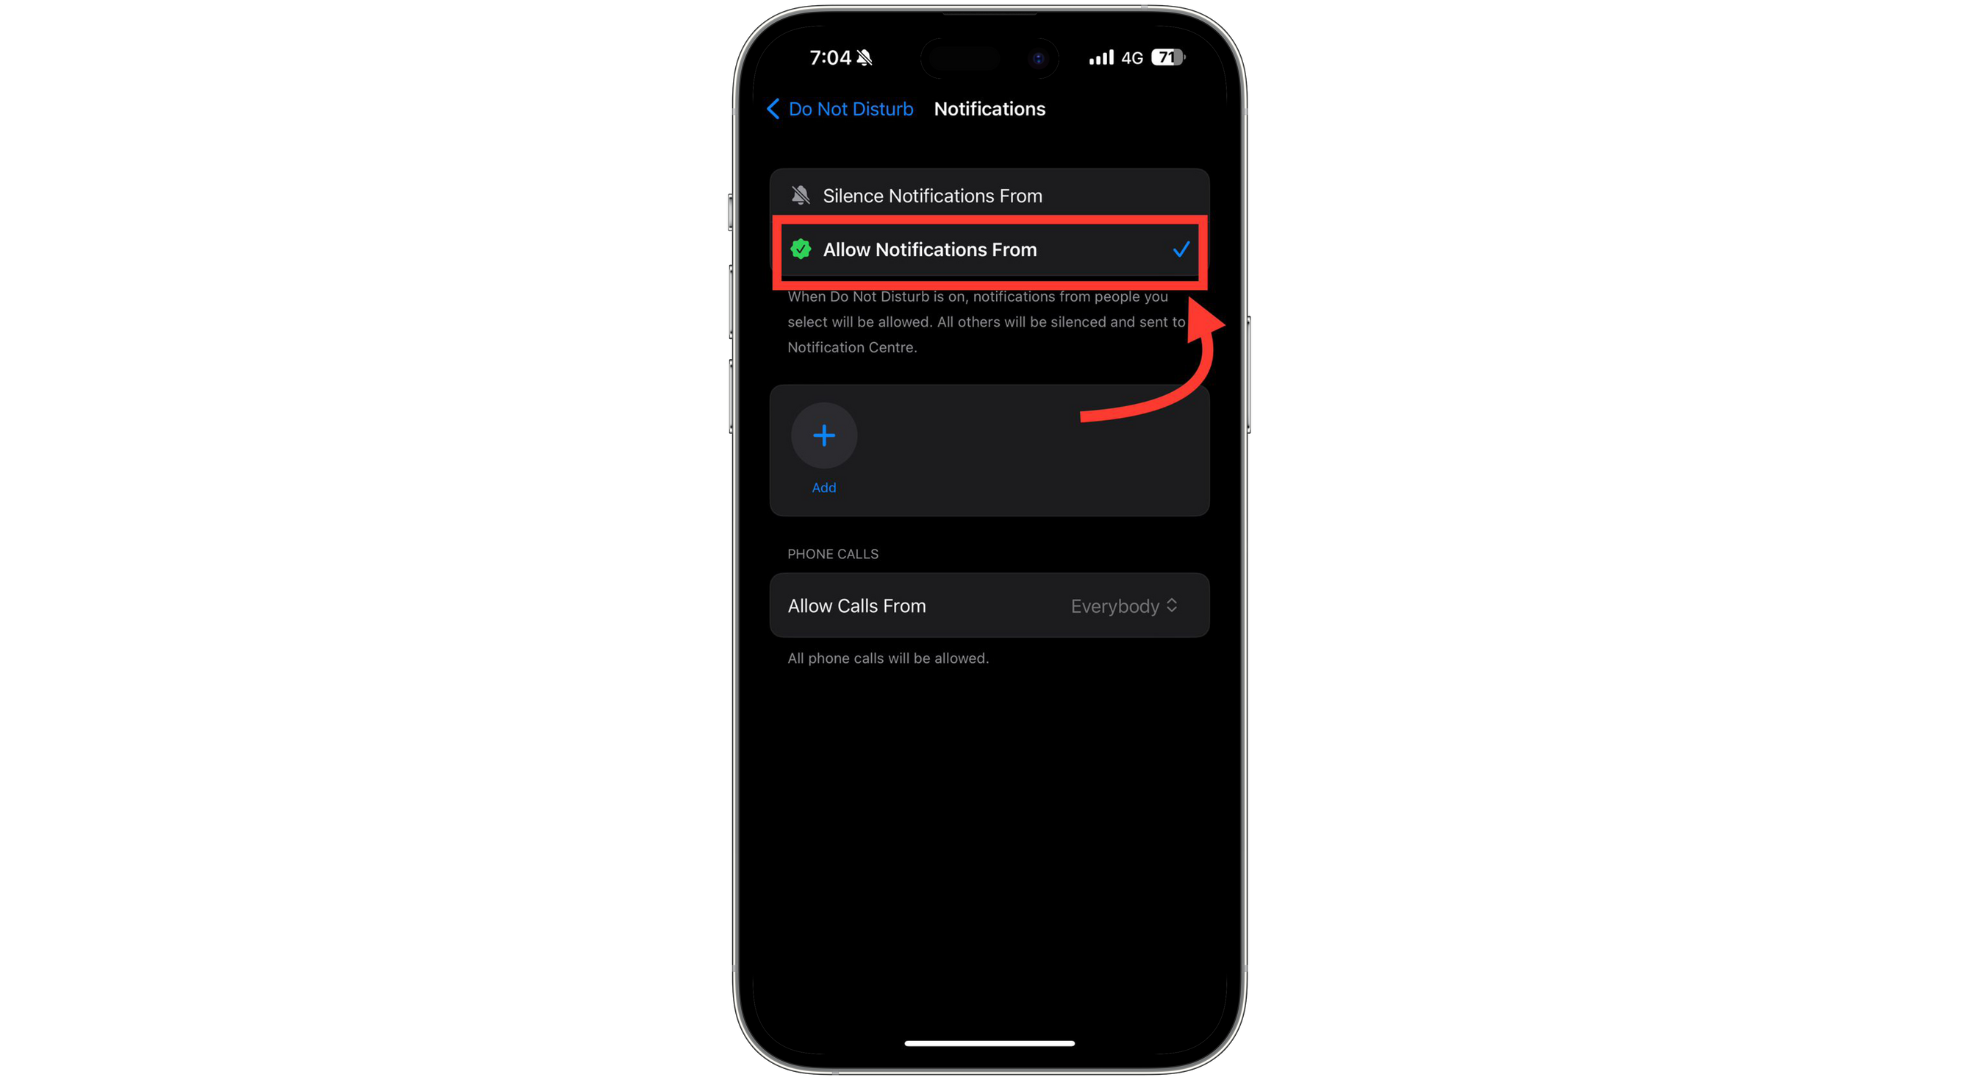
Use Allow Notifications From - Under this option, you can also specify which contacts you want to receive calls from. Tap “Allow Calls From” and select an option from the list that appears.
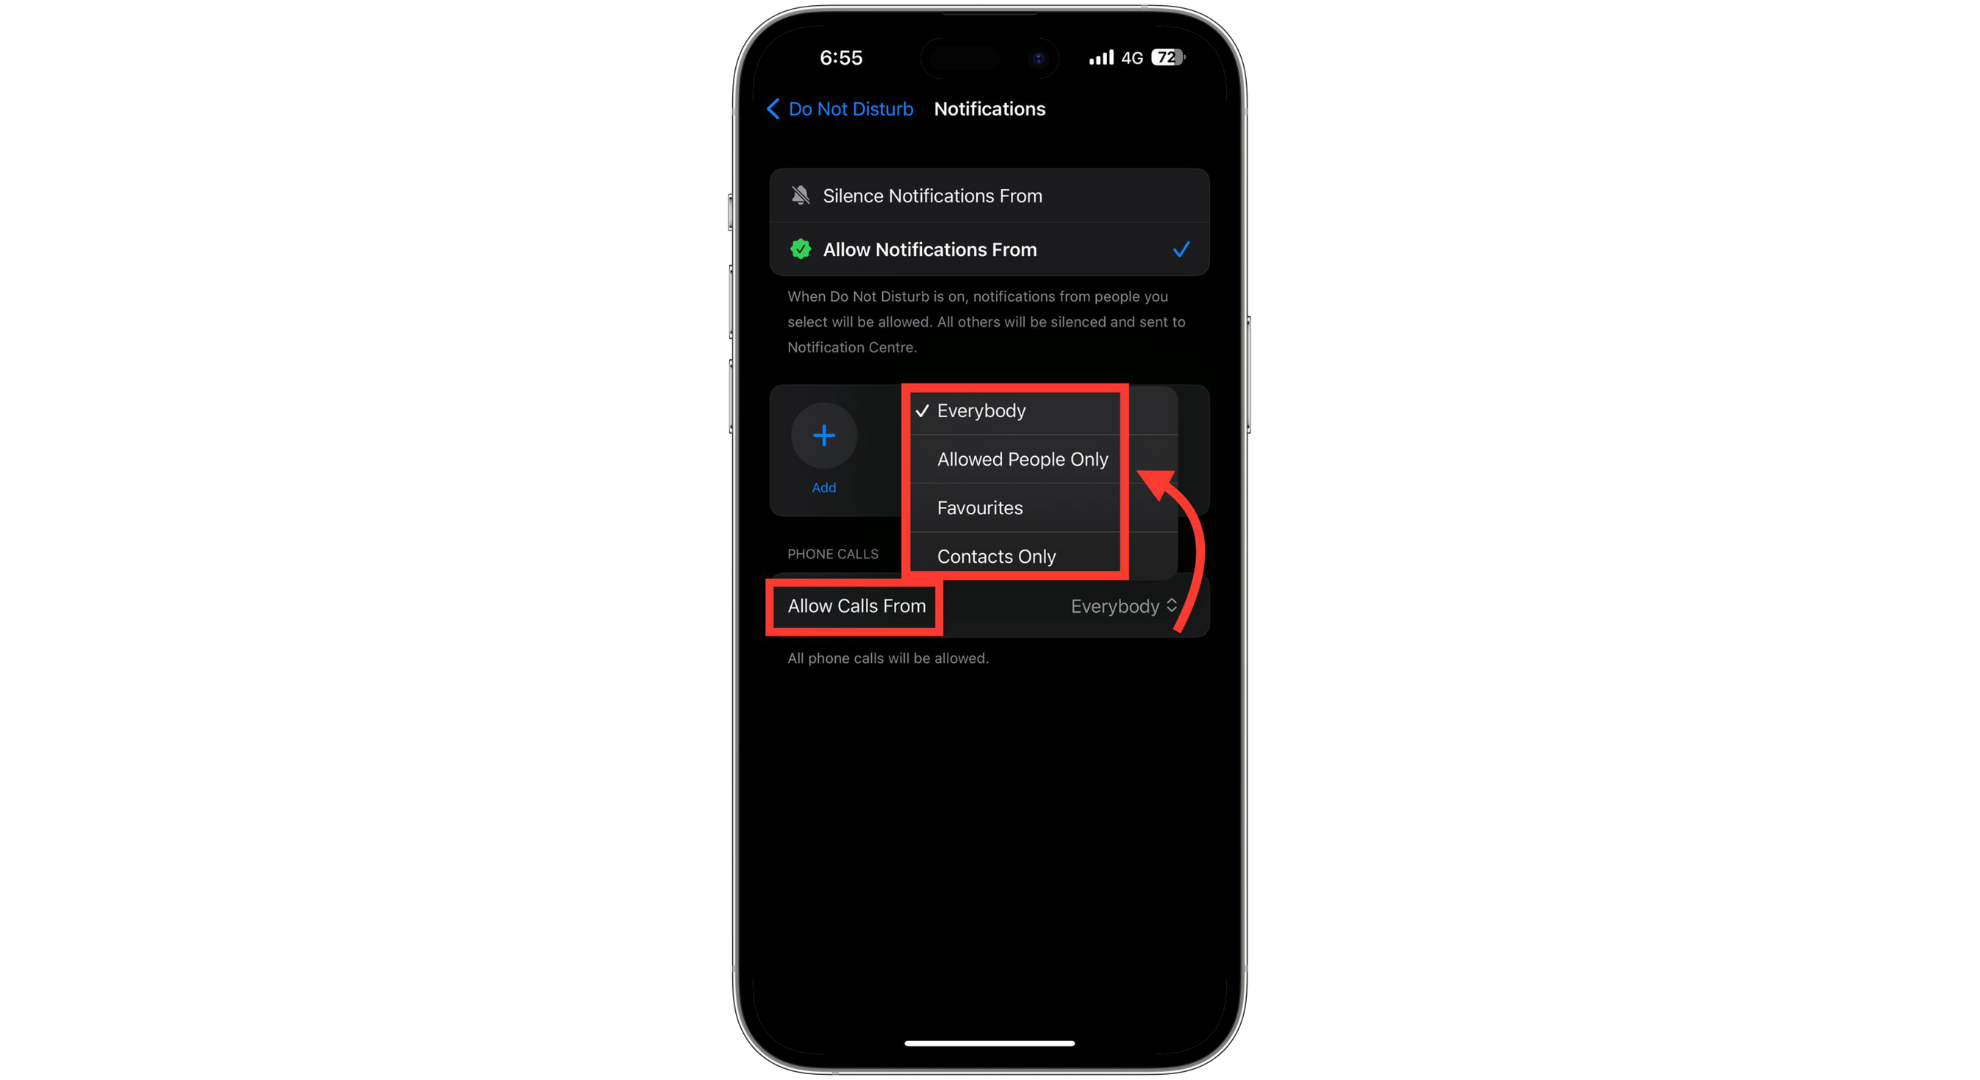
Tap Allow Calls From_ and select an option
2. Customize app notifications in Do Not Disturb mode in Focus settings
Here’s how you can customize app notifications in Do Not Disturb mode in Focus on your iPhone:
- Go to the “Do Not Disturb” settings on your iPhone and tap on the “Apps” tab.
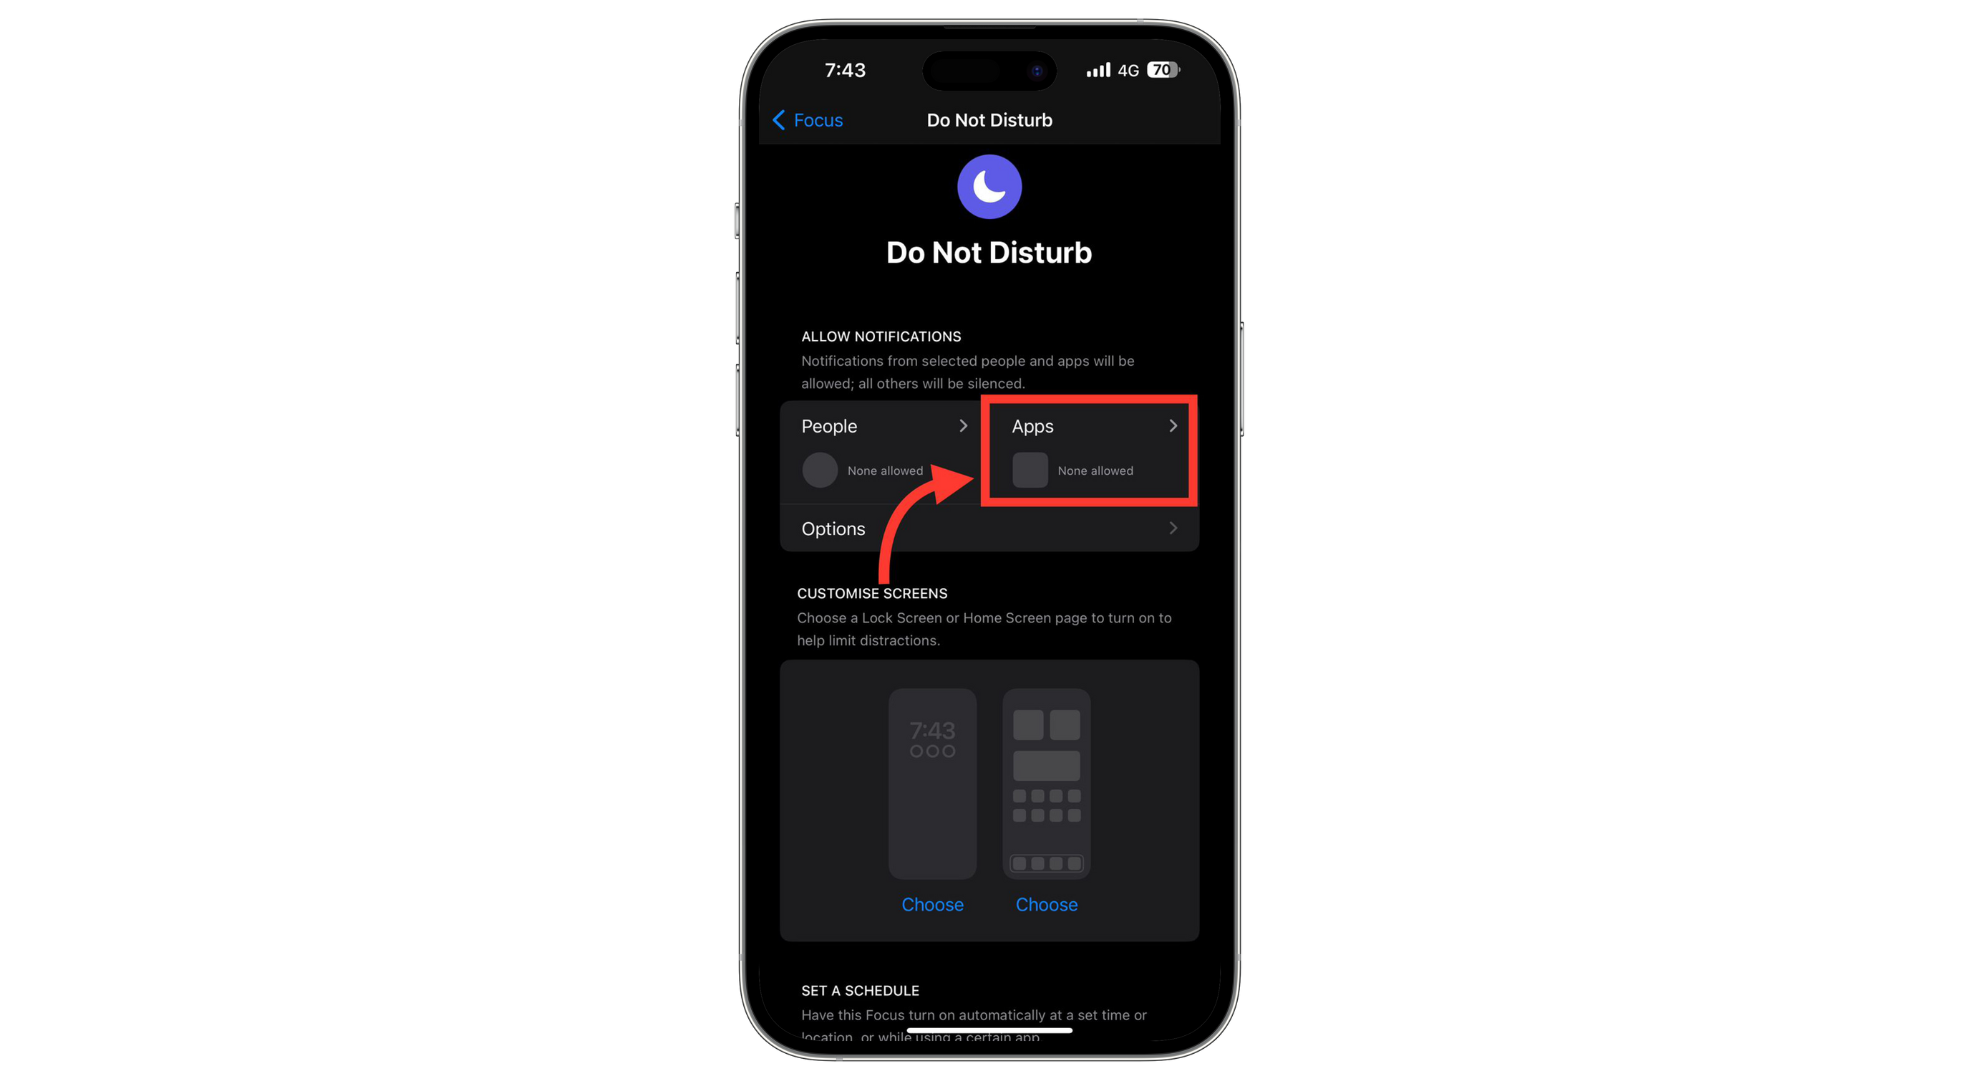
Tap on the Apps tab - There are two options here: “Silence Notifications From” and “Allow Notifications From.”
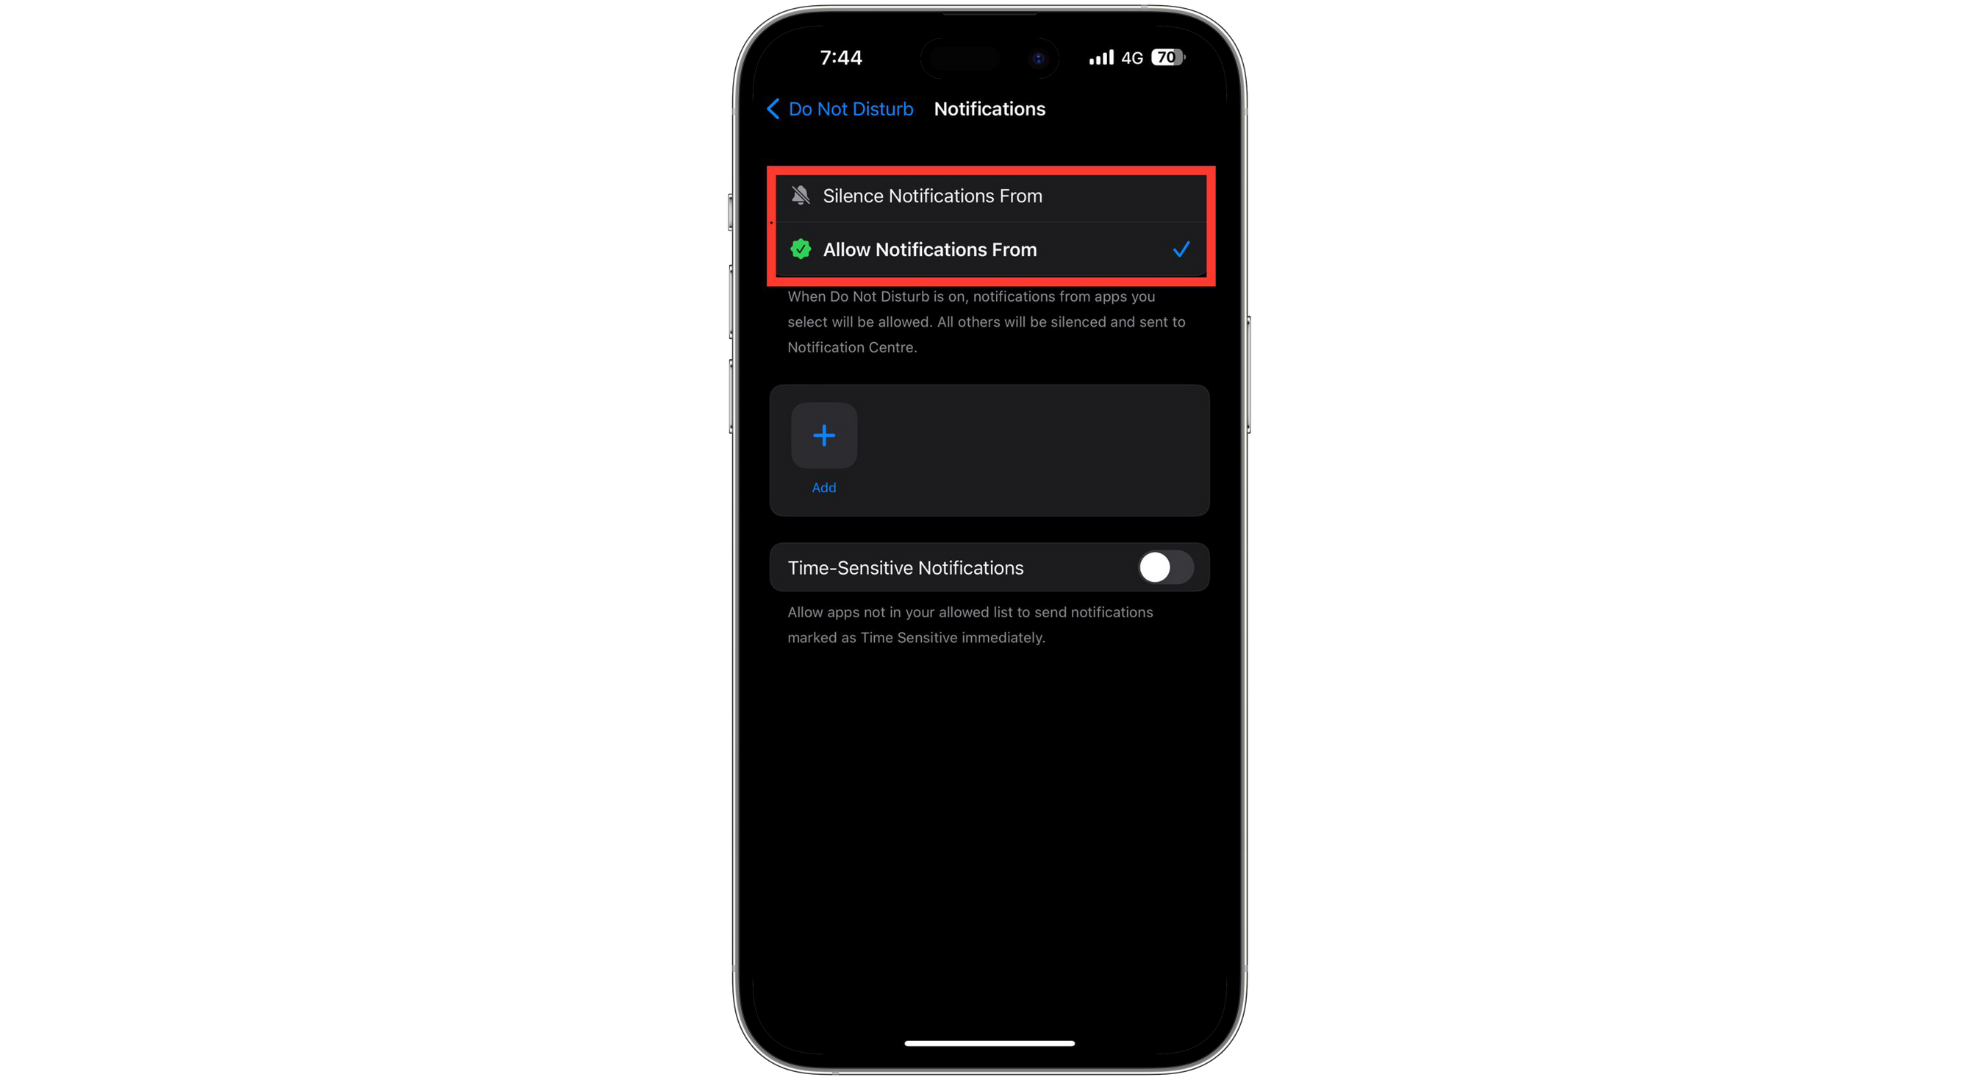
You’ll see two options - Choose “Silence Notifications From” to stop notifications from selected apps. Enable “Time Sensitive Notification” to allow urgent notifications from these apps.
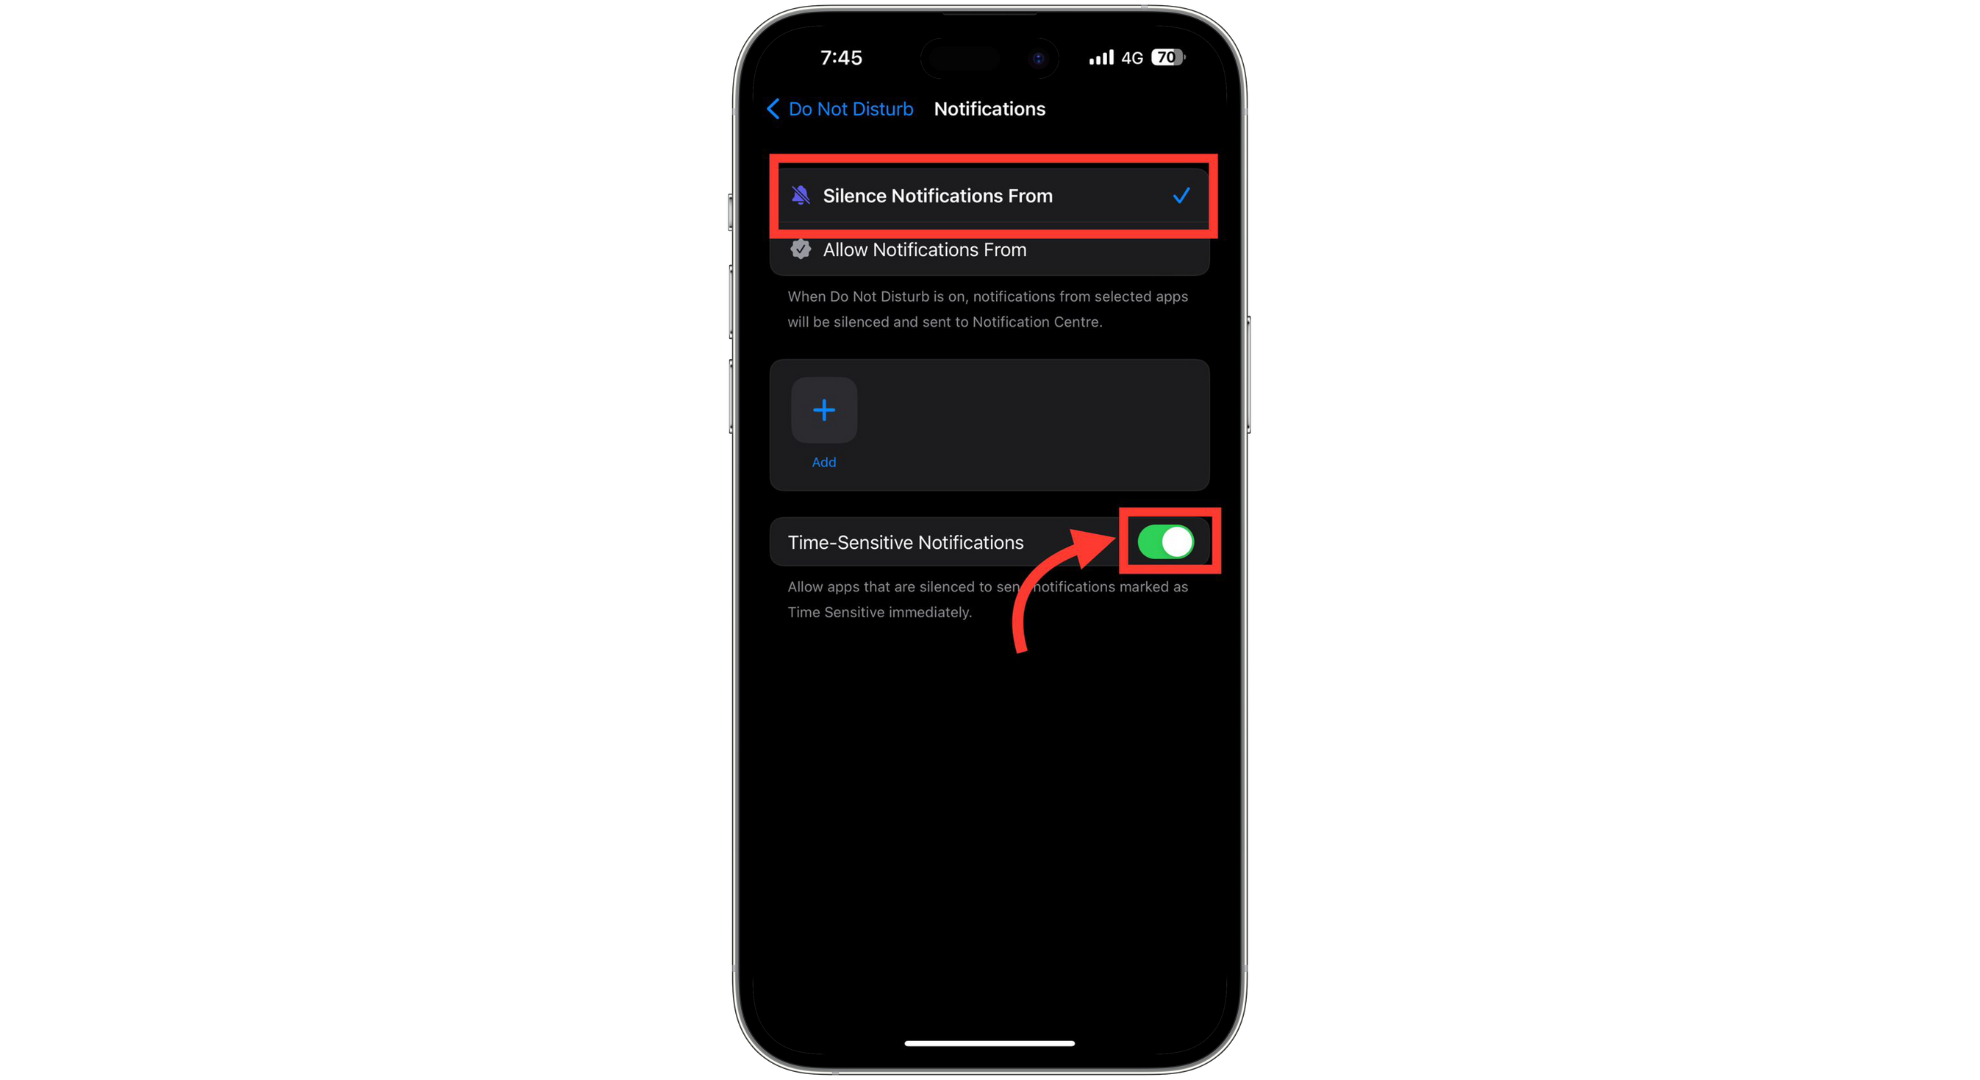
Choose Silence Notifications From - Tap the “+” icon to add apps to your allowed list. It’s advisable to avoid adding distracting apps like social media.

Tap the + icon to add apps - To receive notifications from certain apps while silencing others, tap on “Allow Notifications From” and select the desired apps by tapping the “Add” button.
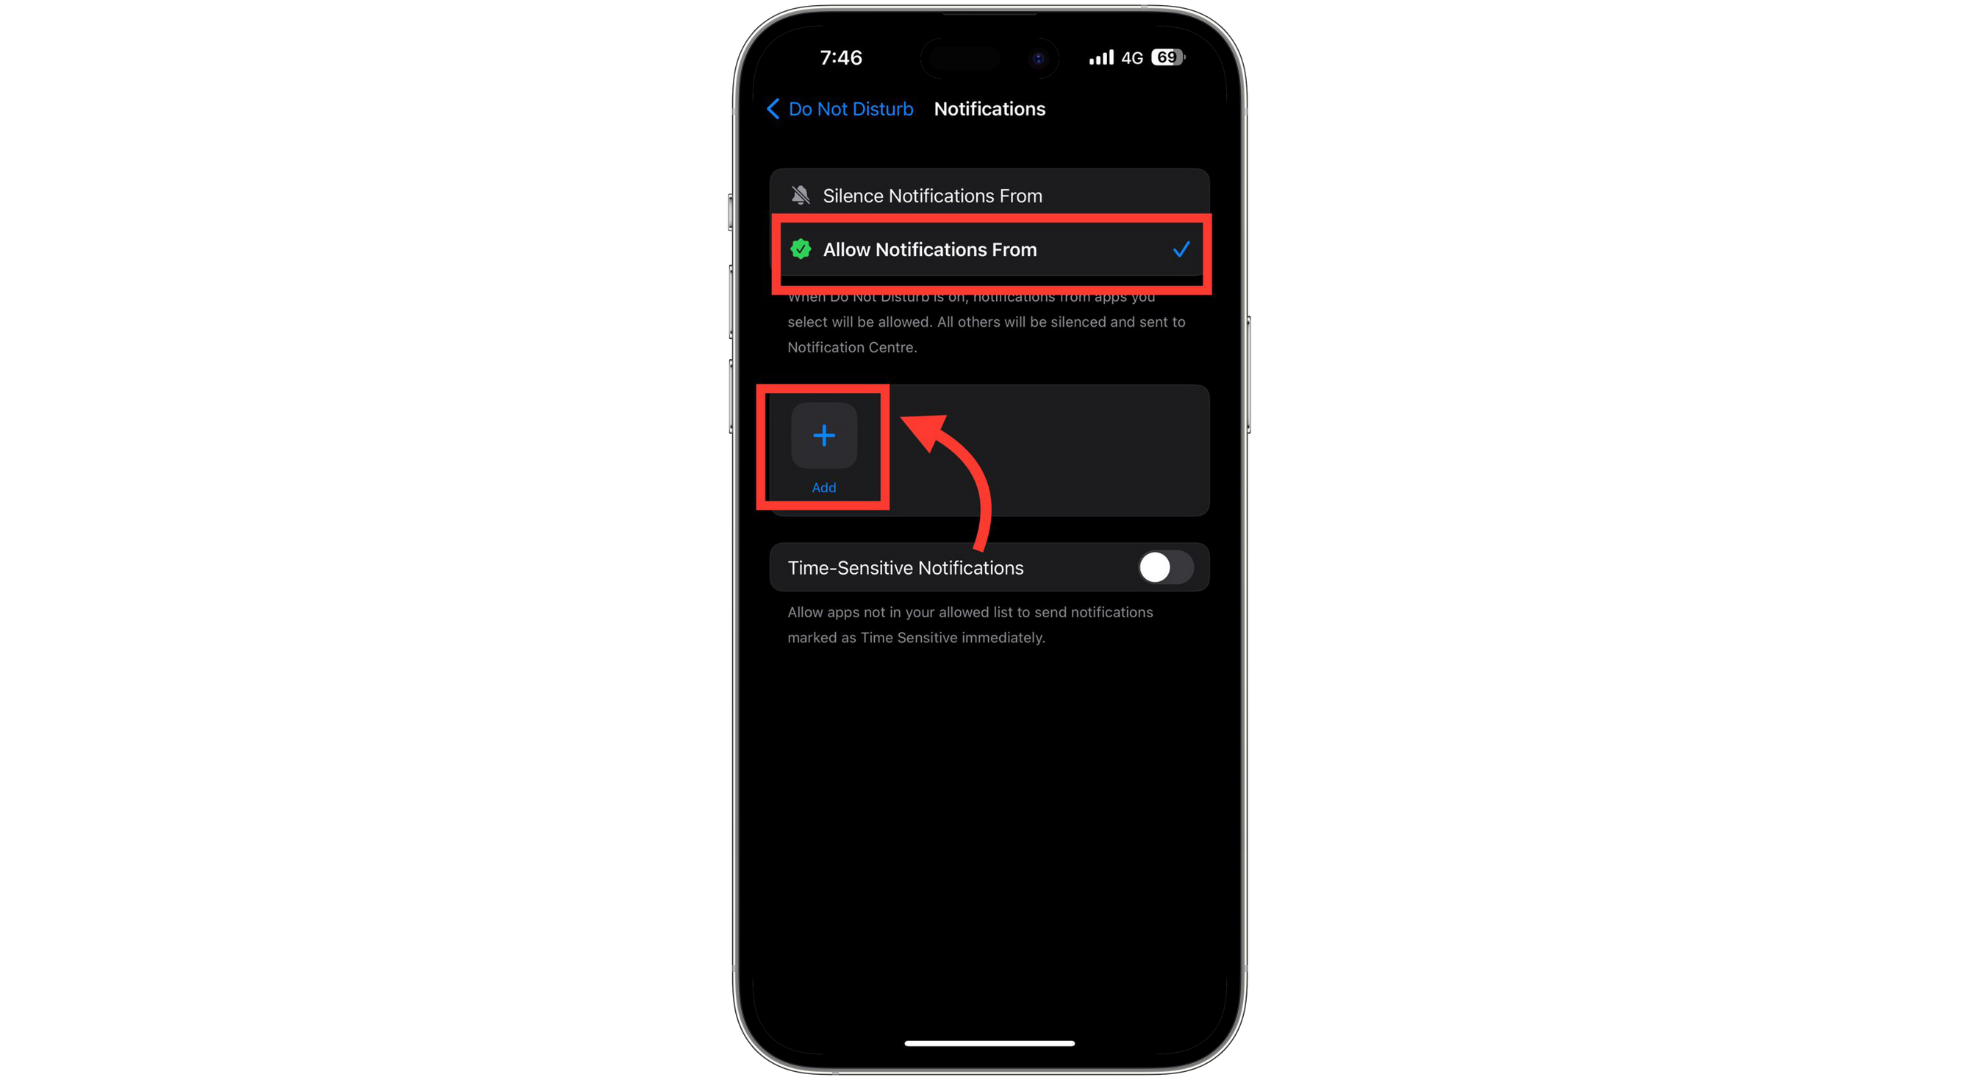
Select the desired apps by tapping the Add
3. Customize Focus Filters
Under Do Not Disturb on your iPhone, Focus Filters lets you customize app and system performances for a tailored, distraction-free experience.
- Scroll to find “Focus Filters” in the Do Not Disturb settings. Tap “Add Filter“.
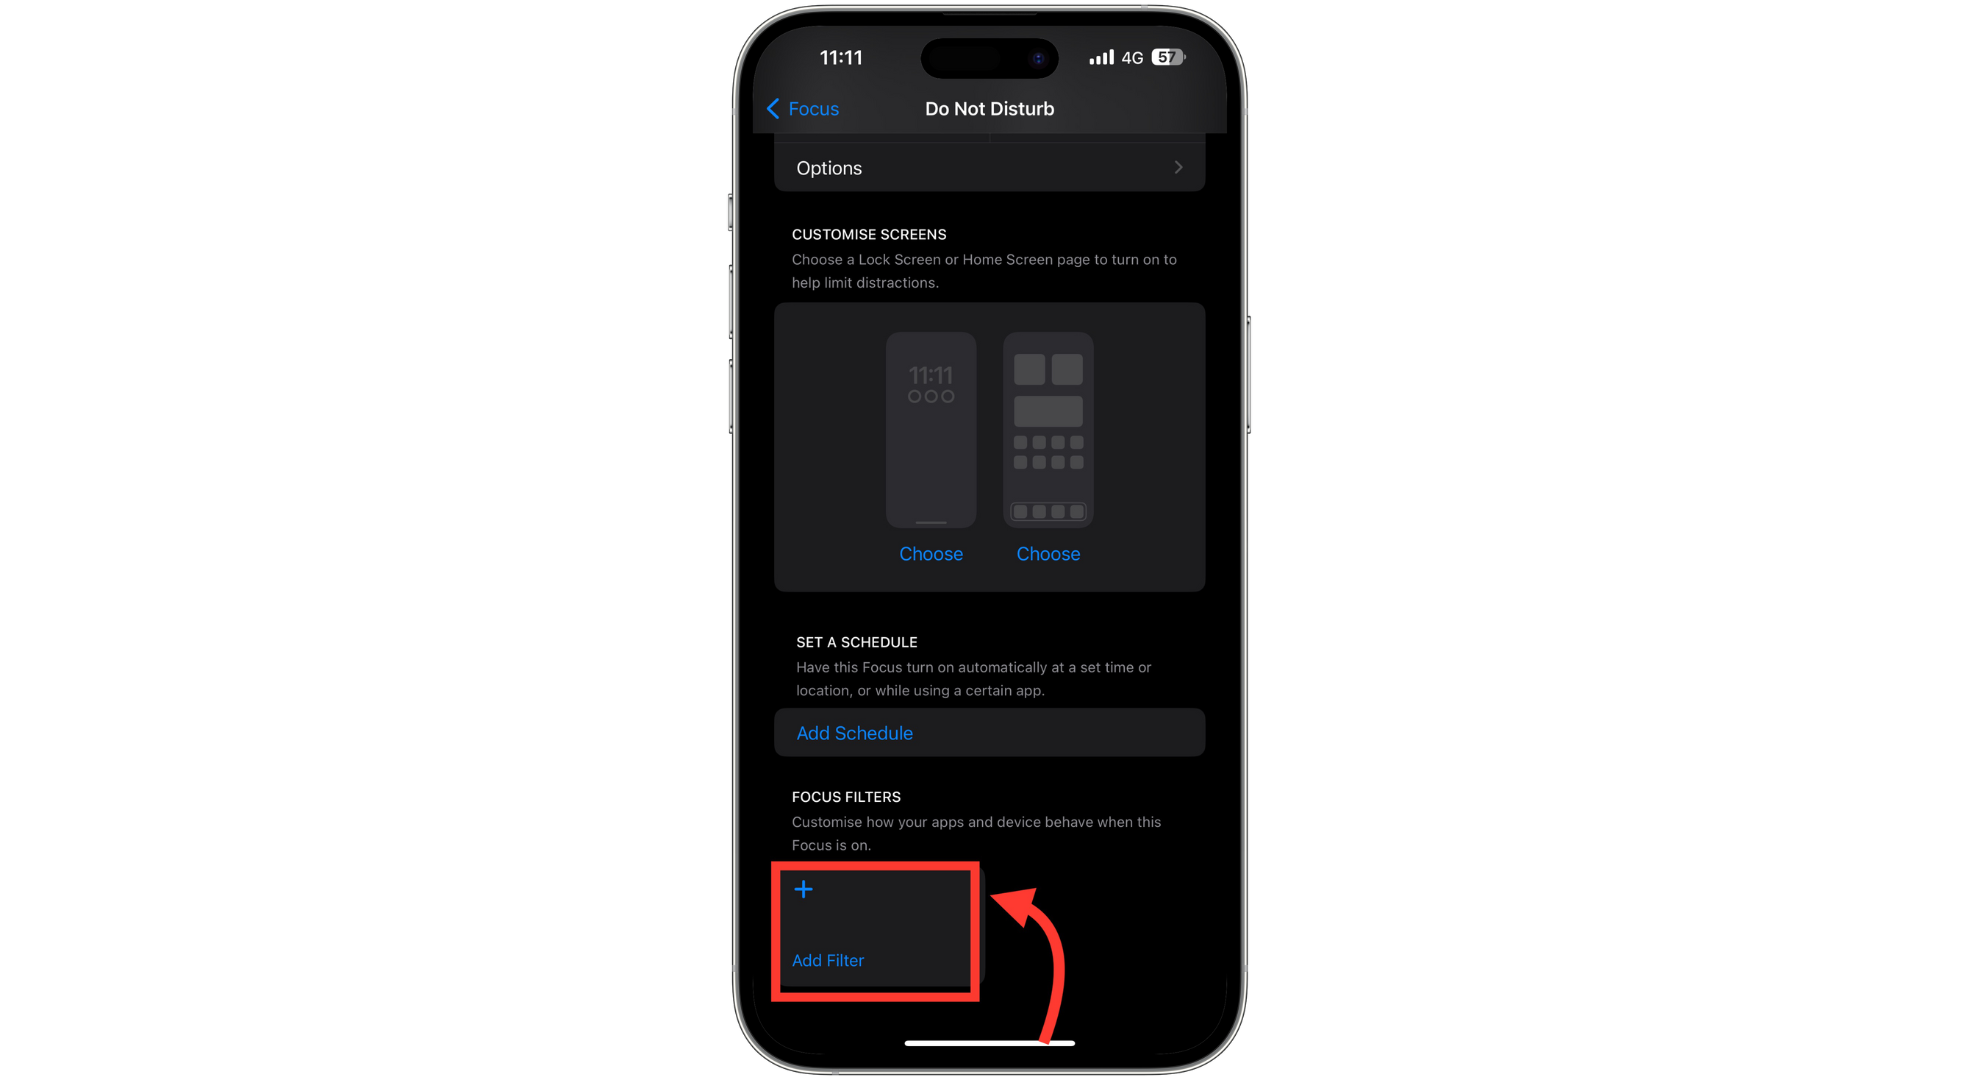
Tap Add Filter - You will see two sections: “App Filters” and “System Filters.”
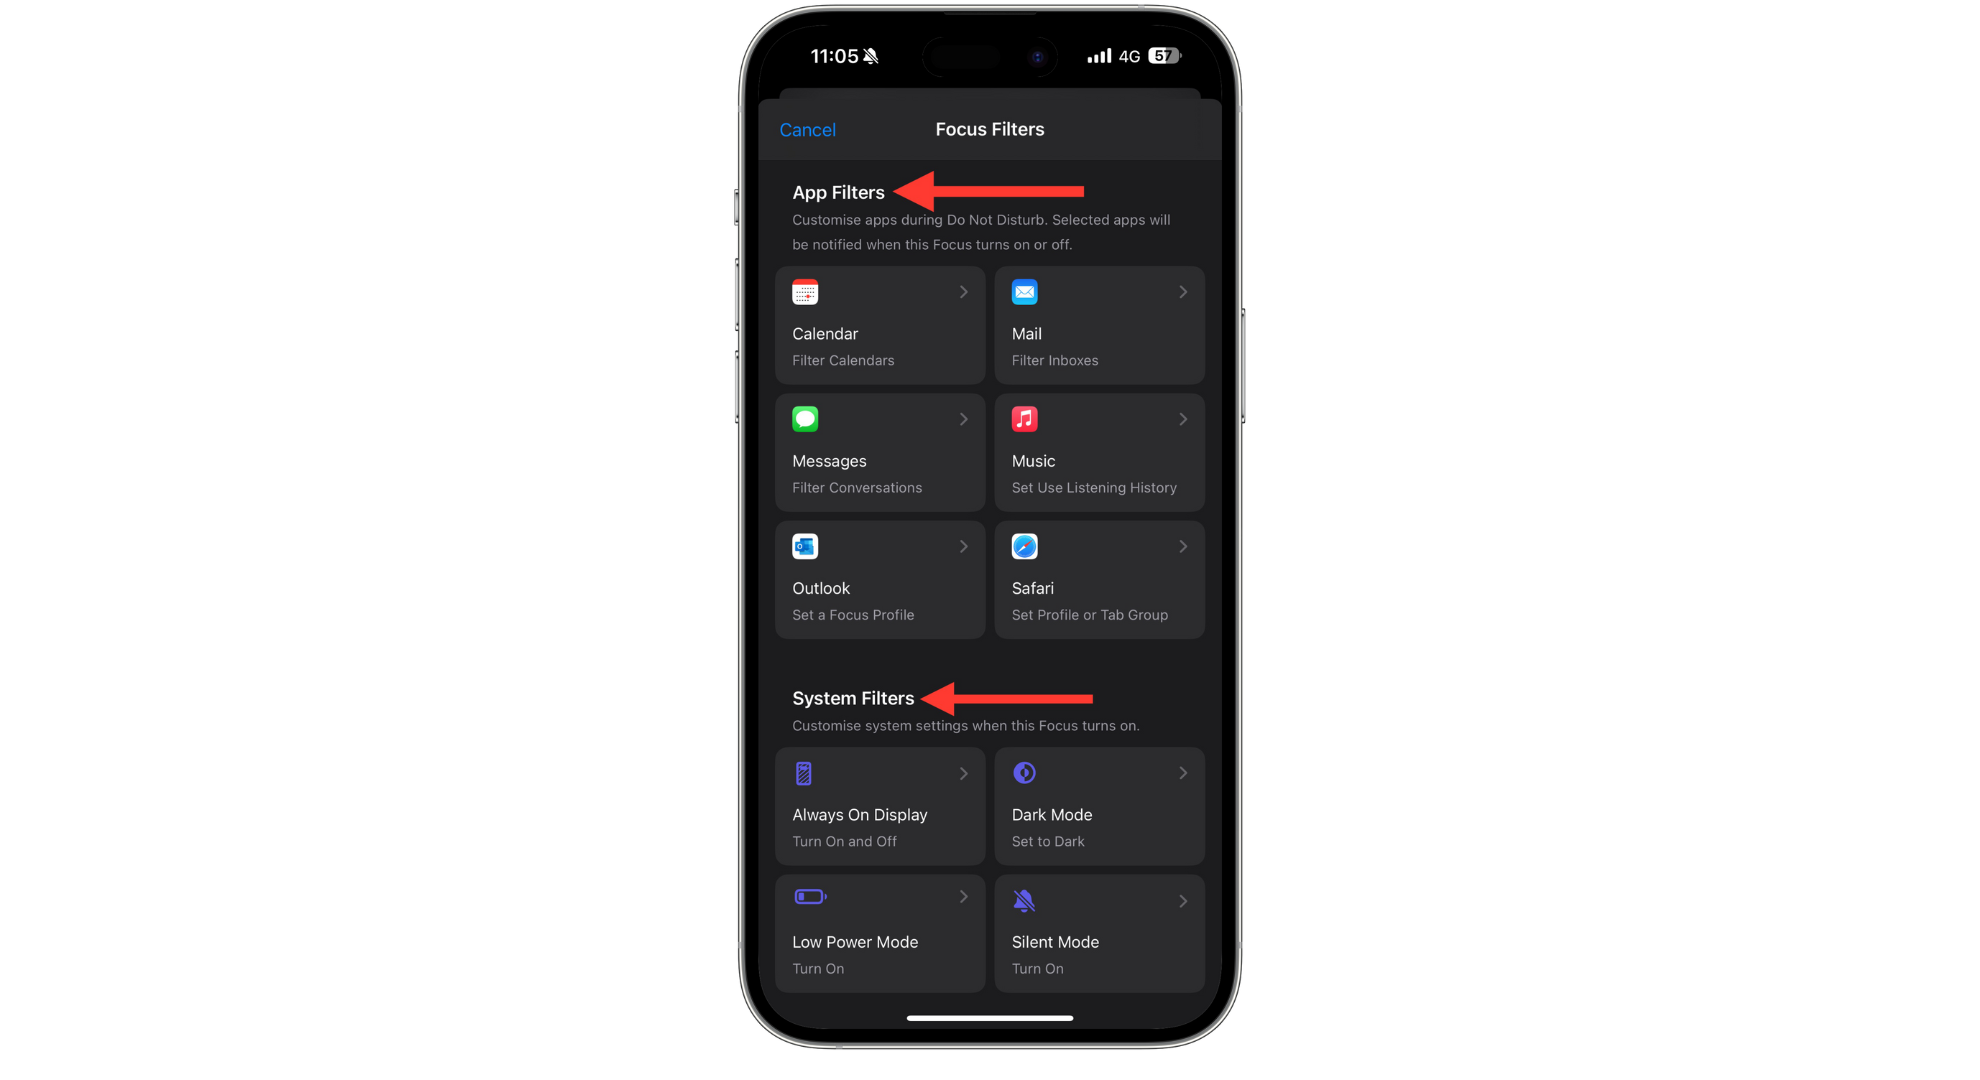
App Filters and System Filters - Under App Filters, choose from the following:
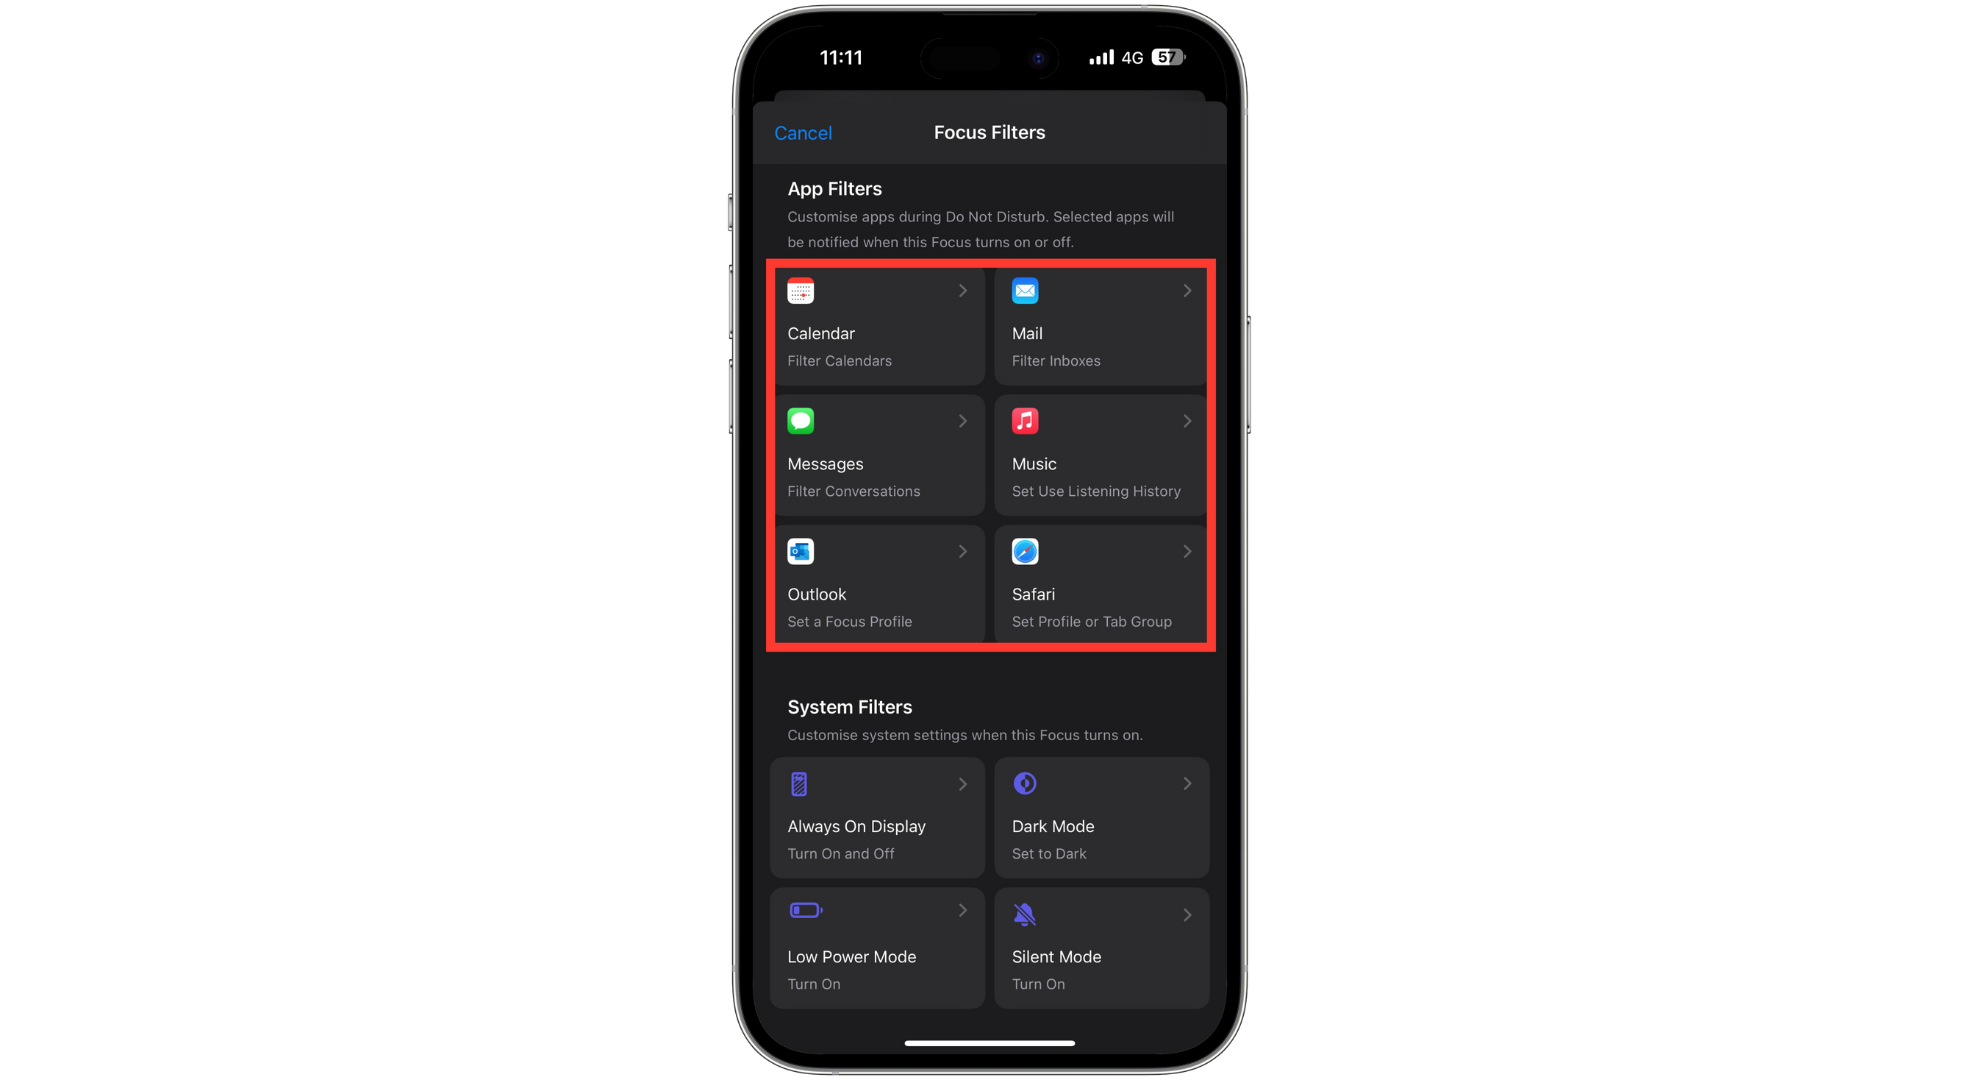
You can choose several app filters
-
- Calendar: Set preferences for calendar visibility.
- Mail: Configure email focus filters.
- Messages: Control message notifications from specific people.
- Safari: Set which tab group is accessible during Do Not Disturb.
- System Filters offers these options:
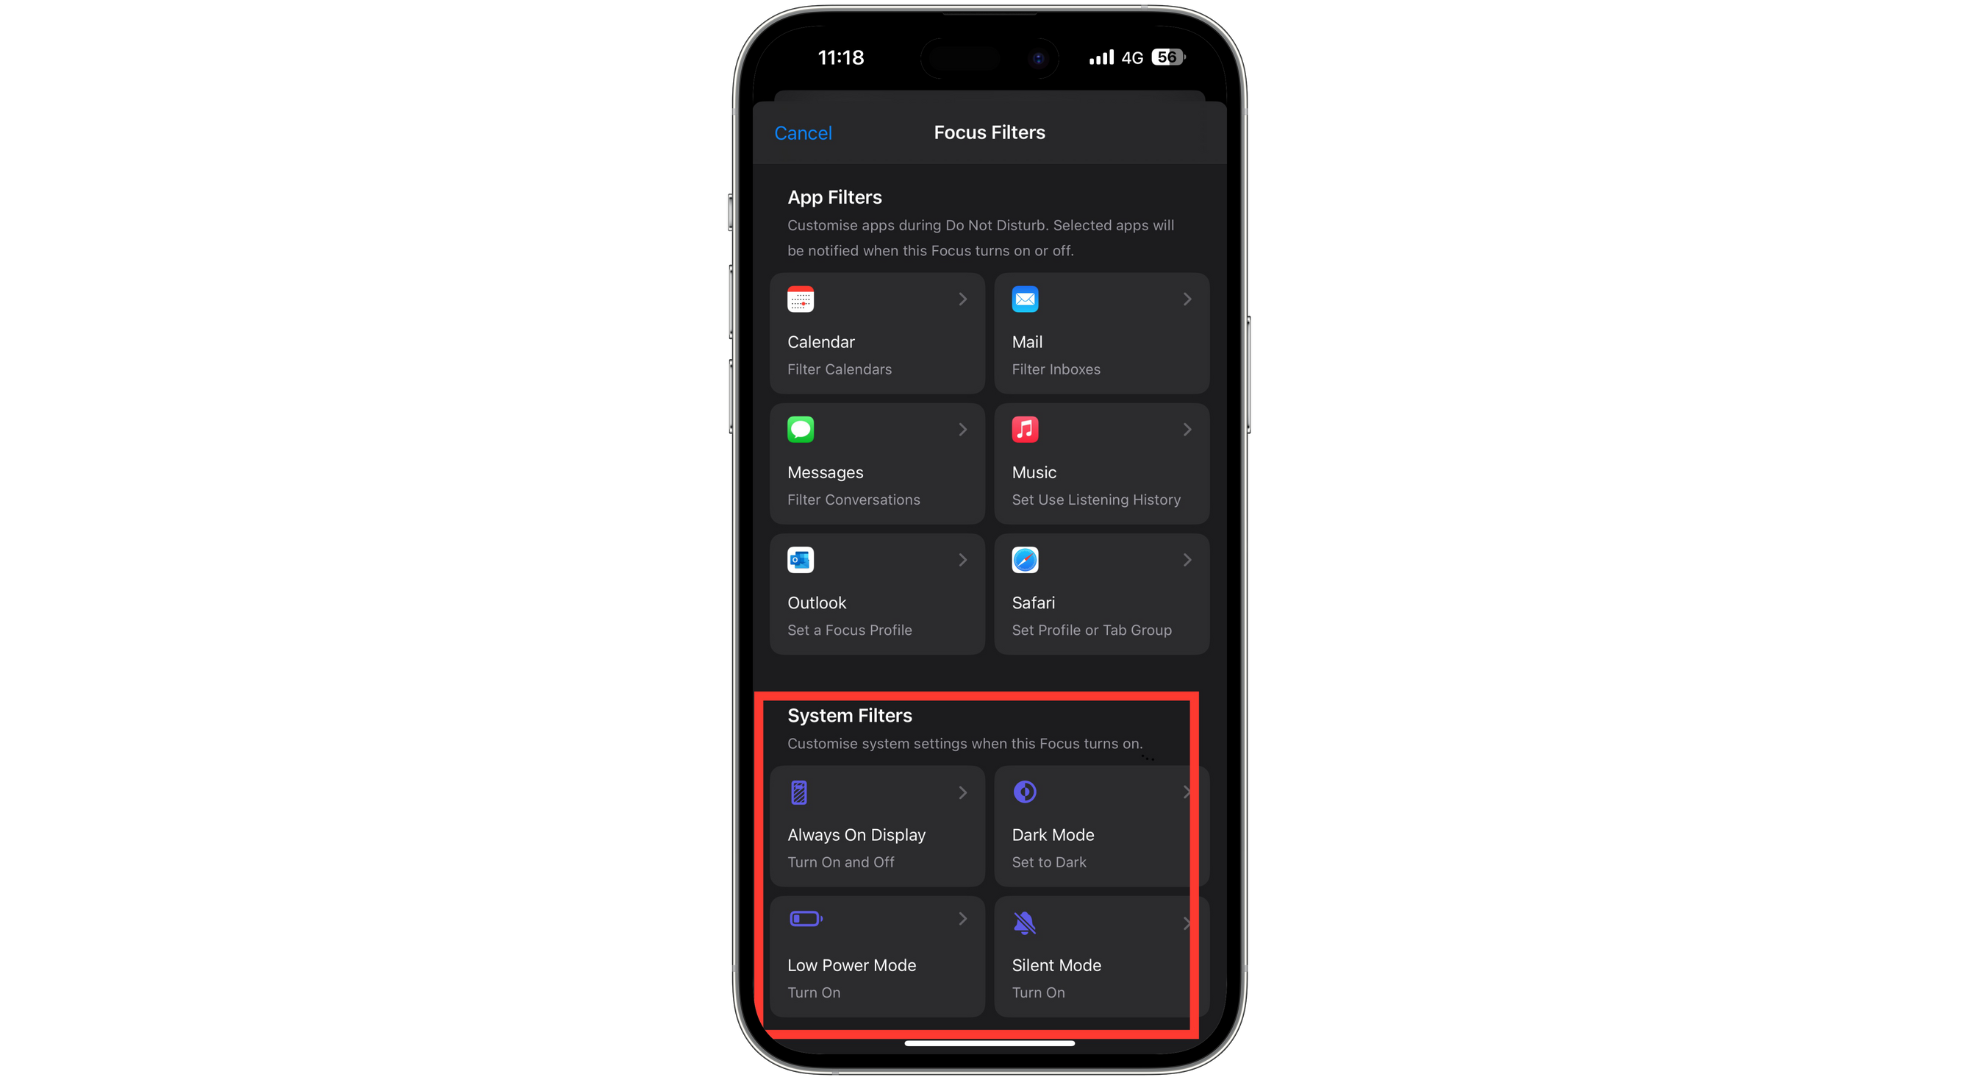
You can choose System Filters
-
- Appearance: Choose between dark or light mode during Do Not Disturb.
- Low Power Mode: Automatically turn low power mode on or off in conjunction with Do Not Disturb.
- Always On Display: Control the Always On Display feature during Do Not Disturb.
- Silent Mode: Automatically turn silent mode on or off when Do Not Disturb is active.
How to turn off Do Not Disturb on an iPhone?
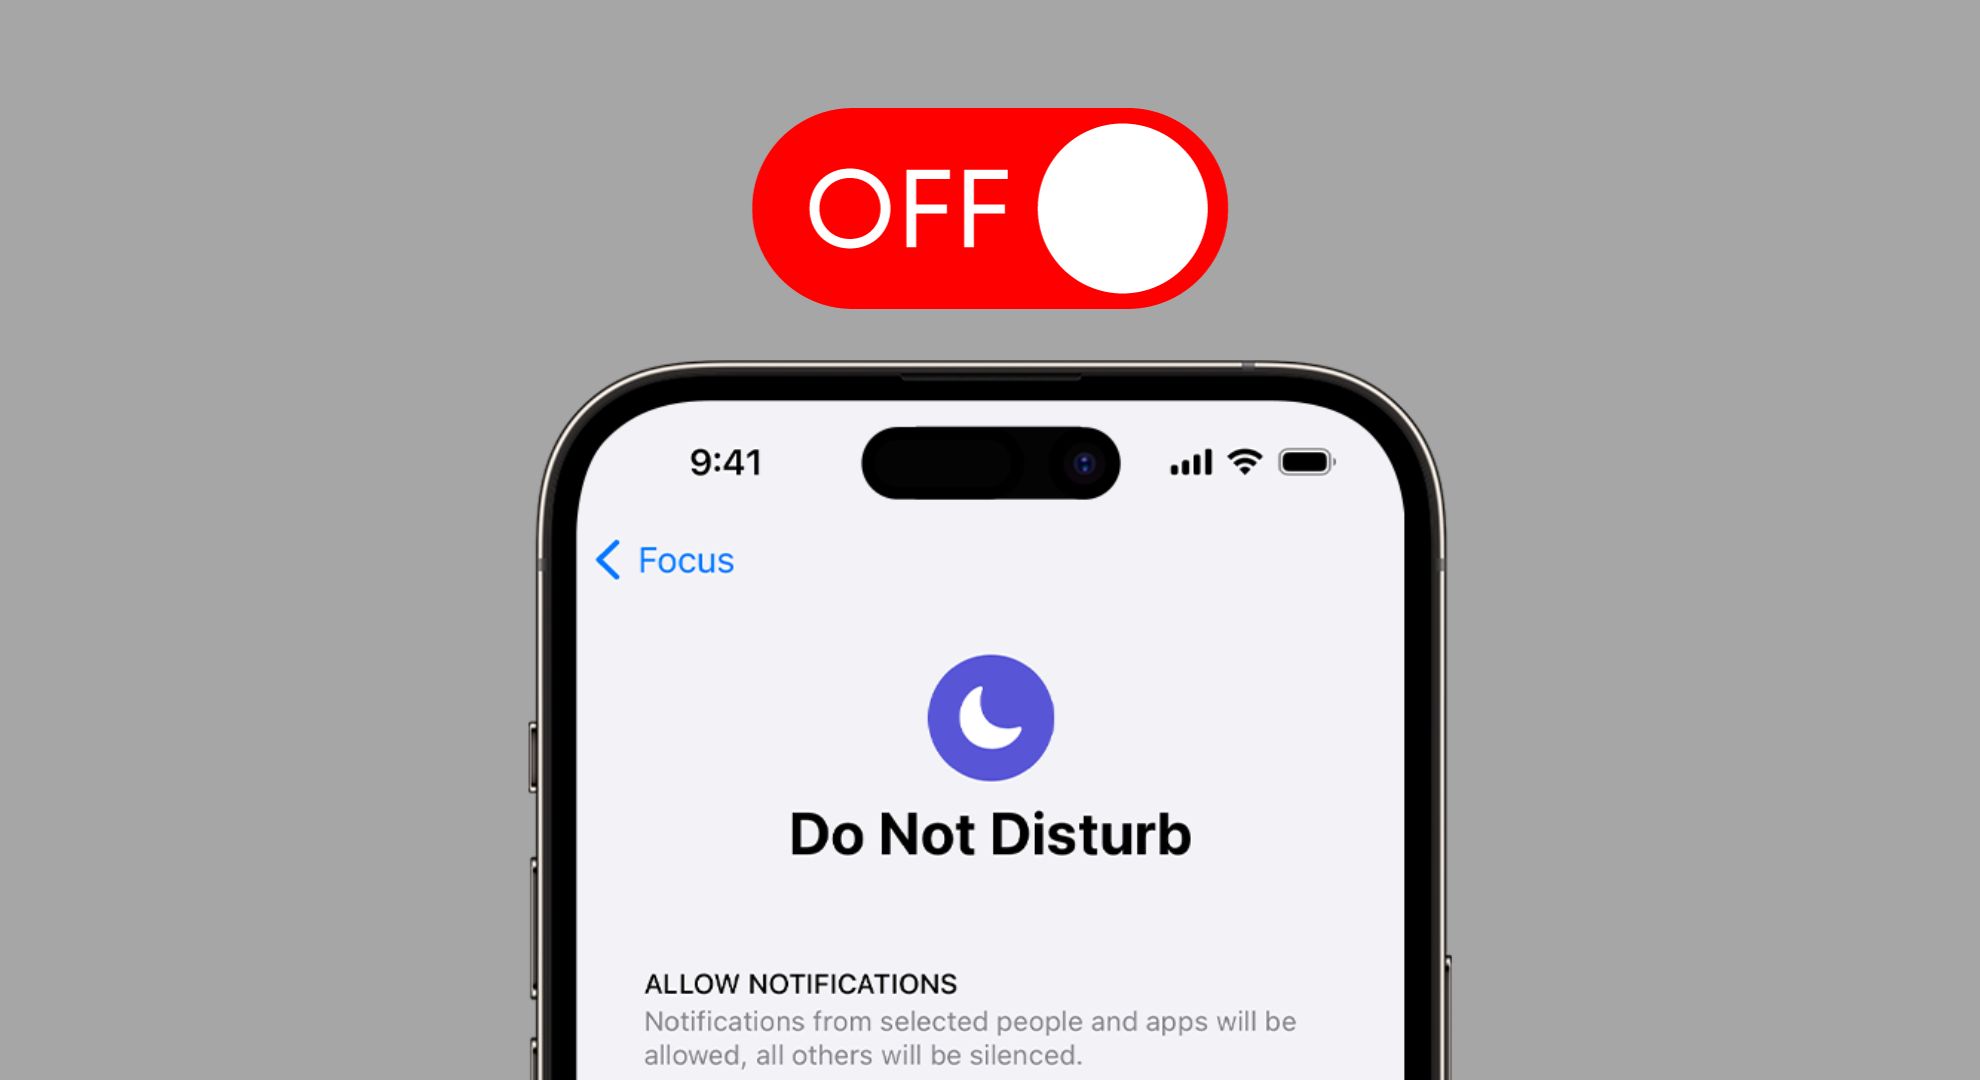
Turning off Do Not Disturb mode on an iPhone follows steps similar to those you take while turning it on. To turn off Do Not Disturb on an iPhone running iOS 15 or later, swipe to access the Control Center and tap the Focus icon (often a moon symbol). Then, disable “Do Not Disturb” from the options.
For iOS 14 or earlier, access the Control Center and tap the moon icon to turn off Do Not Disturb. In both cases, if DND is set to a schedule, it will automatically turn off when the scheduled time ends. However, these steps allow for manual deactivation at any time.
Reviewed by Huzaifa Haroon