How to Disable Video Autoplay in Chrome, Firefox, and Microsoft Edge?
When you visit a website many a time, you may have noticed a video or an audio playing in the background. I personally find it very annoying, and you may too as this is something that disrupts focus. This usually appears on a corner or somewhere, and it happens due to the default settings of your web browser.
Almost all browsers like Chrome, Firefox, and Microsoft Edge have the autoplay setting enabled by default. In this article, we will walk you through all the steps required to address this problem.
Disabling Video/Audio Autoplay in Chrome
Google Chrome is an eminent web browser. It has the video autoplay function enabled by default. In its previous versions, it allowed users to disable video autoplay in developer flags. But in its current releases, Google changed chrome settings and buried the video autoplay function. Now it is difficult to disable video autoplay in chrome but you can mute all the websites and unmute them manually.
Method 1: Mute Audio for all Websites
The first method of disabling video/audio is to Mute sites that play sound. This option will mute sound but still, videos will play but you can unmute any website manually.
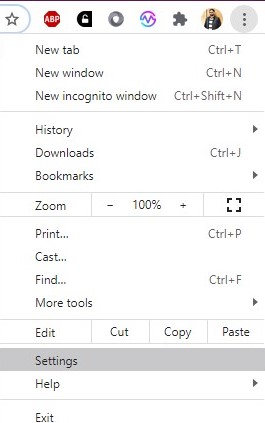
- Start the Chrome browser and click on the vertically three dots.
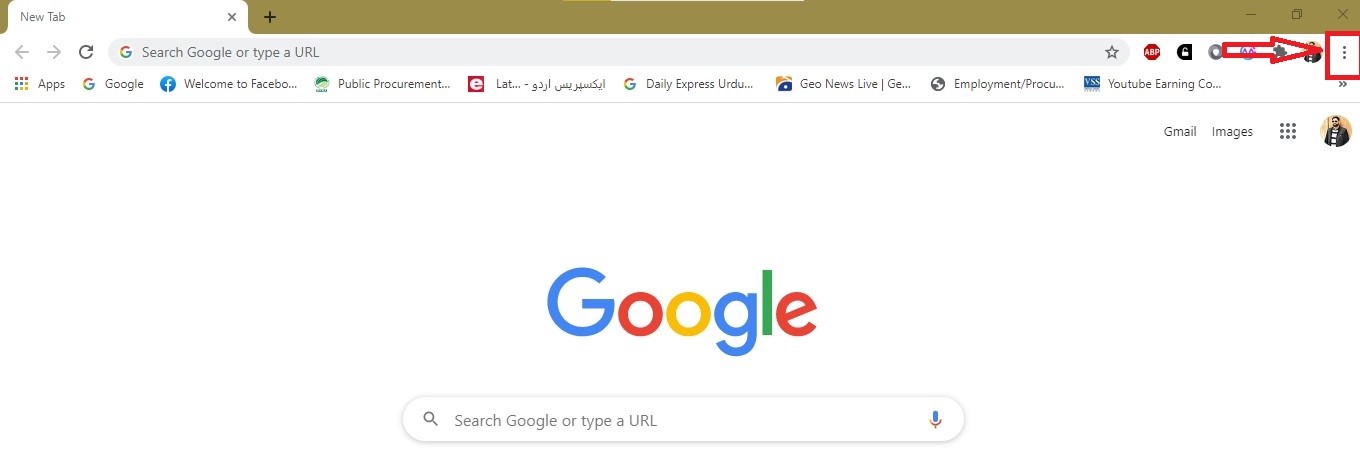
- Select Settings from the appeared menu.
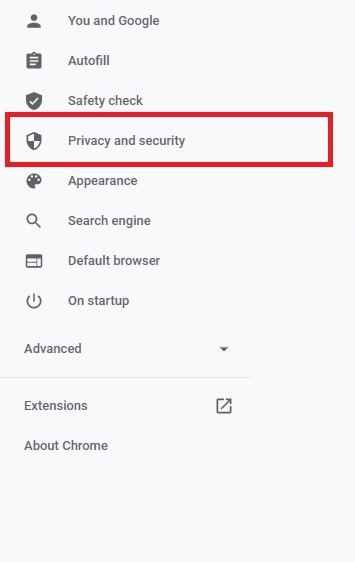
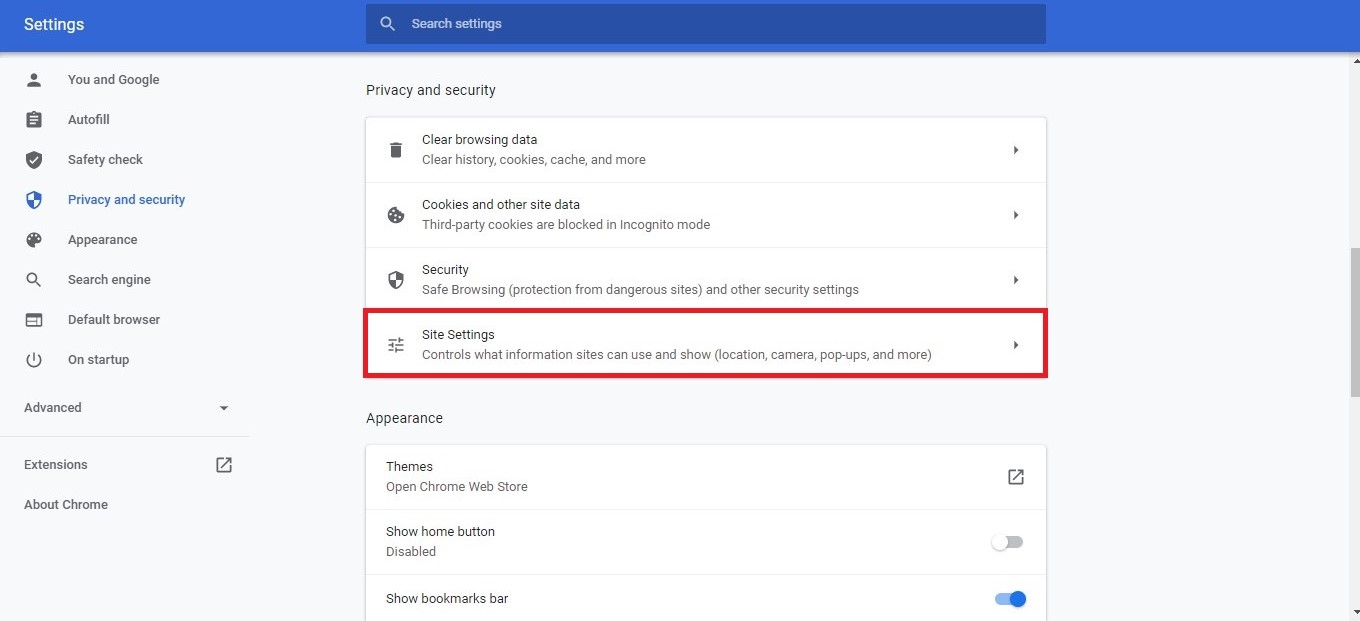
- Chrome’s menu will be opened. Now click on the Privacy and Security from the left side listed options.
- Select Site Settings from the further opened options.
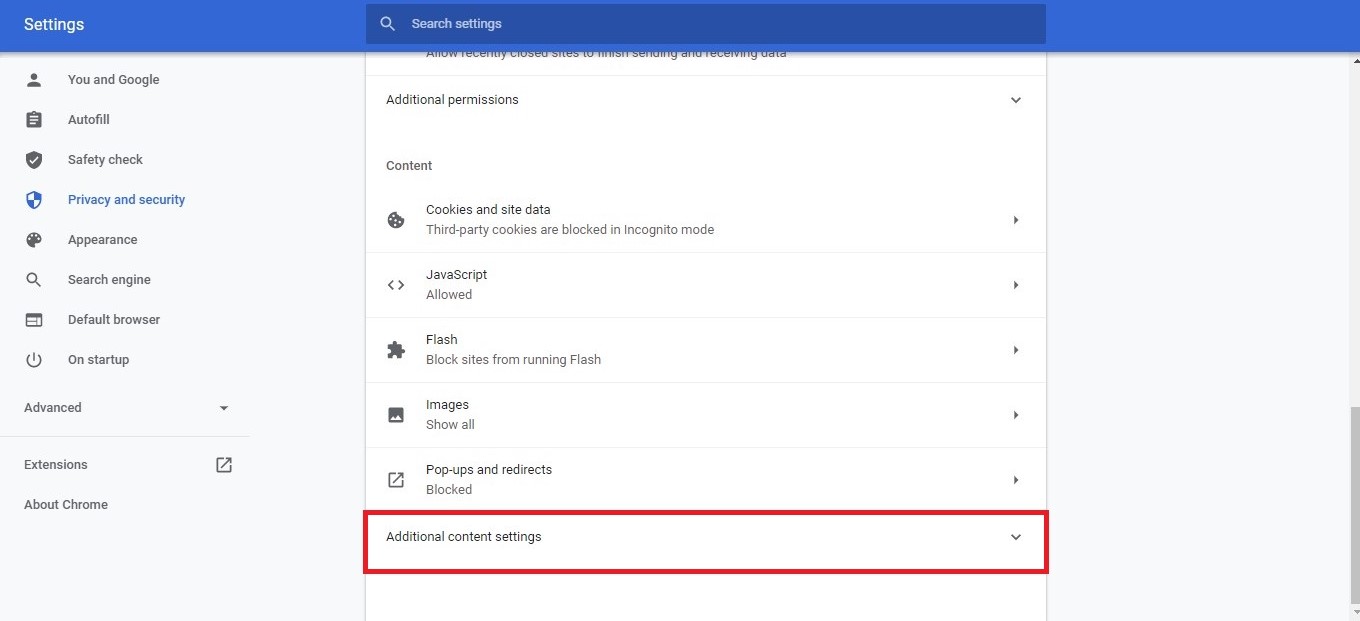
- The Chrome site settings will be opened. Scroll down the settings and click on the Additional content settings.
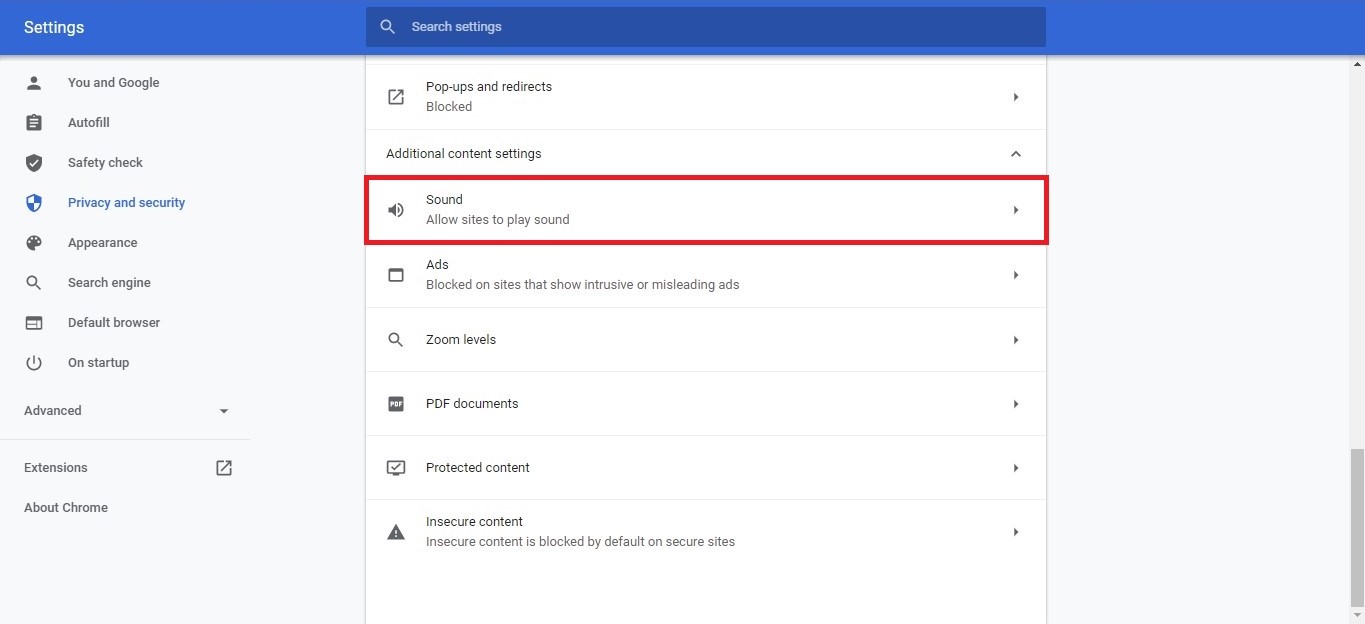
- In additional content settings, click on the Sound option.
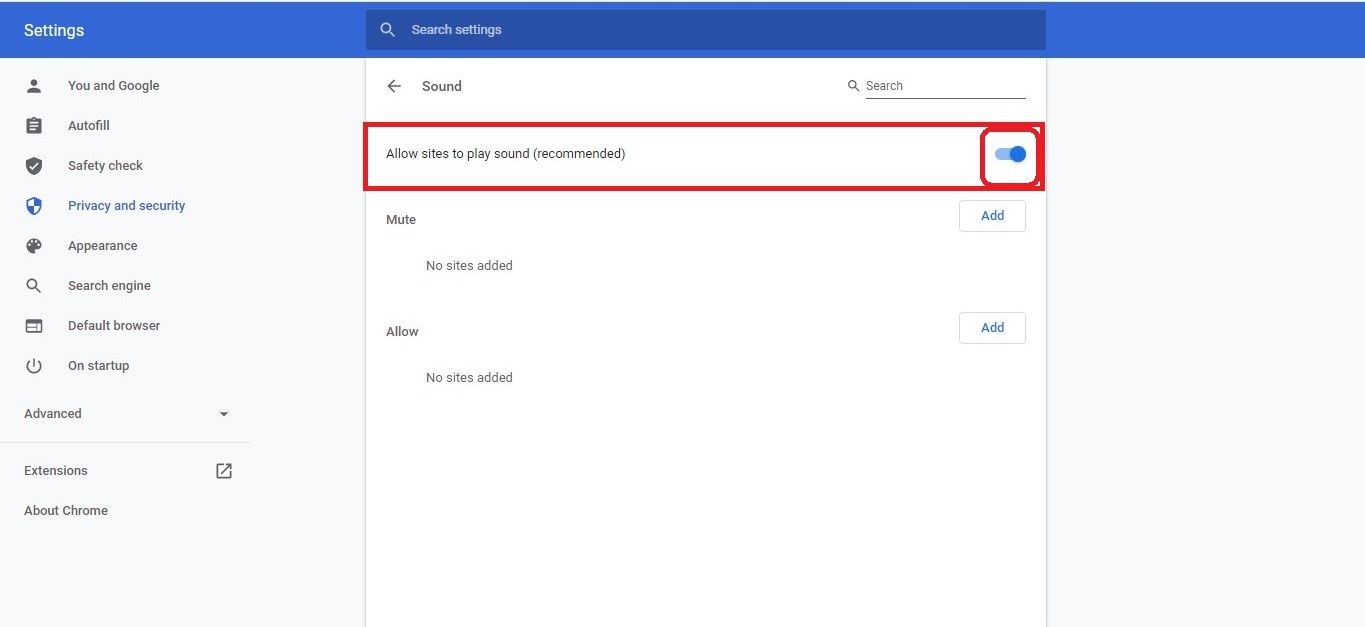
- Now toggle on the Mute sites that play sound This will mute all the websites.
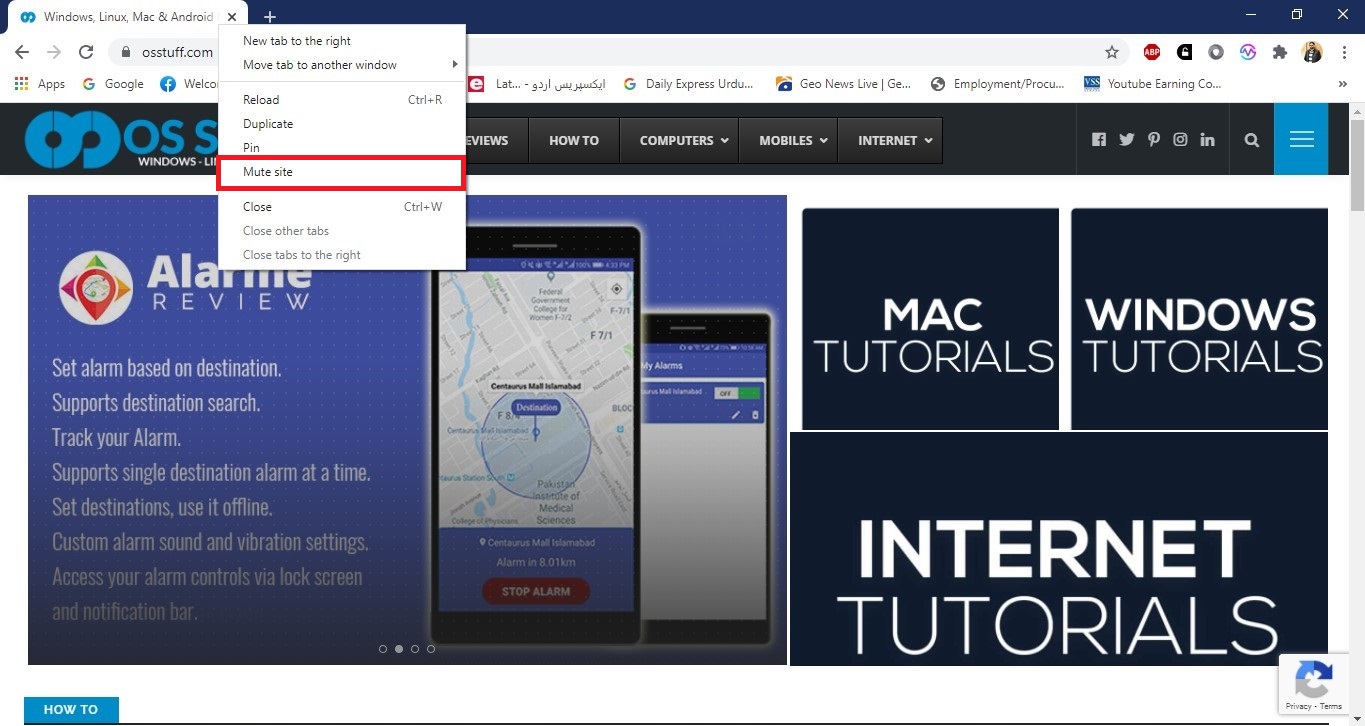
- If you want to unmute sound for a particular website. Then right-click on that particular tab, a small menu will open. From that menu click on the Unmute site option.
Method 2: Disable Autoplay from Chrome Shortcut
In the latest versions of Chrome, Google prevents users to access Disable Autoplay option. But don’t worry; it can still be disabled by command line flag from the desktop shortcut icon. This method works only when you open chrome from the desktop shortcut. Also, it does not surely work for all websites.
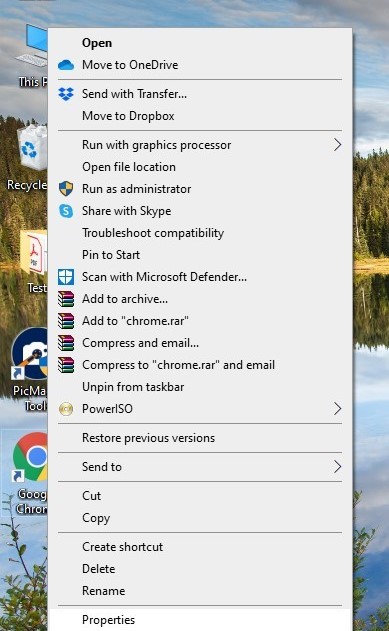
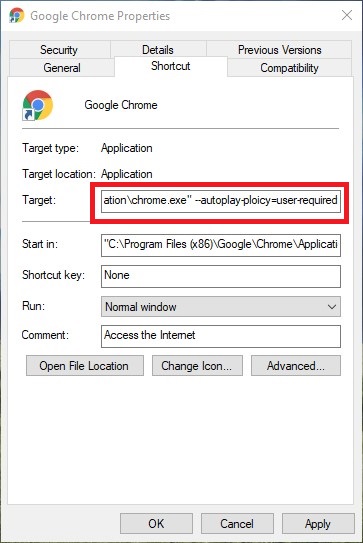
- Right-click on the Google Chrome desktop shortcut icon. Then click on the Properties option from the menu.
- Google Chrome Properties will be opened and by default Shortcut named tab open.
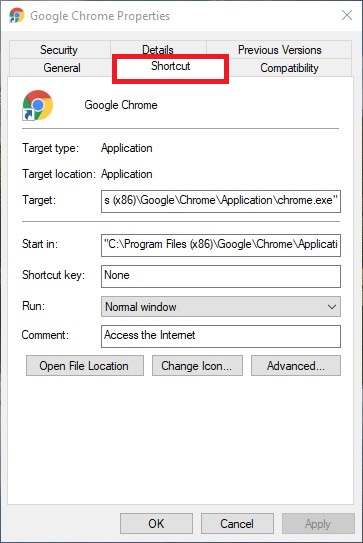
- In the Target field, set the cursor at the end of the field after chrome.exe quotes.
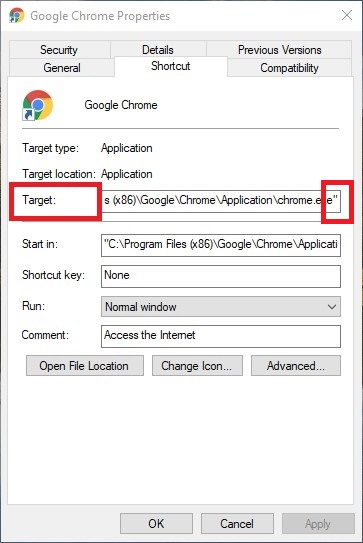
- Now add a space and type “–autoplay-policy=user-required” and press the Apply button. This may need admin permissions to allow the change.
Disabling Video/Audio Autoplay in Firefox
Firefox is also a renowned browser and fortunately, it allows users to disable autoplay video. You can mute only audio or block both video and audio within its privacy settings.
- Launch the Firefox and click on the three-line stack icon. A menu will be opened.
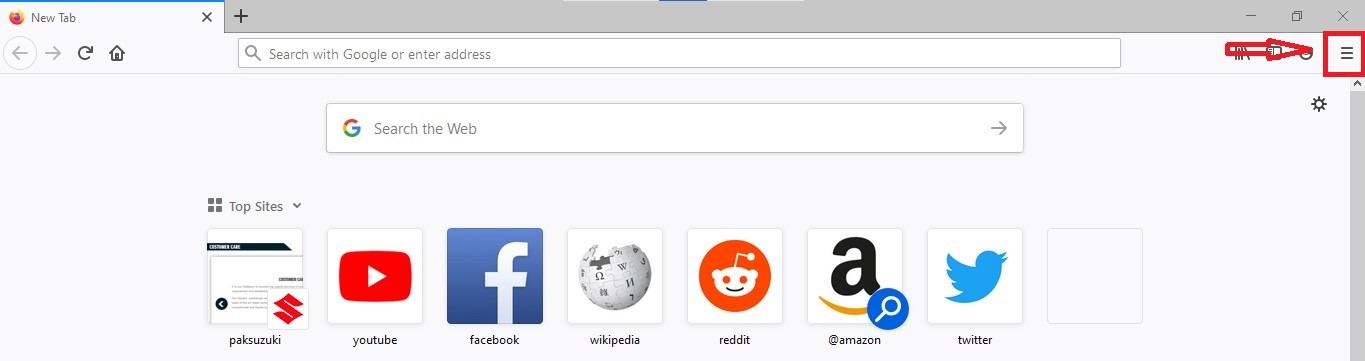
- From the menu click on the Options.

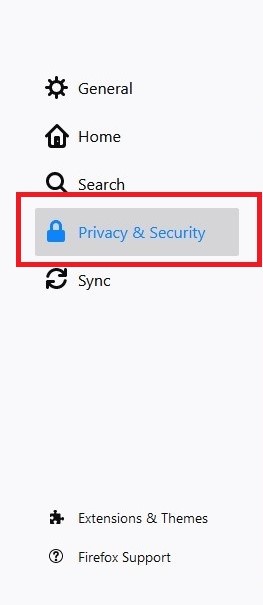
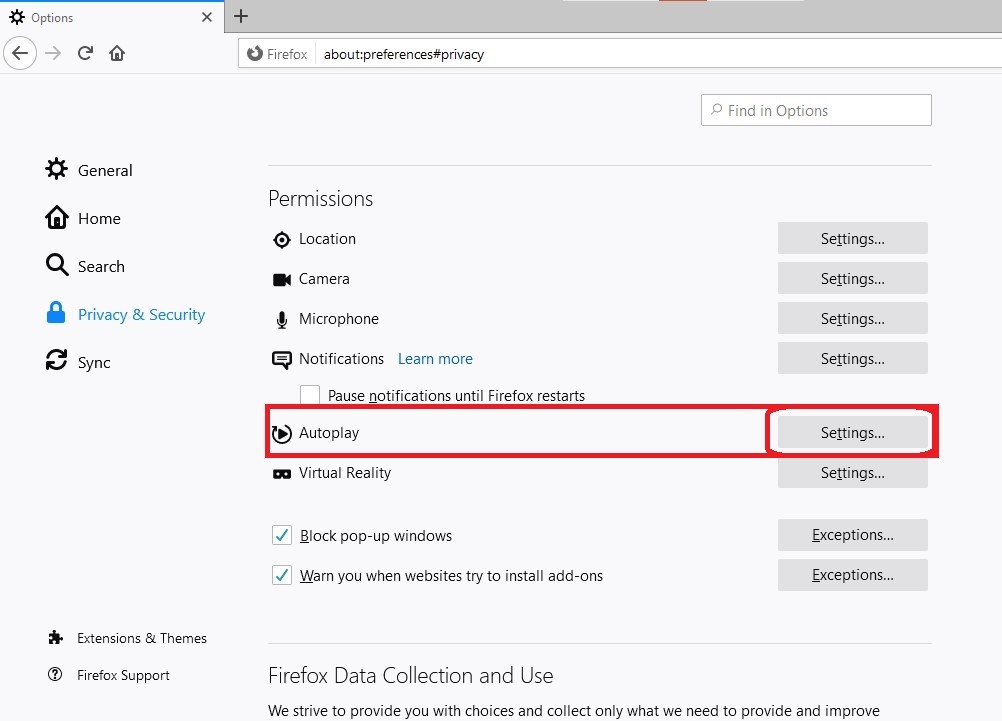
- Firefox Settings will be opened. Now choose the Privacy & Security option from the left side listed options.
- Scroll down the settings and find the Permissions option.
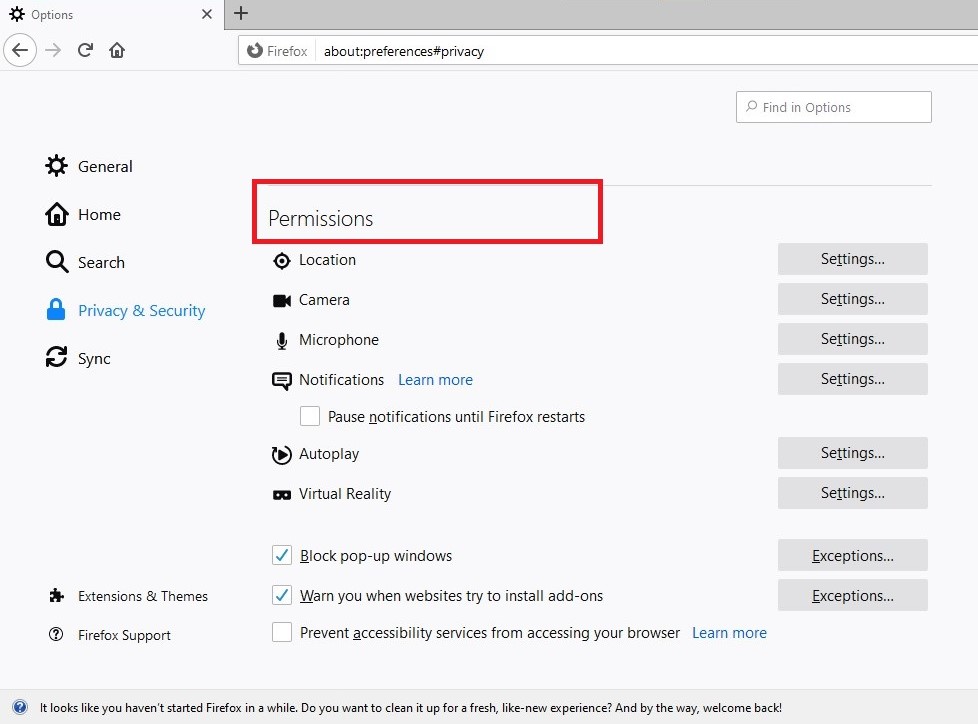
- Now click on the Settings ahead of the Autoplay option.
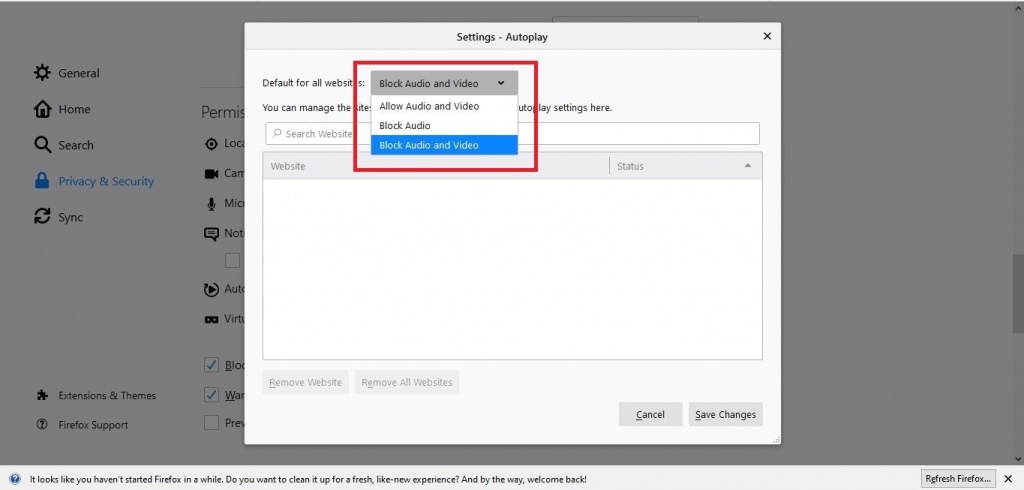
- A pop-up window will be opened with the autoplay settings. From the drop-down menu of Default for all websites, you can either block only audio or both video and audio.
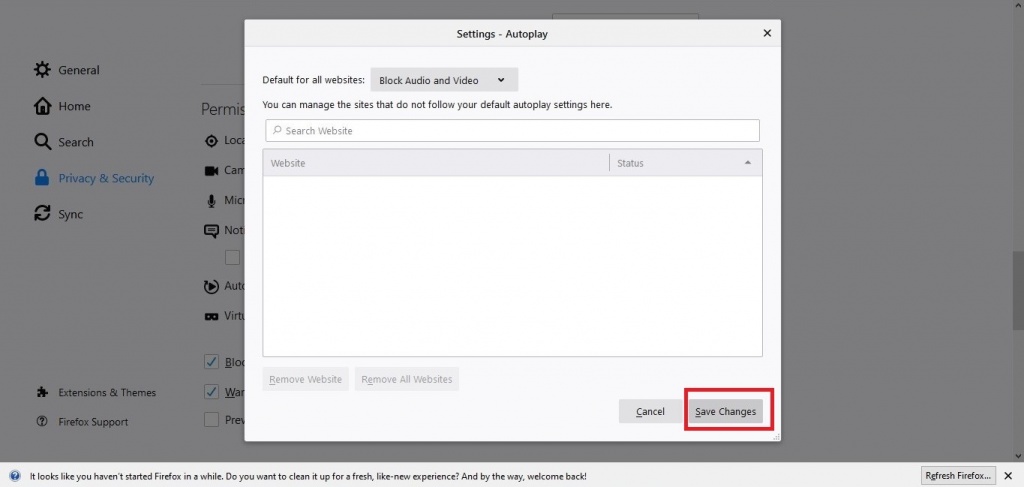
- After selecting the option, click on the Save Changes button in the bottom right corner of the window.
Note: With these settings, you can also control the website’s video autoplay permissions separately like streaming service or YouTube.
Disabling Video/Audio Autoplay in Microsoft Edge
Microsoft Edge replaces Internet Explorer and is famous these days with his new look and improved performance. It has simple settings to control the whole browser and easily disable the autoplay video/audio.
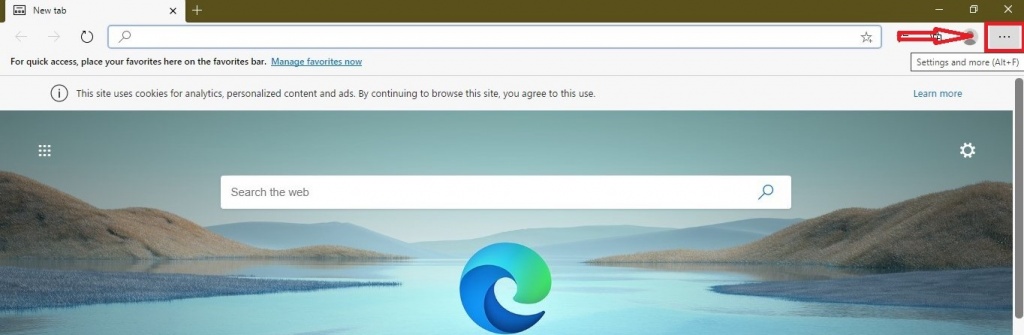
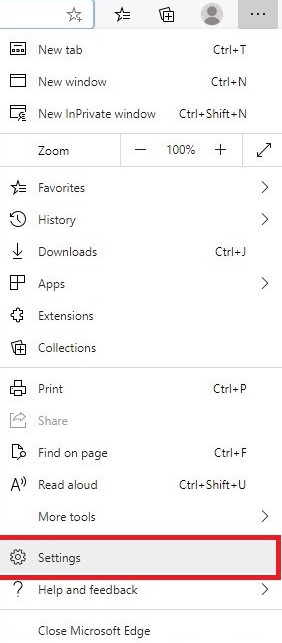
- Launch the Microsoft Edge and click on the three-dotted line icon in the right upper corner.
- A menu will be opened. Select Settings from the listed menu.
- Settings will be opened.
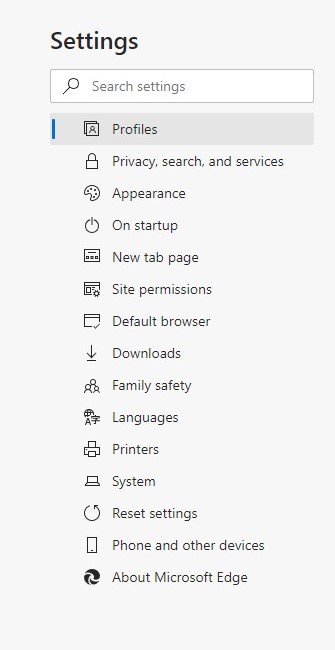
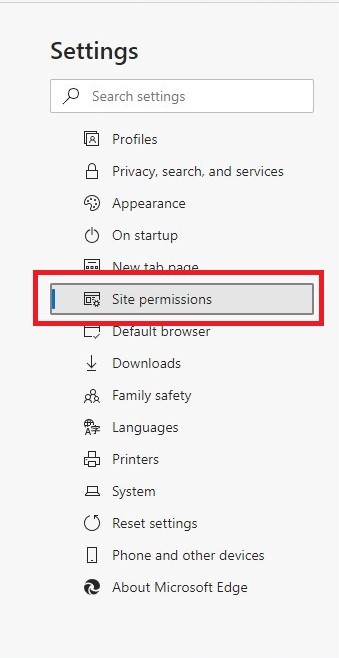
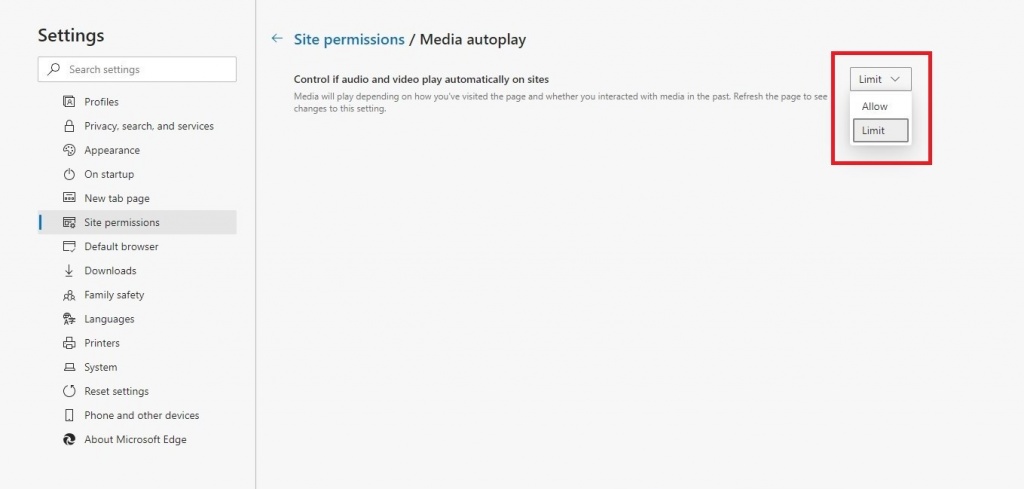
- Now click on the Site Permissions option.
- Scroll down and find Media Autoplay and click on it.
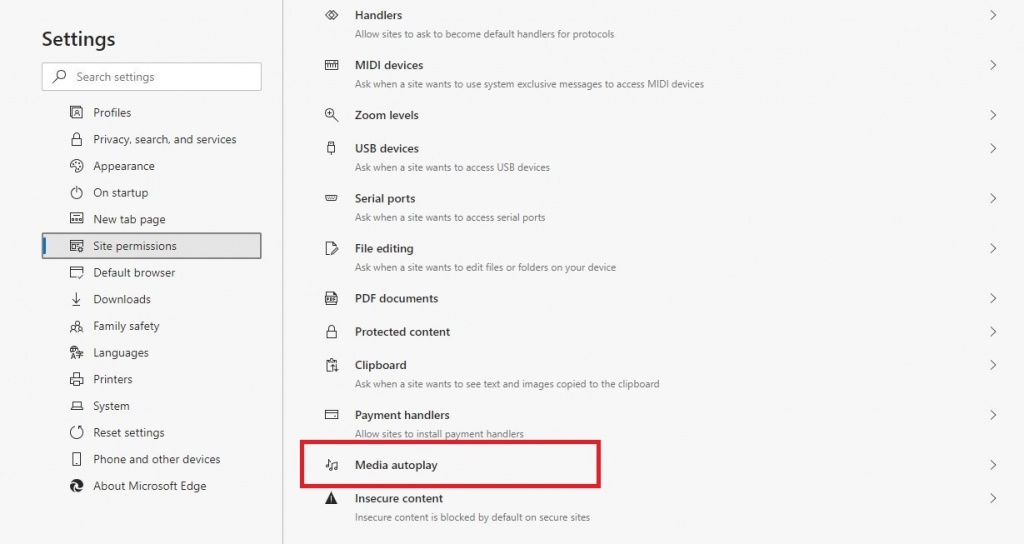
- Now you can set the control of autoplay video/audio to Limit.


Did you mean –autoplay-ploicy=user-required or –autoplay-policy=user-required???