How to Disable Screensaver for Standard Users in Windows 10?
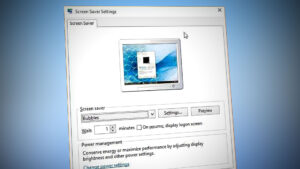
The Screensaver is a computer program that is set to run moving images or black screen after a period of user inactivity. The older monitors had an issue of burning the image into the display if the same image was displayed on the screen for a long period of time. Screensavers were introduced to prevent damage to older monitors. However, the new monitors do not face the same issues as the older monitors used to. That is why Screensavers are less used in modern days. Some users will still use these on their devices for entertainment or protection purposes. As an administrator, you can disable the Screensaver for standard users. They will be unable to turn ON the Screensaver on the system.
The setting for this specific task can be found in the Group Policy Editor on your system. However, we have also included the Registry Editor method for the users that do not have access to the Group Policy Editor.
Method 1: Disabling through the Local Group Policy Editor
The Local Group Policy Editor contains all the settings through which users can control the working environment of their operating system. Some of the settings may not be available in the Control Panel or the Settings app but can be easily found in the Group Policy. These policy settings are easy to configure and do not require any technical steps. The policy setting for Screensaver that we are using in this method will disable the Screensaver and the Screensaver section in the Settings app and Control Panel. Standard users will be unable to do change any options for the Screensaver on the system.
Note: If you are using the Windows 10 Home edition operating system, then skip this method and try using the Registry Editor method. That is because the Group Policy Editor is available only on Windows 10 Education, Enterprise, and Pro editions.
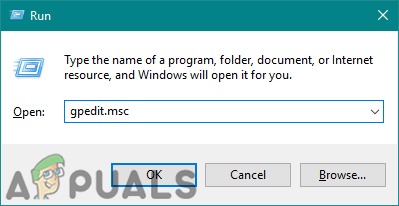
- Press the Windows + R key together on your keyboard to open a Run dialog. Now, you need to type “gpedit.msc” and press the Enter key or click on the Ok button. This will open up the Local Group Policy Editor window on your system.
Opening the Group Policy Editor - In the Local Group Policy Editor window, go to the following path:
User Configuration\ Administrative Templates\ Control Panel\ Personalization\
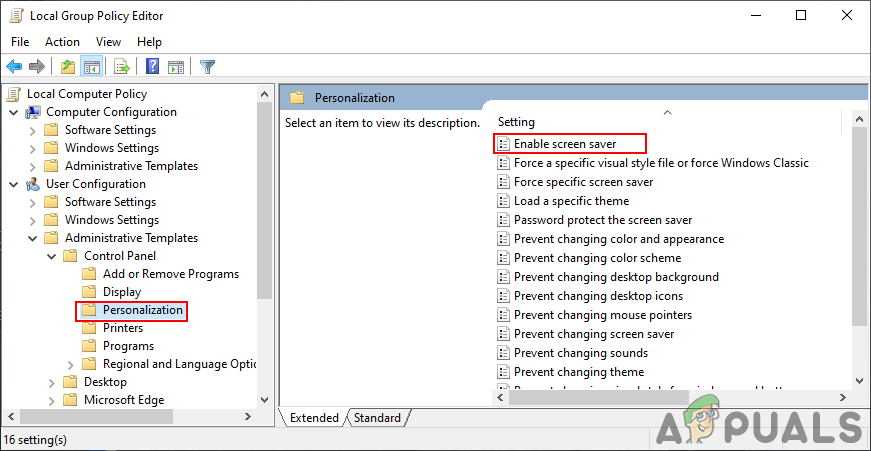
Navigating to the setting - Now double-click on the policy named “Enable screen saver” and it will open another window. Then change the toggle option to Disabled as shown in the screenshot.
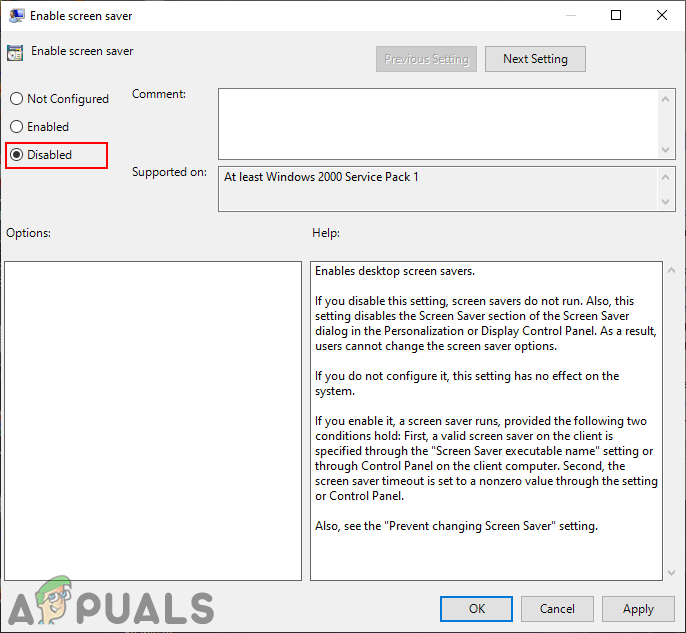
Disabling the Screensaver - After that, click on the Apply and Ok buttons to save these changes.
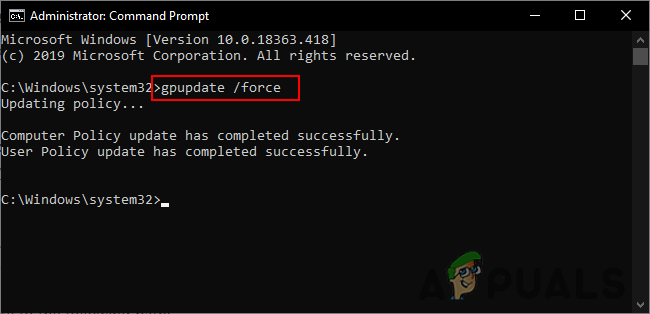
- Most of the time the Group Policy will automatically update the changes. If not, then you need to force the update for the group policy.
- Search for Command Prompt in the Windows search feature and run it as an administrator. Now type the following command in Command Prompt (Admin) and press the Enter key. You can also do this by simply restarting the system.
gpupdate /force
Updating the Group Policy - Now the Screensaver is disabled for that specific standard user.
Method 2: Disabling through the Registry Editor
Another method is by using the Registry Editor on your system to disable the Screensaver. The Windows Registry is the database that contains all the information about your operating system and applications. If you used the Group Policy Editor method for this setting, then the value will already be available in the Registry Editor with the configured setting. If you are using this method directly, then you may need to create the key and value for disabling the Screensaver. Try to follow the below steps carefully without making any mistakes:
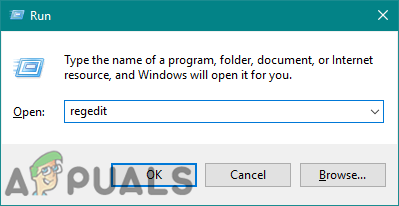
- First, open the Run dialog box by pressing the Windows and R keys together on your keyboard. Then, you need to type “regedit” in the box and press the Enter key to open the Registry Editor. If prompted by the UAC (User Account Control) prompt, then click on the Yes button.
Opening the Registry Editor - To create a Registry backup before making new changes, click on the File menu and choose the Export option. Select the path and name the file as you want. Finally, click on the Save button to create a Registry backup.
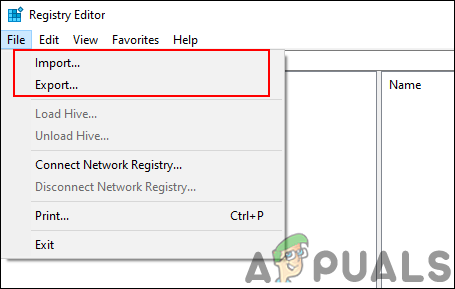
Creating a registry backup Note: You can always recover a backup by clicking on the File > Import option and then choosing the backup file that you recently created.
- In the Registry Editor window, navigate to the following location:
HKEY_CURRENT_USER\ Software\Policies\Microsoft\Windows\Control Panel\Desktop
Note: If the Desktop key is missing, just right-click on the available key and choose the New > Key option. Then name that newly created key as “Desktop“.
- Right-click on the right pane of the Desktop key and choose the New > String Value option. Then rename the value as “ScreenSaveActive” and save it.
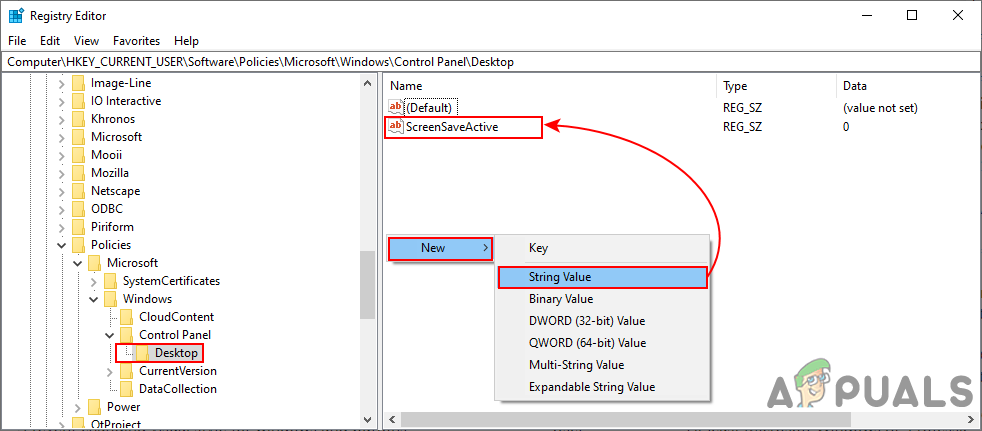
Creating a new value - Double-click on the ScreenSaveActive value and it will open a small dialog. Now change the value data to 0 to disable the Screensaver.

Changing the value data to disable Screensaver - Finally, close the Registry Editor window, and restart the system to apply these new changes.


