How to Disable/Enable Notifications on Windows 11
Windows 11’s notification system is just slightly different than the equivalent of previous Windows versions. And those that used to turn the notifications off on older OS versions will likely do the same for Windows 11.
If you prefer the peace and quiet that you get when you disable Notifications for specific apps or at a system level, we’ve got you covered.
This article will show you every way that will allow you to turn off or re-enable notifications for every application or only for certain apps.
There are actually several different ways to accomplish this on Windows 11:
- You can disable or enable Notifications at a System Level from the Settings menu.
- You can disable or enable Notifications only for Specific Apps and other senders from the Settings menu.
- You can disable or enable Notifications at a System-level via the Registry Editor.
- You can disable or enable Notifications for Specific Apps & Other Senders using the Notification Center.
We’ve covered every potential method, so feel free to follow any of the sub-guides below, depending on how you’re looking to customize the notification behavior on Windows 11.
Turn On or Off All Windows 11 Notifications via Settings menu
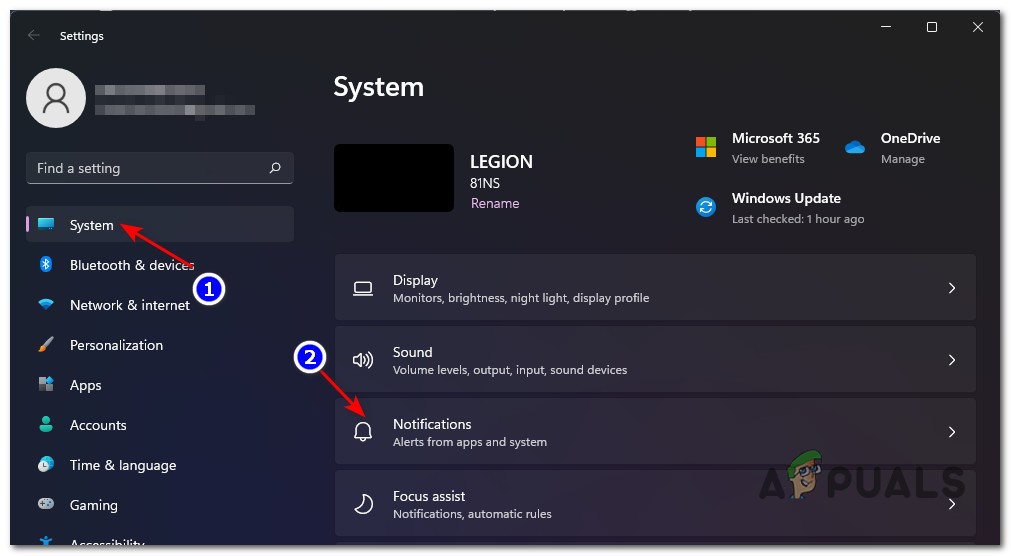
- Press Windows key + I to open up the Settings menu on Windows 11.
- Inside the main Settings screen, use the menu on the left to click on System. If you don’t see the options by default, click the action button in the top-left corner.
- Once you’re inside the System tab, move over to the right-hand side menu and click on Notifications.
Accessing the Notification settings on Windows 11 - Next, from the dedicated Notifications menu, set the toggle to OFF to disable the notifications from all your apps, or set it to ON if you want to receive every notification.
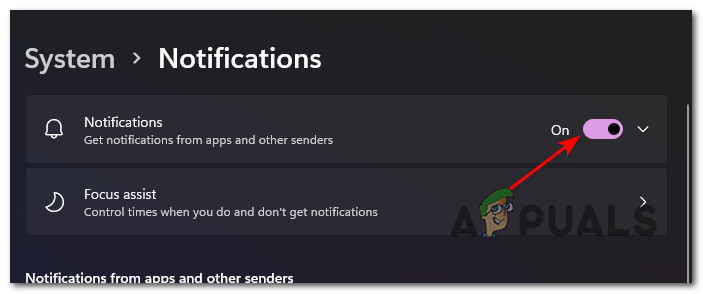
Disable or Enable Notifications - As soon as you change the toggle, the new behavior will be enforced (no need to restart). You can safely close the Settings screen at this point.
Turn On or Off Specific Windows Notifications via Settings menu
- Press Windows key + I to open up the Settings menu.
- Next, click or tap on System from the vertical menu on the left.
Accessing the Notification settings on Windows 11 Note: If the vertical menu is not visible by default, click on the action button in the top-right section of the screen.
- With the System tab selected, move over to the right-hand pane and click or tap on Notifications.
- Once you’re inside the Notifications settings page, scroll down to the Notifications from apps and other senders section and turn off or on the dedicated toggles according to which apps you want to receive notifications from.
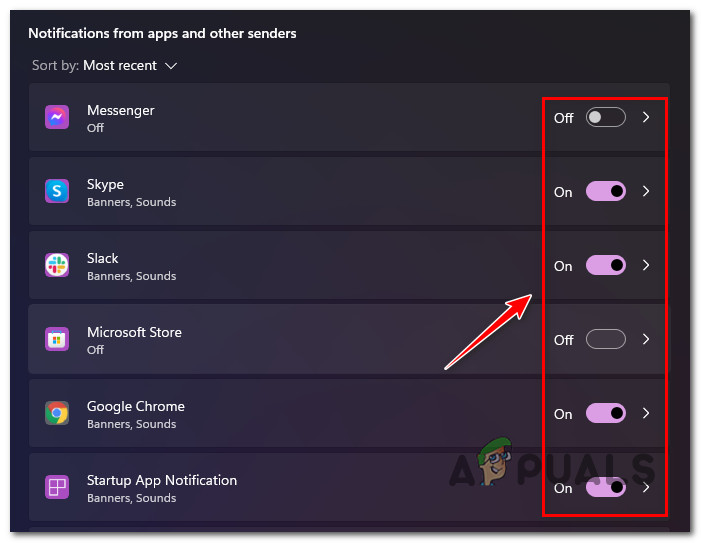
Modifying specific notifications behavior - Once the changes have been enforced, you can safely close the Settings screen.
Turn On or Off All Windows 11 Notifications via Registry Editor
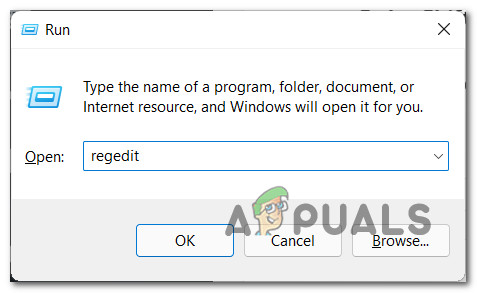
- Press Windows key + R to open up a Run dialog box. Next, type ‘regedit’ inside the text box that just appeared, then press Ctrl + Shift + Enter to open up a Registry Editor page with admin access.
Open up Registry Editor - When you’re prompted by the User Account Control prompt, click Yes to grant administrative privileges.
- Once you’re inside the Registry Editor, use the menu on the left-hand side to navigate to the following location:
HKEY_CURRENT_USER\Software\Microsoft\Windows\CurrentVersion\PushNotifications
Note: You can either navigate to this location manually or you can paste the location inside the bar at the top of Registry Editor and press Enter to arrive there immediately.
- Right-click on PushNotifications from the menu on the left and choose New > Dword (32-bit) Value from the context menu that just appeared.

Create a new Dword - Next, move over to the right-hand pane and rename the newly created Dword to ToastEnabled by right-clicking on the item and choosing Rename.
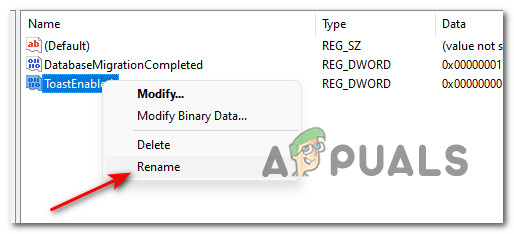
Rename the Newly Created Dword - Double-click on the newly created ToastEnabled item then set the Base to Hexadecimal and the Value to 1 depending on what you’re looking to accomplish:
0 - Disable the Notifications at a system level on Windows 11
1 - Enable the Notifications at a system level on Windows 11
- Once the change has been made, close Registry Editor and reboot your PC in order to allow the changes to take effect.
Turn On or Off Specific Windows 11 Notifications via Notification Center
Note: You will only be able to use this method if the app that you already have a notification from the app that you want to modify the default notification behavior.
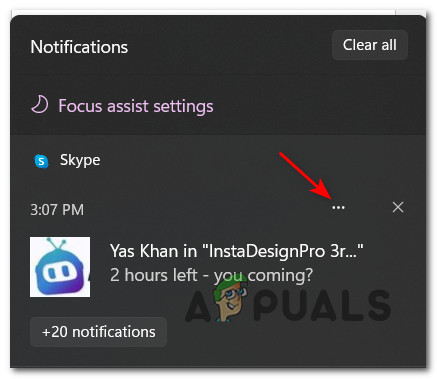
- Press Windows key + N to open up the Notification Center on Windows 11.
- Next, click on the action button (three-dot icon) from the top of the app that you want to turn off notifications for.
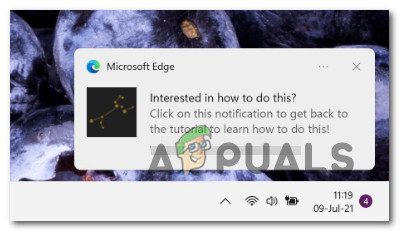
Accessing the settings of notification on Windows 11 - From the context menu that just appeared, click on Turn off all notifications for *name of the app*.
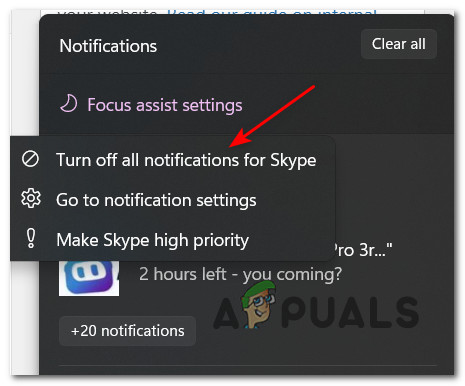
Turn Off Modifications for Skype Note: *Name of the app* is just a placeholder.
- Close the Settings app as the changes should already be enforced.


Win + N does not open my notifications !
any idea what setting i fouled up ?
in settings notifications are on – calendar will not open and i have a counter showing the number of notifications