How to Fix Windows Desktop Not Auto-Refreshing?
The Windows Desktop is designed to auto-refresh whenever you make changes on it. However, due to various reasons, it may not refresh automatically. For example, When you create a new file, folder, or shortcut, your Desktop or Windows Explorer may fail to refresh automatically.
This requires you to manually refresh by pressing the F5 key or using the context menu to see the changes. This issue also occurs when deleting, downloading, or moving/copying files on the Desktop or in File Explorer.
Upon investigating this issue, we discovered that it often results from corrupted history within Windows. Moreover, if your desktop folder resides in OneDrive, this issue is likely to occur.
Having discussed several causes, let’s delve into the methods to resolve this issue.
1. Restart the File Explorer
Restarting the File Explorer is an effective solution to this problem. It not only restarts File Explorer but also refreshes the necessary services and clears data from memory. To do this, follow the steps below:
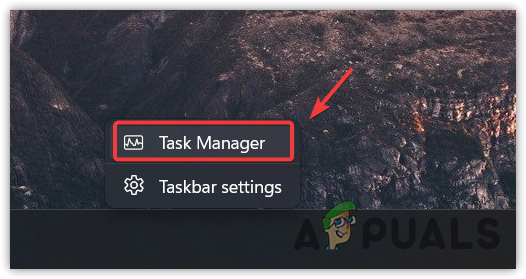
- Right-click the Taskbar and select Task Manager.
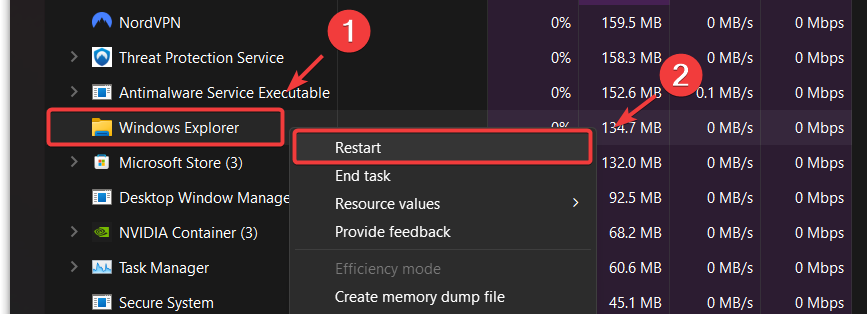
- In the Processes tab, right-click Windows Explorer and choose Restart.
- Check to see if the Desktop or File Explorer now refreshes automatically after changes are made.
2. Restore File Explorer to Default
The issue is frequently caused by File Explorer’s history. Clearing this history and restoring File Explorer to its default settings may fix the problem.
- Press Win + E to open Windows File Explorer.
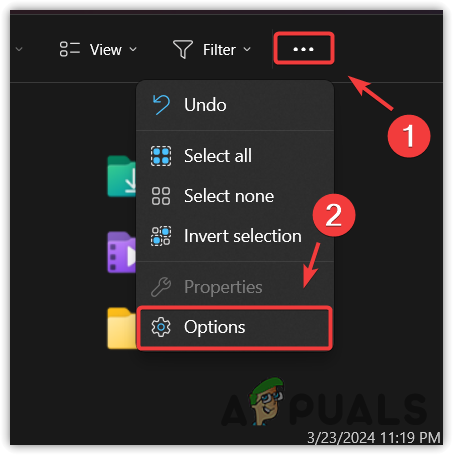
- Click on the three dots at the top and select Options.
- In the Privacy section, click Clear followed by Restore Defaults.
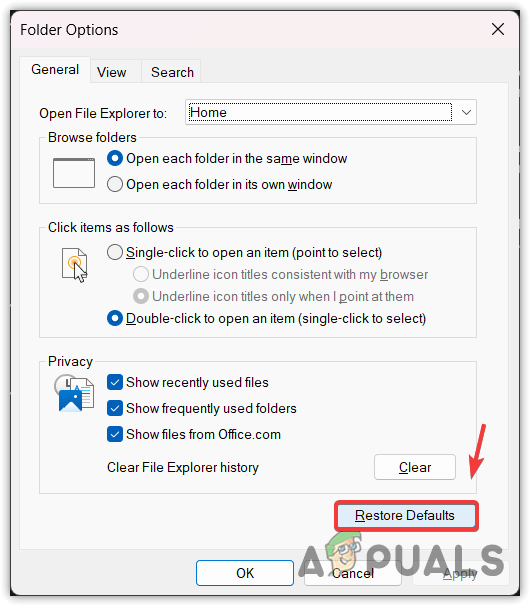
- Click Apply and then OK.
- Verify if the issue has been resolved.
3. Modify the Registry
The problem may also arise if the registry entry named DontRefresh is missing. Creating this entry could enable automatic refreshing after changes are made.
Before proceeding with modifications in the registry editor, ensure you create a backup. Learn how to restore the registry backup if needed by following this guide: How to Back Up and Restore the Registry.
- Search for Registry Editor using the Start Menu and open it.
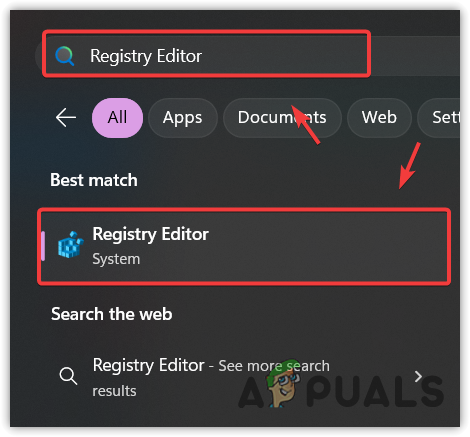
- Press Enter.
- For 64-bit operating systems, navigate to
HKEY_CLASSES_ROOT\Wow6432Node\CLSID; for 32-bit systems, go to HKEY_CLASSES_ROOT\CLSID.
- Right-click on CLSID, hover over New, and select Key.
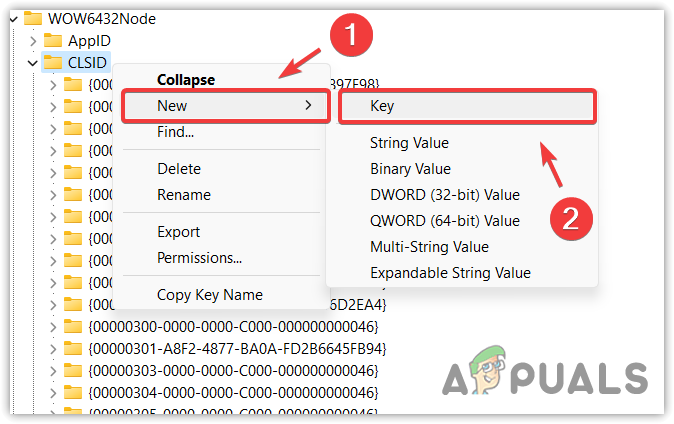
- Name the key {BDEADE7F-C265-11D0-BCED-00A0C90AB50F}.
- Right-click on the new key, select New > Key, and name it Instance.
- Right-click on Instance, select New, and choose DWORD (32-bit) Value or QWORD (64-bit) Value depending on your system. For 64-bit operating systems, it’s advisable to try both, but delete the one that doesn’t work.
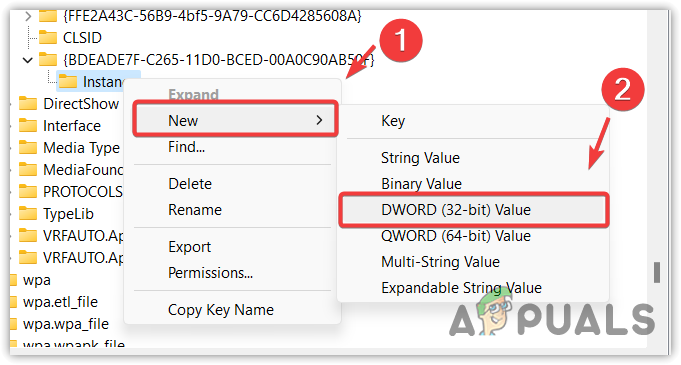
- Name the value dontrefresh and set it to 0.
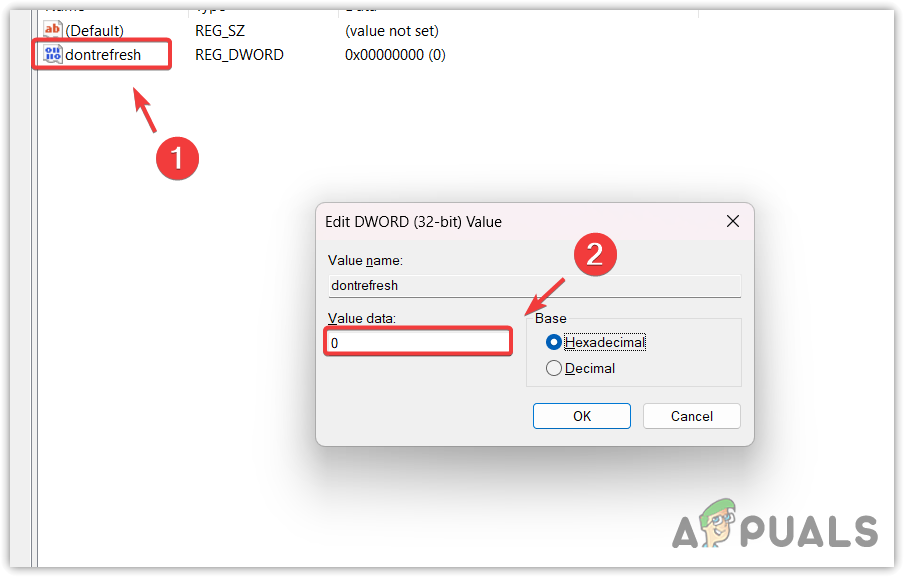
- Close the registry editor and restart your computer or File Explorer for the changes to take effect.
4. Reset Desktop Icons
This unusual solution has worked for some users. Resetting the desktop icons moves them back to their default positions and, for unknown reasons, can help with this issue.
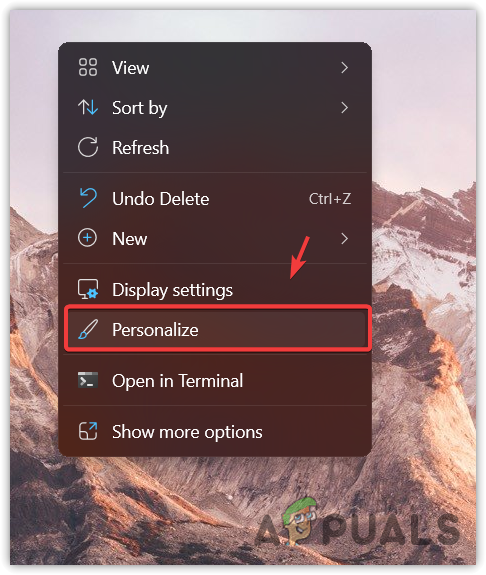
- Right-click on the Desktop and select Personalize.
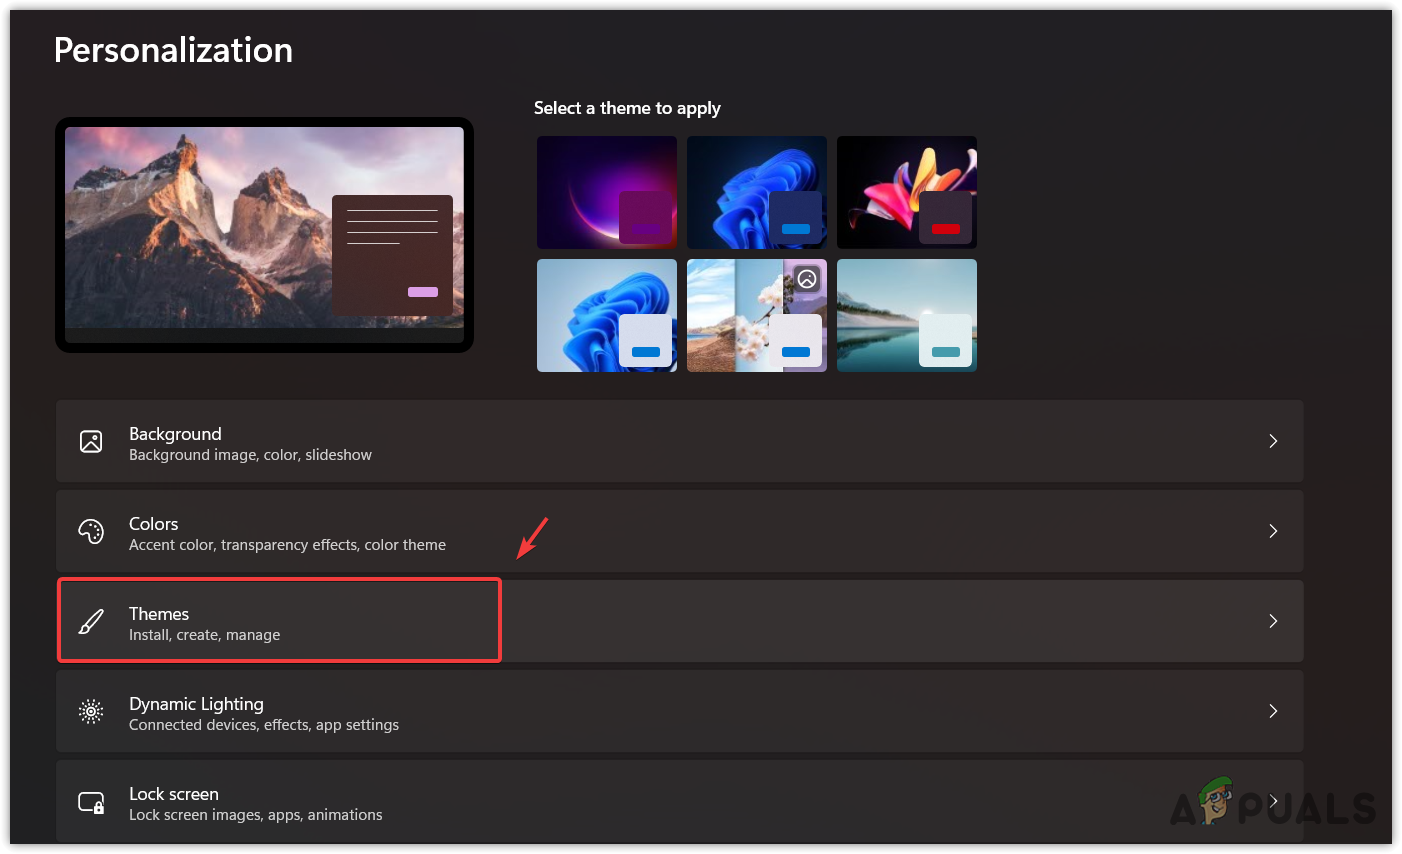
- Navigate to Themes > Desktop Icon Settings.
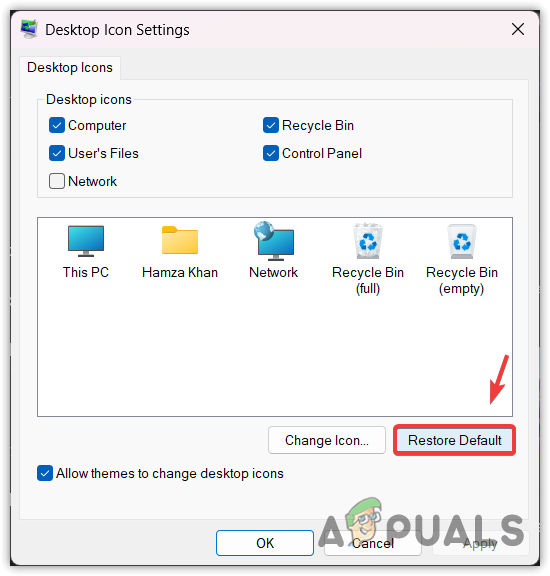
- Click Restore Default, then Apply, and finally OK.
- Check if the issue has been fixed.
5. Uninstall OneDrive
OneDrive integration might be another reason for this problem, particularly if the desktop folder is stored in OneDrive. To resolve this issue, either unlink OneDrive from your PC or completely uninstall it. Many users have found uninstalling OneDrive to be effective.
5.1 Unlink OneDrive
- Open OneDrive from the notification area.
- Click the Help icon and choose Settings.
- Under the Account tab, click Unlink this PC.
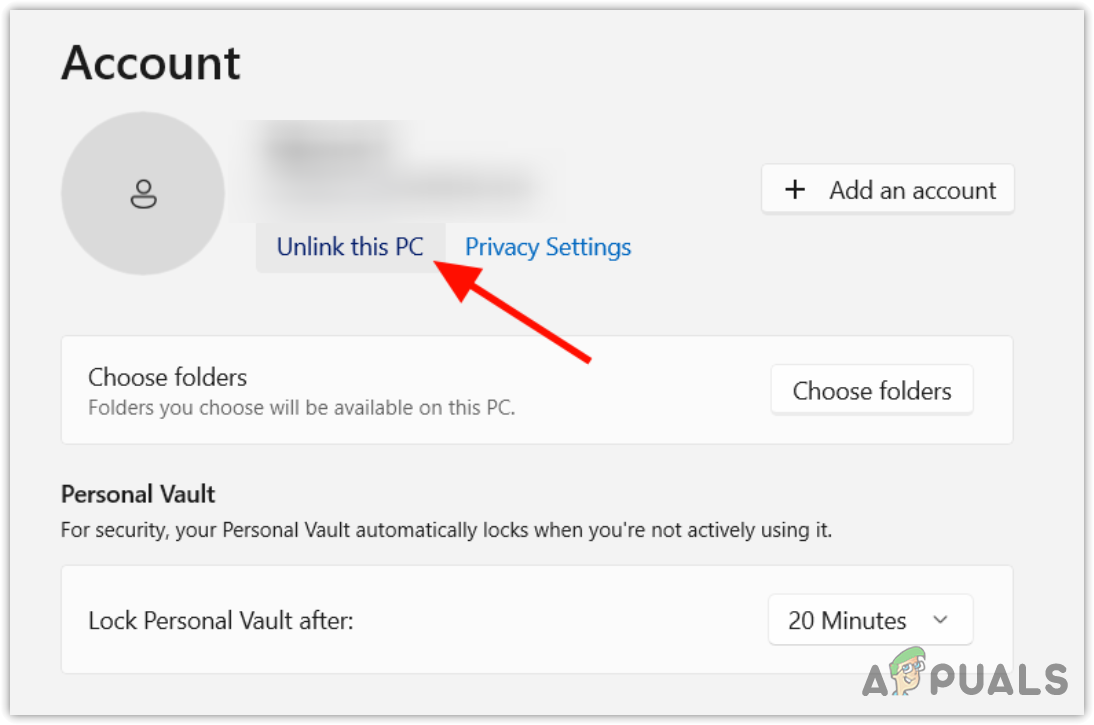
- Test to see if the issue is resolved.
5.2 Uninstall OneDrive
- Go to Settings and then to Apps > Installed Apps.
- Find OneDrive, click the three-dot menu, and select Uninstall.
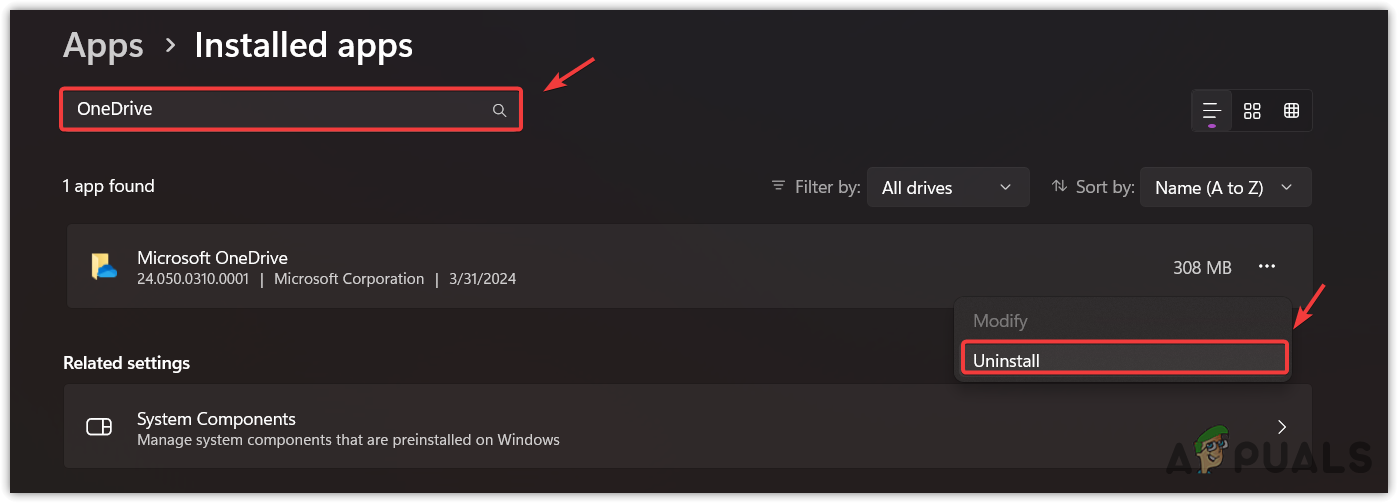
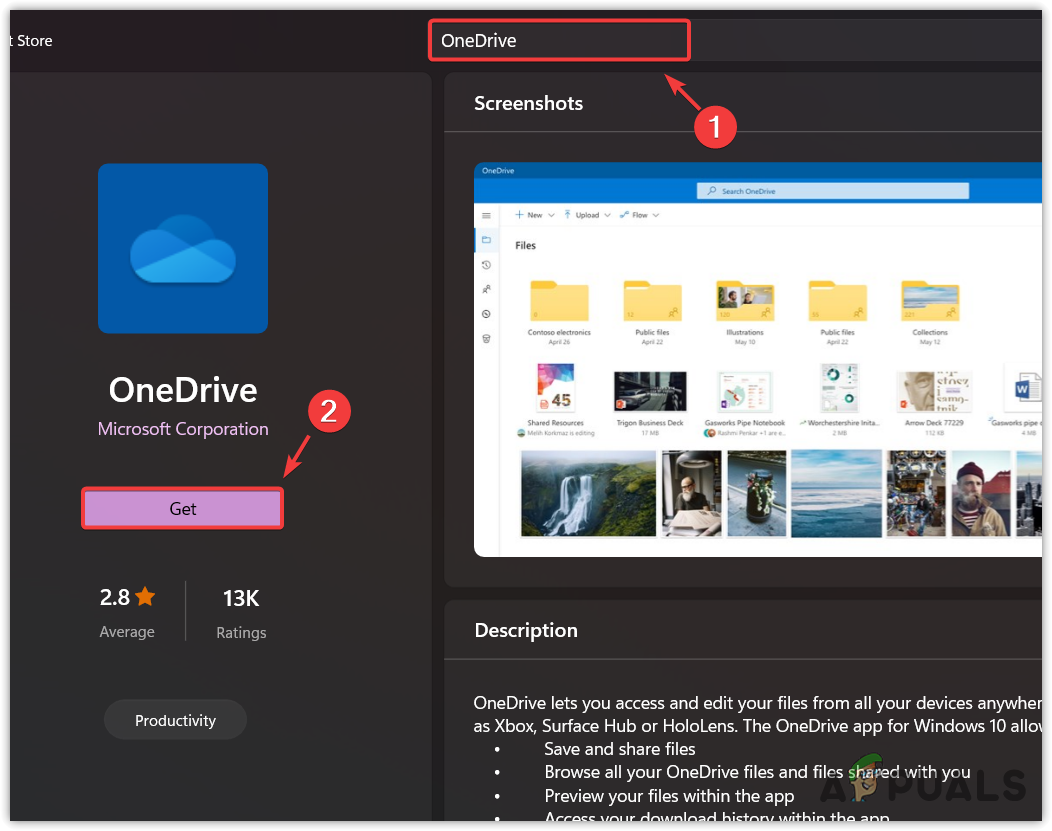
- Afterward, open the Microsoft Store and reinstall OneDrive from there, if desired.
If nothing works, you are not out of options. You can still attempt to fix the issue by resetting Windows or performing a system restore.


