Datacolor SpyderX Pro Review
Calibrating the display is not something you find yourself doing on a frequent basis- much less a regular one. Part of the reason for that maybe the fact that it is quite misunderstood and hence, underrated. An average person who’s looking to get just the bare essentials from his computer can’t find monitor calibration to be of good use. However, to the professional eye where no detail goes unnoticed, the right calibration can be just the thing to tip the scales.

PRODUCT INFO SpyderX Pro Manufacture Datacolor Available at View at Amazon
Professional work such as picture and video editing where precise colours are required, monitor calibration is of utmost importance. No matter how expensive a monitor may be, it is given that each model of a monitor has slightly different factory calibration settings.
As a result, the colours visible on your monitor may be slightly different than the universal standard, or what your printer is going to print out. To counter this, Datacolor has got you covered. With the new and improved Spyder X Pro screen calibration tool/device, you can make sure that your monitor’s colours correspond to the universal standard. With the device’s help, you can be sure that the colours of the picture you’ve edited and what the printer will print out will be the same. With that being said, we are going to review the SpyderX Pro today and see if it is worth it or not. Let’s begin!
Design and Build
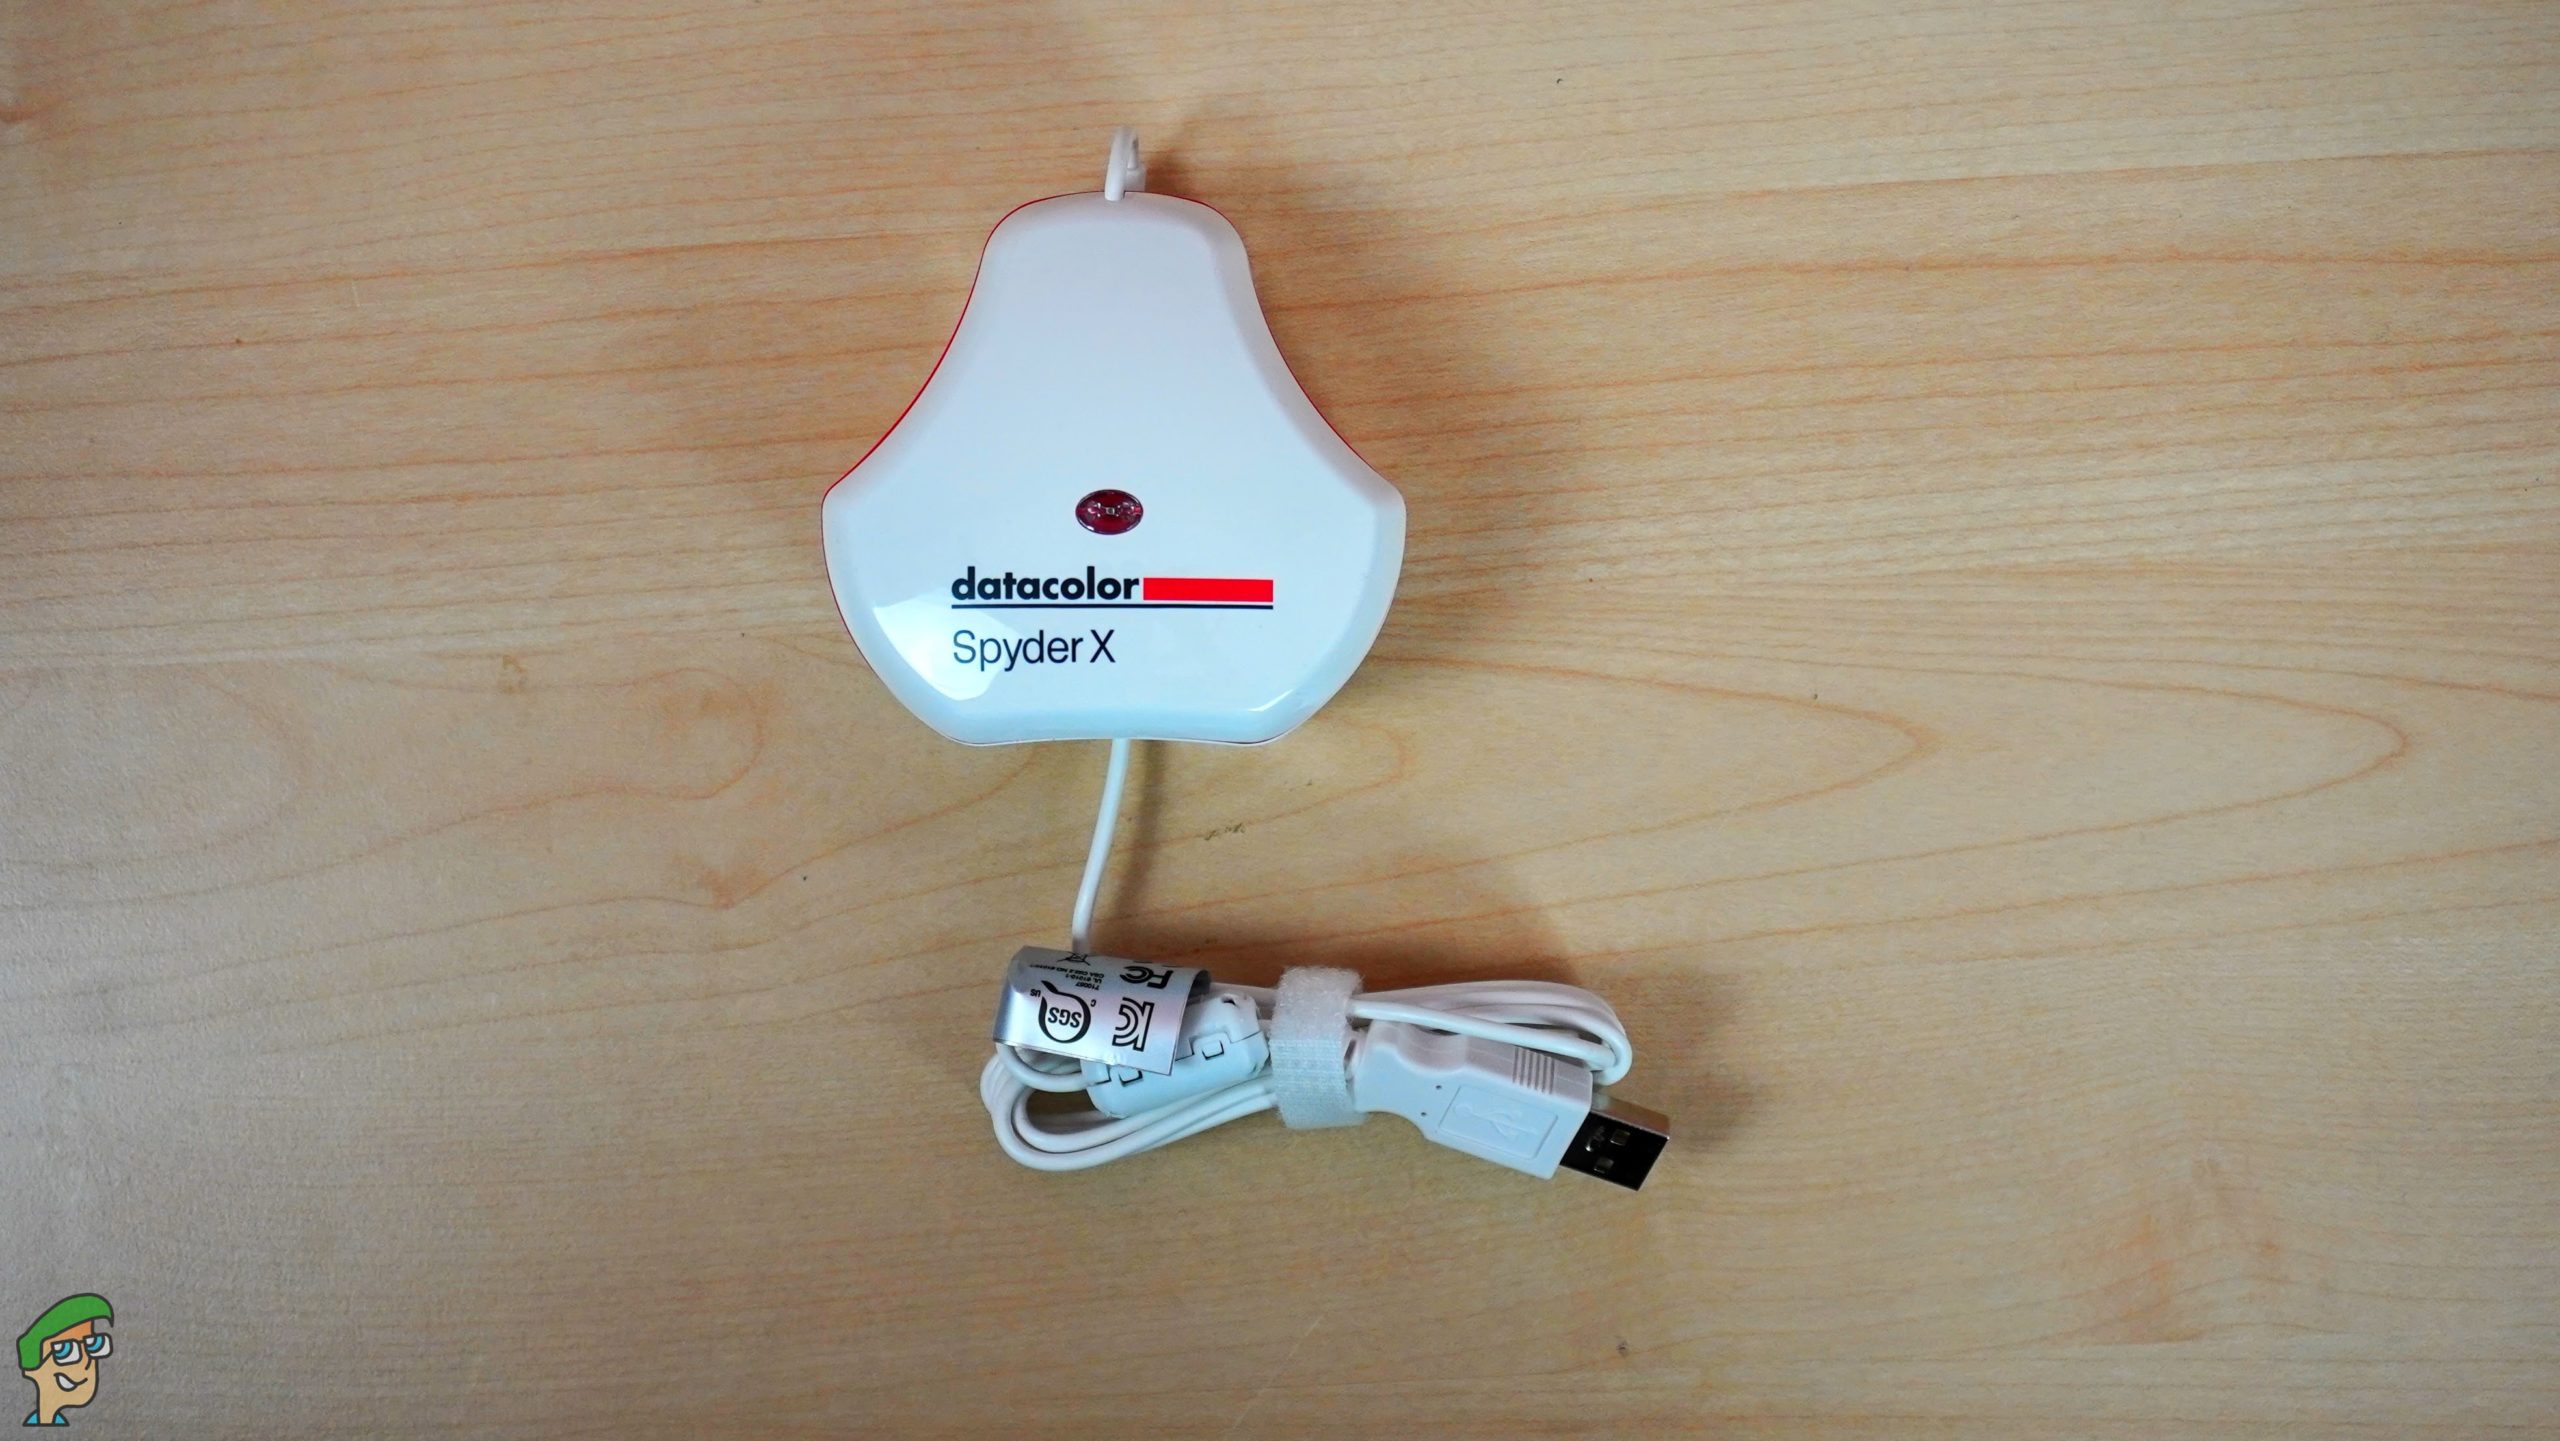
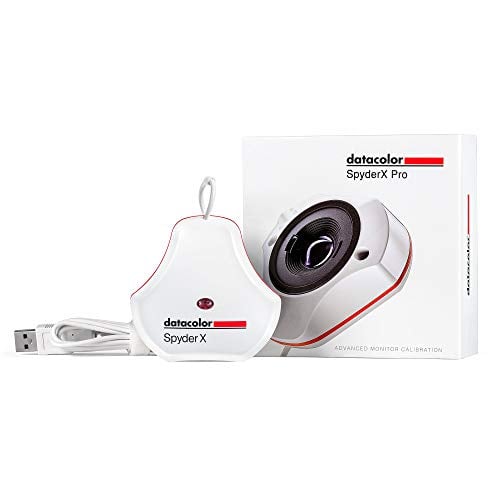
With a newer lens over the previous Spyder5 colourimeter, the SpyderX Pro also has a better design. The edges are smooth and the plastic has a very smooth and overall nice feel about it. With white colour and red accents, it sports a refreshing look as well. However, the main thing about this colourimeter lies in the inside.
You can pull apart the backside of the Spyder X Pro to see the optical sensor. You’ll notice that while one side has the optical sensor, the other looks like a base. That half goes around your monitor with the little wire helping the sensor hang over your monitor to calibrate the settings.
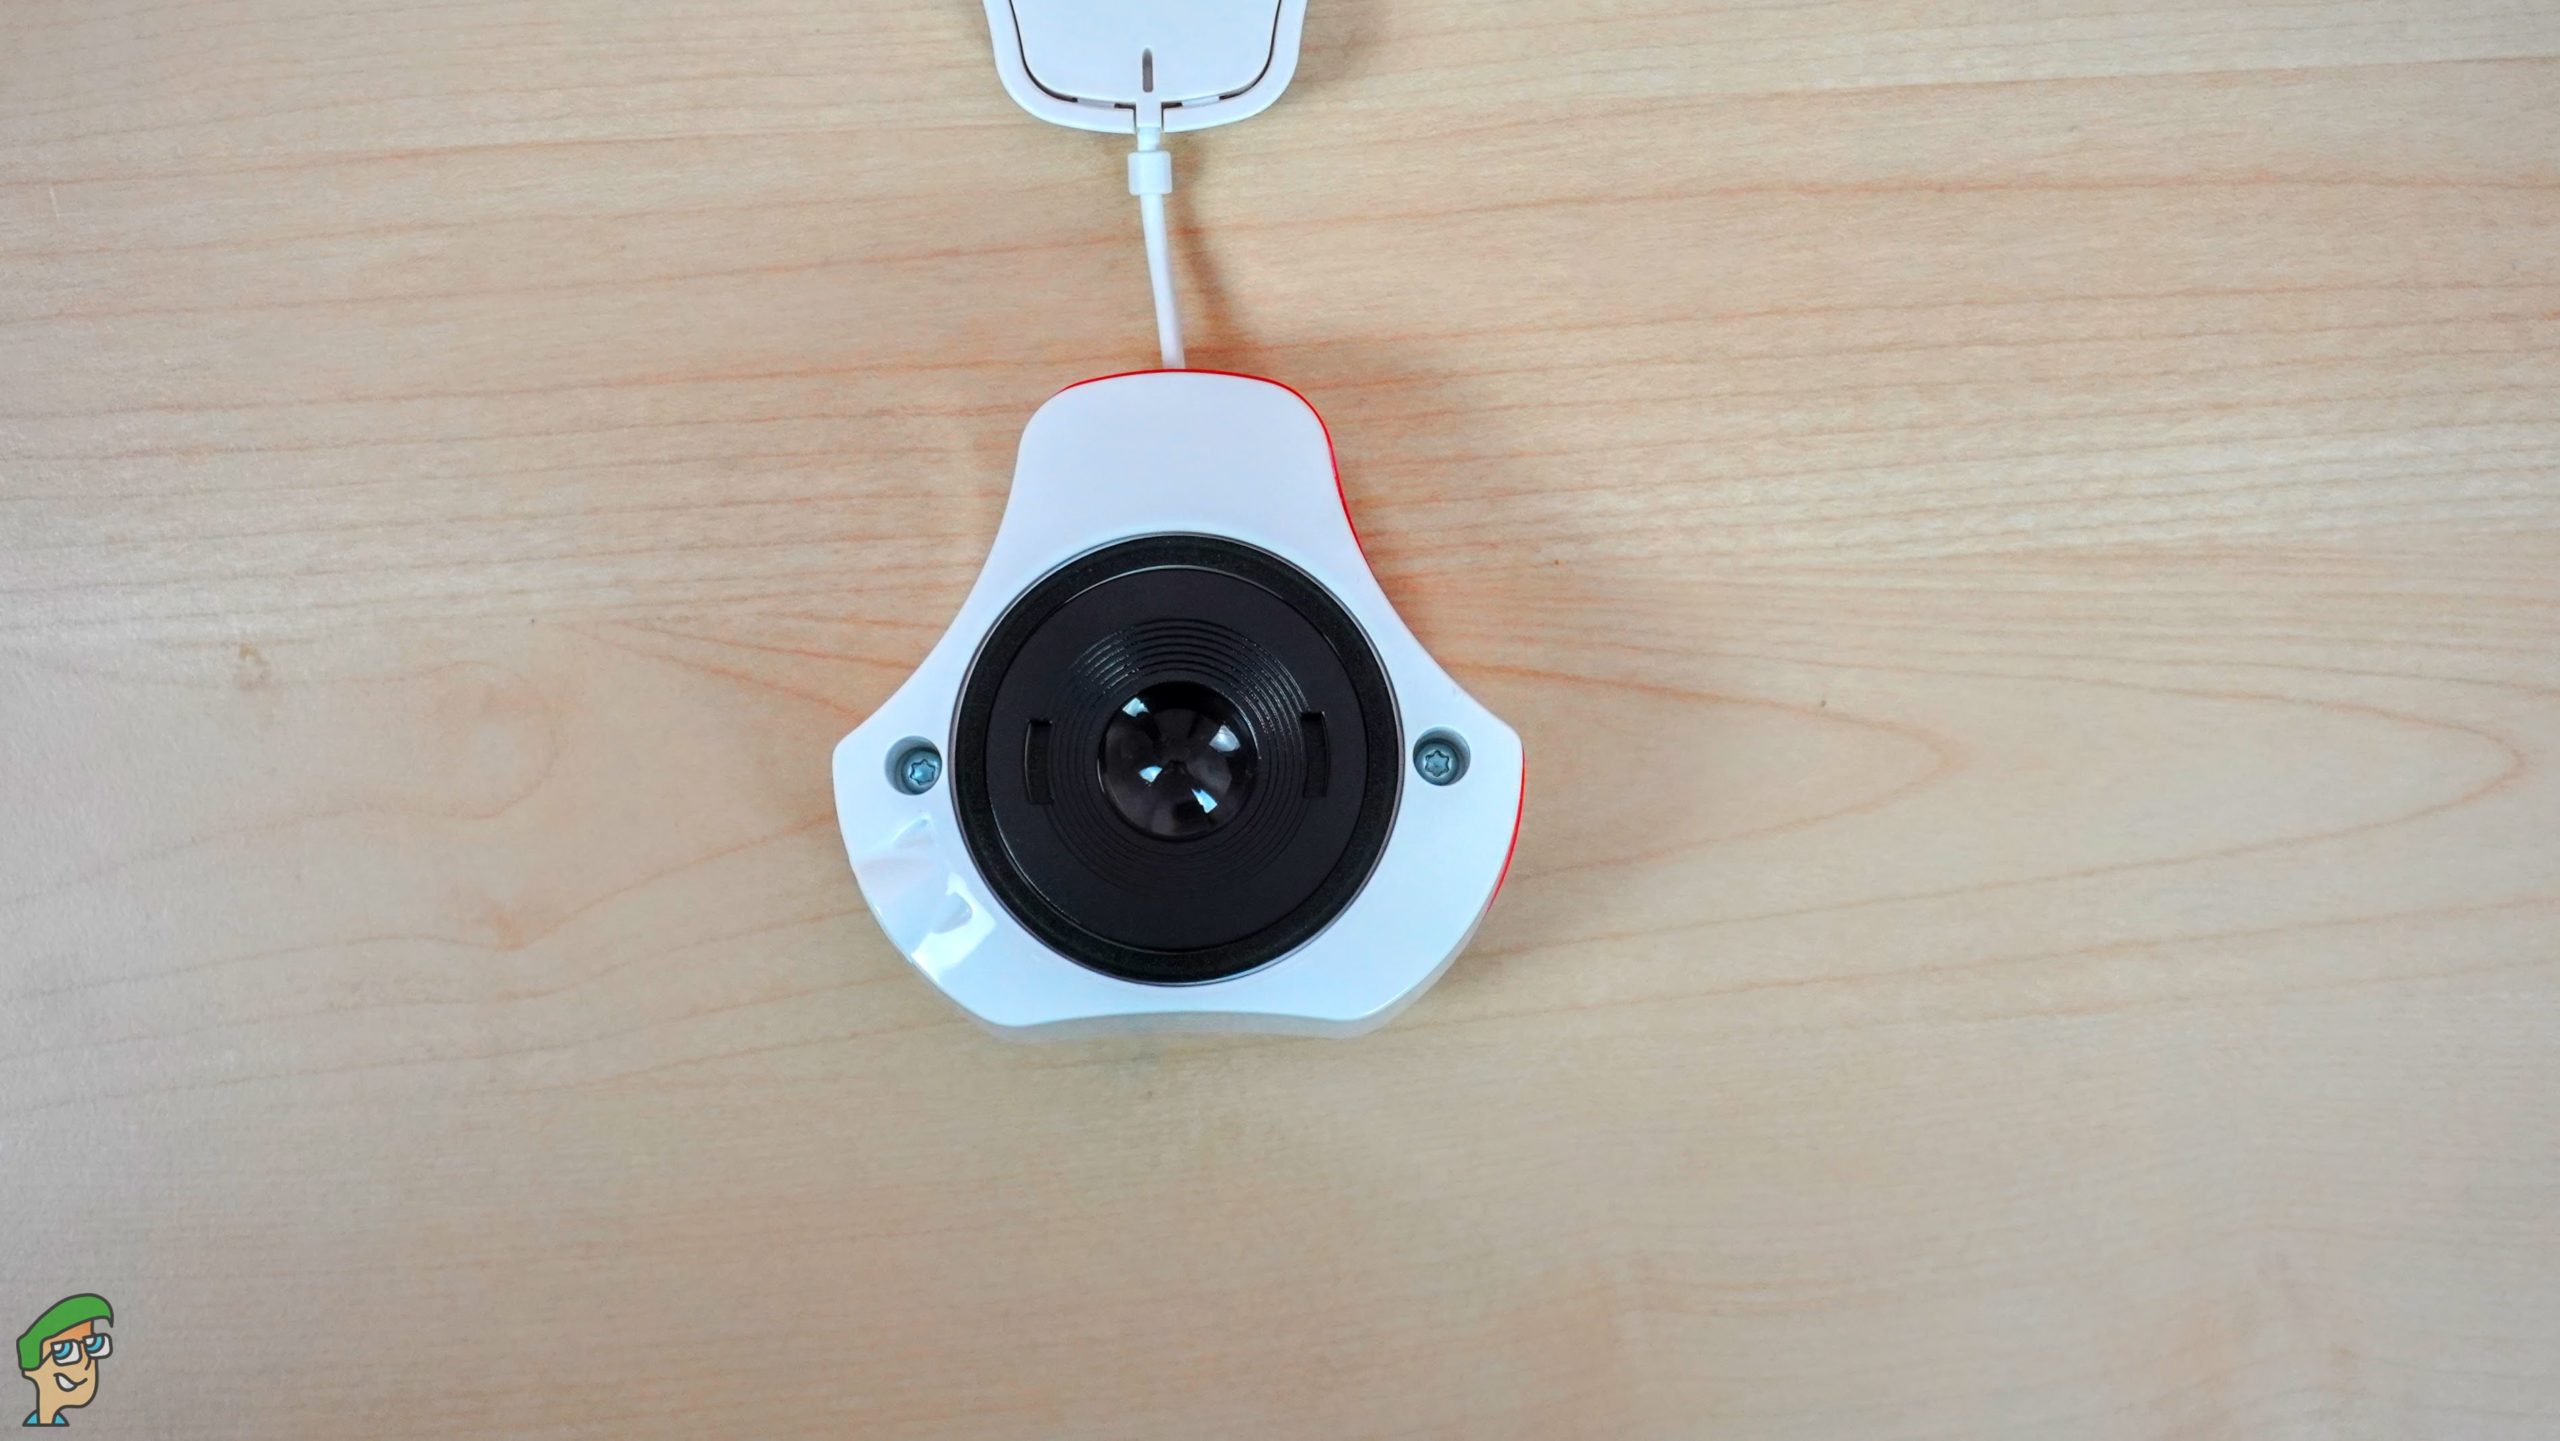
On the front, you’ll also notice that there’s a little ambient light sensor just above where it is printed “datacolor”. That ambient light sensor notices the type of light that is in your room and makes the adjustments for calibration accordingly. So, if one studio has a lot of natural light coming from the sun and the other has artificial lighting, the ambient light sensor will take note of that.
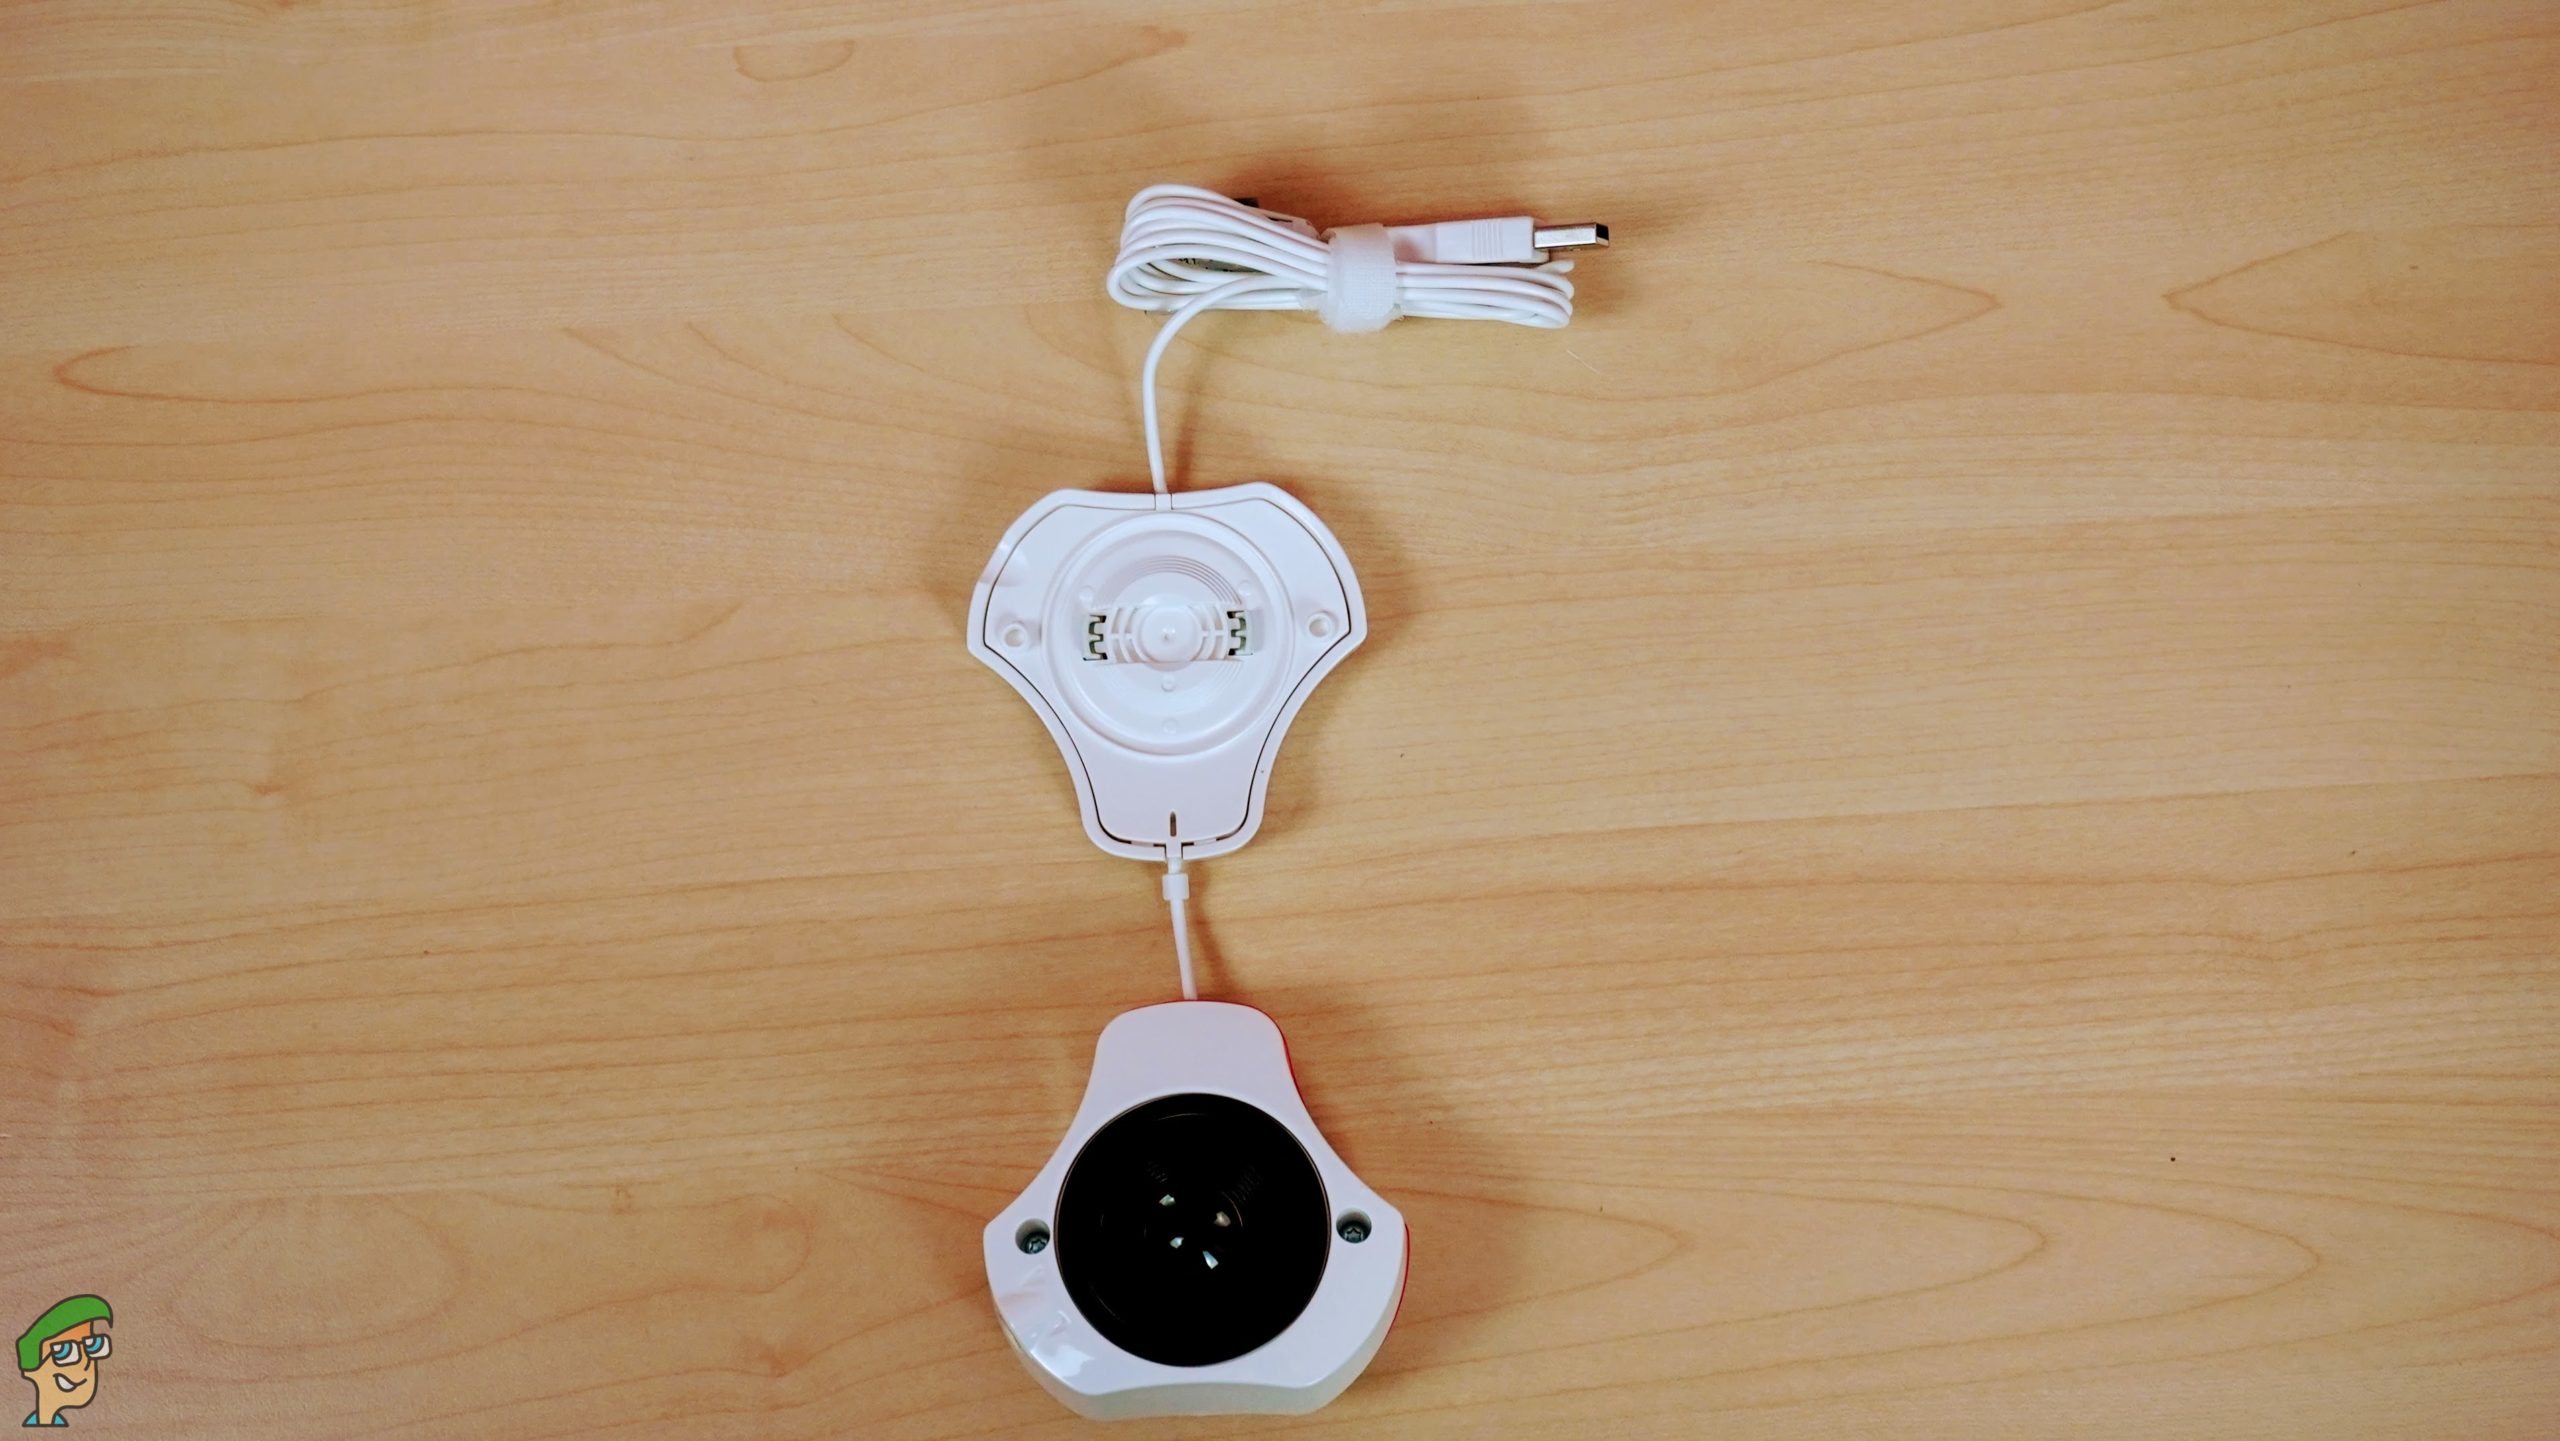
The Spyder X Pro is connected and powered via a USB cable. You can also find a standard mount on the Spyder X Pro that goes on standard tripod stands. By placing it there, you can move this colourimeter around for adjustments that require specific positionings.
Setting up the Spyder X Pro

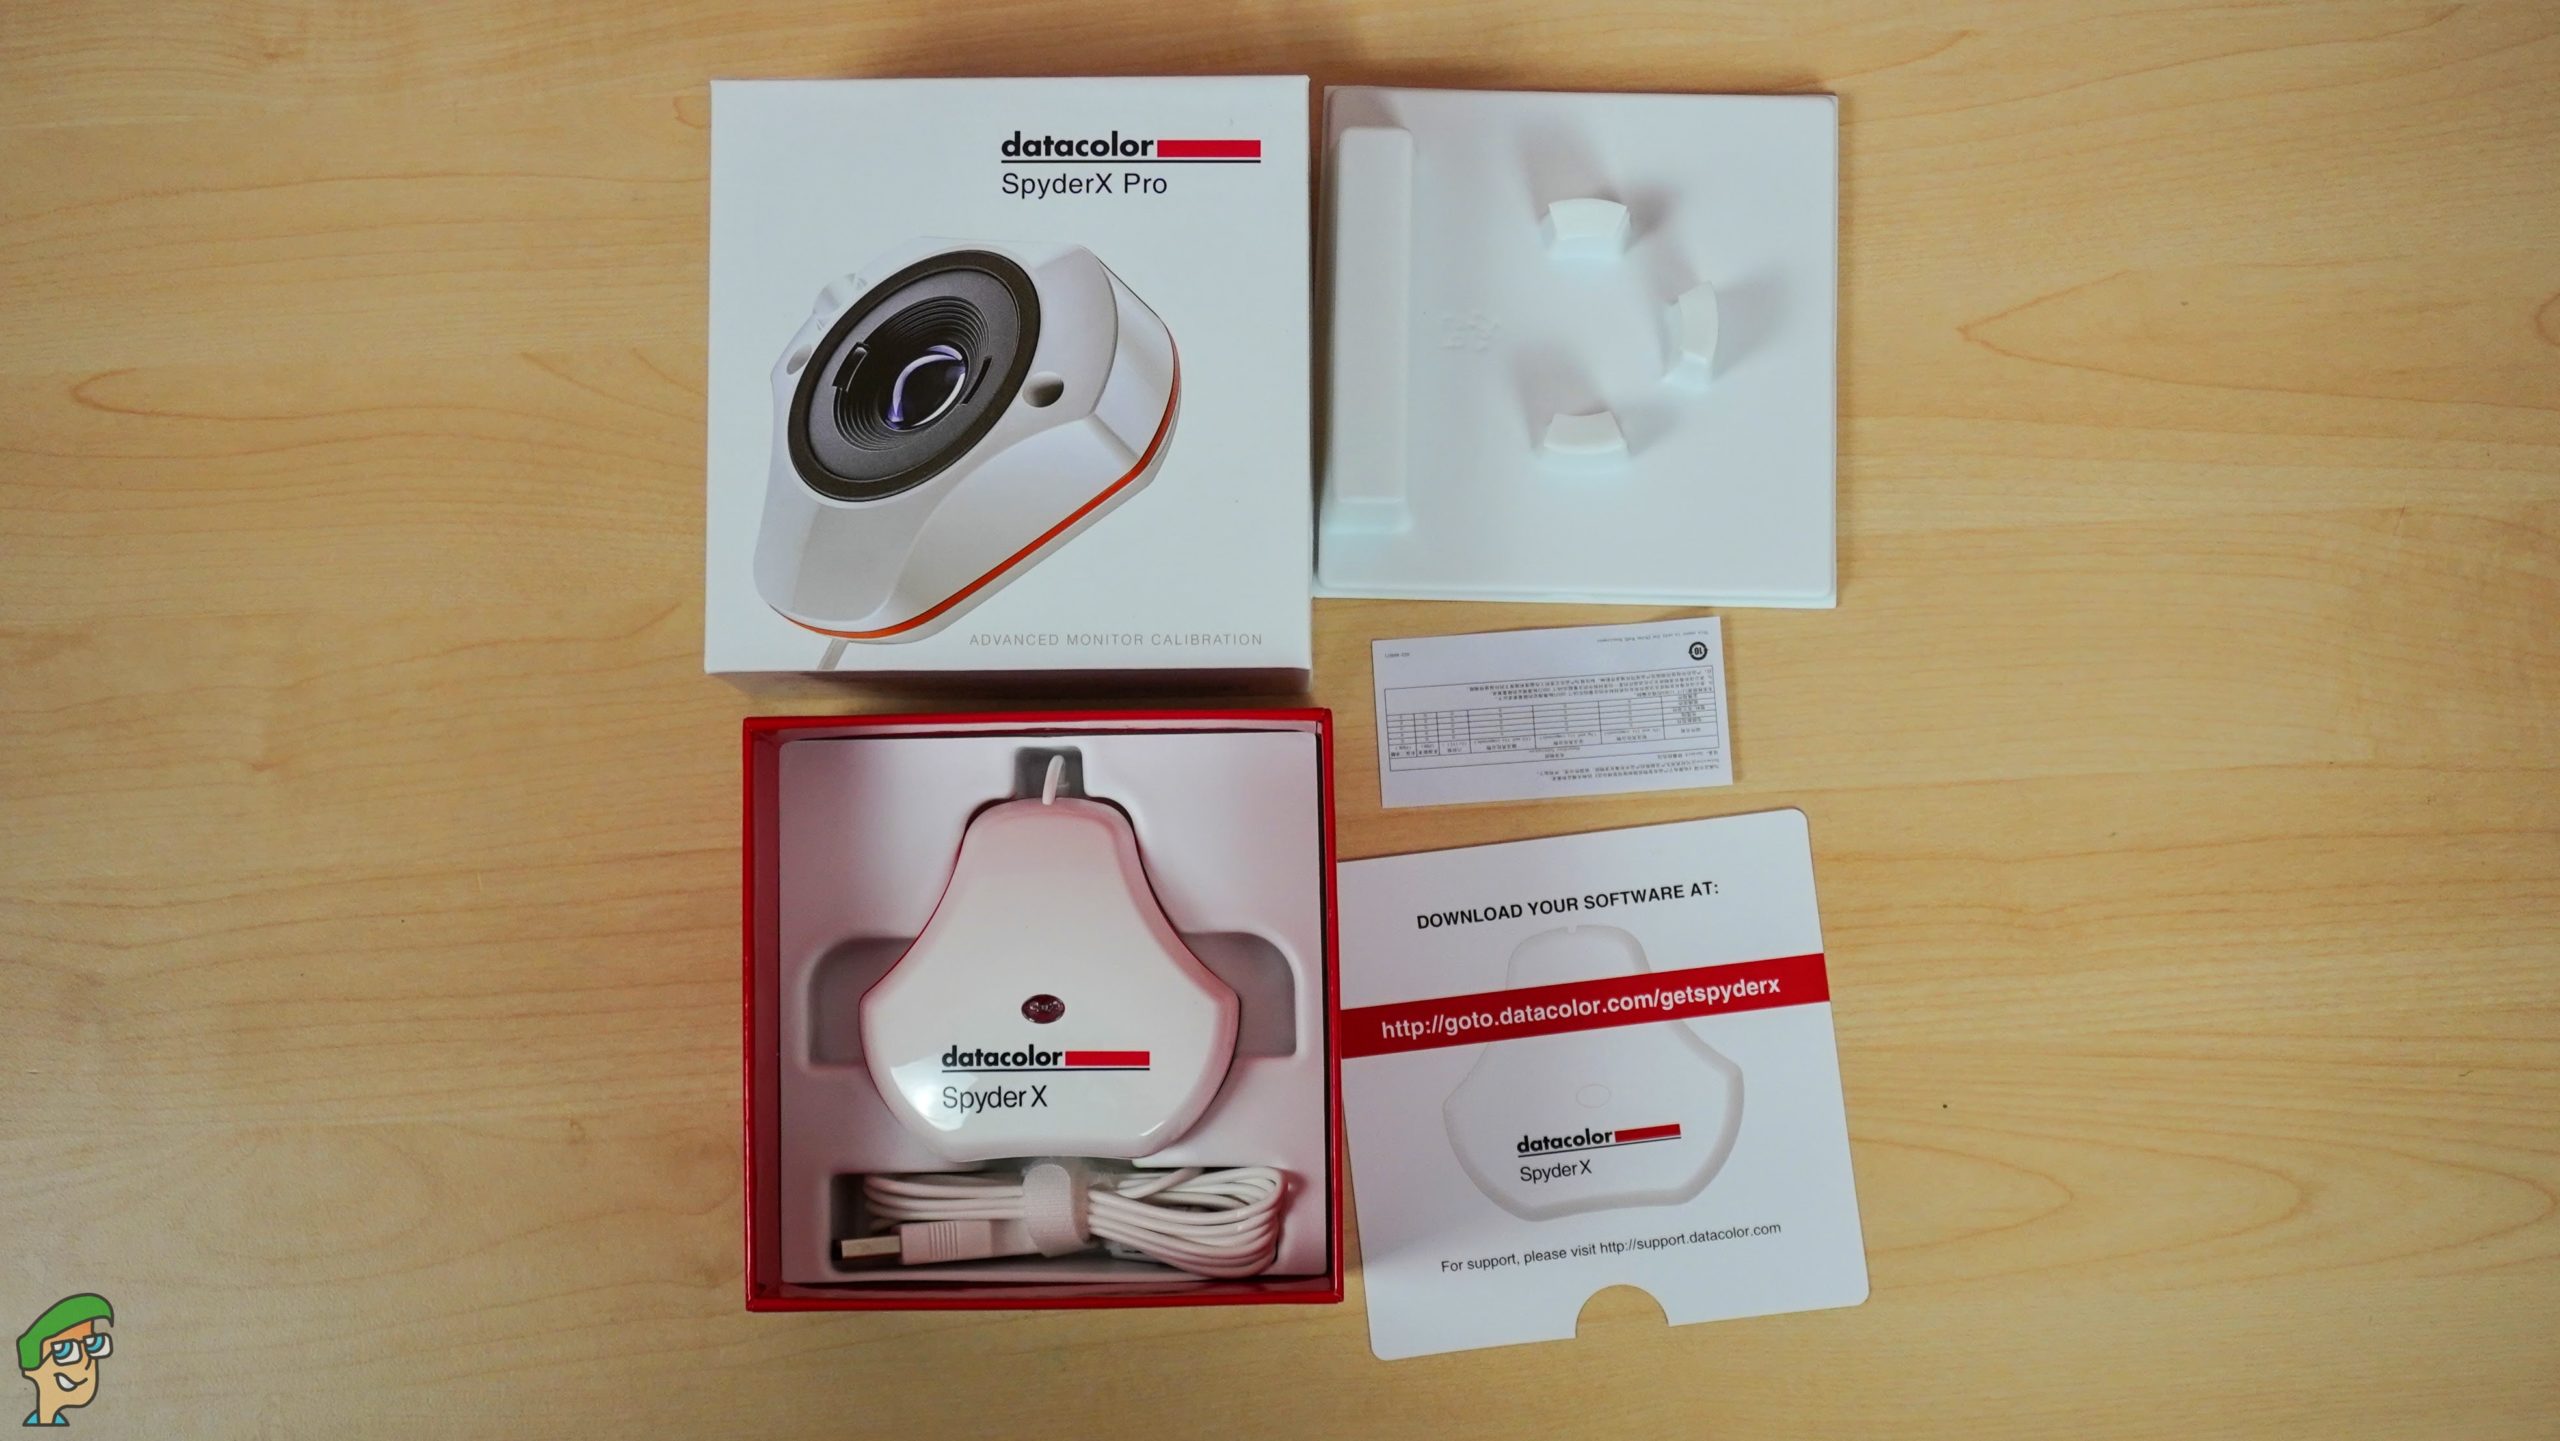
The setup, as well as the calibration process, takes only a few minutes so you can be good to go instantly. Once you have the Spyder X Pro out of the box, set it up by letting it hang over your monitor and plugging it in via the USB cable. After installing the software, you’ll notice the SypderUtility icon in your system tray which you can launch to begin the calibration.
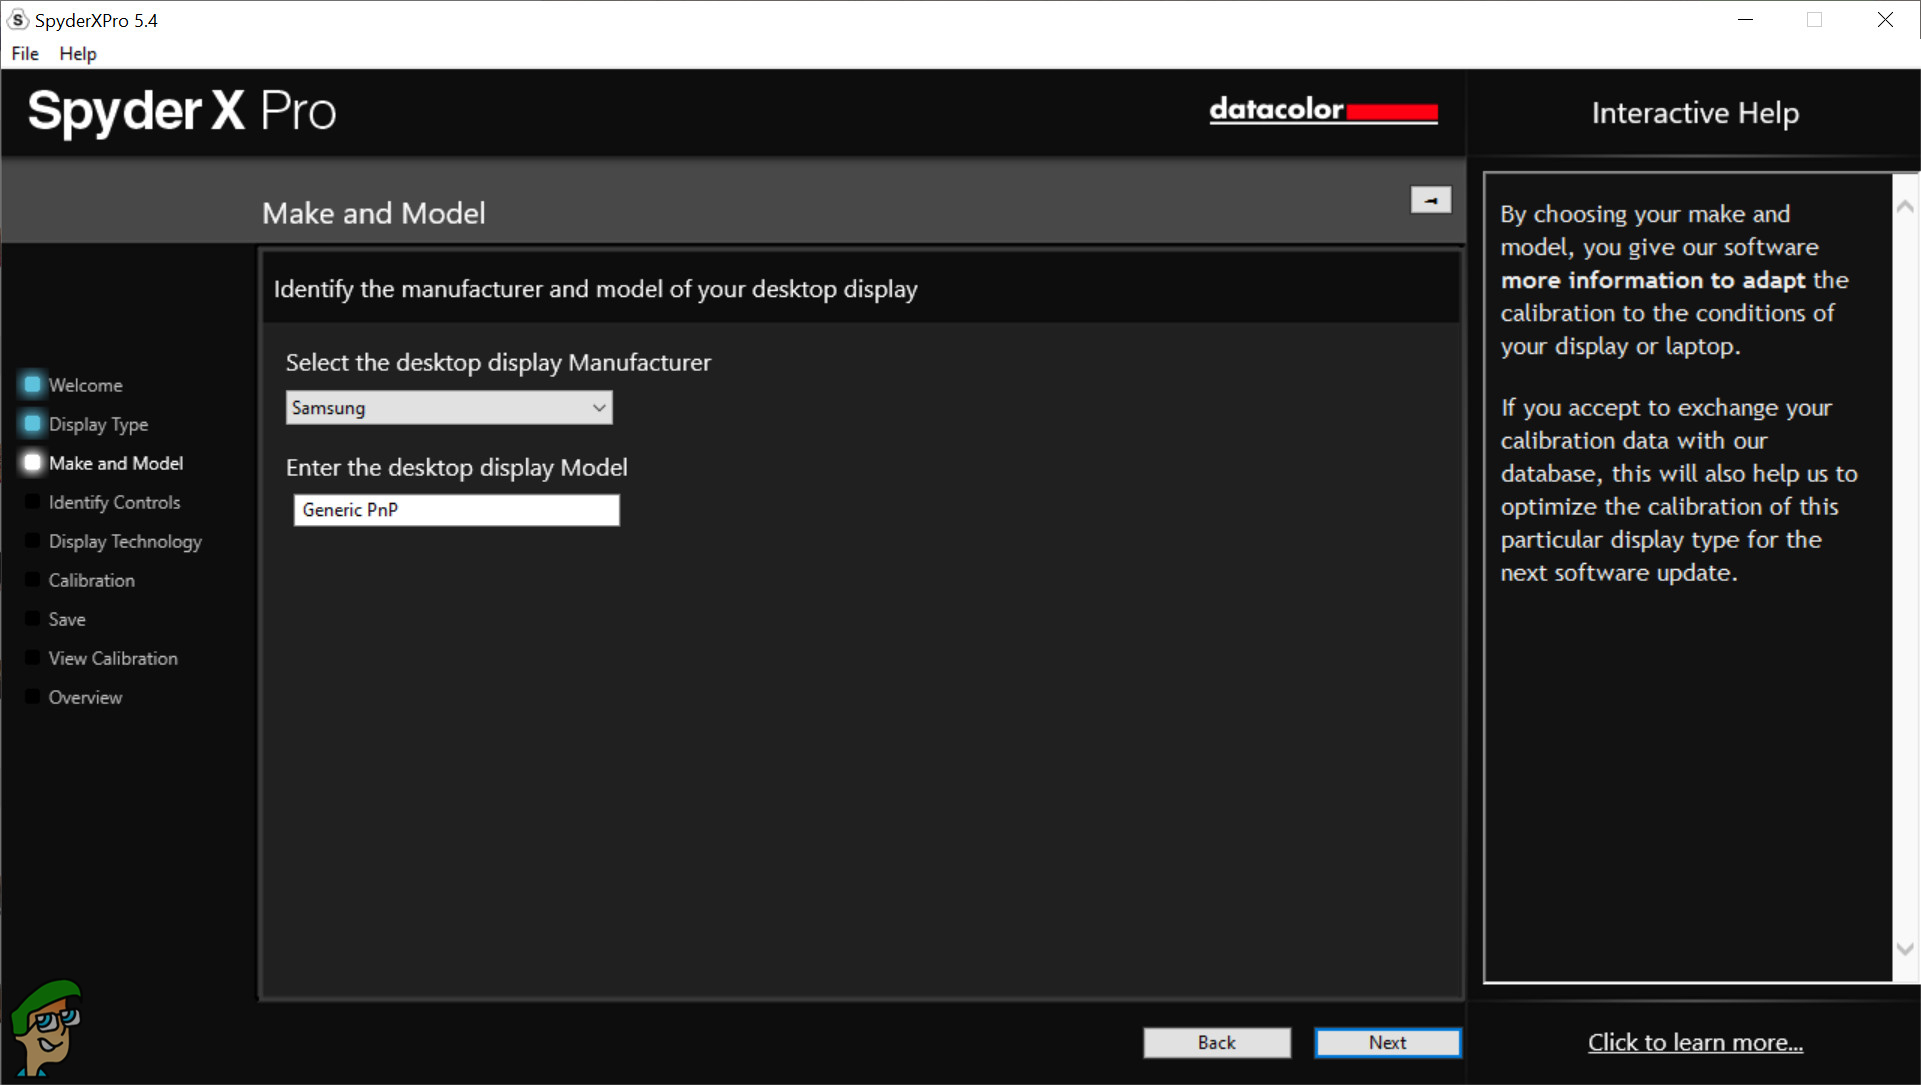
The setup is fairly simple to understand. With the Spyder X Pro, you can calibrate multiple monitors as well so in the screen prompt, simply choose the monitor that you want to calibrate.
In order to achieve the best results, the wizard utility shows you a few tips such as making sure that your monitor has been on for at least 30 minutes. Along with that, it is also important that the lighting conditions of the room are what you’d normally have. Intense lights coming down on your monitor that usually may not be present when you’re working can mess with the calibration.
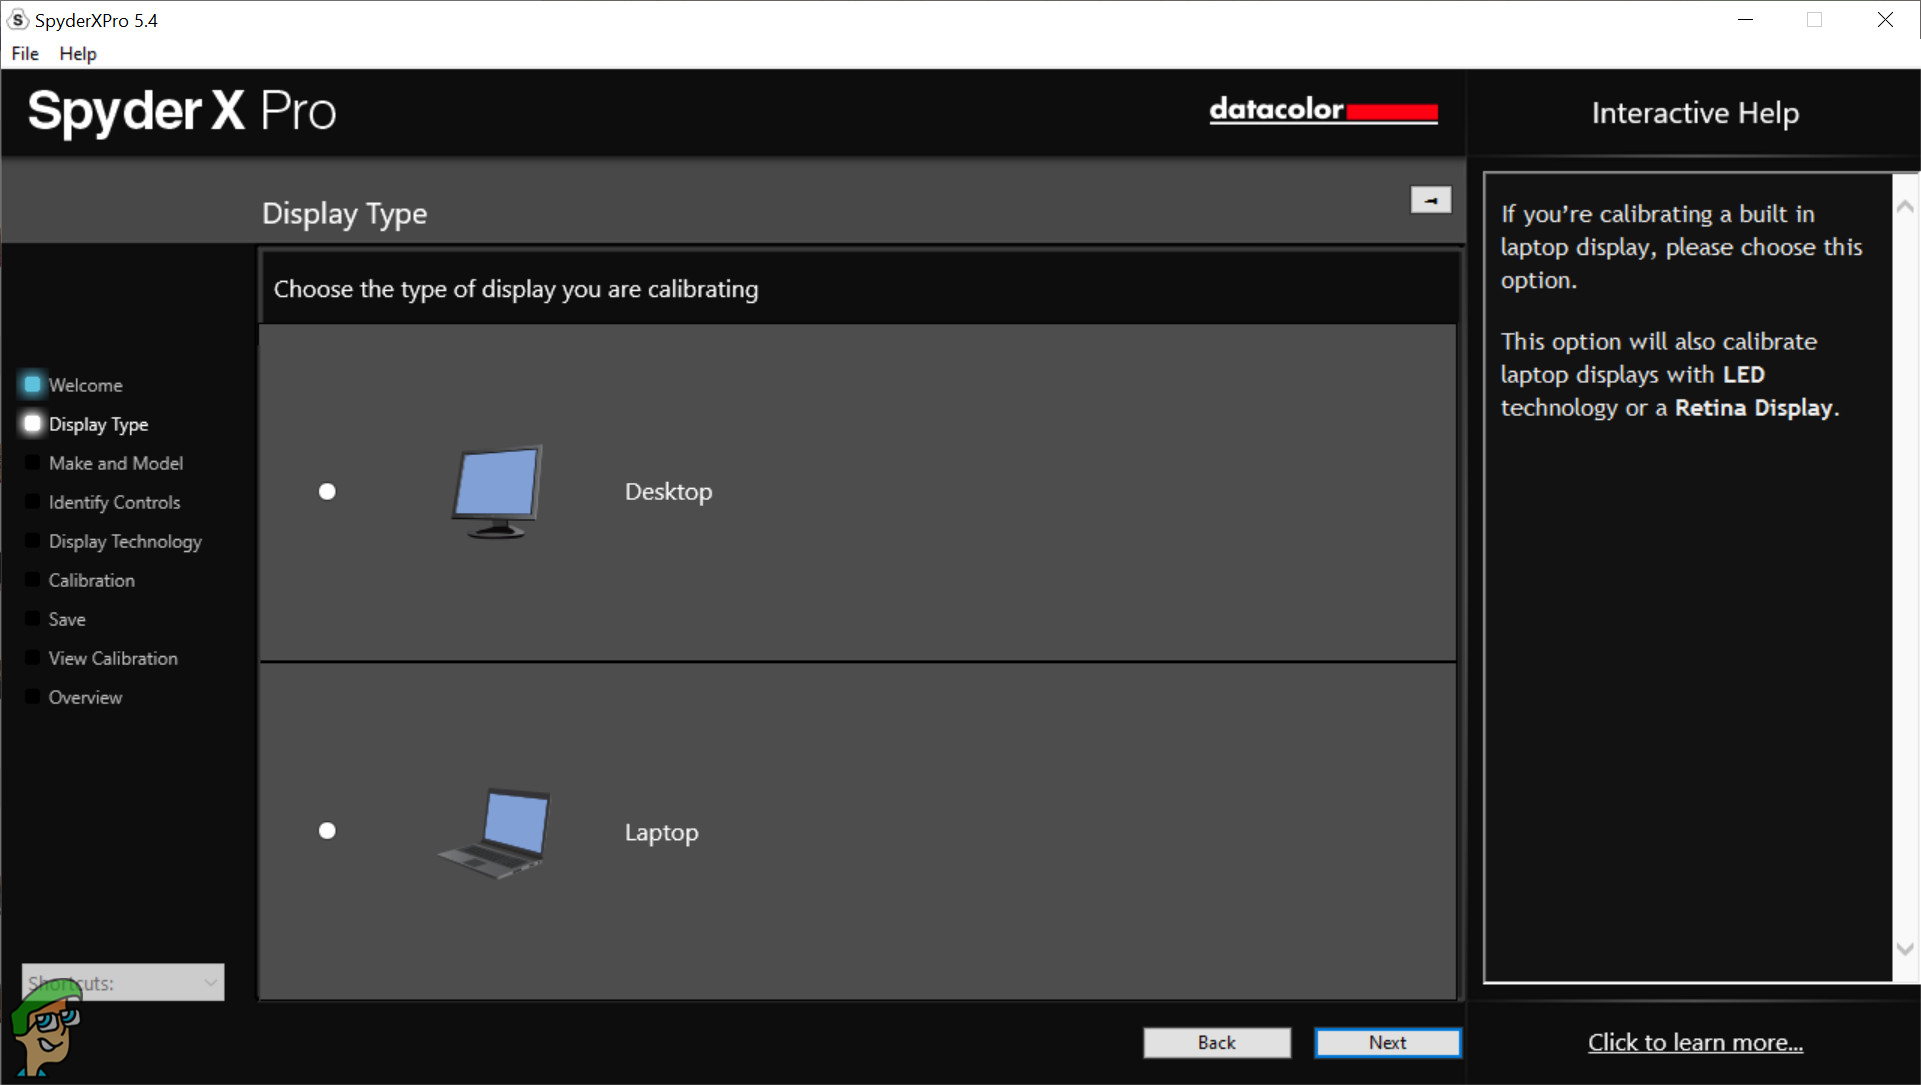
Since this is the Spyder X Pro, you can calibrate your desktop monitor or a laptop screen. There is an option for full calibration and recalibration. Both the processes are quite fast and you can be done with them in no time.
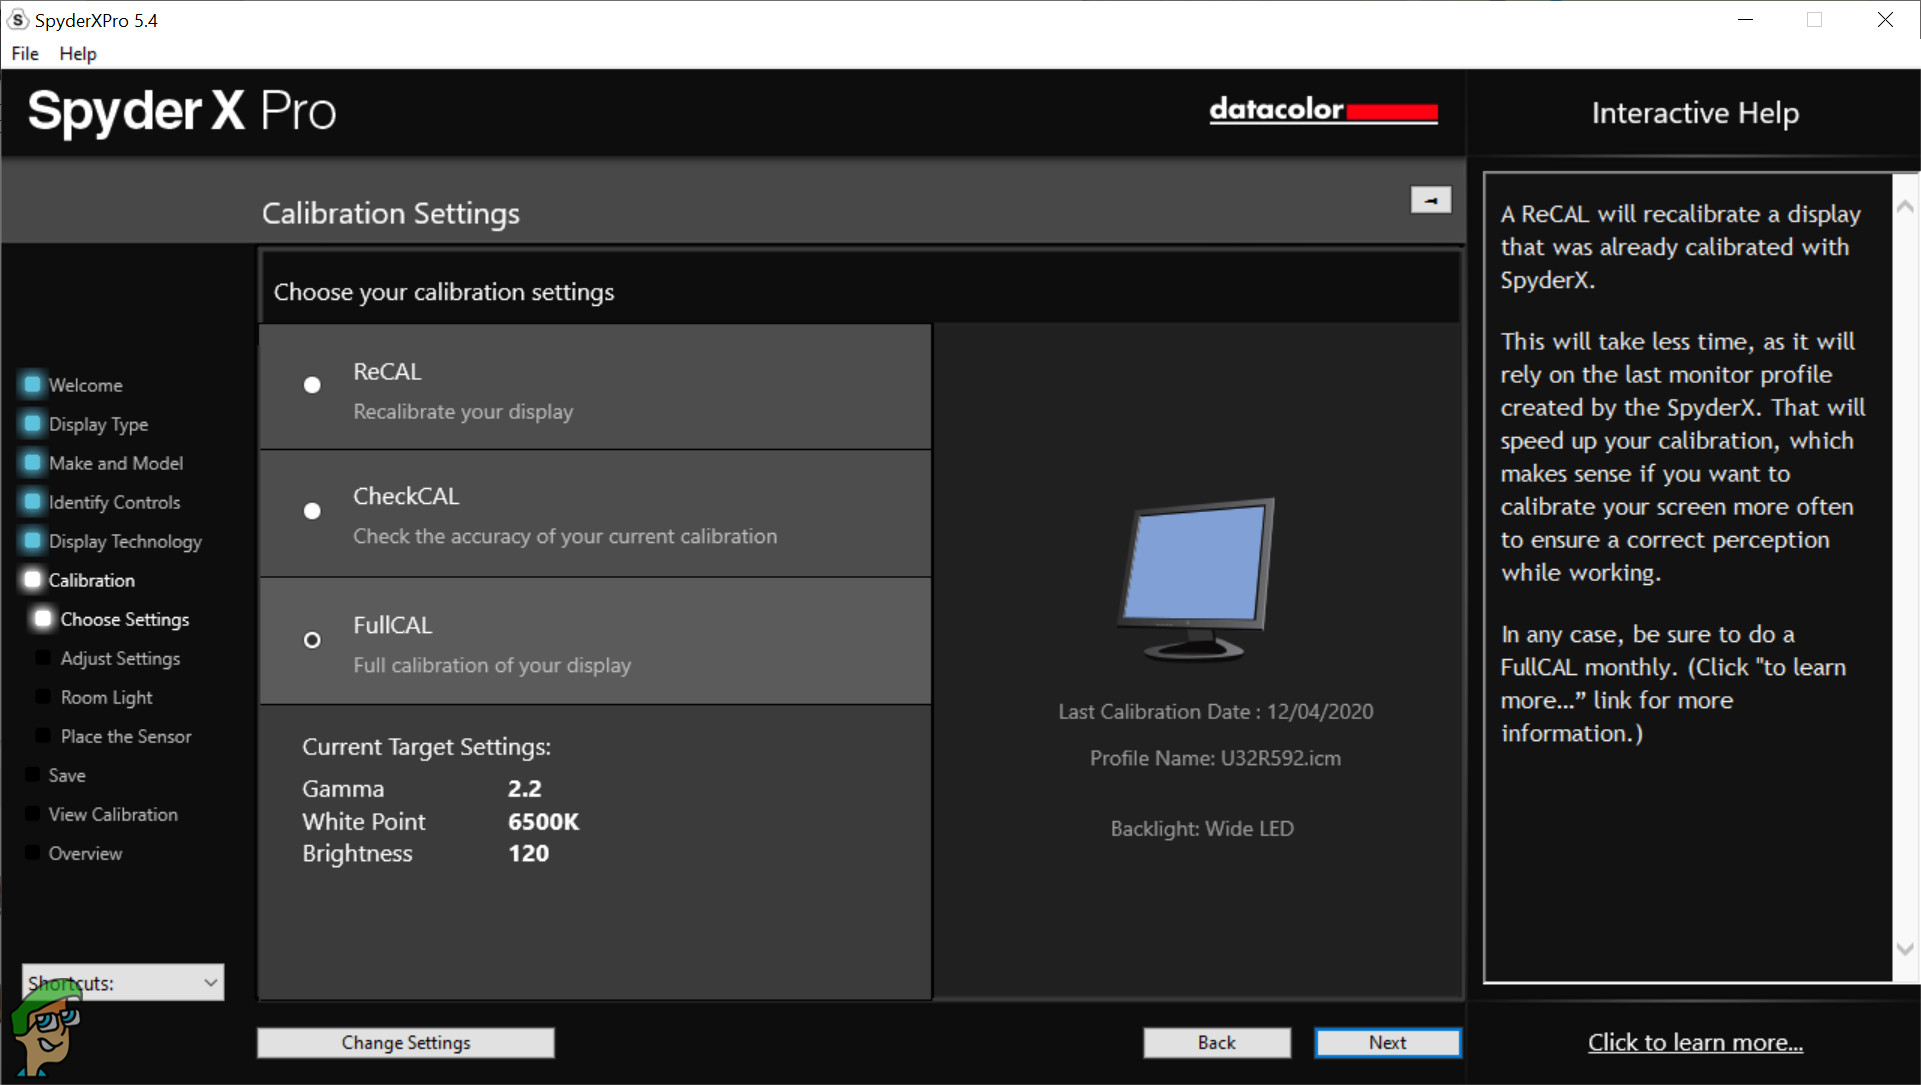
If you have previously done a calibration by a SpyderX colourimeter, you can do a ReCal which matches the settings to the profile that has already been established. Whereas, the full calibration is sort of like a fresh one. Regardless, you should do a full calibration at least once a month to make sure that the profile is up to date and adjusted to whatever changes may have occurred.
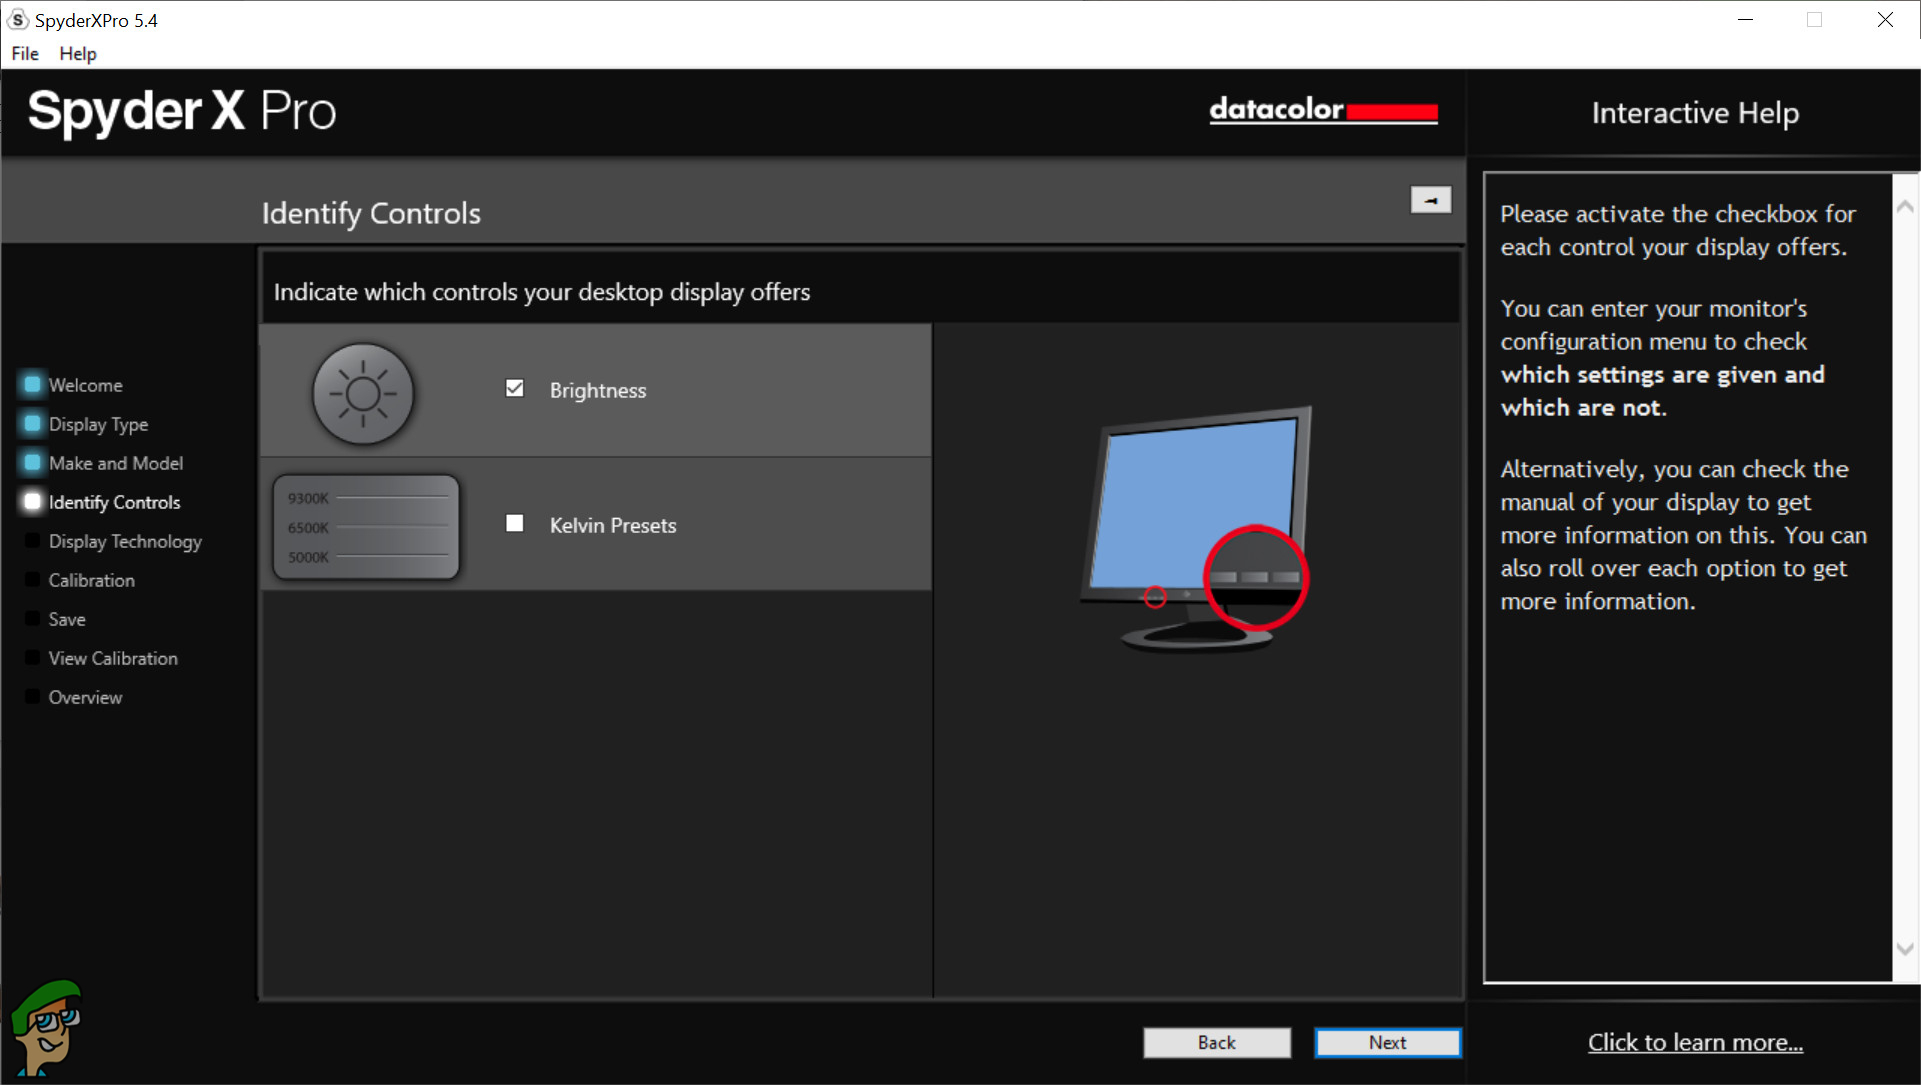
Through the process, you’ll be asked to adjust certain values of your monitor to match the recommended ones. You’ll also notice your screen change colours from green to white but this all takes only but a few minutes. Once that’s done, you’re all set and good to go.
Usage/Functionality
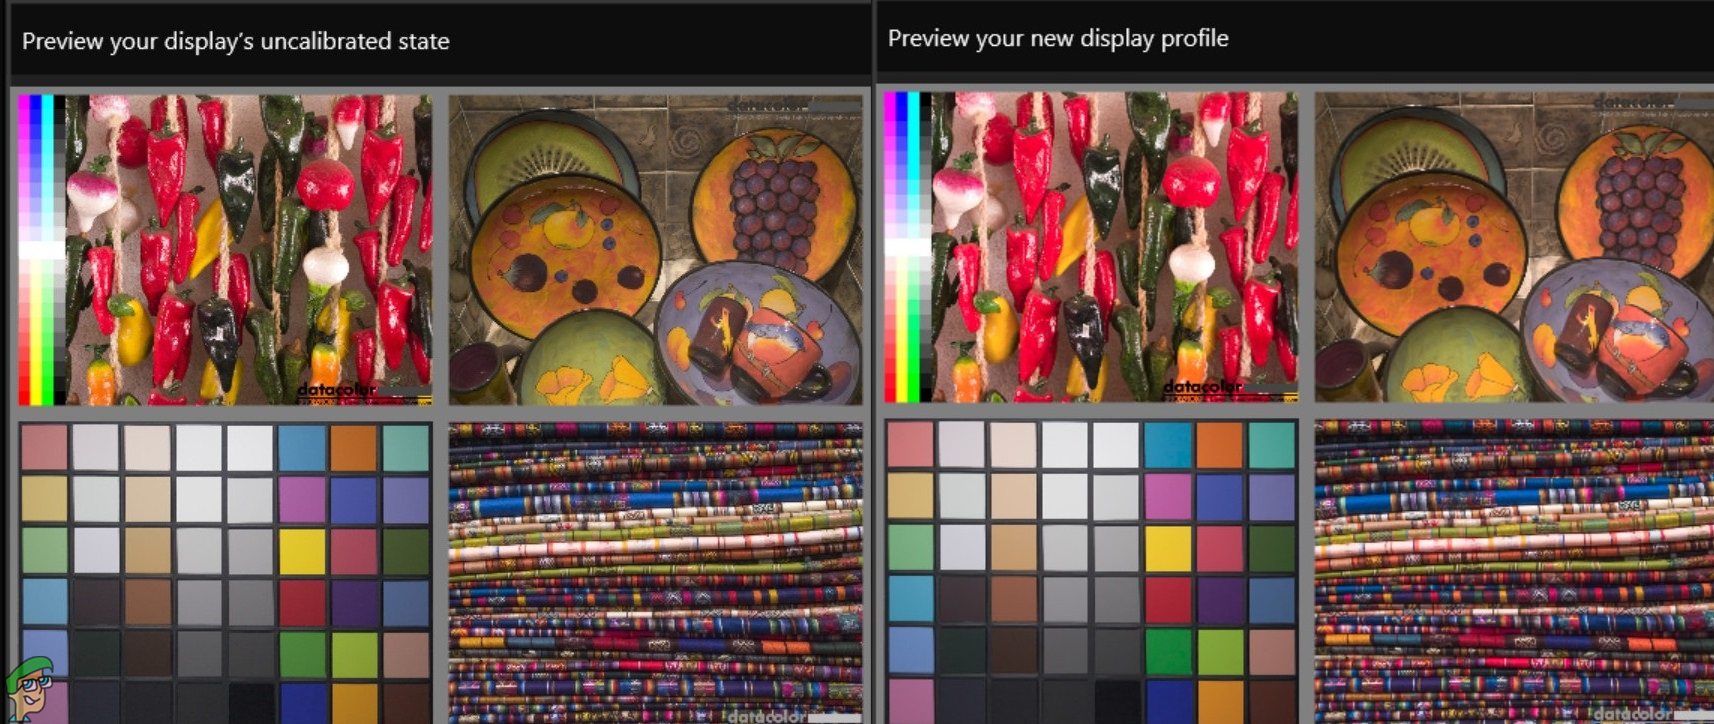
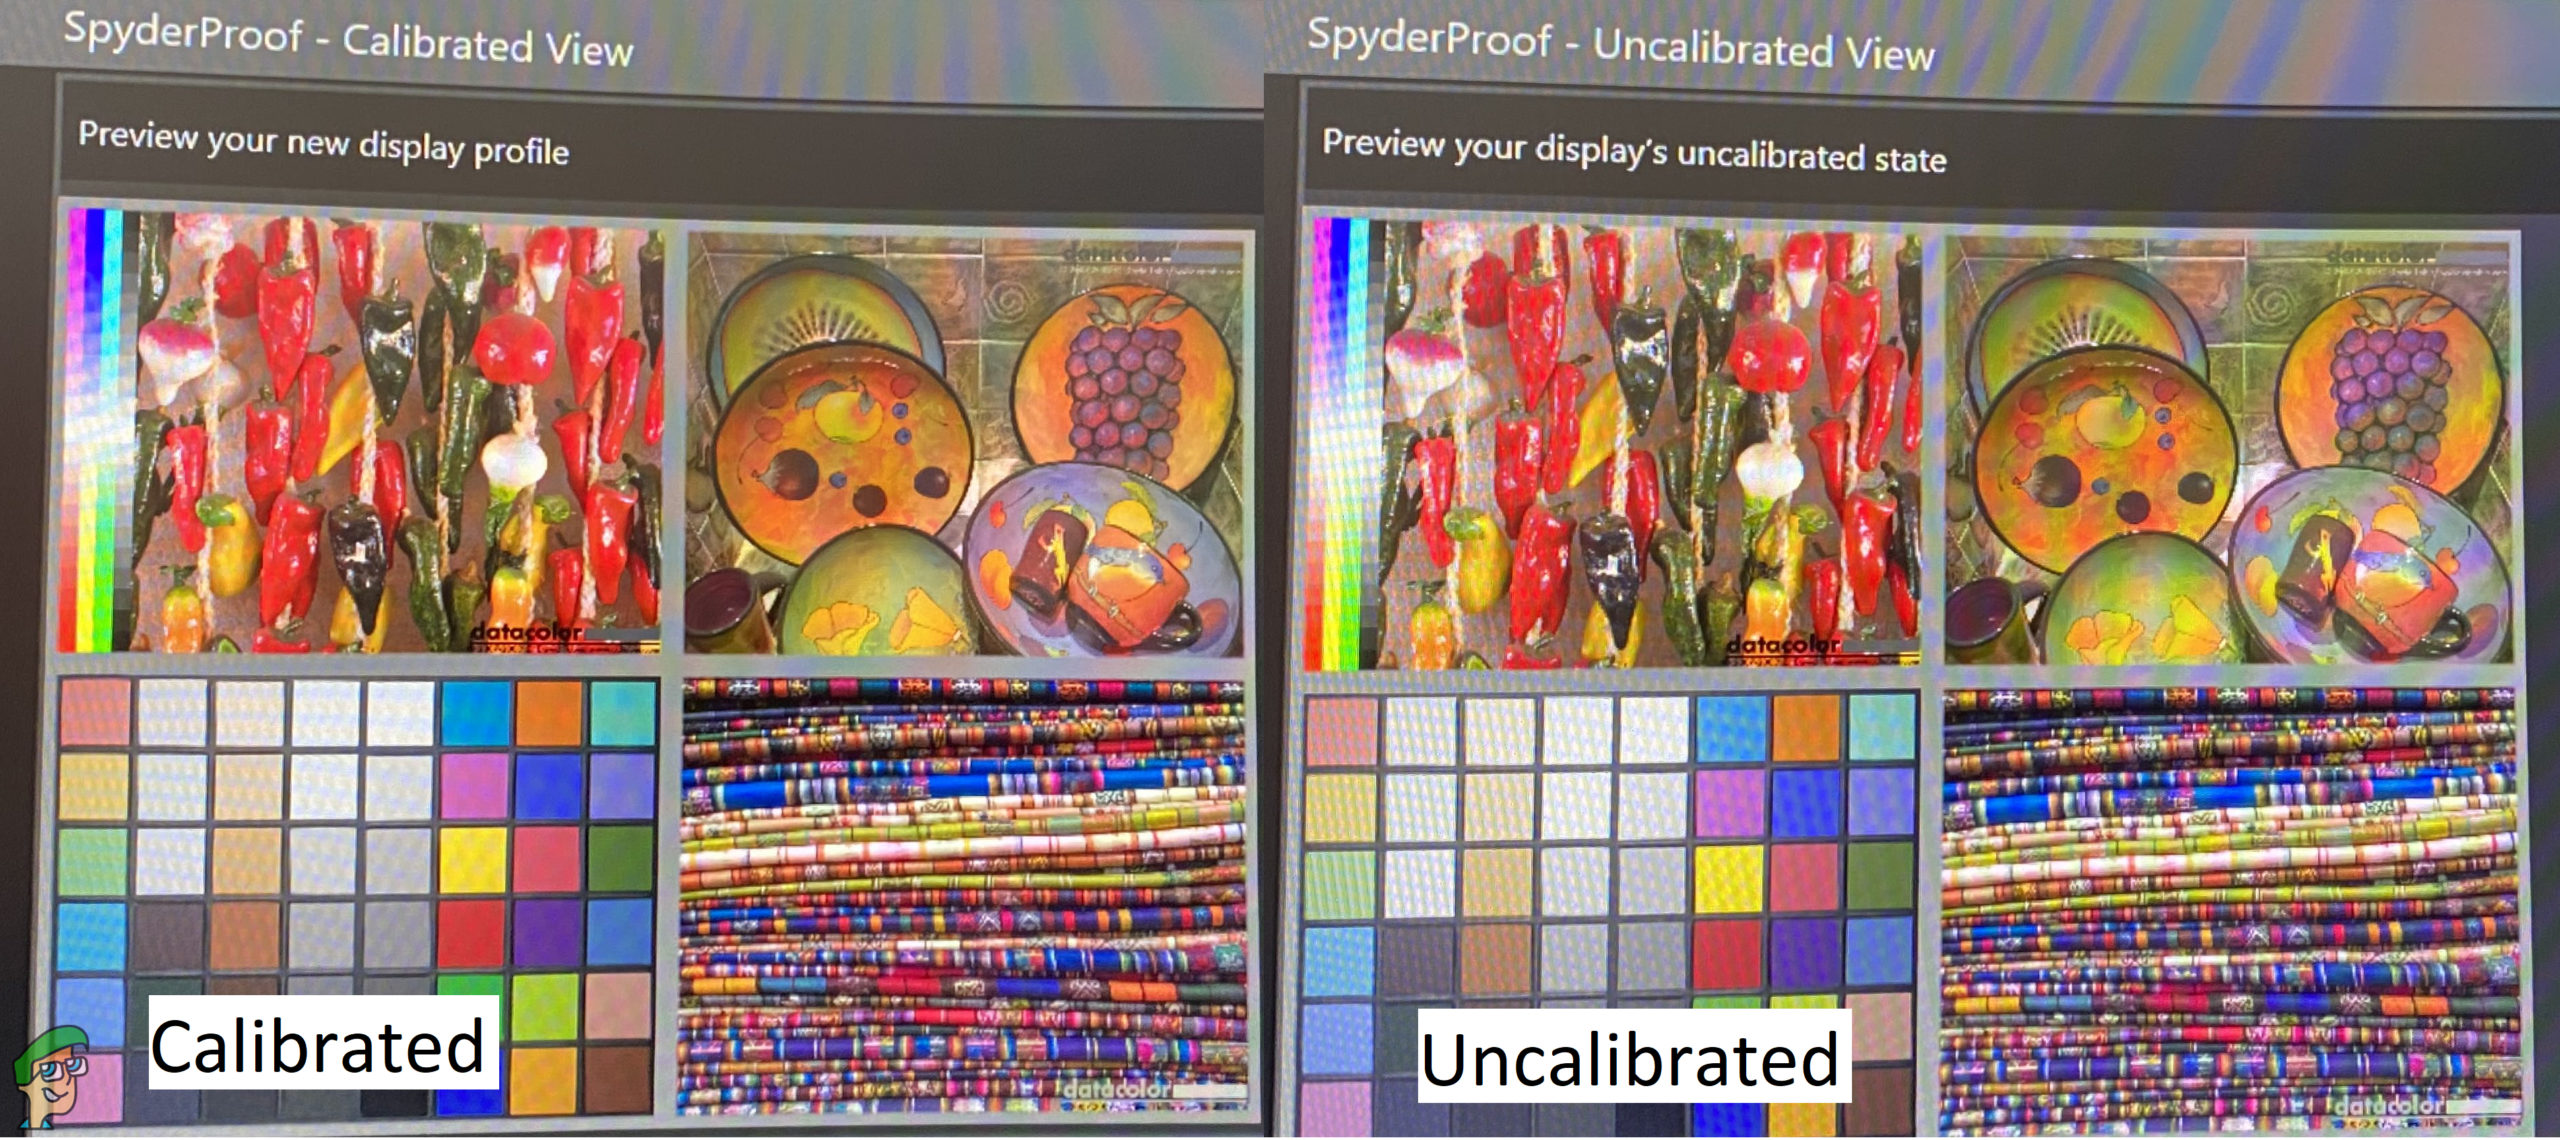
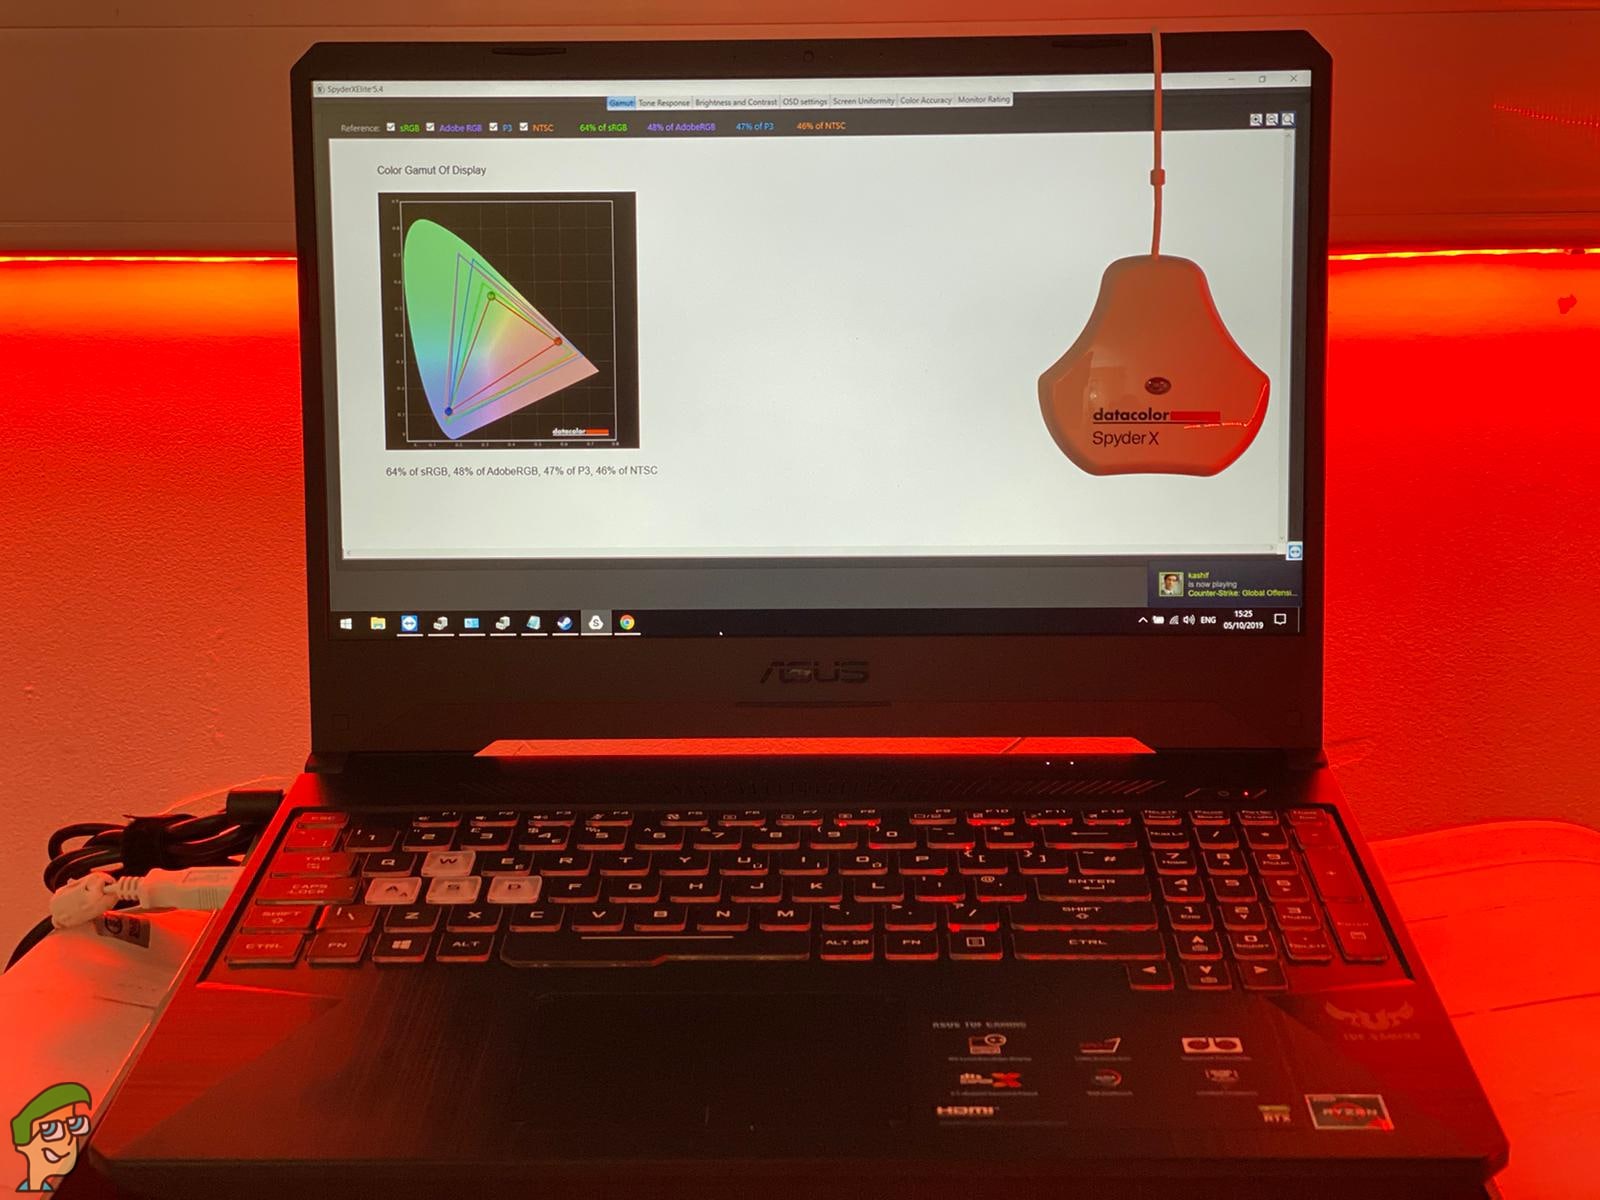
Once you have completed the calibration process, which takes only a couple of minutes, the SpyderUtility shows you a couple of pictures which you can use to compare how the monitor colours look before and after. After running this, you essentially set up a new colouring profile for your monitor that will match the standards that it should. Depending on how well your monitor was calibrated before and what the colour and brightness settings were, the difference in the before and after photos can vary. However, it is there and it is quite noticeable.
Folks who have never even thought about calibrating their monitors are not really going to be able to put this colourimeter to good use. Chances are, they have never had to encounter such a scenario where screen calibration is required. But, that’s not the case for all. In the field of professional photography, video editing and studio work, optimal screen calibration is very important. After seeing the post-calibration results, odds are you’re going to want to reevaluate some of your work to see what’s what.
You’ve put money in an expensive monitor for your work. Latest monitors are able to utilize more of the sRGB and Adobe RGB spectrum which works wonders for this colourimeter. With different types of panels and LEDs, there are a lot of variations that can come into play. This can happen even if you are using two monitors of the same make and model. However, it really goes up a notch if the two monitors being used are different. Manually, it is almost impossible to ideally match both the monitors to display the same results. However, this is a cakewalk with the Spyder X Pro.
The usefulness of the Spyder X Pro is not just for your monitor. After all, what good is it if the colours that you’re seeing on your monitor are just not it when you print them out. Instead of trying to tweak settings through a hit and trial method to see which one hits the mark, Spyder X Pro makes that a walk in the park as well.
Spyder X Pro vs Spyder X Elite
The Spyder X Pro and Spyder X Elite are two almost identical colourimeters by Datacolor that you can use to optimize and calibrate your display. By looking at them at first, you’ll notice almost no differences because their build and design is identical. But the two are slightly different based on the features they offer.
In simple terms, the Spyder X Elite is designed for those who not only need colour and screen calibration for their monitor, but also for other devices. Along with that, the calibration options and settings offered in the Spyder X Pro are a little less than what you’d get in the Spyder X Elite. For starters, the Spyder X Pro is used to calibrate the monitor settings only whereas the Spyder X Elite can be used for projectors too.
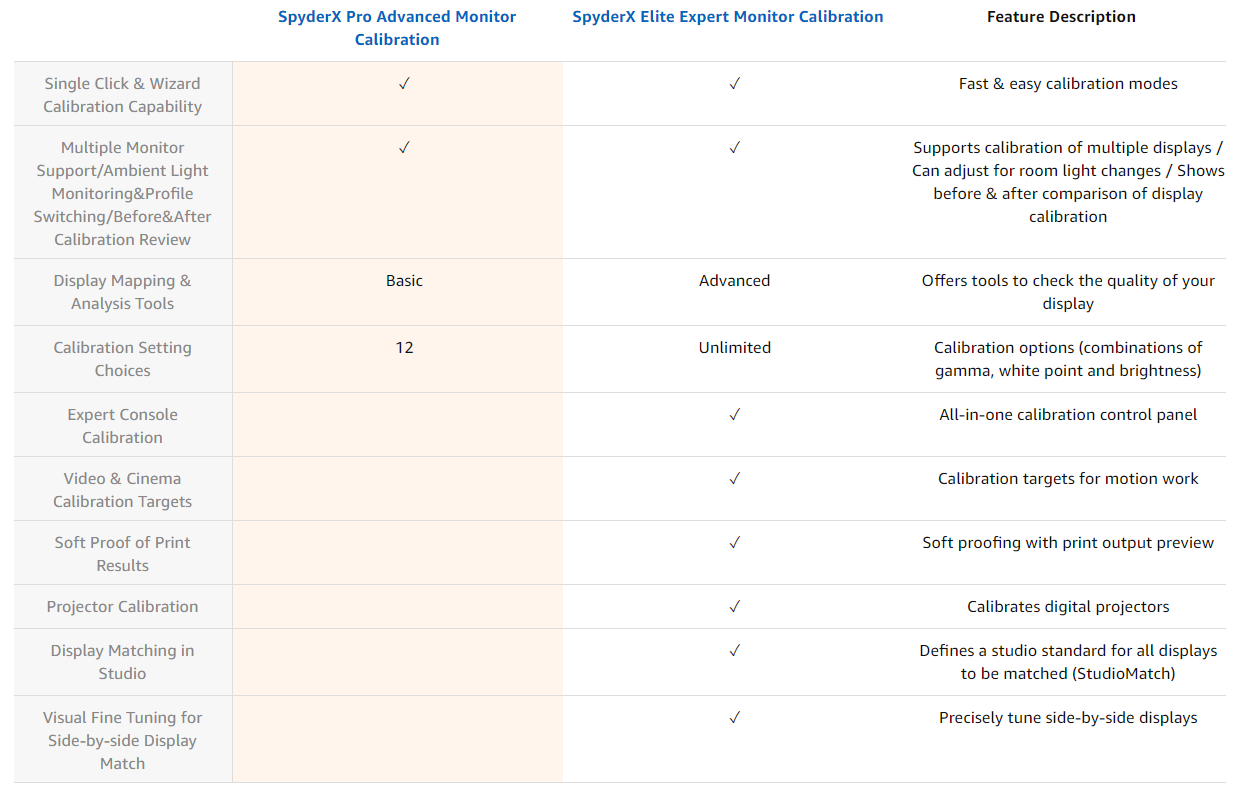
Another feature that the Spyder X Elite has over the Pro is SoftProof printing. With SoftProofing, you can actually look at how the picture or media will look on a different device. Be it a tablet or a mobile phone, the Spyder X Elite will allow you to take a look at your work from a different perspective before printing it out to finalize things. Where the Spyder X Pro gives you 12 different targets for calibration, Spyder X Elite has unlimited predefined calibration settings. With that, you can observe the settings and calibration through the choice of television as well.
Both of these devices are quite intuitive and don’t require the user to be an expert of the colour palette. In fact, their strength also lies in the fact that all of this is a simple setup that anyone can do. The use of Spyder X Pro or Elite depends upon the fact whether you need precise colour calibration or not. If you are not in the field where this is required, you can easily spend your days without worrying about this. But for those who do have the eye for it and require precise colour calibration of their monitor or other devices, the Spyder X colourimeter is a must. It is an excellent device that will bring out the colours that you may be missing out on.
Conclusion
The Spyder X Pro colourimeter is an excellent device with very few and minor flaws. The interface and layout of the software is the same clunky one that it was previously with the Spyder5. However, I’m positive that even when nitpicking, this is a minor inconvenience in light of all that the Spyder X Pro colourimeter gets right. Despite being old, the SpyderUtilitty feels just as fast and simple to use as the Spyder X Pro itself. Rapid calibration, a plethora of options that even the ones with looking for very specific settings to tweak can get behind. In all departments, the Spyder X Pro is an excellent device that you should not let slide. If you are in the market for such a device, the Spyder X Pro is going to prove to be a very valuable investment which will come in handy time and time again.
Datacolor SpyderX Pro
The Ultimate Monitor Calibrator
Pros
- Incredibly easy to use
- Accurate colour calibration for all types of monitors
- Before and after calibration pictures help highlight what has been changed and improved
Cons
- Software's interface feels a little clunky and outdated
Connectivity: USB | Weight: 10.2 ounces

VERDICT:Screen calibration may not be at the top of the list for everyone. But there is no doubt about it that with the Spyder X Pro, there is very little that can go wrong. Rapid calibrations, a tonne of options and an incredibly easy to use software is what makes this colourimeter so great. On top of that, the ambient light sensor also makes sure that all types of external factors are taken into account when calibrating your screen. The Spyder X Pro is a great device that can easily be put to great use, all in a matter of mere minutes.
 Check Price
Price at the time of the review: US $150 / UK N/A