How to Cut/Trim/Arrange Audio in Audacity?
Audacity is open-source free audio software for editing and recording audio tracks. It is the simplest application for editing audio files with minimum steps. It has all the features that users want in a good audio editing software. However, new users will require a guide for the basic cutting, trimming and arranging features of Audacity. In this article, we will be teaching you these features.
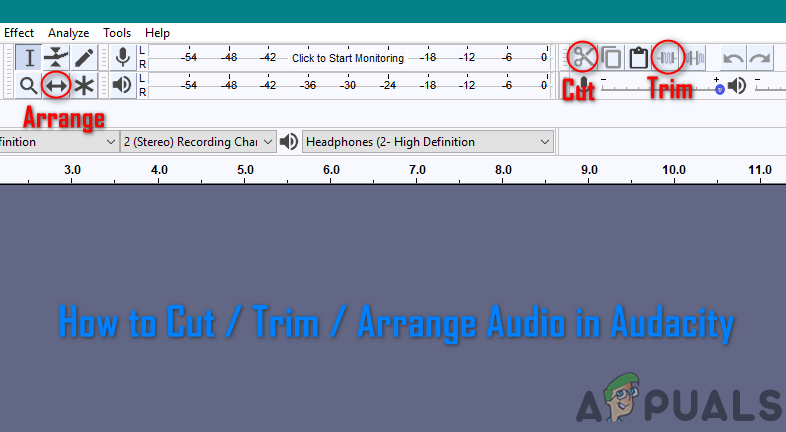
How to Cut/Copy Audio with Audacity
In Audacity, the user can cut part of the track from the audio file. This feature can be used for removing some parts of the soundtrack or taking that part to use in other tracks. Sometimes in remix songs, the user will require to get parts from different songs to make the remix. Follow the below steps to learn how to cut and copy part of the track:
- Open Audacity by double-clicking the shortcut or searching Audacity in the Windows search feature.
- Click on the File menu in the menu bar, choose the Open option and select the track you want to add. Click on the Open button.
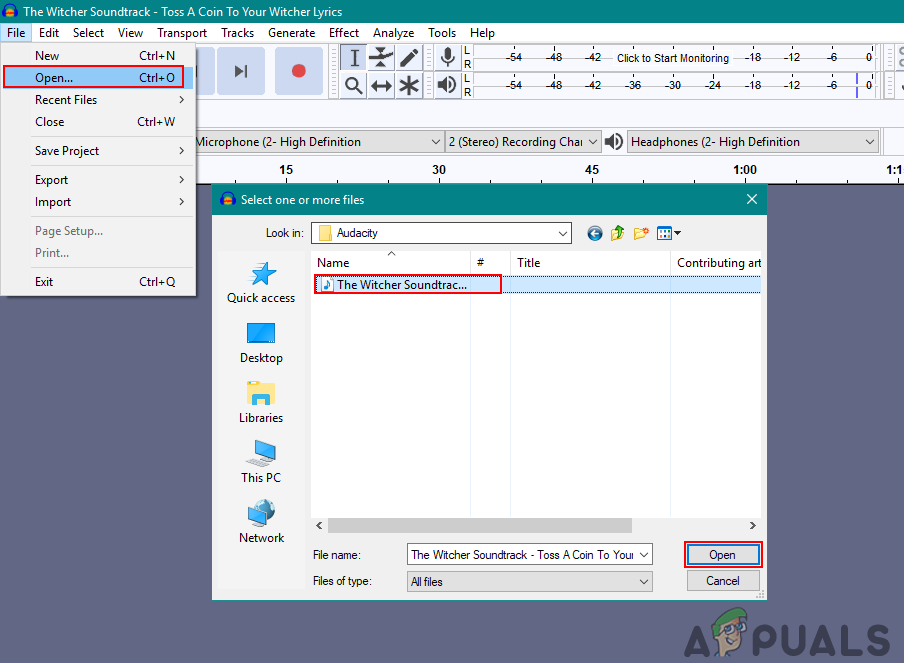
Opening an audio file in Audacity - Select the Selection tool from the tools menu. Hold mouse right-click on the area in the track channel from one point and move it to the other point as shown below:
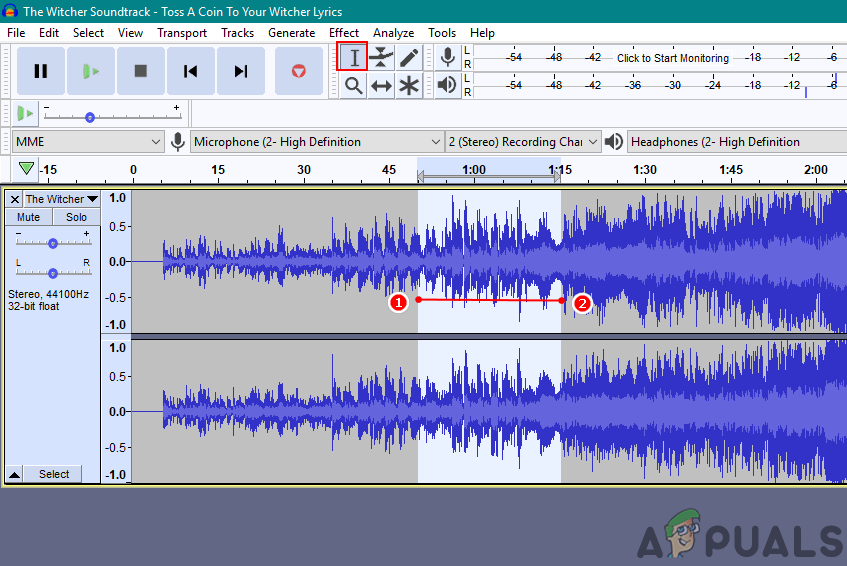
Selecting the area of the track - Hold CTRL key and press X to cut or you can just click on the Cut icon on the tools menu at the top left.
Note: Holding CTRL and pressing C will copy the track. You can also find the copy icon next to the Cut icon.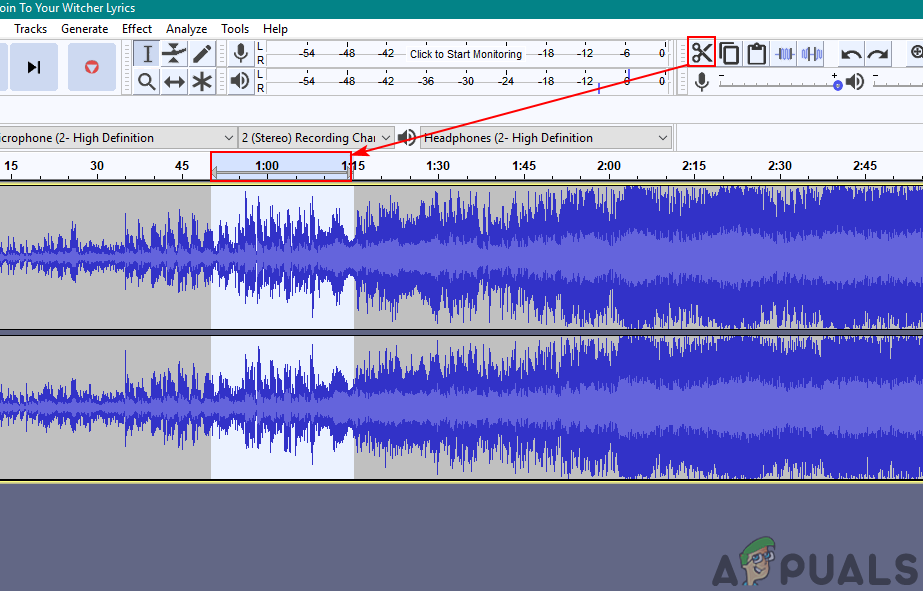
Cutting part of the track - The selected area in the track channel will be cut. You can add it to the new track channel or other track by pasting it.
How to Trim Audio in Audacity
Now trim is the opposite of the cut operation in Audacity. If you select some part of the track and use the trim feature, it will remove all the unselected parts of the track. Trim defines making it neat or cutting the unwanted parts. So rather than cutting all the unwanted parts, the user can just select the required part and use the trim feature to remove unwanted parts by one click. Follow the below steps to use the trim feature in Audacity:
- Open your Audacity application by double-clicking the shortcut icon or by searching Audacity in the Windows search feature.
- Click on the File menu in the menu bar and choose the Open option. Select your audio file and click on the Open button.

Opening the audio file in Audacity - Select the Selection tool from the tools menu at the top. Select the area in the track by holding a mouse right-click from one point to another.

Selecting the area of the track - Once you have selected the area of track that you need, click on the Trim button in the tools menu at the top right side.
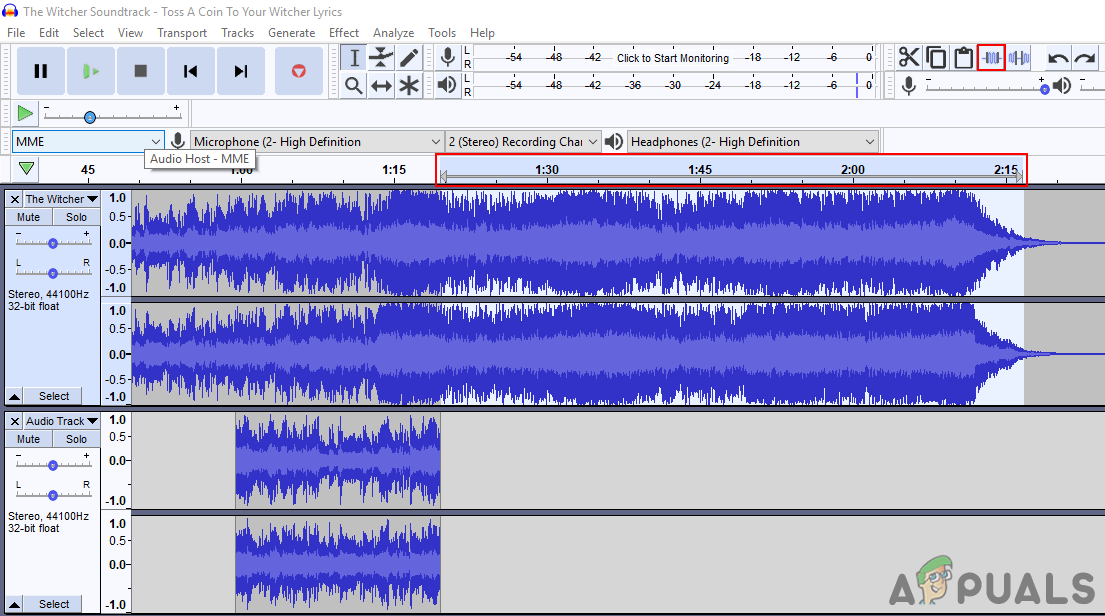
Trimming the unwanted area of the track - All the unwanted parts will be removed from your soundtrack.
How to Arrange Audio in Audacity
Arranging audio is one of the important features in Audacity. If the user is editing the audio in Audacity, they must know how to arrange the different track channels. For combining multiple tracks, the user will need to arrange and move the tracks at different times so one can end and another can start after that. Follow the below steps to arrange your audio in Audacity:
- Open Audacity application by double-clicking the shortcut or by searching Audacity in the Windows search feature.
- Click on the File menu in the menu bar and choose the Open option. Select your audio track and click on the Open button.
Note: If you want to open multiple audio files in the same project, then click on the File menu and choose Import > Audio.
Opening the audio file in Audacity - Select the Time Shift tool in the tool menu, click and hold mouse right-click on the track and arrange it in the track channel to wherever you want to.
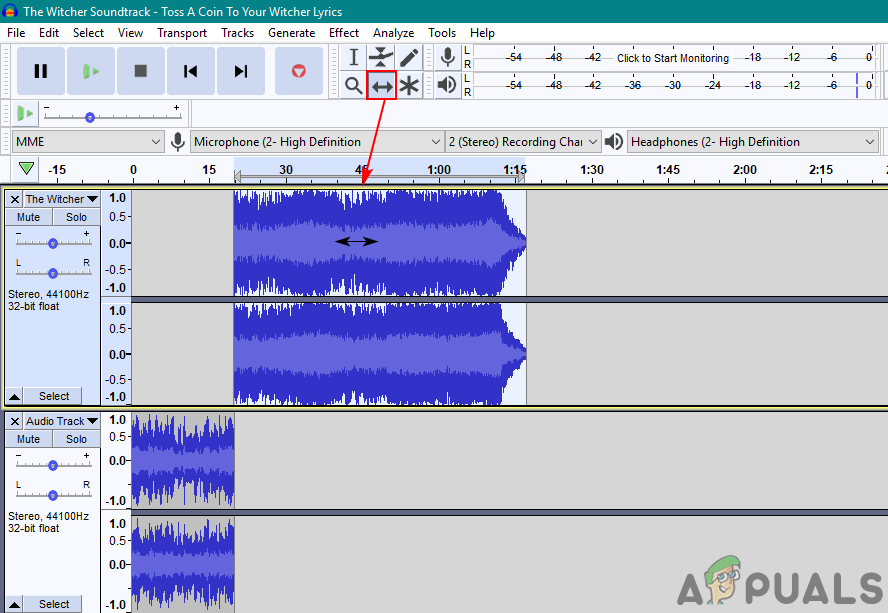
Arranging tracks with the time shift tool - You can also silence part of the track by selecting that area of a track with the selection tool and clicking on the Silence audio selection tool.
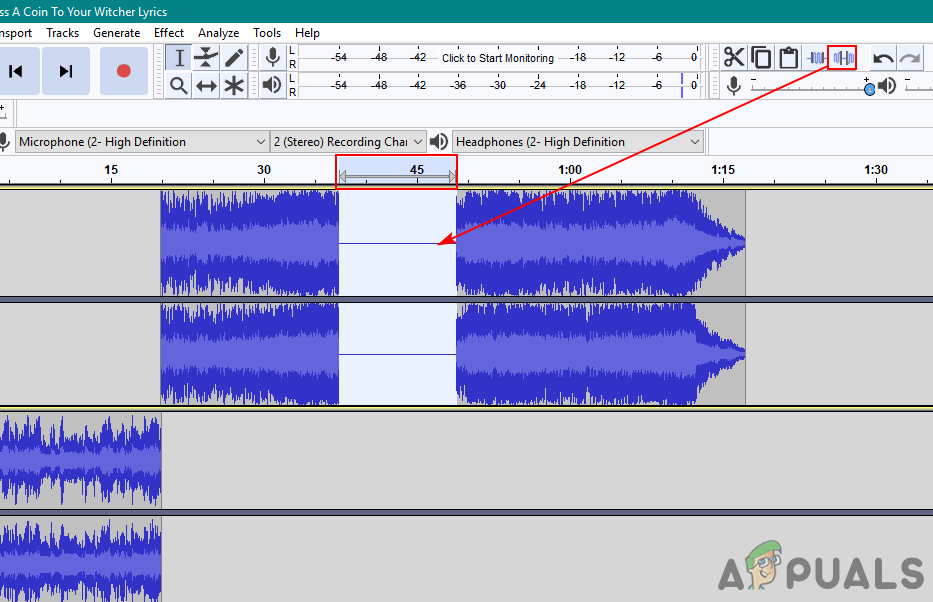
Making part of track silence - You can do many things more to arrange audio tracks depending on your needs.


