How to Create and Set a Custom Resolution on Windows?

Windows allows you to select from a range of preset screen resolutions for your display, determined by your graphics card or GPU and monitor hardware. You can easily adjust your screen resolution using one of these presets. However, what if you need a resolution not included in these options? This is where custom resolutions come into play. Custom resolutions enable you to set almost any screen resolution and refresh rate for your display. If you’re trying to use a bespoke resolution not available in Windows’ preset list, this guide will show you how to add it.

Please note that not all computer manufacturers have enabled custom modes for their drivers, and older graphic drivers may not support this feature. In this article, I’ll guide you through modifying your screen resolution on Intel, AMD, or NVIDIA graphics cards using their native control software or third-party software for those whose systems do not support customizable screen resolutions.

1. Set a Custom Resolution Using Dedicated GPU Software

This method might vary slightly based on the version of your graphics driver and graphics card, but the process is similar for both NVIDIA and AMD GPUs.

1.1 NVIDIA Graphic Card:

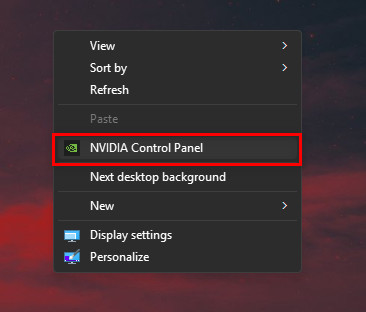
  1. Open the NVIDIA Display Properties by right-clicking on the Windows desktop and selecting NVIDIA Display.
  2. In the Display category, choose Change Resolution.
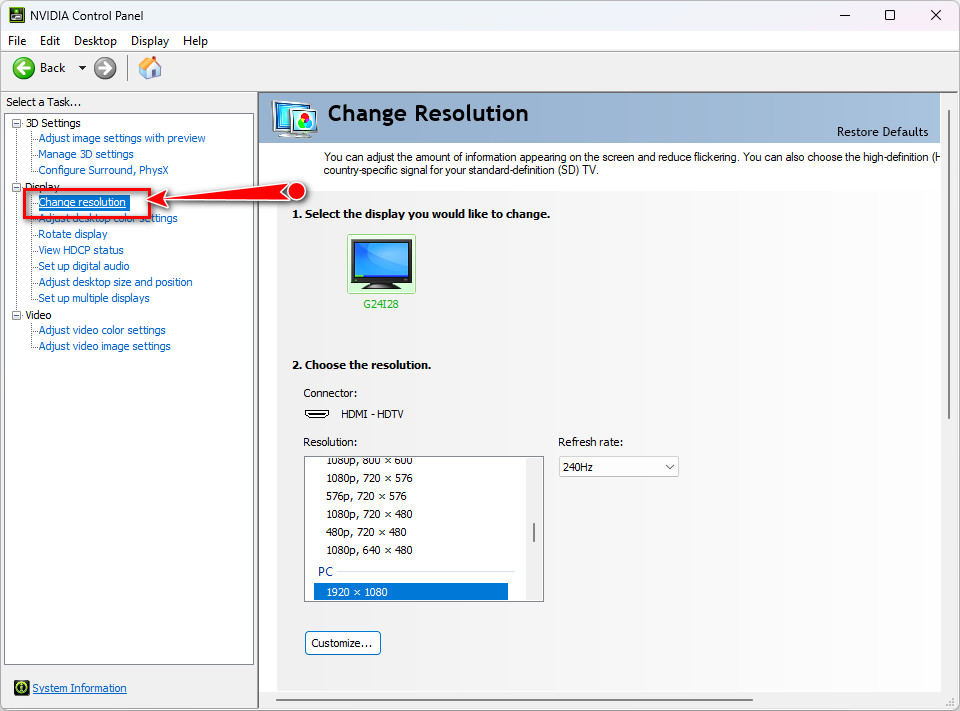
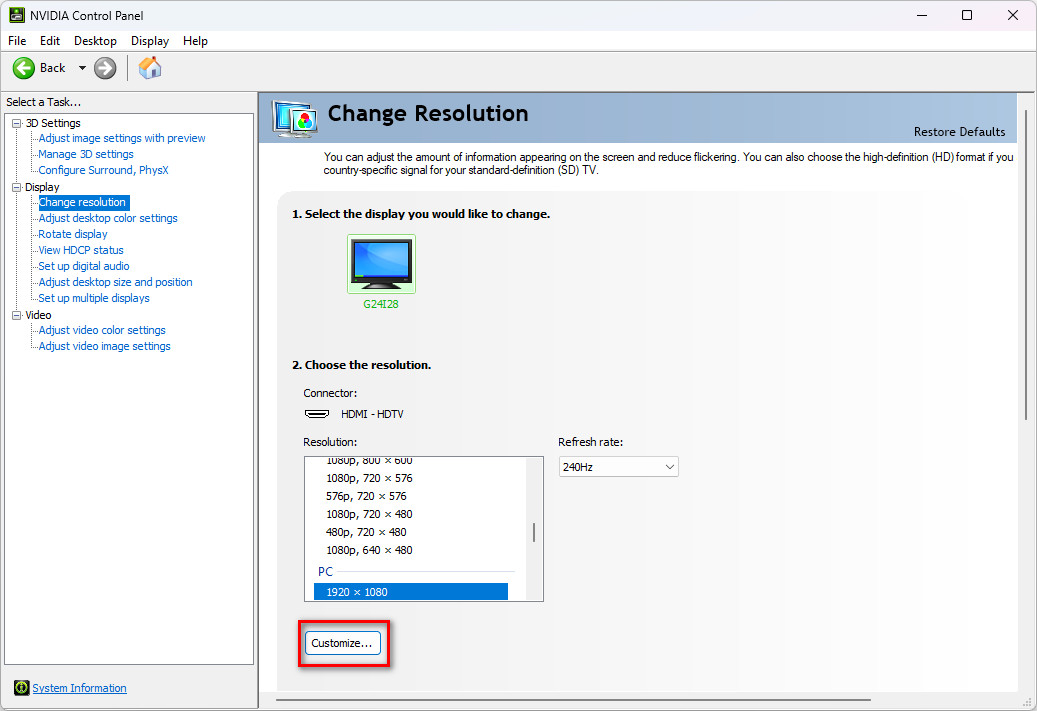
  3. If you’re using multiple monitors, select the one you want to customize and click on Customize.
  4. If accessing this feature for the first time, accept the End User License Agreement.
    Click on Agree.
  5. In the next window, hit Create Custom Resolution.
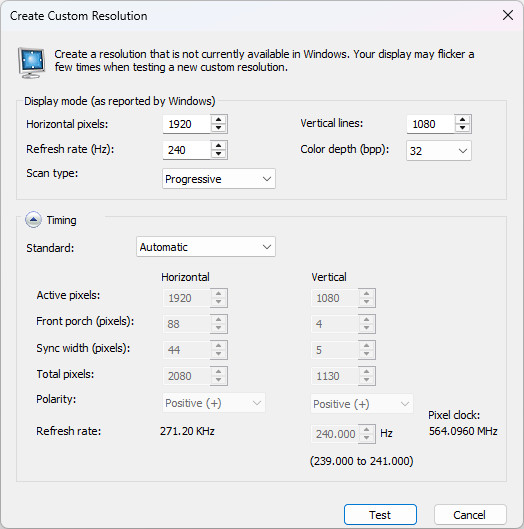
    Create Custom Resolution
  6. Input your desired values for the display, adjusting Horizontal pixels (width), Vertical lines (height), Refresh rate, Color depth, and Scan type as needed.
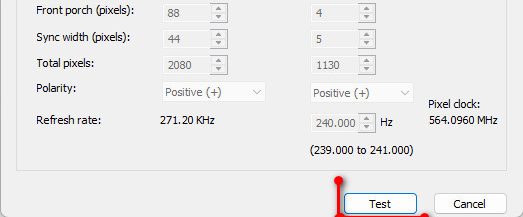
  7. Click the Test button to see if the custom mode is supported. If the test fails, you’ll need to try different settings.
    Remember: Not all monitors/LCDs support higher Refresh Rates (Hz) or even Resolution.
  8. Return to the Change Resolution page to select from your newly created custom resolutions.
If your monitor goes black, it indicates that the current resolution is unsupported. Please do not interact with the system. The resolution will automatically revert to its previous setting after a few seconds, restoring your display. Try lowering the resolution or refresh rate, following your monitor’s specifications.

1.2 AMD Graphic Card:

  1. Open the AMD Catalyst Control Center.
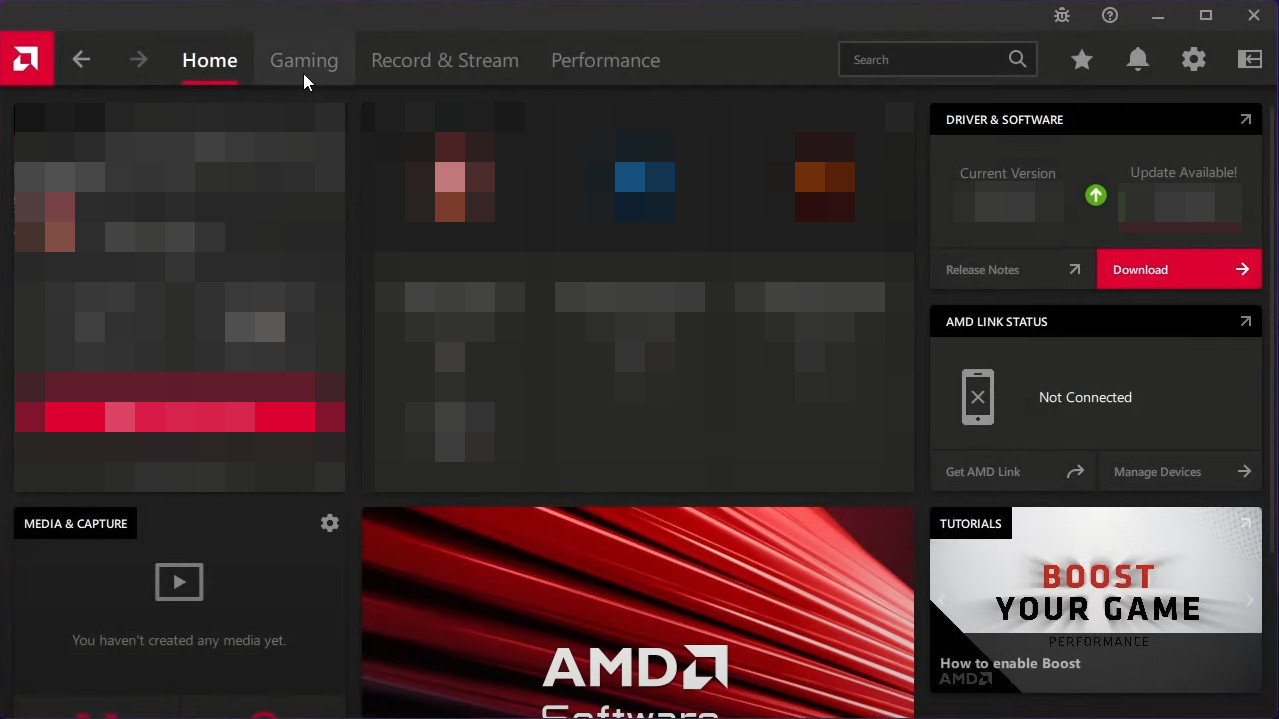
  2. Navigate to the Gaming section, select Display, and choose your monitor if you’re using multiple monitors with your GPU.
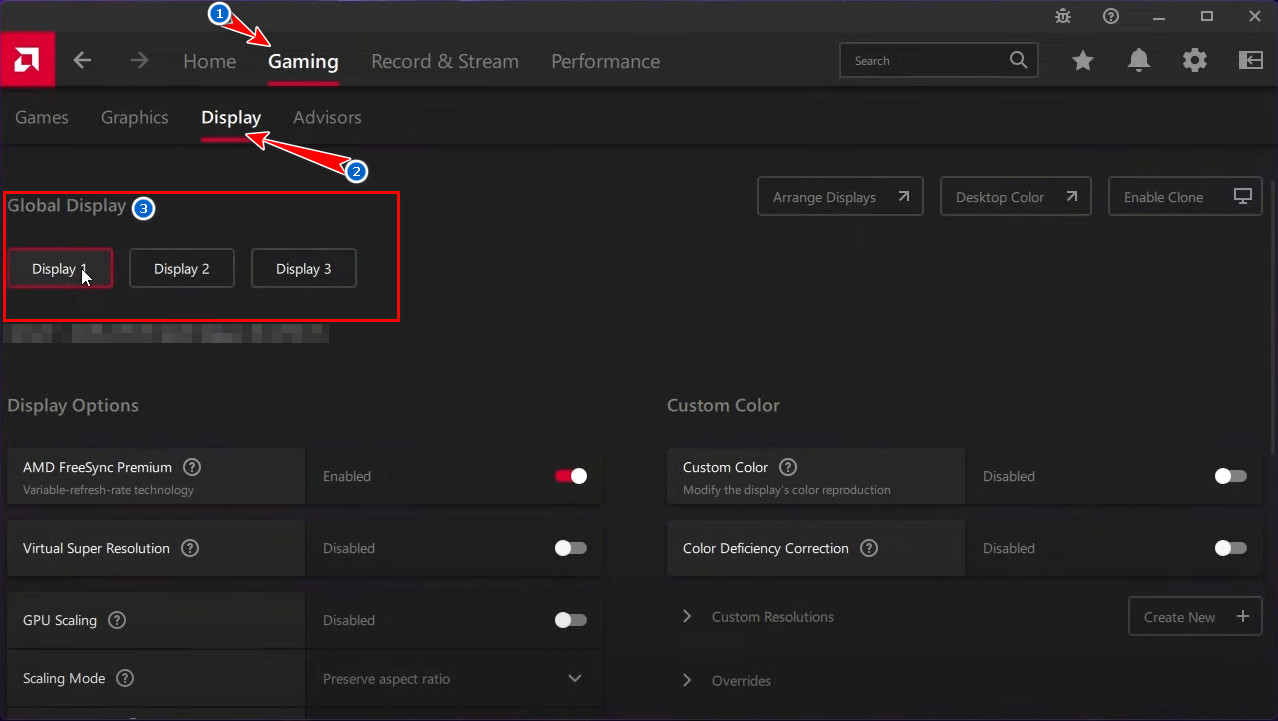
  3. Click on the Custom Resolution button at the bottom right corner, then hit +Create New.
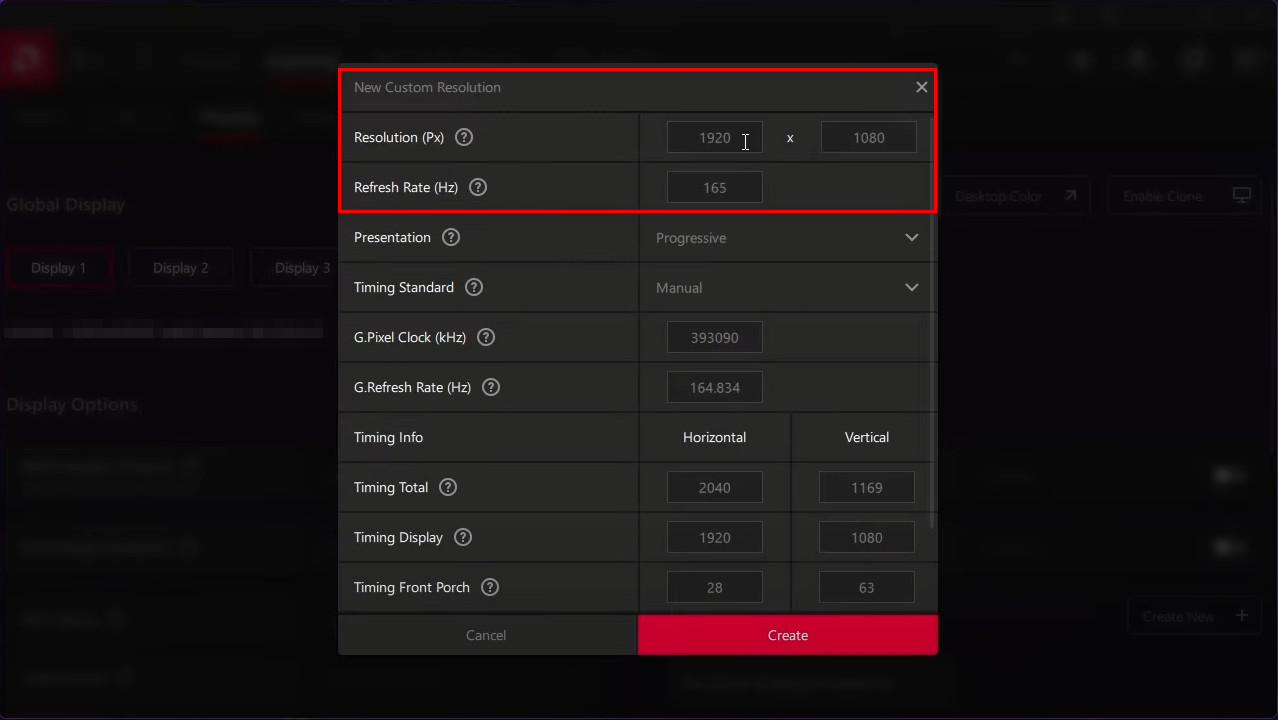
  4. Select your resolution (Vertical × Horizontal) and the supported Refresh Rate (Hz).
    Remember: Standard office monitors typically support 60Hz, while gaming monitors can support higher rates.
  5. In the Timing Standard, opt for CVT-Reduced Blanking.
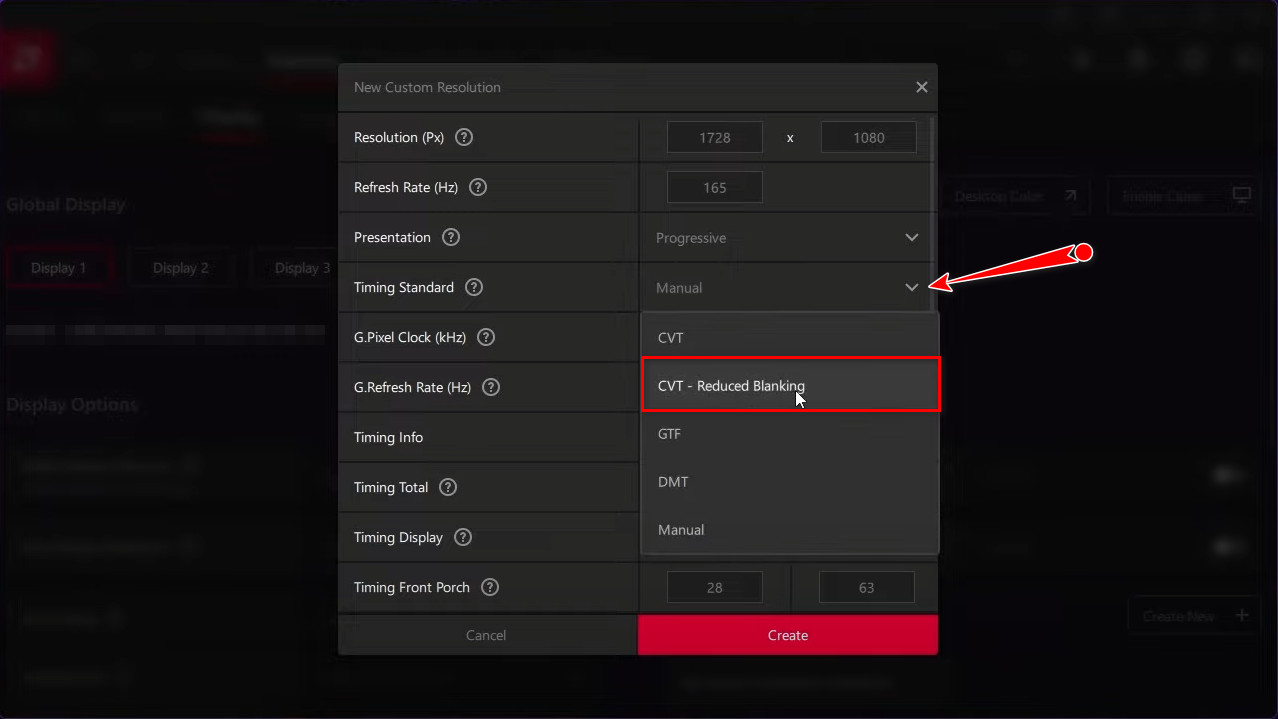
  6. Press Create without modifying any other settings.
  7. Your custom resolution will now appear on the right side as illustrated in the image.
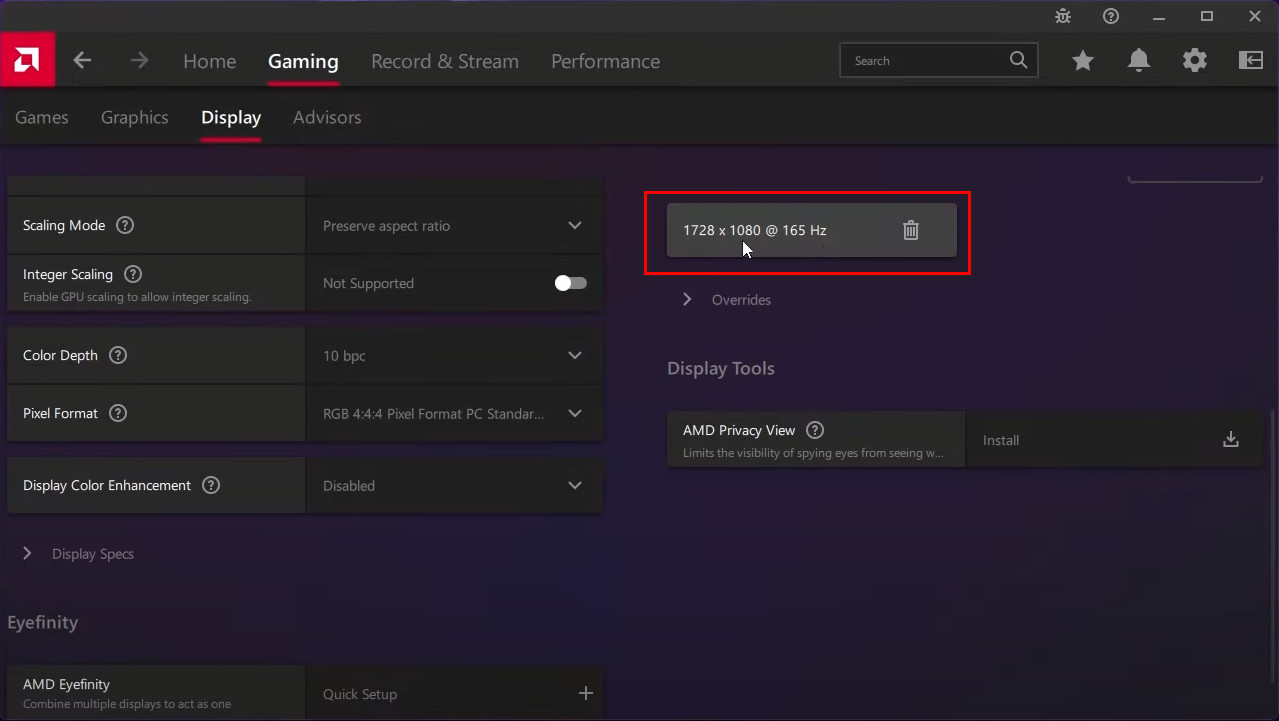
  8. Scroll up, locate GPU Scaling, and toggle it ON.

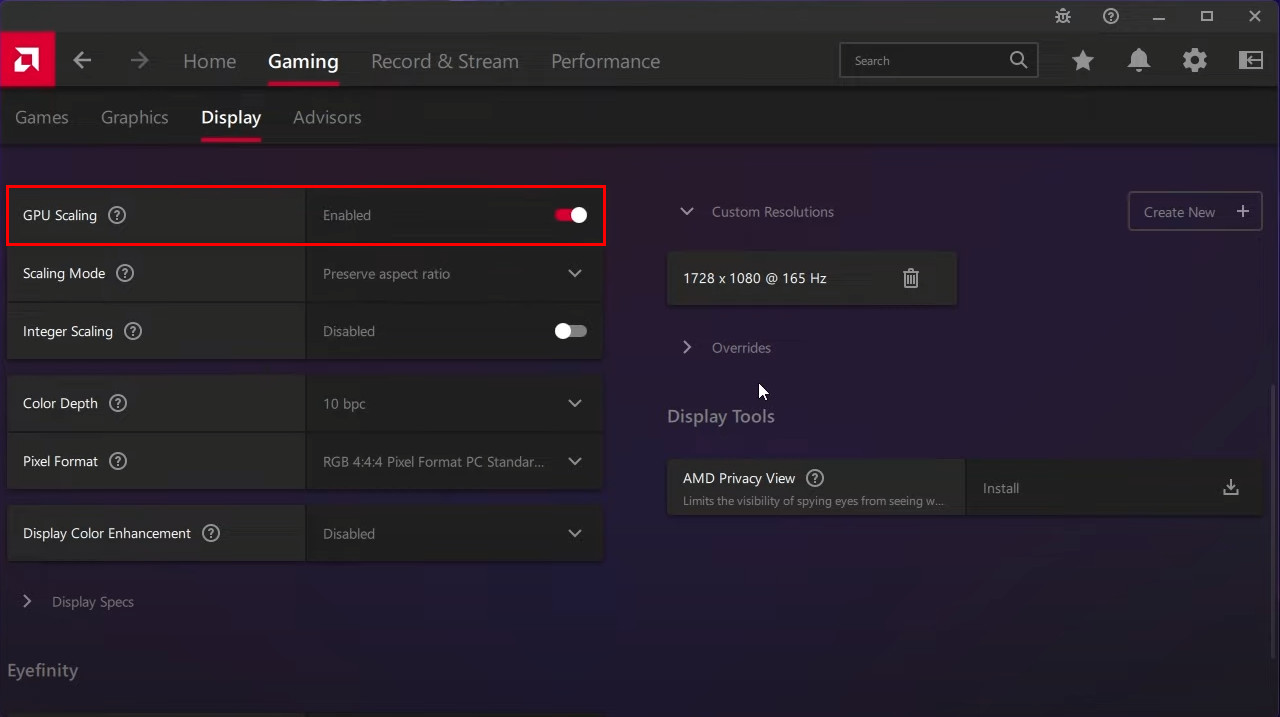
That’s it. Often, enabling GPU Scaling doesn’t require a restart, but if changes don’t take effect, simply restart your PC.

2. Set a Custom Resolution Using Third-Party Software

For users desiring more customization options or whose graphics cards may not support custom resolutions natively, third-party software is a viable solution. This method is compatible with PCs running Windows Vista or later, including systems with AMD, NVIDIA, or partially supported Intel GPUs.

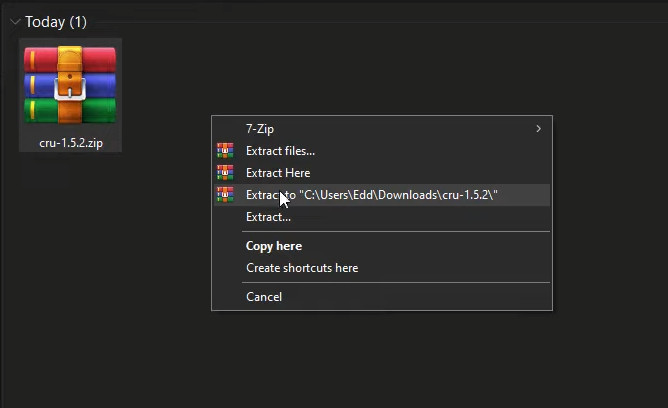
  1. Download the Custom Resolution Utility (CRU) and extract the zip file.
  2. Run CRU.exe.
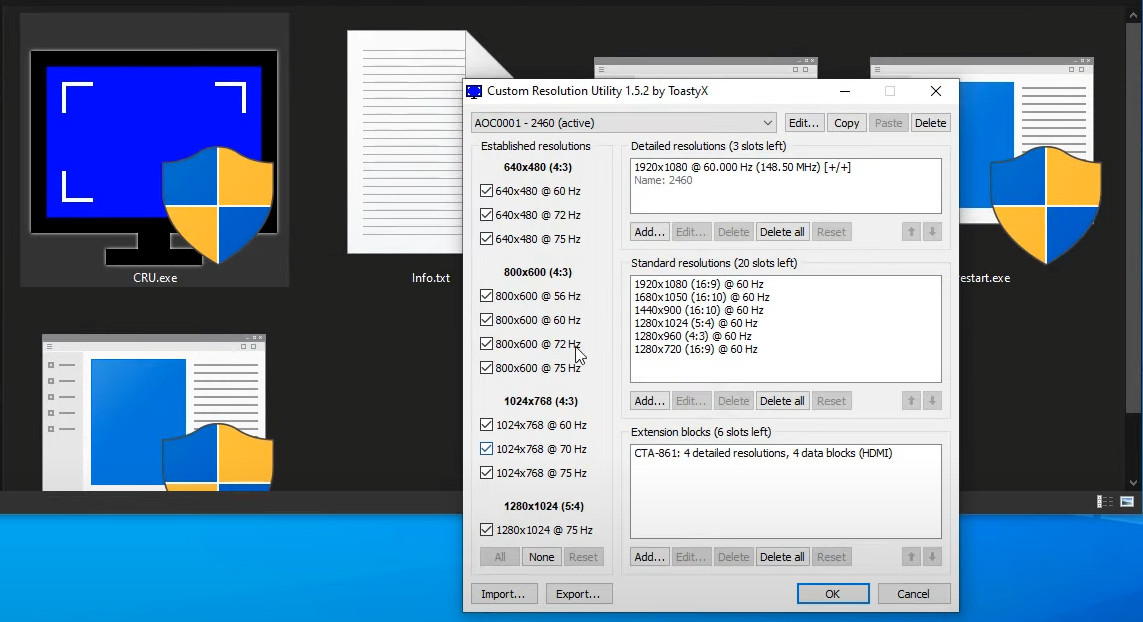
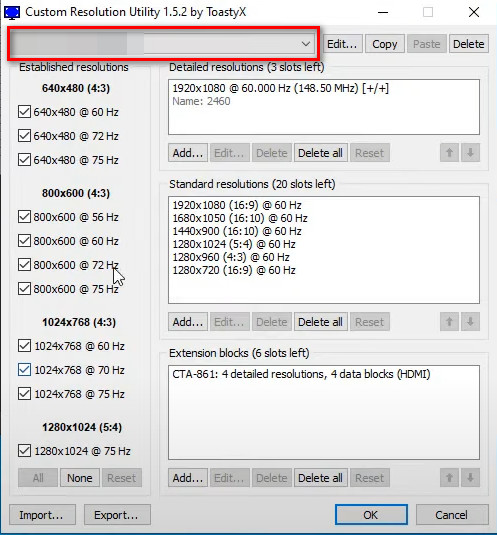
  3. Select your display from the drop-down menu at the top of the window.
  4. Under “Detailed Resolution,” click Add.
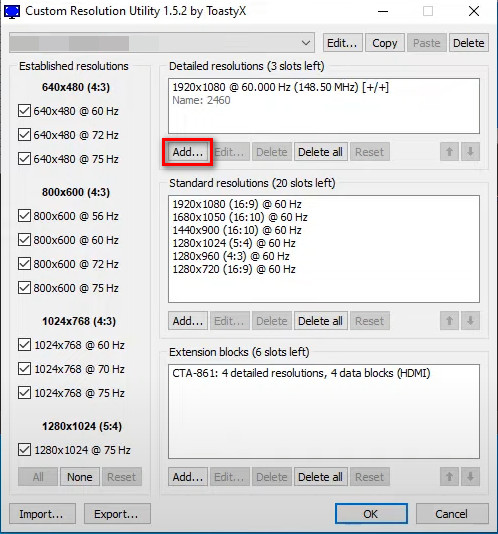
  5. A “Detailed Resolution” window will pop up with a preset resolution.
  6. Input the width, height, and refresh rate of the screen in the respective fields.[img class=”aligncenter size-full wp-image-442066″ src=”https://appuals.com/wp-content/uploads/2025/01/2025-01-05_121816.jpg” alt=”” width=”496″ height=”533″]
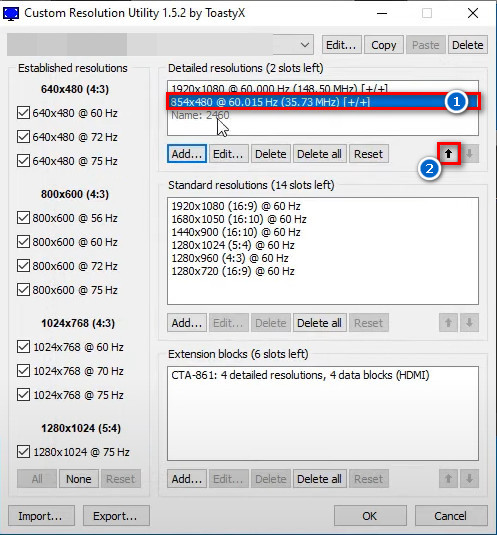
  7. Once the resolution is created, move it to the top by clicking the Upward arrow.
  8. In the CRU folder, run restart.exe or restart64.exe for 64-bit systems to restart the graphics driver.
    Running this tool applies the changes.

That’s it; these methods are simple and effective for setting up a custom resolution.

ABOUT THE AUTHOR

Muhammad Zubyan


Muhammad Zubyan is a certified Google IT Support Professional with over 7 years of extensive experience. He has worked on more than 1500 computers, gaining valuable insights that enable him to detect and troubleshoot any complicated root cause of Windows-related issues and errors. In addition to managing Appuals as a Senior Editor, he is currently developing his own Game Optimization program that caters to both gamers and casual users alike.

Comments

17
    JB
    Jim Booth Aug 10, 2017

    Hi
    Thanks for the article, I have followed the steps to set up the custom resolution and when I look in the Intel HD Control panel the resolution is there. However when I then click on the desktop and try and select the cusom resolution for my external monitor it does not appear in the list for me to select from it still reverts to the recommended resolution?

      BR
      Brian Aug 10, 2017

      Are you working from a laptop? There might be two things happening here.

      1. Either you set the custom resolution for your laptop screen and not for the external monitor. Make sure you plug in your monitor, then select your external monitor in your intel hd graphics, set the custom resolution then apply it

      2. Everytime you unplug and plug in your external monitor, new settings are acquired depending on its resolution and the old ones are overwritten. So you need to set the custom resolution after you plug in your monitor

      Reply
    ER
    errq Jul 30, 2018

    For the AMD one it seems when i press right click on DALNonStandardModesBCD1. it doesnt give me an option edit

      KA
      Kamil Anwar Aug 6, 2018

      Can you post a screen shot? and does it works on another properties (the right click)?

    GV
    Gabriel Esteban Benitez Villas Oct 2, 2018

    Thank you very much! The method 1 for Intel works perfect for me.

    GS
    guy whos monitor went to shit Oct 8, 2018

    Thanks!!! Method 4 finally worked for me. My monitor’s cable (the blue one) fell out one time and when I plugged it back in, the aespect ratio was different and when I tried to change it back, my monitor’s standard default resolution (1440×900) was missing? I tried for hours trying to figure out how to fix it but finally just using the custom resolution software thingy helped me fix it back. Now I finally have my real resolution back. Thank god

    ST
    Stefan Jan 11, 2019

    can u help me? I set 1600×1080 and i can’t delete this resolution.
    i want to delete this because my monitor are black when i turn on computer and i need to set resolution manualy with keyboard. (do not mind my speech, I do not know so well English)

    G
    Gustas G -GAMER- Jan 31, 2019

    I cannot set 1366*768, on standard resolution it makes the numbers red, on detailed it just doesn’t appear

      SW
      Shane Warren Author Sep 20, 2019

      Try a different method to set the resolution and make sure that the display scaling is set to GPU. Also, make sure that you first create the resolution in the Nvidia control panel if you are using that.

    CV
    cevu vucina Mar 9, 2019

    i need help i still cant put custom resolution. once i do all these steps and go to restart64 my resolution changes to the desired one but only for like 2 seconds and it comes back to the previos normal one. Does anyone know how can i fix this?
    i am using amd gpu

      SW
      Shane Warren Author Sep 18, 2019

      Have you tried following the 3rd method? It is more specific towards AMD cards.

    SW
    Shane Warren Author Oct 4, 2019

    It won’t increase your performance in games, taking down the resolution might help though but the refresh rate won’t increase your game’s performance in any noticeable way. Also, your hardware might not support a lower refresh rate or your

    IA
    Iazu May 20, 2022

    i got error: No display found in registry run restart.exe or reboot to redtect display i
    i did all of this no fixed also tried restart64.exe

      MZ
      Muhammad Zubyan Author Jun 16, 2022

      Contact me on my Discord so that I can check this issue while you screen share, Zubyan Gul#9955

        IA
        Iazu Jun 18, 2022

        It started working now after i reseted my pc

    AE
    aeop Feb 18, 2023

    I cant find ”
    DALNonStandardModesBCD1″ in method 3, pls help

      MZ
      Muhammad Zubyan Author May 3, 2023

      Try creating it:

      Right-click on the “0000” folder and select “New” > “Key.”

      Name the new key “DALNonStandardModesBCD1” and press Enter.

      Right-click on the new “DALNonStandardModesBCD1” key and select “New” > “DWORD (32-bit) Value.”

      Name the new value “DALNonStandardModesBCD1” and press Enter.

      Double-click on the new “DALNonStandardModesBCD1” value and set the value data to “1” and click OK.

      Close the Registry Editor and restart your computer.